Table of Contents
Advertisement
Quick Links
Advertisement
Table of Contents

Related Manuals for JRC Alphatron Marine AlphaAnnounce


Summary of Contents for JRC Alphatron Marine AlphaAnnounce
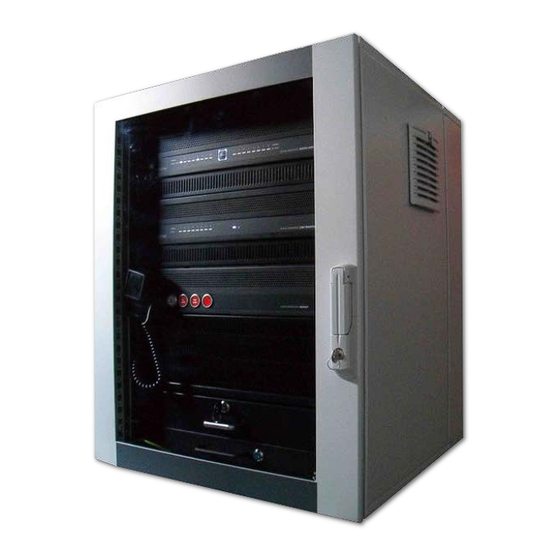
- Page 1 AlphaAnnounce Installation and Operation Manual www.jrc.am...
-
Page 2: Table Of Contents
Contents I Preface......................5 I.1 Revision History................................ 5 II Warnings and Cautions................6 II.1 Safety Instructions..............................6 III Introduction....................7 1 AlphaAnnounce Digital Amplifier............. 8 1.1 Contents of Delivery..............................8 1.2 Front Panel................................8 1.3 Rear Panel................................10 1.4 System Description..............................10 1.5 System Components.............................. - Page 3 1.6.9 Functional Features............................23 1.6.9.1 Signal Processing and Routing Characteristics................... 23 1.6.9.2 Digital Signal Processing in Each Input....................23 1.6.9.3 Digital Signal Processing in Each Output.................... 23 1.6.9.4 Control Buses and I/O Interfaces......................24 1.6.9.5 Time Based Functions......................... 24 1.6.9.6 Log Functions............................24 1.6.9.7 System Functions..........................24 1.6.9.8 System Monitoring..........................24 1.6.10 Technical Specifications..........................25...
- Page 4 5.3 Models..................................67 5.4 Front Panel................................67 5.4.1 Front panel of Alpha Announce Control panel..................... 68 5.4.2 Front Panel of AlphaAnnounce Extension Panel..................70 5.5 Rear Panel of AlphaAnnounce Control Panel....................... 70 5.6 Operation Instructions............................71 5.7 Configuration................................72 5.8 Setup..................................73 5.8.1 Cabling and Connection..........................73 5.8.2 Address and Backlight Power Setting......................
-
Page 5: I Preface
I Preface I.1 Revision History Revision Nr. Description Date V0.1 For review only 31- March - 2017 V0.2 Minor modifications 4 - April - 2017 V1.0 First release 9 - October - 2017 5 | Preface... -
Page 6: Warnings And Cautions
II Warnings and Cautions II.1 Safety Instructions Note This device is intended only for indoor use. Attention • Attention: Live voltage • AlphaAnnounce Transfer Unit has HAZARDOUS LIVE connectors, which are marked with #-symbol. Cable installations to these connectors are allowed to do by skilled workman only. •... -
Page 7: Introduction
III Introduction This manual is divided in five main parts: 1. Description of the AlphaAnnounce Digital Amplifier 2. Description of the AlphaAnnounce Transfer unit 3. Description of the AlphaAnnounce Backup 4. Description of the AlphaAnnounce Configuration Software 5. Description of the Alpha Announce Control panel 7 | Introduction... -
Page 8: Alphaannounce Digital Amplifier
1 AlphaAnnounce Digital Amplifier 1.1 Contents of Delivery The delivery of Digital Amplifier Unit contains: • Digital Amplifier Unit • IEC power cord for a grounded wall socket • USB-cable USB(A) / USB(B) • Flash-memory stick containing configuration software and User Manuals •... - Page 9 When system is fault monitored and one or more faults are detected, the blue LED's are switched off and four "fault" yellow led start blinking. When one or more system fault is active, on Stand-By mode yellow "fault" LED's are on and blue LED's are blinking. When all system faults are cleared, yellow "fault"...
-
Page 10: Rear Panel
1.3 Rear Panel 1. IEC power cord. Connect only to grounded wall socket. 2. Device fuses, 2 pcs. of T3,15A 5x20mm. Always use correct fuse value. Before changing a fuse disconnect mains. 3. RS-232 Serial port service purpose 4. Amplifier output connectors to loudspeakers or Transfer Unit 5. -
Page 11: System Components
Figure 1: An example diagram of the AlphaAnnounce solution 1.5 System Components 1.5.1 Digital Amplifier Unit See Digital Amplifier on page 14 1.5.2 Transfer Unit Line Transfer adapts 8 ohm amplifier outputs suitable for 100V loudspeakers. Maximum load is 120W/output. Unit also 24VDC outputs for priority relays or spare amplifier control. -
Page 12: Asv 800 Source/Volume Remote Control Device
1.5.3 ASV 800 Source/Volume Remote Control Device • Select source and adjust volume for one program group • Up to 32 control units to System and 8 to Local Bus • Connection to Local or System bus with TIA/EIA-568 cabling (CAT5/6) •... -
Page 13: Adc 200 Dry Contact Output Module
1.5.5 ADC 200 Dry Contact Output Module Connected to Digital Amplifier control outputs when potential free control output is needed. ADC 200 also has got circuit to implement monitored control line together with ASI 200. 1.5.6 ASI 200 Supervised Input Module Connected to Digital Amplifier control inputs when supervised control input is needed. -
Page 14: Aeu 100 Line End Unit
1.5.8 AEU 100 Line End Unit AEU 100 is used when speaker line monitoring is required. Unit is connected to the end of the line. It is suitable for 50, 70 or 100 Volt level speaker lines. 8 ohm line does not need the unit. 1.5.9 AlphaAnnounce Microphone Panel •... -
Page 15: Block Diagram
1.6.1 Block Diagram Figure 2: Internal block diagram of Digital Amplifier 1.6.2 Analogue Audio Inputs Digital Amplifier has 4 electrically balanced analogue audio inputs for external program sources. Audio input can be programmed to be microphone (-45dB) or line level (+6dB) inputs. +48VDC Phantom voltage for condenser microphones can be selected with dip switch. -
Page 16: Amplifier Outputs
Figure 3: Analogue audio input block 1.6.3 Amplifier Outputs Digital Amplifier includes eight digital amplifiers having versatile digital signal processing properties. Low ohm (8 ohm) loudspeakers can be connected to speaker outputs. When line level loudspeakers are used, outputs are connected to Line Transfer Unit's (see Figure 5: Digital Amplifier and Transfer Unit configured for 3x80W, 1x160W and 1x240W on page 17). - Page 17 speaker line load is more than 120W outputs several outputs can be combined together and make Locked group. With Locked groups 160W or 320W lines can be used. Total output power for one Digital Amplifier unit is 640W. Locked group is defined with configuration software. All DSP settings from first locked group amplifier is copied to other amplifiers in the group.
-
Page 18: System And Local Bus
1.6.4 System and Local Bus Both System and Local bus have 4 signal pairs: audio and data power supplies, audio and data signals. System Bus is a systems wide data bus where all Digital Amplifier units are connected. Paging units and control panels can be connected to either System or Local Bus. -
Page 19: Control Outputs
1.6.6.2 Control Outputs Digital Amplifier has got also eight programmable logic outputs. Control outputs are open collector outputs and they have +24VDC output that can be used to drive directly +24V relays. Each output can control a maximum load of 300mA. Outputs can be used to control lights, alarm bells, start audio substation etc. -
Page 20: Audio Input 1-7
1.6.8.3 Audio Input 1-7 Removable 3-pin terminal block connector. Maximum conductor area that can be used is 0.75 mm². Order ⊥ Ground Audio + Audio - 1.6.8.4 System and Local Bus Out RJ-11 connector Order Ground Audio + Audio - Relay contact NC Relay contact NO Relay contact Common... -
Page 21: System Bus And Link (Coupled Together) And Local Bus
1.6.8.6 System Bus and Link (coupled together) and Local Bus Order System/Local audio + System/Local audio - Audio GND Digital GND +12V +24V Data (A) Data (B) Note Audio and data signals must be always connected to own twisted pairs. 1.6.8.7 Control In/Out 1-8 Removable 16-pin terminal block connector for both control input and output. -
Page 22: Rs-232 Port
Control Output Control 1 (Open Collector) +24V Control 2 +24V - - - - - - - Control 8 +24V 1.6.8.8 RS-232 Port Order Rx Data Tx Data 1.6.8.9 Speaker Outputs 1-8 Removable 8-pin terminal block connector. Maximum conductor area that can be used is 2.5 mm². 22 | AlphaAnnounce Digital Amplifier... -
Page 23: 24Vdc Power Output For Alt 8X8
Order Output Channel 1 + Output Channel 1 - Output Channel 2 + Output Channel 2 - - - - - - - - - - - - - - - Output Channel 8 + Output Channel 8 - 1.6.8.10 24VDC Power Output for ALT 8x8 +24VDC 1.6.8.11 48VDC Power Input for Redundant Power Source 2x7A Max 1.6.9 Functional Features... -
Page 24: Control Buses And I/O Interfaces
1.6.9.4 Control Buses and I/O Interfaces • Local Bus interface for paging units and control devices. Used also as a redundant bus for System Bus • System Bus interface for paging and control devices • System Bus link out to next Digital Amplifier unit •... -
Page 25: Technical Specifications
1.6.10 Technical Specifications • Analogue input 1…7, sensitivity -45 dBu … + 6 dBu • Analogue input impedance (balanced) 20 kohm • System and Local Bus audio (balanced) + 6dBu • Digital message signal format (WAV) 16bit 32 or 44.1 kHz sample rate •... -
Page 26: Alphaannounce Transfer Unit
2 AlphaAnnounce Transfer Unit 2.1 Contents of Delivery The delivery of Transfer Unit contains: • Transfer Unit • 1m RJ45 (LAN) control cable • Connection cable Digital Amplifier speaker outputs to Transfer Unit audio input • Rear panel connectors for outputs •... -
Page 27: Rear Panel
2.4 Rear Panel 3. ‘LOW IMPEDANCE INPUTS’: audio inputs for Digital Amplifier low impedance outputs 4. ‘24 VDC IN’ for 24 V dc supply from either the Digital Amplifier unit (max. 500 mA) or an external additional power supply unit 5. -
Page 28: Connections
2.5 Connections • Connect the eight DIGITAL AMPLIFIER ‘SPEAKER OUTPUTS’ to the eight Transfer Unit ‘LOW IMPEDANCE INPUTS’ • Connect the DIGITAL AMPLIFIER ‘24V 0.5A OUT’ to Transfer Unit ‘24VDC IN’ (not necessary when using an external power supply unit) •... -
Page 29: Alphaannounce Backup
3 AlphaAnnounce Backup 3.1 System Alpha Announce Backup ensures communication in case of a failure in secondary power source, the control panel or in the signal processing. The unit is hardwired directly to the amplifiers in the Alpha Announce Digital Amplifier and has a built-in independent message player. -
Page 30: Configuration
Figure 6: Overview connection backup unit Vessels backup batteries are connected to backup units +24VDC input connector. Backup unit will raise the output voltage level to +48VDC as long as batteries can supply +19VDC level. Front panel buttons and indication leds are connected behind Backup Unit to its CPU card with 10 wires. -
Page 31: Use
3.4 Use Front panel buttons are all locked type buttons and they are activated by pressing button down. Buttons are prioritized as following: Activating ALL CALL button will stop all alarm signals but audio signal won’t be heard until PTT on microphone is pressed. -
Page 32: Maintenance
Figure 7: Volume adjustment 3.6 Maintenance The unit main cooling fan as well converters fans are to be cleaned yearly, no other maintenance needed. 3.6.1 System Testing Back-up unit’s operations are recommended to be tested at last two times / year. 3.7 Power Supply Requirements Secondary power supply can be batteries or generator, which nominal voltage is 24 VDC. -
Page 33: Alphaannounce Software Configuration
4 AlphaAnnounce Software Configuration 4.1 Software Installation 4.1.1 Installation Wizard • Double click AlphaAnnounce installation file. Follow wizard through the installation • As default wizard will create installation folders under Program files folder C:\[Program Files Folder]\Alpha Announce\Program C:\[Program Files Folder]\Alpha Announce\Project •... -
Page 34: Uploading And Downloading Of Configuration
• “DIG AMP connected/x”, x is the address of the Digital Amplifier Unit. Connection is open. Monitoring and system state are also shown on status bar. While the Digital Amplifier is connected monitoring can be set ON/OFF by double clicking the text monitoring (restart will set monitoring always on if it is activated on configuration). Also Standby-by mode can be toggled same way by double clicking “Active”/ “Stand-By”... - Page 35 • Loading procedure prompts user “Do you want to send to slave units also?” Click Yes. • Configuration file is first uploaded to master DIGITAL AMPLIFIER System Unit • When uploading to master is completed it will set all slave units to stand-by mode and starts to upload the configuration to those •...
-
Page 36: Uploading To Digital Amplifier System Units One By One
4.2.2 Uploading to Digital Amplifier System Units one by one • Disconnect System Bus wires between DIGITAL AMPLIFIER units • Upload to Master unit and choose “No” for “Do you want to send to slave units also?” • After the uploading disconnect USB-cable from Master DIGITAL AMPLIFIER and wait until status “DIGI AMP not Connected”... -
Page 37: Definition Of Basic System Info And Password
It is very important to create the configuration in right steps to avoid conflicts with functions of the system. The creation can be divided to eleven main steps: 1. Definition of the basic system info and password 2. Definition of the basic hardware of the system: DIGITAL AMPLIFIER units 3. -
Page 38: Definition Of Digital Amplifier Units
DIGITAL AMPLIFIER is equipped with a back-up battery to keep clock in time during short mains power cuts. If the unit is disconnected from the mains more than couple of days, the clock time should be checked and set again. Note If the clock is adjusted backward in time it is needed to reboot the system. - Page 39 • Is the system based on low impedance (8 ohm) or line level (50/70/100V) speaker lines or mixed? • How many lines are needed? • What is the estimated load of each line level speaker line? • Is A/B-lines needed? Example: All speaker lines are 100V.
- Page 40 Name Add and name or remove DIGITAL AMPLIFIER units. Addresses are created automatically. Note Addresses for DIGITAL AMPLIFIER units must be set by DIL-switches located at back of DIGITAL AMPLIFIER unit. Refer AlphaAnnounce Digital Amplifier on page 8 for more information. Auxiliary Audio Inputs Give names for program audio sources.
-
Page 41: Definition Of Announcement Characteristics
Note that if multiple outputs are needed to fulfil the power requirements, it is recommended to name lines to same. For additional information, see the section “Locked Group”. Transfer line voltage level is only informative. Real selection needs to be done with hardware. LINE TRANSFER CTRL mode: →... - Page 42 Name Use informative names for paging zones to make configuration process easier. E.g.“All call”. Created Paging Zones are used later when setting out Control panel’s Function keys, AAI 800 Control buttons, Control Inputs and Events definition. Amplifiers Select outputs to be included in Paging Zone. Each amplifier output is possible to choose to each paging zone. Locked groups are shown as a one line and name;...
-
Page 43: Definition Of Program Groups
create paging zones with or without priority function. Priority is not available if control is defined for spare amplifier control. Level Level is used to trim sound pressure levels to right level during the paging. You can control any lines’ SPL between -15 dB to +3dB. - Page 44 Startup Preset At least one preset needs to be defined to be a startup preset. This preset is loaded when system is started. Preset window is opened from DIGITAL AMPLIFIER window by selecting the “DSP settings” button. It will open the main Preset configuration window: Startup Program Routing Mode “Restore Last Routing Settings”...
- Page 45 Message volume determines the level for all pre-recorded messages. The control value is 0dB …. -40dB. Master Level Master volume is the overall volume for DIGITAL AMPLIFIER. The change in master volume changes the announcement and stored message volume also. The control value is 0dB …. -100dB. Default As the presets have significance affect to the total capability of the sound response and level, it is necessary to do the DSP-settings with a great care.
- Page 46 3-Band Input Filter 46 | AlphaAnnounce Software Configuration...
- Page 47 Each audio input contains 3-band parametric filter (PEQ) to adjust input signal tone. Parametric filter is equipped with following parameters: Bypass, Central frequency (20-20000 Hz), Gain (-30 to +6 dB) and Bandwidth (0.0 – 2.3 octaves). Note Avoid multiply PEQ-settings for the same frequency; that may spoil the sound quality remarkably. Matrix Routing The behaviour of routing is selected in “Startup Program Routing Mode”...
- Page 48 Take a look on the block diagram of the output section below to understand the possibilities of the output stage configuration: Matrix contains two independent 4x4 DSP chip each having a fully digital audio router, where each node point’s level is adjusted in case: •...
- Page 49 Output Activate the output to adjust for. Tone Tone controls for bass and treble with level and corner frequency settings for all amplifiers. 5-Band Filter Each output stage contains 5-band parametric filter (PEQ) to adjust signal quality independently. Parametric filter is equipped with following parameters: Bypass, Frequency (20-20000 Hz), Gain (-30 to +6 dB) and Bandwidth (0.0 –...
-
Page 50: Uploading Or Removing Alarm And Info Messages
High/Low Pass Filter High/Low pass Filter block contains four filters for each output stage: All filters can be set to: • Bypass • Low pass 12 dB/oct. slope • Low pass 6 dB/oct. slope • High pass 12 dB/oct. slope •... - Page 51 With message management you can: • Upload new messages from PC to DIGITAL AMPLIFIER Internal or USB memory • Remove messages from system Messages on USB stick must be stored in folders on USB root named: Info_Messages Alarm_Messages All messages are in WAV-format with 32 or 44.1 kHz sample rate. All messages must start with number and every number must be used only once.
-
Page 52: Definition Of Control Panel
Note Installing the USB-memory stick inside requires removing the cover of the unit. Please contact to manufacturer or retailer to get more info. USB-memory stick makes it possible to store many high quality messages on system. Fastest way is to store messages on system is to shut down system, disconnect USB stick and connect it straight to computer and copy messages to correct folders. - Page 53 Name paging unit and assign address and priority for it. There can be up to 32 paging units in the System bus and 32 in each Local Bus. Note Be sure that unit address match with configuration. The address can be set by DIP-switch located to the back of the unit.
-
Page 54: Definition Of Remote Control Units And Devices
Selectable functions for the buttons are: • Zone selection • Paging zone selection. Also control output can be assigned for zone selection. • Message paging, single • Activate message paging to be played once to configured zone. • Message paging, continuous •... - Page 55 Devices can be added either to System bus or Local bus. When Local bus is selected, the Center for each unit must be defined. Every unit needs own address. There can be up to 32 Units in a Bus. Device can be software monitored. Control Buttons Devices have three programmable buttons.
-
Page 56: Definition Of System Monitoring
Each ASV 800 unit can control audio input and volume level for one program group. That is configured by choosing Program group from the toolbar. Note Program groups are created for every day auxiliary audio program routing and control; they are not bound to paging groups in any way. - Page 57 To fulfill EN-60849 Voice evacuation standard monitoring activated this selection. It will activate monitoring of each System unit’s internal voltage, message, as well system devices monitoring. Only needed monitoring to be defined manually are speakers lines monitoring. Monitoring settings can be configured manually from DIGITAL AMPLIFIER main windows. All these can be monitored: operation voltages, temperature, fan, message repeater, System and Local buses, amplifiers, speaker lines and audio inputs signal level.
-
Page 58: Definition Of Control I/O Features
4.3.10 Definition of Control I/O Features Control Input and Output configuration window is opened from DIGITAL AMPLIFIER main window: Control Inputs DIGITAL AMPLIFIER contains 8 programmable control inputs. Active state can be configured to normally open (NO) or normally closed (NC) mode. Selectable functions for the buttons are: •... -
Page 59: Ambient Noise Compensation
Selectable functions for the buttons are: • Start Control. Can be used to start other equipment on system • Fault control. Active if system is monitored and any fault occurs • Page area control. Active when paging to selected Paging zone is active. •... - Page 60 Note Maximum Channel Level is +12dB. If Channel level in preset is already for example +6dB ANC gain control can only be +6dB. 60 | AlphaAnnounce Software Configuration...
- Page 61 Noise Sense Inputs All Inputs defined as Noise Sense Microphone are shown in this list. One or several inputs can be used for several ANC Group. Ambient Level Ambient level is the noise level measured from the input. This can be used to find out right threshold Level. If ambient level is too low, external preamplifier should be used.
-
Page 62: System Management Using Config-Software
Sample Time is a time interval for measuring of background noise. The smaller the interval, the faster is the response to the variation of noise. Normally Sample Time is 5…20s. If variation change is slow, it is recommended to use even longer interval between measurements. - Page 63 Error Log When PC is connected to Digital Amplifier Error log can be read from Master DIGITAL AMPLIFIER by pressing the icon. Error log contains the list of fault definitions with event dates and times. 63 | AlphaAnnounce Software Configuration...
- Page 64 The list is the same that can be seen in AAE 808 Paging/Control Unit. Faults can be cleared with “Clear Log” - buttons in Error log window and from AAE 808. Events Log Action log can be read from Master DIGITAL AMPLIFIER by pressing the icon. Event log is used when it is necessary to have information about the event history.
-
Page 65: Direct System Commands From Pc
Note If Error log or Events log icon is pressed without the connection to the Unit, the error message will be reported and the last list is read from the Project folder stored to the PC (if any). Both Error and Action log files are saved on program/Config-folder of the project. Example: C:\Program files\Audico Oy\Audico AVEC\PROJECTS\Default_Project\Config\ErrorEvents.txt C:\Program files\Audico Oy\Audico AVEC\PROJECTS\Default_Project\Config\ActionEvents.txt 4.3.13 Direct System Commands from PC... -
Page 66: Alphaannounce Control Panel
5 AlphaAnnounce Control Panel 5.1 Contents of Delivery The delivery of Paging / Console contains: • Paging/Control Console equipped with needed modules • Windscreen for the microphone capsule • 1 pcs. RJ-45 connecting Cable 2,5 m with EMI suppressing ferrite •... -
Page 67: Models
• Dimmable backlight • External dimmer input • Local speaker mute contact • Fed from central rack • 4 Button extension panel option • Engraved buttons • Cut out dimension 142*142 mm • Front dimension 160*180 mm • Up to 16 Control panels per system Alpha Announce Extension panel is used to extend the number of programmable push buttons for Alpha Announce Control panel. -
Page 68: Front Panel Of Alpha Announce Control Panel
5.4.1 Front panel of Alpha Announce Control panel PUSH TO TALK–button PAGING to selected zones can be done by holding this button. Button can also be configured to operate in toggle-mode. Button is blinking during prefix and message. GROUP 1–button Group 1 paging zone selection and deselection. - Page 69 GROUP 2–button Group 2 paging zone selection and deselection. Decrease of backlight brightness of buttons when pushed over 2 seconds. GROUP 3 and 4–button Group 3 and 4 paging zone selection and deselection. GENERAL ALARM–button Push over 2 seconds to activate defined prerecorded GENERAL ALARM–message. FIRE ALARM–button Push over 2 seconds to activate defined prerecorded FIRE ALARM–message.
-
Page 70: Front Panel Of Alphaannounce Extension Panel
5.4.2 Front Panel of AlphaAnnounce Extension Panel External panel can be equipped with both green and red buttons. Button functions are configured with PC software in Control panel dialog. 5.5 Rear Panel of AlphaAnnounce Control Panel Dry contact output for System fault remote control or local speaker mute control. Aux audio input, 3.5 mm stereo plug. -
Page 71: Operation Instructions
Dip switch to set the address (1-4) and to select the power supply for button backlight (5 and Connector for external power supply for backlight (24 VDC). Figure 8: Type plate on the bottom of the console 5.6 Operation Instructions Power-on After power-on, the STATUS/RESET-button will lit up and the console starts establishing connection to the main unit. -
Page 72: Configuration
Speak to microphone from a distance of 10-20 centimeters. 3. Paging is ended by releasing PUSH TO TALK-button. Activating Pre-Recorded Emergency Message Pre-recorded emergency messages are started by holding message button (usually red) until the light of the button goes off (2-3 seconds). The PUSH TO TALK-button will blink to indicate the on-going message. The message will keep playing repeatedly. -
Page 73: Setup
• Call-off control 5.8 Setup 5.8.1 Cabling and Connection Consoles can be connected to system using CAT5, CAT6 or CAT7 category cabling. Dedicated network is recommended, but building general data cabling can be used also. Note! be sure not to use cables in use for Ethernet or Intranet. -
Page 74: Ctrl Output
Backlight for the buttons can be powered from internal or external 24VDC power supply. Power supply selection is made with dip switches 5 and 6. 5.8.3 CTRL Output Console is equipped with relay dry contact output control. It can be used for: •... -
Page 75: Technical Specifications
5.9 Technical Specifications Compliance with following standard EN 60849:1998 EN 54-16:2008 ISO7240-16:2007 EN 60945:2002 • Frequency response (-3 dB) 200 - 17,000 Hz (mic) 50 - 17,000 Hz (aux) • THD+N 1 kHz < 0.1 % • Connectors type • System Bus RJ-45 •... - Page 76 All over the world, close to the customer JRC/Alphatron Marine B.V. Schaardijk 23 (harbor 115) The information in this document is subject to change without notice and 3063 NH Rotterdam does not represent a commitment on the part of Alphatron Marine B.V.
Need help?
Do you have a question about the Alphatron Marine AlphaAnnounce and is the answer not in the manual?
Questions and answers