Table of Contents
Advertisement
Quick Links
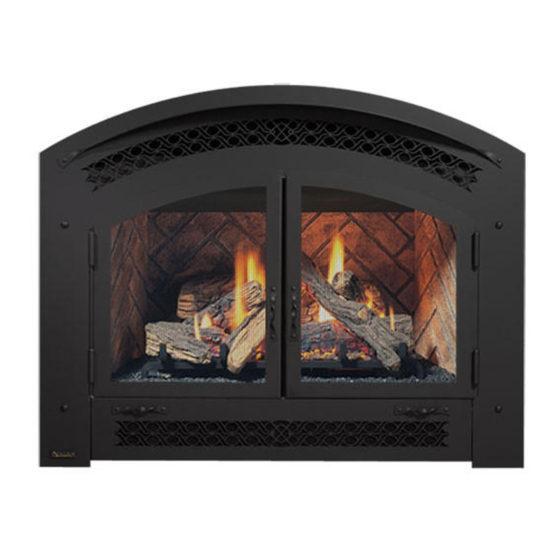
Excalibur
Direct Vent Gas Fireplace
MODELS:
P90E-NG11 Natural Gas
WARNING
FIRE OR EXPLOSION HAZARD
failure to follow safety warnings exactly could result in serious
injury, death, or property damage.
- Do not store or use gasoline or other flammable vapors and liquids in the vicinity of this or any other
appliance.
- WHAT TO DO IF YOU SMELL GAS
•
Do not try to light any appliance.
• Do not touch any electrical switch: do not use any phone in your building.
Leave the building immediately.
• Immediately call your gas supplier from a neighbour's phone. Follow the gas supplier's
instructions.
• If you cannot reach your gas supplier, call the fire department.
- Installation and service must be performed by a qualified installer, service agency or the gas supplier.
Tested by :
Certified to/Certifié pour:
919-971a
P90E Zero Clearance
®
P90E-LP11 Propane
CSA 2.17-2017
ANSI Z21.88-2017
CSA 2.33-2017
REGENCY FIREPLACE PRODUCTS. 6988 Venture St., Delta, BC Canada, V4G 1H4
Installer: Please complete the details on the back cover and leave this manual
with the homeowner.
Homeowner: Please keep these instructions for future reference.
Owners &
Installation Manual
www.regency-fire.com
04.05.19
Advertisement
Table of Contents

Related Manuals for Regency Excalibur P90E Zero


Summary of Contents for Regency Excalibur P90E Zero
- Page 1 Installer: Please complete the details on the back cover and leave this manual Certified to/Certifié pour: CSA 2.17-2017 with the homeowner. ANSI Z21.88-2017 CSA 2.33-2017 Homeowner: Please keep these instructions for future reference. 919-971a REGENCY FIREPLACE PRODUCTS. 6988 Venture St., Delta, BC Canada, V4G 1H4 04.05.19...
- Page 2 As it also bears our own mark, it promises to provide you with economy, comfort and security for many trouble free years to follow. Please take a moment now to acquaint yourself with these instructions and the many features of your Excalibur Fireplace. ® Regency Excalibur P90E-11 Direct Vent Gas Stove ®...
- Page 3 INFORMATION FOR MOBILE/MANUFACTURED HOMES AFTER FIRST SALE This Regency product has been tested and listed by Intertek as a Direct Vent Wall Furnace to the following standards: to Vented Gas ® Fireplace Heaters ANSI Z21.88-2017 • CSA 2.33-2017 and Gas-fired Appliances for Use at High Altitudes CSA 2.17-2017.
-
Page 4: Table Of Contents
See the instructions in this manual and on the Lighting Instructions plate on Warranty the appliance to light or re-light the pilot. Warranty ................66 Regency Excalibur P90E-11 Direct Vent Gas Stove ®... -
Page 5: Unit Dimensions
Unit Dimensions ALL PICTURES / DIAGRAMS SHOWN THROUGHOUT THIS MANUAL ARE FOR ILLUSTRATION PURPOSES ONLY. ACTUAL PRODUCT MAY VARY DUE TO PRODUCT ENHANCEMENTS. Regency Excalibur P90E-11 Direct Vent Gas Stove ®... -
Page 6: Copy Of Safety Decal For P90E-11
The safety label is located on the front inside base of the unit, visible when the bottom louver is open. NOTE: Regency units are constantly being ® improved. Check the label on the unit and if there is a difference, the label on the unit is the correct one. -
Page 7: Important Message
YOUR WARRANTY AND MAY CAUSE A SERIOUS HOUSE FIRE. CHILDREN AND ADULTS SHOULD BE ALERTED TO THE HAZARDS OF HIGH SURFACE TEMPERATURES, ESPE- CIALLY THE FIREPLACE GLASS, AND SHOULD STAY AWAY TO AVOID BURNS OR CLOTHING IGNITION. Regency Excalibur P90E-11 Direct Vent Gas Stove ®... -
Page 8: Lighting Procedure / Shutdown Procedure
If the unit is being operated in IPI (intermittent pilot) mode, neither the above instructions nor the seven day timer will apply. See the instructions in this manual and on the Lighting Instructions plate on the appliance to light or re-light the pilot. Regency Excalibur P90E-11 Direct Vent Gas Stove... -
Page 9: Copy Of The Lighting Plate Instructions
If service is to be performed–you must disconnect power and shut off gas to the unit. Appuyer sur la touche ON/OFF de la télécommande. En cas d'entretien, vous devez débrancher l'alimentation et couper le gaz alimentant l'unité. DO NOT REMOVE THIS INSTRUCTION PLATE 919-634 Regency Excalibur P90E-11 Direct Vent Gas Stove ®... -
Page 10: Proflame Ii Remote Control Operating Instructions
(*) The receiver may be independent or integral to the IFC hearth ap- pliance control module. The receiver instruction may not be indepen- dent when part of the IFC. Figure 2: Transmitter LCD Display Fig3: Battery Figure 3: Battery Compartment compartment. Regency Excalibur P90E-11 Direct Vent Gas Stove ® 919-829 09.29.17... - Page 11 Transmitter LCD display will only show the room temperature (Fig. 6). At the same time the Receiver will turn off the appliance. A single “beep” from the Receiver confi rms reception of the command. Figure 9 Figure 10 Regency Excalibur P90E-11 Direct Vent Gas Stove ® 919-829 09.29.17...
- Page 12 Keys (fi g.1) to turn on, off or adjust the fan speed (fi g. 14). A single “beep” will confi rm reception of the command. Figure 17 Figure 18 Figure 13 Figure 14 Regency Excalibur P90E-11 Direct Vent Gas Stove ® 09.29.17 919-829...
- Page 13 3rd battery is installed, then release the mode button only. 4. The screen will show either "Clr" or "Set" with the 1st mode being your option to disable or enable. Regency Excalibur P90E-11 Direct Vent Gas Stove ®...
-
Page 14: Installer's Information
(e) A copy of all installation instructions for all Product Approved side wall horizontally vented gas fueled equipm ent, all venting instructions, all parts lists for venting instructions, and/or all venting design instructions shall remain with the appliance or equipment at the completion of the installation. Regency Excalibur P90E-11 Direct Vent Gas Stove ®... -
Page 15: General Safety Information
15. The appliance area must be kept clear and manufacturer. free of combustible materials, (gases and other flammable vapours and liquids). Regency Excalibur P90E-11 Direct Vent Gas Stove ®... -
Page 16: Locating Your Gas Appliance
Heat Release Kit Locations" section. Heat Release Kit The HeatWave Duct Kit and the Heat Release Kit have different clearance and framing requirements, check the HeatWave and Heat Release manual for details. Regency Excalibur P90E-11 Direct Vent Gas Stove ®... -
Page 17: Unit Base Standoffs
3. For exterior walls, insulate the enclosure to the same degree as the rest of the house, apply vapour barrier and drywall, as per local installation codes. (Do not insulate the fireplace itself.) Regency Excalibur P90E-11 Direct Vent Gas Stove ®... -
Page 18: Combustible Mantels
Mantel can be installed anywhere in shaded area or higher using the above scale. Note: Ensure the paint that is used on the mantel and the facing is "heat resistant" or the paint may discolour. Mantel Leg Clearance Regency Excalibur P90E-11 Direct Vent Gas Stove ®... -
Page 19: Facing Requirement
You must maintain clearance from Regency provides a template the vent to combustible on the box. m a t e r i a l s fo r b o t h... -
Page 20: Optional Framing Kit
2. Adjust the nailing strips by loosening 2 screws on each nailing strip - adjust and retighten screws. Attach tall vertical studs (792-022) from framing kit to existing wood framing. Framing kit dimensions 02.12.15 919-508 Regency Excalibur P90E-11 Direct Vent Gas Stove ®... -
Page 21: Wall Mount On / Off Switch And Battery Holder Installation
11. Using the two (2) screws provided secure the cover plate to the Battery Holder. 12. For coding instructions, see full details in this manual. Low Voltage Junction Box Proflame Battery Holder J-Box Battery Holder Slider Switch Wall Plate Diagram 1 Regency Excalibur P90E-11 Direct Vent Gas Stove ®... -
Page 22: Unit Assembly Prior To Installation
Side Nailing Strips The side nailing strips come attached to the unit. There are 2 plates, one on the top and bottom that can be folded out as required. Plates can be folded out. Regency Excalibur P90E-11 Direct Vent Gas Stove ®... -
Page 23: Venting - Fpi Direct Vent System (Flex) Horizontal Termina
9. screws #8 x 1-1/2" Drill Point, Stainless Steel (4) Steel (4) Vinyl Siding Standoff (optional) Wall Thimble (required in Canada only) AstroCap Termination Cap 4" dia. flue pipe 6-7/8" spring spacer (17 mm) dia. Flue pipe Regency Excalibur P90E-11 Direct Vent Gas Stove ®... -
Page 24: Exterior Vent Termination Locations
* Clearance in accordance with local installation codes and the requirements of the gas supplier 3 feet (91cm) within a height of 15 feet (4.5m) above the meter / regulator assembly 3 feet (91cm) above - if within 10 feet (3m) horizontally Regency Excalibur P90E-11 Direct Vent Gas Stove ®... -
Page 25: 4" X 6-5/8" Rigid Pipe Cross Reference Chart
” RIGID PIPE CROSS REFERENCE CHART Components from different Manufacturers may not be mixed. Not all rigid pipe components are available directly from Regency. Note: The listed manufacturers may have other lengths not shown on this chart, which would also be approved. - Page 26 Note: Horizontal runs of vent must be level, or have a 1/4” rise for every 1 foot of run towards the termination. Never allow the vent to run downward - this could cause high temperatures and may present a possible fi re hazard. Regency Excalibur P90E-11 Direct Vent Gas Stove...
-
Page 27: 5" X 8" Rigid Pipe Cross Reference Chart
Components from different Manufacturers may not be mixed. Not All Rigid Pipe components are available directly from FPI. Components from different Manufacturers may not be mixed. Not all rigid pipe components are available directly from Regency. Note: The listed manufacturers may have other lengths not shown on this chart, which would also be approved. - Page 28 36” (914mm) 29-13/16” (757mm) 39-7/16” (1002mm) Never allow the vent to run downward - this could cause high temperatures and may present a possible fire hazard. 48” (1219mm) 38-1/4” (972mm) 47-7/8” (1216mm) Regency Excalibur P90E-11 Direct Vent Gas Stove ®...
-
Page 29: Rigid Pipe Venting Systems
American Metal Products Ameri Vent Direct Vent, Olympia Ventis DV, Security Secure Vent ® , Selkirk Direct-Temp. AstroCap is a proprietary trademark of FPI Fireplace Products International Ltd. Dura-Vent® and Direct Vent are registered and/or proprietary trademarks of Simpson Dura-Vent Co. Inc. Regency Excalibur P90E-11 Direct Vent Gas Stove ®... -
Page 30: Horizontal & Vertical Terminations For 5''X8'' Venting
Horizontal & Vertical Terminations for 5" x 8" Venting Regency Excalibur P90E-11 Direct Vent Gas Stove ®... -
Page 31: Rigid Pipe Venting Arrangements - Horizontal Terminations
Maintain clearances to combustibles as listed in the "Clearances" section. • Horizontal vent must be supported every 3 feet. • Firestops are required at each floor level and whenever passing through a wall. Regency Excalibur P90E-11 Direct Vent Gas Stove ®... -
Page 32: Rigid Pipe Venting Arrangements - Vertical Terminations
Please note that all vertical Note: Must use optional rigid pipe adaptor when using rigid measurements are taken from vent systems (Part # 510-994). the base of the unit excluding risers or bottom stand-offs. Regency Excalibur P90E-11 Direct Vent Gas Stove ®... - Page 33 Please note min. 1 foot between 5' Min. 4' Max. 10' Min. 7' Max. elbows is 6' Min. 5' Max. 11' Min. 8' Max. required. 7' Min. 6' Max. 12' Min. 9' Max. Regency Excalibur P90E-11 Direct Vent Gas Stove ®...
- Page 34 5' Max. 7' Min. Please note min. 1 foot 5' Min. 6' Max. 8' Min. between 90 elbows is 6' Min. 7' Max. 9' Min. required. 7' Min. 8' Max. 10' Min. Regency Excalibur P90E-11 Direct Vent Gas Stove ®...
-
Page 35: Horizontal Terminations
Failure to do so may result in drafting clearances to combustible materials or performance issues not covered under are maintained (Diagram 4). Install the warranty. termination cap. Diagram 3 Regency Excalibur P90E-11 Direct Vent Gas Stove ®... -
Page 36: Vertical Terminations
Ruban de over 16/12 to 18/12 2.13 plombier over 18/12 to 20/12 2.29 relié à Diagram 7 l’attache Diagram 3 over 20/12 to 21/12 2.44 murale Attache Regency Excalibur P90E-11 Direct Vent Gas Stove ® murale walstrpf.eps Coudes de 45... -
Page 37: Installation Procedures For Fpi Direct Vent System
(4 per connection) end. We recommend framing a 10"(254mm) x 10"(254mm) (inside dimensions) hole to give Wall Thimble structural rigidity for mounting Screws 2 pieces the termination. (3 per connection) (10" Outer Diameter) Regency Excalibur P90E-11 Direct Vent Gas Stove ®... -
Page 38: Vertical Termination 4" X 6-7/8" Venting - Vertical Flex Vent Kit
10. Attach the rigid pipe section to the adaptor by using Mill-Pac on the inner/ Note: Any closets or storage spaces which the vent passes through must outer pipe. Use 3 screws to secure outer pipe. be enclosed. Regency Excalibur P90E-11 Direct Vent Gas Stove ® 919-695... -
Page 39: Vertical Flue Extension Kit (Part #946-756)
Firestop spacer to prevent debris from falling into the ceiling Diagram 1 Roof support firestop Ceiling firestop Enclosure Ceiling firestop Diagram 1a 919-698 06.12.18 Regency Excalibur P90E-11 Direct Vent Gas Stove ® 919-696 08.10.16... -
Page 40: System Data
(clockwise) with a 1/8" flat screwdriver. Note: Screw should be snug, but do not over ote: If you have an incorrect flame pattern, Electrical: 120 V A.C. System. tighten. contact your Regency dealer for further ® Circulation Fan: variable speed 130 CFM. instructions. -
Page 41: Conversion From Ng To Lp
Also check that the pilot and main burner injectors are appropriate 16) Check inlet and outlet pressures. for the gas type. 17) Check operation of flame control. Air shutter should be set to a minimum of 5/16" open. Pilot retainer clip Installer Notice: These instructions must be left with the appliance. Regency Excalibur P90E-11 Direct Vent Gas Stove ® 920-003 03.12.19... -
Page 42: Optional Brick Panels
Be very careful not to scratch them on the firebox hardware. Note: If the bottom brick panel must be removed: Remove the Rear Log Stand, then remove the Burner Tray. See the "Removing Valve" section. Regency Excalibur P90E-11 Direct Vent Gas Stove ®... -
Page 43: Log Set Installation
Carefully remove the logs from the box and unwrap them. The logs are fragile, handle with care - do not force into position. Sprinkle the vermiculite over base brick panel. 918-067c Page 1 of 4 01/04/08 Regency Excalibur P90E-11 Direct Vent Gas Stove ®... - Page 44 Position Log 02-54 across the cutouts in Logs 02-51 and 02-53. The notch in the bottom right end fi tting against the 5th grate tab. Rear Bracket Cutouts 02-54 02-51 5th Grate Tab 918-067c Page 2 of 4 01/04/08 Regency Excalibur P90E-11 Direct Vent Gas Stove ®...
- Page 45 Log Indentation 02-55 02-53 Notch 02-50 02-52 02-54 Rear Grate Tab Photo shows rear grate tab. Log 02-51 was removed to show the positioning of Log 02-52. 918-067c Page 3 of 4 01/04/08 Regency Excalibur P90E-11 Direct Vent Gas Stove ®...
- Page 46 If there is any fl ame hesitation, check that area for any blockage of the burner ports. 02-75 02-55 02-50 02-54 02-51 918-067c Page 4 of 4 01/04/08 Regency Excalibur P90E-11 Direct Vent Gas Stove ®...
-
Page 47: Birchwood Log Set Installation
Carefully remove the logs from the box and unwrap them. The logs are fragile, handle with care - do not force into position. Sprinkle the vermiculite over base brick panel. 919-954 Page 1 of 4 11.08.18 Regency Excalibur P90E-11 Direct Vent Gas Stove ®... - Page 48 Position Log F across the cut outs in Logs E and D. The notch in the bottom right end fi tting against the 5th grate tab. Rear Bracket Cutouts 5th Grate Tab 919-954 Page 2 of 4 11.08.18 Regency Excalibur P90E-11 Direct Vent Gas Stove ®...
- Page 49 fi tting into the fi rst grate tab. Front Brackets Log Indentation Notch Rear Grate Tab Photo shows rear grate tab. Log E was removed to show the positioning of Log G. 919-954 Page 3 of 4 Regency Excalibur P90E-11 Direct Vent Gas Stove 11.08.18 ®...
- Page 50 If there is on the burner tray. any fl ame hesitation, check that area for any blockage of the burner ports. 919-954 Page 4 of 4 11.08.18 Regency Excalibur P90E-11 Direct Vent Gas Stove ®...
-
Page 51: Glass Door Installation
Installation seat into upper slots on the bracket within the unit. 1. The optional decorative double doors can be added to the Arch surround by attaching with 4 magnets as shown below. Regency Excalibur P90E-11 Direct Vent Gas Stove ®... -
Page 52: Aeration Adjustment
Excalibur Installer at the time of ® installation or service. Adjustment Wire: Push to close or pull to open aeration cap. Closed - Tall yellow Open - Short Blue Regency Excalibur P90E-11 Direct Vent Gas Stove ®... -
Page 53: Wiring Diagram Without Thermostat
The fan grounded three-prong recep- and or lights will not operate during a power tacle. Do not cut or remove the outage. grounding prong from this plug. EXTERNAL ANTENNA Regency Excalibur P90E-11 Direct Vent Gas Stove ®... -
Page 54: Optional Wall Thermostat
250-750 millivolt rated non- anticipator type thermostat that is CSA, ULC or UL approved may be used. Wiring Diagram with Optional Thermostat Thermostat( Optional) (Millivolt) GREY GREY EXTERNAL ANTENNA Regency Excalibur P90E-11 Direct Vent Gas Stove ®... -
Page 55: First Fire
This is the recommended procedure for operating the unit with a thermostatic set point. If a millivolt wall thermostat is required for bedroom installation or as preferred method of controlling the stove, see noted option. Regency Excalibur P90E-11 Direct Vent Gas Stove ®... -
Page 56: Backup Battery
3. Install 4 AA batteries ensuring they are polarity correct. See diagram 4. 2. Press down on both tabs to remove battery compartment door. See diagrams 2 and 3. 4. Reverse steps 3-1. Regency Excalibur P90E-11 Direct Vent Gas Stove ®... -
Page 57: Normal Operating Sounds Of Gas Appliances
While the pilot flame is on it can make a very slight WARNING: CHILDREN AND ADULTS "whisper" sound. ote: If you have an incorrect flame pattern, SHOULD BE ALERTED TO THE contact your Regency dealer for further ® HAZARDS OF HIGH SURFACE Gas Control Valve: instructions. -
Page 58: Maintenance Instructions
2. Remove the Cap, and shine a flashlight down should be done by a licensed or qualified the Vent. Remove any bird nests, or other foreign service person. material. Caution: Wear gloves when removing damaged or broken glass. Regency Excalibur P90E-11 Direct Vent Gas Stove ®... -
Page 59: Fan Maintenance
These fans collect a lot of dust from within your home. Ensure you maintain these fan motors on a regular basis by vacuuming the fan blades and the hous- Diagram 3 ing with a soft brush nozzle. Regency Excalibur P90E-11 Direct Vent Gas Stove ®... - Page 60 2. Remove two (2) Phillips head screws on each side of the valve then remove valve from mounting bracket. Diagram 1 Diagram 5 3. Reverse the steps to reinstall new valve. Diagram 2 Regency Excalibur P90E-11 Direct Vent Gas Stove ®...
-
Page 61: Parts List
Brick Panel - Back 96. 946-005 Wall Adaptor Plate - White 34. * Brick Panel - Left 97. 910-417 Knob - White 98. 910-366 Switch Cover Plate - White 35. * Brick Panel - Right Regency Excalibur P90E-11 Direct Vent Gas Stove ®... - Page 62 HEAT WAVE DUCT KIT 97 98 HEAT RELEASE DUCT KIT BRICK PANELS Regency Excalibur P90E-11 Direct Vent Gas Stove ®...
-
Page 63: Burner Assembly & Log Set
IFC Metal Cover - Top 911-210 External Antenna IFC 910-428 Duplex Receptacle 910-429 Box - Receptacle 910-430 Cover - Receptacle 904-687 Clamp Connector 910-331/P Replacement Blower Motor *Not available as a replacement part. Regency Excalibur P90E-11 Direct Vent Gas Stove ®... -
Page 64: Arch Surround And Safety Screen Assembly
Arch Surround and Safety Screen Assembly Part # Description 792-038 Flush door frame 940-326/P Flush glass 936-155 Glass Gasket (tadpole) 792-920 Arch surround with safety screen 792-950 Black Double doors Regency Excalibur P90E-11 Direct Vent Gas Stove ®... - Page 65 Regency Excalibur P90E-11 Direct Vent Gas Stove ®...
-
Page 66: Warranty Warranty
FPI is not responsible for results or costs of workmanship of unauthorized FPI dealers or agents in the negligence of their service work. Revision Date: February 2019 Regency Gas Products Warranty Regency Excalibur P90E-11 Direct Vent Gas Stove... - Page 67 Products made or provided by other manufacturers and used in conjunction with the FPI appliance without prior authorization from FPI may void this warranty. Revision Date: February 2019 Regency Gas Products Warranty Regency Excalibur P90E-11 Direct Vent Gas Stove ®...
- Page 68 Product Registration and Customer Support: Thank you for choosing a Regency Fireplace. Regency strives to be a world leader in the design, manufacture, and marketing of hearth products. To provide the best support for your product, we request that you complete a product registration form at http://www.regency-fire.com/Customer-Care/Warranty-Registration.aspx...
- Page 69 Product Registration and Customer Support: Thank you for choosing a Regency Fireplace. Regency strives to be a world leader in the design, manufacture, and marketing of hearth products. To provide the best support for your product, we request that you complete a product registration form found on our Web Site under Customer Care within ninety (90) days of purchase.
- Page 70 Regency Excalibur P90E-11 Direct Vent Gas Stove ®...
- Page 71 Regency Excalibur P90E-11 Direct Vent Gas Stove ®...
- Page 72 Dealer Name & Address: ______________________________________________ ___________________________________________________________________ Installer: ___________________________________________________________ Phone #: ___________________________________________________________ Date Installed: ______________________________________________________ Serial No.: __________________________________________________________ Printed in Canada Regency and Excalibur are trademarks of FPI Fireplace Products International Ltd. ® © Copyright 2019, FPI Fireplace Products International Ltd. All rights reserved.
Need help?
Do you have a question about the Excalibur P90E Zero and is the answer not in the manual?
Questions and answers