Hilti DD 150-U Operating Instructions Manual
Hide thumbs
Also See for DD 150-U:
- Manual (128 pages) ,
- Original operating instructions (100 pages) ,
- Operating instructions manual (28 pages)

Related Manuals for Hilti DD 150-U


Summary of Contents for Hilti DD 150-U
- Page 1 DD 150-U English Printed: 05.02.2019 | Doc-Nr: PUB / 5162567 / 000 / 02...
- Page 2 Printed: 05.02.2019 | Doc-Nr: PUB / 5162567 / 000 / 02...
- Page 3 DD 150-U Original operating instructions Printed: 05.02.2019 | Doc-Nr: PUB / 5162567 / 000 / 02...
- Page 4 Printed: 05.02.2019 | Doc-Nr: PUB / 5162567 / 000 / 02...
- Page 5 Information about the documentation About this documentation • Read this documentation before initial operation or use. This is a prerequisite for safe, trouble-free handling and use of the product. • Observe the safety instructions and warnings in this documentation and on the product. •...
- Page 6 Wear eye protection Wear a hard hat Wear ear protection Wear protective gloves Wear protective footwear Wear light respiratory protection Read the operating instructions before use 1.3.2 Status indicator The following symbols are used on the product: Theft protection indicator Drilling performance indicator Service indicator 1.3.3...
- Page 7 The type designation and serial number are printed on the rating plate. ▶ Write down the serial number in the table below. You will be required to state the product details when contacting Hilti Service or your local Hilti organization to inquire about the product. Product information...
- Page 8 Electrical safety ▶ Power tool plugs must match the outlet. Never modify the plug in any way. Do not use any adapter plugs with earthed (grounded) power tools. Unmodified plugs and matching outlets will reduce risk of electric shock. ▶ Avoid body contact with earthed or grounded surfaces, such as pipes, radiators, ranges and refrigerators.
- Page 9 To achieve a high level of dust collection, use a suitable vacuum extractor of the type recommended by Hilti for wood dust and/or mineral dust and which is designed for use with this tool. Ensure that the workplace is well ventilated. The English Printed: 05.02.2019 | Doc-Nr: PUB / 5162567 / 000 / 02...
- Page 10 If the machine’s supply cord is damaged it must be replaced with a specially-prepared and approved supply cord available from Hilti Customer Service. Check extension cords at regular intervals and replace them if found to be damaged. Do not touch the supply cord or extension cord if it is damaged while working.
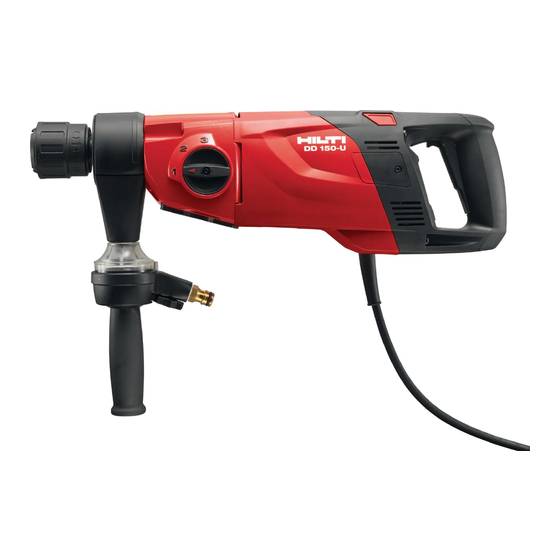
- Page 11 Description Parts of the tool and operating controls Diamond core drilling machine Water swivel / suction head Service indicator ∙ Water flow rate indicator Drilling performance indicator Side handle Carbon brush cover £ Water flow regulator Supply cord with PRCD Water connection Rating plate &...
- Page 12 Drill stand Grip Leveling indicator Column Adjusting lever Carriage Leveling screws Carriage lock Hole center indicator Type identification plate Depth gage Vacuum relief valve Locking pin Ü Vacuum hose connector Carriage play adjusting screw Vacuum seal End stop screw Base plate Supply cord holder Æ...
-
Page 13: Technical Data
To help ensure safe and reliable operation, use only genuine Hilti spare parts and consumables. Spare parts, consumables and accessories approved by Hilti for use with the product can be found at your local Hilti Center or online at: www.hilti.com... - Page 14 DD 150-U Rated current input 230 V 10.3 A Rated power input 2,200 W Weight of the diamond core drilling machine 8.2 kg Weight of the drill stand with combination base plate and 13.3 kg carriage Dimensions, diamond core drilling machine (L×W×H) 516 mm x 129 mm x 159 mm Dimensions, drill stand (L×W×H)
- Page 15 Core bit diameter Use of the water collection system in combination with a wet-type industrial vacuum extractor is mandatory for upward wet drilling. 1st gear 2nd gear 3rd gear Ø core bits (stand- With water 102 mm …162 mm 28 mm …87 mm 12 mm …25 mm guided drilling, collection sys-...
- Page 16 ▶ Use anchors suitable for the material on which you are working and observe the anchor manufacturer’s instructions. Hilti metal expansion anchors M12 and M16 are usually suitable for use as anchors for diamond core drilling equipment in uncracked concrete. Under certain conditions, however, it may be necessary to use an alternative fastening method.
- Page 17 5. Use the leveling screws to level the base plate. Make sure that the leveling screws are firmly seated against the surface. 6. Use a suitable open-end wrench to tighten the clamping nut on the clamping spindle. 7. Make sure that the diamond core drilling machine is secure. Securing the drill stand by vacuum WARNING Risk of injury if pressure is not checked !
- Page 18 5. Make sure that the diamond core drilling machine is secure. Fitting the hand wheel The hand wheel can be fitted on either side of the drill stand. ▶ Fit the hand wheel on to the shaft. ▶ Secure the hand wheel. Fitting the side handle 1.
- Page 19 Adjusting the side handle 1. Slacken the side handle by turning it counter-clockwise. 2. Position the side handle. 3. Secure the side handle by turning it clockwise. 4. Check to ensure that the side handle is tightened securely. Adjusting the depth gauge (when using the drill stand) 1.
- Page 20 5. Use the hand wheel to release the locking pin (turn counterclockwise). 6. Pull the locking pin out of the slot. 7. Pivot the machine away from the drill stand. 5.10 Enabling a machine equipped with theft protection system (TPS) 1.
- Page 21 5.13 Connecting the vacuum removal system 1. Unscrew the cover from the water swivel / suction head. 2. Push the suction hose into the suction hose connector. 3. Close the water valve in the side handle. 5.14 Fitting the water supply connection ATTENTION Hazard due to incorrect use! Incorrect use can result in irreparable damage to the hose.
- Page 22 5.15 Fitting the water collection system (accessory) WARNING Danger of electric shock! There is a possibility of water flowing over the motor and cover if the vacuum removal system is faulty. ▶ Cease operations immediately if the vacuum removal system is not working. The diamond core drilling machine must be at a 90°...
- Page 23 1. Lock the carriage on the rail with the carriage lock. Check to ensure that it is securely fastened. 2. Open the chuck by turning it in the direction of the "Open brackets" symbol. 3. From below, push the diamond core bit into the chuck on the diamond core drilling machine, turning it until the teeth engage.
- Page 24 0 or the TEST button is pressed. ▶ Have your diamond core drilling machine repaired by Hilti Service. 4. Press the "I" or "RESET" button on the PRCD.
- Page 25 A different hole-starting aid is required for each core bit diameter. 1. Fit the hole-starting aid into the open end of the diamond core bit. 2. When you start drilling apply only light pressure until the core bit has centered itself. Then apply more pressure.
- Page 26 1. Secure the side handle in the desired position. 2. Optional: Install and use the two-part hole-starting aid. → page 20 3. Plug the supply cord into the power outlet and press the “Reset” switch or the “I” button on the PRCD. 4.
- Page 27 5. When you start drilling apply only light pressure until the core bit has centered itself. Then apply more pressure. 6. Watch the drilling performance indicator and adjust contact force accordingly. 6.16 Using the Rota-Rail (column swivel) The Rota-Rail allows quick and easy access to the hole or core being drilled, with no need to partly or fully dismantle the system.
-
Page 28: Troubleshooting
To help ensure safe and reliable operation, use only genuine Hilti spare parts and consumables. Spare parts, consumables and accessories approved by Hilti for use with the product can be found at your local Hilti Store or online at: www.hilti.group. - Page 29 Malfunction Possible cause Action to be taken Interruption in the electric supply. ▶ Plug in another electric tool or appliance and check whether it works. The service indicator shows ▶ Check the plug connections, nothing. supply cord, power supply line and main supply fuse.
- Page 30 Malfunction Possible cause Action to be taken The diamond core bit doesn’t The diamond core bit has become ▶ Guide the diamond core drilling rotate. jammed in the hole. machine in a straight line. ▶ Use an open-end wrench to release the core bit: Disconnect the supply cord plug from the power outlet.
- Page 31 Most of the materials from which Hilti tools and appliances are manufactured can be recycled. The materials must be correctly separated before they can be recycled. In many countries, your old tools, machines or appliances can be returned to Hilti for recycling. Ask Hilti Service or your Hilti representative for further information.
- Page 32 English Printed: 05.02.2019 | Doc-Nr: PUB / 5162567 / 000 / 02...
- Page 33 Printed: 05.02.2019 | Doc-Nr: PUB / 5162567 / 000 / 02...
- Page 34 Hilti = registered trademark of Hilti Corp., Schaan 20181214 Printed: 05.02.2019 | Doc-Nr: PUB / 5162567 / 000 / 02...
Need help?
Do you have a question about the DD 150-U and is the answer not in the manual?
Questions and answers