Advertisement
Advertisement
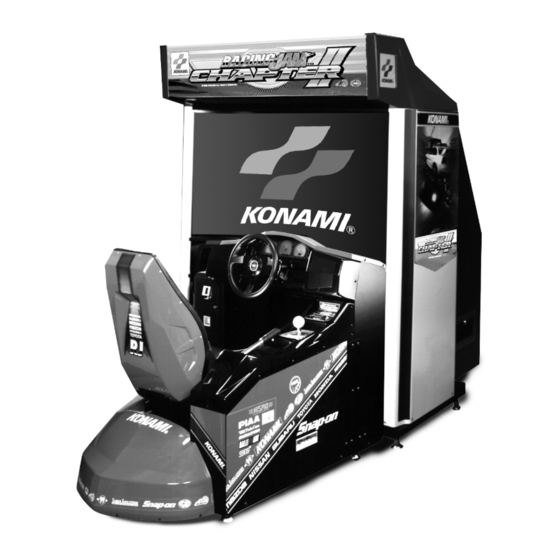
Table of Contents

Related Manuals for Konami Racing Jam Chapter II


Summary of Contents for Konami Racing Jam Chapter II
- Page 2 About this product Thank you for purchasing this KONAMI product. This manual explains how to operate your game machine correctly and safely. •Failure to operate the machine correctly could result in malfunction or accidents, so please read this manual carefully before commencing operation.
-
Page 3: Table Of Contents
Contents Precautions for use ……………………………………………… 2 Setting the kit in the machine ………………………………… 6 PCB settings 2-1 PCB start-up check (self test) ………………………………… 11 2-2 Correcting the positions of the steering wheel etc. ………… 12 2-3 Adjusting the game environment (manual test) …………… 13 2-4 Mode descriptions ……………………………………………... -
Page 4: Precautions For Use
Precautions for use In this manual, the precautions to be followed without fail in order to prevent damage to persons to install, use or maintain “RACING JAM CHAPTER ll” or other persons or to properties are shown as follows. Be sure to read the following •The following suggestions show the degree of danger and damage caused when the product is used improperly with the suggestions disregarded. - Page 5 Precautions for use WARNING •Be sure to follow the installation instructions. Wrong handling may cause a machine trouble or accident. Contact an industry specialist or your nearest dealer for installing this kit. (You will be charged.) •The projector unit has some internal parts with high voltage. Only a qualified industry specialist is allowed to open the back door of the machine.
- Page 6 Precautions for use CAUTION • Before removing the PCB unit or installing the kit, put on a wrist band to prevent static electricity. Do not do this job on a carpet or the like. · Static electricity may damage the electric parts on the game PC board. •...
- Page 7 MEMO...
-
Page 8: Setting The Kit In The Machine
1 Setting the kit in the machine Removing the PCB unit •Be sure to ask a qualified industry specialist or your nearest dealer to replace the PCB unit. (You will be charged.) •Before removing the PCB unit, be sure to turn OFF the machine’s power switch and unplug the power cord. - Page 9 1 Setting the kit in the machine Wood screws Remove the wood screws and PCB unit detach the old PCB unit off the wooden board. •Since the PCB unit is heavy, use due care when handling it. Wooden board Take out the PCB unit, remove the two countersunk screws from the PCB unit (old) wooden board, and take out the...
- Page 10 1 Setting the kit in the machine U n p l u g t h e p o w e r p l u g a n d disconnect the connector and grounding wire, all from the power unit. See the figure at right. Power plug Connector Grounding wire...
- Page 11 1 Setting the kit in the machine Connect the accompanying cables Connector(White) Accmpanying cables between the detached connectors and the power unit connectors. Connector(White) See the figure at right. •Be very careful not to confuse the connectors. A fire may result. Connector(Red) Accmpanying cables Connector(Red)
- Page 12 1 Setting the kit in the machine Reconnecting the connectors Reconnect the connectors that were disconnected see the figure below. Audio cables Monaural cable (black) Networking cables (black) CN10 *1: Be careful not to confuse the networking cables and the monaural cable.
-
Page 13: Pcb Settings
2 PCB settings 2-1 PCB start-up check (self test) When the power switch is turned ON after replacement of the PCB unit, the performance of game Printed Circuit Boards (PCB) is checked automatically and the result is displayed on the screen. •For networking, be sure to connect with the same “RACING JAM CHAPTER II”... -
Page 14: Correcting The Positions Of The Steering Wheel Etc
2 PCB settings 2-2 Correcting the positions of the steering wheel etc. After the self-test, the positions of the steering wheel, hand brake, acceleration pedal, brake pedal and clutch pedal are corrected automatically. At this time, the message “DO NOT TOUCH THE CONTROL DEVICE WHEN THE MACHINE IS BEING INITIALIZED.”... -
Page 15: Adjusting The Game Environment (Manual Test)
2 PCB settings 2-3 Adjusting the game environment (manual test) Manually check the settings for the screen displays and game contents and change them as required. Starting the manual test mode 1 Turn ON the power switch. 2 Press the test switch on the service panel during the game mode demo (during the game mode demo of all the game machines in the case of networking) . -
Page 16: Mode Descriptions
2 PCB settings 2-4 Mode descriptions The original factory settings are displayed in green; the changed settings are displayed in red. ·To change the settings, move the shift lever up or down to select an item, and press the START button to enter it. ·After the setting change, select “SAVE AND EXIT”... - Page 17 2 PCB settings SCREEN CHECK Adjusting the on-screen size, etc. Mode for checking the screen display. Using the LCD projector, adjust the display size, display position and other factors so that the marks on the screen up to the screen edges. (See page 72 of the “RACING JAM ”...
- Page 18 2 PCB settings C.G. BOARD CHECK Checking the C.G. board function Mode for checking the function of the C.G. board. Observe the screen in this mode to make sure that the C.G. board is functioning well. To return to the main menu screen, press the START button. C.G.BOARD CHECK •The “RACING JAM CHAPTER II ”...
- Page 19 2 PCB settings GAME OPTIONS Enters the game settings This screen is used to make game settings and to check them. Move the shift lever up or down to select an item, and press the START button to enter it. To return to the main menu screen, select “SAVE AND EXIT” or “EXIT” and press the START button.
- Page 20 2 PCB settings COIN OPTIONS Setting the coin options This screen is used to make coin settings and to check them. Move the shift lever up or down to select an item, and press the START button to enter it. To return to the main menu screen, select “SAVE AND EXIT” or “EXIT” and press the START button.
- Page 21 2 PCB settings NETWORK OPTIONS Sets and checks the network Sets and checks the network. Move the shift lever up or down to select an item, and press the START button to enter it. To return to the main menu screen, select “SAVE AND EXIT” or “EXIT” and press the START button.
- Page 22 2 PCB settings Screen display when game machines are networked •Two game machines are networked Screen for player 1 Screen for player 2 NETWORK CHECK NETWORK CHECK THIS BOARD-ID IS 2 THIS BOARD-ID IS 1 ERROR DOWN STATUS ERROR DOWN STATUS ID No.1 ID No.1 ID No.2 ID No.2 ID No.3 ID No.3...
- Page 23 2 PCB settings NETWORK CONFIGURATION Configuring various settings This mode is to automatically configure a group of already networked machines to the settings of a machine that has been connected to the group. To return to the “NETWORK OPTIONS” screen, press the START button. Setting Auto setting Setting modes which can be unified are as follow:...
- Page 24 2 PCB settings BOOKKEEPING Displaying the coin data In this mode, the total data on the number of coins put into the machine is displayed. If the time is preset in this mode, the total data on the number of coins put into the machine can be viewed by coin slot.
- Page 25 2 PCB settings When the shift lever is moved downward on the “COIN DATA OF LAST 7 DAYS” screen, shown on the preceding page, the past 51-week coin data is displayed in weekly totals. Move the shift lever upward and press the START button, and the total coin data is cleared.
-
Page 26: Measures To Be Taken When There Is A Network Abnormality
2 PCB settings 2-5 Measures to be taken when there is a network abnormality If the “NETWORK ERROR” message appears, if any item responds incorrectly in the network communication check described on pages 19 and 20, or if the projector displays differ from the specified ones, take the following measures. - Page 27 2 PCB settings The “NETWORK ERROR” message appears on the screen during playing. Symptom 2 NETWORK ERROR CALL ATTENDANT Possible causes and measures to be taken Possible causes Measures •One of the networking cable has been ·1.Turn OFF the power switch. disconnected from during play.
-
Page 28: Replacing The Labels And Others
3 Replacing the labels and others Replacing the title panel and labels •Before replacing the title panel, be sure to turn OFF the machine’s power switch and unplug the power cord from the receptacle. First replace the title panel Remove the screws and replace and then apply this label. -
Page 29: How To Play
4 How to play The “RACING JAM CHAPTER II” virtual-reality racing game, with its high-quality graphics, provides for unprecedented realism and sense of speed. The full-scale race driving game also gives you the thrill of car racing such as drifting, counter-steering, load center shift at cornering, spin turning and other actions. - Page 30 MEMO...
-
Page 31: Wiring Diagram
5 Wiring diagram 5 Wiring diagram...
Need help?
Do you have a question about the Racing Jam Chapter II and is the answer not in the manual?
Questions and answers