
Subscribe to Our Youtube Channel
Related Manuals for Sartorius LMA110S


Summary of Contents for Sartorius LMA110S
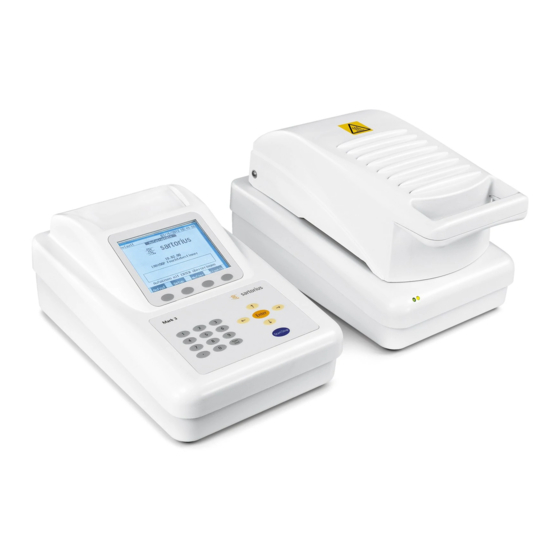
- Page 1 Operating Instructions Sartorius LMA110S Moisture Analyzer Model Mark 3 LTE Electronic Moisture Analyzer 98040-699-09 Rev. D...
-
Page 2: Table Of Contents
Contents Contents Sort Programs Introduction Configuring the Printout Intended Use Print Current Program Descriptions and Symbols Print Program List Print All Programs Warning and Safety Information Data Log Sample Pans Device Information Safety Precautions Modify Operators Getting Started Graphing Storage and Shipping Conditions Results Printout Format Unpacking the Moisture Analyzer Setting the Time and Date... -
Page 3: Introduction
Operating Instructions to learn the safe national version of the field-proven Mark operation of this analyzer. The Mark 3 3 from Sartorius. This analyzer is a modu- LTE has many features that will be lar analytical instrument that can be con-... -
Page 4: Warning And Safety Information
Warning and Safety Information This moisture analyzer complies – The moisture analyzer may be with the European Council Direc- operated only by qualified persons tives as well as international regu- who are familiar with the properties lations and standards for electrical of the sample to be analyzed. - Page 5 In case you have any problems with chapter entitled “Getting Started”) your moisture analyzer: – The analyzer comes with a power $ contact your local Sartorius office, supply that has a grounding con- dealer or service center ductor – The only way to switch the power off completely is to unplug the power cord.
-
Page 6: Sample Pans
Hazards for persons or equipment Corrosion: posed by using specific samples: – Substances that release aggressive vapors during the heating process (such as acids): In this case we recom- mend that you work with small sample quantities. Otherwise, vapors can con- dense on cold housing parts and cause Fire Explosion... -
Page 7: Safety Precautions
Caution Safety Precautions Do not touch the metal surfaces inside the drying chamber while removing Danger or placing a sample in the analyzer since Use of this product in a manner the surfaces are very hot. not specified by the manufacturer may impair any safety protection Do not touch the heater hood ventila- provided by the equipment! -
Page 8: Getting Started
Thank you for choosing the Sartorius Storage and Shipping Conditions LMA110S moisture analyzer. The Allowable storage temperature: LMA110S is a modular analytical instru- –10 to +50°C ment designed to be configured to meet –14°F to +122°F various performance requirements. Each... -
Page 9: Instructions For Recycling The Packaging
Check carefully to make sure you have – Pan support removed all accessory items. – Pan shield § The LMA110S consists of two modules, a control module and a heater module. – Power cord Up to two heater modules may be connected to a single control –... -
Page 10: General Views Of The Moisture Analyzer
RTD temperature sensor Keypad Heater adjustment tool connector Inter-module cable receptacle LED status lights Module power cable receptacle Service panel, heaters & RTD Ethernet socket: only for Sartorius temperature sensor Service Level vial USB socket: only for Sartorius Adjustable leveling feet Service... - Page 11 Control Module Connector Panel Heater Module Connector Panel Cables Connected to Control and Heater Modules...
-
Page 12: Assembly
Assembly The analyzer does not come fully assembled. The control and heater modules are placed next to each other and may be placed on either side of each other. Assemble the modules and individual components in the following order: 1. Open the heater hood using the handle and install the pan shield so that the center hole fits over the center ring of the cavity base plate. -
Page 13: Choosing A Suitable Location
It will automatically enter a warm-up period as noted on the screen. Should the analyzer display any warn- ings, consult the troubleshooting sec- tion of this manual, or call Sartorius. -
Page 14: Leveling The Moisture Analyzer
§ Observing the level vial, rotate one foot at a time to level. Adjust control module so that it does not rock. Note The heater module must be re-leveled each time the analyzer is moved. Soft keys Numeric keys Navigational keys LMA110S Keypad... -
Page 15: Operating Design
Operating Design The Mark 3 LTE analyzer is operated Numeric and Decimal Point Keys through the keypad in conjunction Numbers from 0 to 9 and the deci- with the quarter VGA screen. The mal point are pressed either to enter Mark 3 LTE is preprogrammed with a specific numeric value or to make operational and setup software that... - Page 16 Used to select an operator. Name will Soft keys: Users be printed on the results printout. The functionality of these keys will change depending on what is on the Display will return to the previous display. A label on the display just menu.
-
Page 17: Display Modes
Display Modes The large quarter VGA display is designed to make operation and setting up the analyzer easy through of detailed information in clear descriptions, choices or menus. The analyzer will display information in several different formats as described below: D e f a u l t 0 5 / 0 1 / 2 0 1 1 0 2 : 1 4 P M Warm-up:... - Page 18 D R Y M I L K P O W D E R 0 5 / 0 1 / 2 0 1 1 0 2 : 1 4 P M Graph: T e m p e r a t u r e / t i m e 25.67 % The graph mode can be entered during or after a test to show a graph of the weight versus time,...
-
Page 19: Menu Structure
Menu Structure 0 5 / 0 1 / 2 0 1 1 0 2 : 1 8 P M The Mark 3 LTE set up software is structured S e t u p M e n u according to a series of menus. The Setup menu lists 1 ) P r o g r a m m a n a g e 2 ) D a t a l o g 3 ) M o d i f y o p e r a t o r s... -
Page 20: Data Output
Data Output Each LED may have three colors: LED Status Lights red, green or amber. Red is generally associated with a warning state and The Mark 3 LTE heater module has two shows that corrective action must be LED lights on the front left corner that taken. -
Page 21: Operating The Moisture Analyzer
Sartorius will support you in finding the set of testing parameters (referred to as a pro- gram) you need for your specific tests. On request,... -
Page 22: Standby Temperature With A New Program
Functions available from the Standby screen: § Press Start|Stop key to initiate a test § Press Recall soft key to change the program to be used for testing a sample § Press User soft key to select an operator name (feature must be turned on in Setup) §... -
Page 23: Default Drying Program
Default Drying Program Program name: Default Your analyzer is delivered with a default drying pro- Temp1=105C gram. The drying program contains all the specific Time1=Off parameters to test a sample including temperature, Temp2=Off, Time2=Off Slope=0.050%/1 minute, Actual endpoint, unit of measure, standby temperature, Start delay=0 second etc. -
Page 24: Recalling A Program
Recalling a Program Drying programs are stored for easy access at a later time. This eliminates the need to change parameters for frequently tested samples. Up to 60 drying pro- grams can be stored. Creating and storing a program is described under Developing a Drying Program. To recall a stored program, perform the following steps: 1. -
Page 25: Testing A Sample
0 5 / 0 1 / 2 0 1 1 0 2 : 1 8 P M D R Y M I L K P O W D E R Testing a Sample S t a n d b y Standby A test can only be initiated from the Standby or Test Done screen. - Page 26 4. At the “Add sample to pan” prompt, open the heater hood and begin adding sample to the pan. A bar graph on the display will guide the operator to place the correct amount of sample as set by the ideal weight parameter of the drying program.
- Page 27 The display will prompt you, the Press the Start|Stop key to begin the operator to remove the sample next test using the same program. before the next sample can be test- ed. Open the hood and carefully Note remove this sample using tweezers, The analyzer balance must be calibrated and while the hood is open, add before putting the unit into routine...
-
Page 28: Setup Menu
Setup Menu All settings for to the Mark 3 LTE, including chang- ing of instrument options and program parameters, are selected in the Setup menu. Each subject is listed on the Setup menu screen. To enter the Setup menu: § From the Standby screen, press the Setup soft key to 0 5 / 0 1 / 2 0 1 1 0 2 : 3 1 P M S e t u p M e n u display the Setup Menu screen. -
Page 29: Edit Current Program
0 5 / 0 1 / 2 0 1 1 0 2 : 1 8 P M D e f a u l t Edit Current Program P r o g r a m M a n a g e M e n u All parameters associated with a currently stored 1 ) E d i t c u r r e n t p r o g r a m drying program can be edited and re-stored or... -
Page 30: Table: Program Settings
Start delay 0 - 9 seconds Delay before starting test Mode Mark 2 Simulates Mark 2 start delay LMA110S LMA110S start delay Standby temp. Standby temp. Maximum 165°C Set temperature between tests Ideal weight Ideal weight 0.1 – 99.0 g... -
Page 31: Units
Units The analyzer will calculate the test result in a variety of units of measure, depending on your specific application. This menu also provides access to the advanced options associated with units: displayed readability and correlation factors. To change the unit of measure: §... -
Page 32: Factors
Factors The analyzer has a feature for entering a scale or offset factor to adjust the result to a more accurate value. Only under special circumstances will either of the factors ever be used. To set or change factors: § Press the 1 key for Units to display the Units screen. §... -
Page 33: Temperature 1 And 2
Temperature 1 and 2 The analyzer will dry the sample at one or two temperatures set in one degree of Celsius incre- ments. A second temperature is optional and is nor- mally set to Off. See the Applications section for a description of when to use a second temperature for two-step drying. -
Page 34: Time 1 And 2
Time 1 and 2 Slope Each the Temperature 1 and 2 setting The slope function provides an auto- can have a set period of time. Time 1 or matic endpoint for the test. The slope 2 is the time during which the sample function consists of two variables: will be dried at each temperature before window of time and percent of initial... - Page 35 To set or change slope: § Press the 4 key from the Program Menu to display the Slope screen. The current initial weight percent- age is shown. § Use the numeric keys type in the desired %IW, then press the Enter key. §...
- Page 36 § Use the numeric keys to type in the desired %IW, then press the Enter key. § Note the mode: Mark 2 or LMA110S. If in the Mark 2 mode, start delay will simulate the previous Mark 2 analyzer. Press the Mode soft key to toggle between Mark 2 and LMA110S.
- Page 37 Ideal Weight The ideal weight is the amount of sample in grams that should be used for the test as prompted with a bar graph and beeper in the Test mode. To set or change the ideal weight: § Press the 7 key from the Program Menu to display the Ideal Weight screen.
- Page 38 Ideal Weight Percent Limit Ideal Weight Lock The ideal weight limit is a tolerance When activated, the ideal weight lock range for the ideal weight in percent prevents the use of any other sample that the sample weight must be in. weight other than the one that is within Example: If the ideal weight is 10 grams, the target limits.
-
Page 39: Target Limits
Target Limits The Target limit Menu provides a statistical process control (SPC) feature that can be set to identify when a tested sample is within or outside the desir- able limits selected. If this feature is activated, a Pass or Fail will be displayed after each test, indicating the sample is within or outside the set limits;... -
Page 40: Test Mode
To change the test mode: Test Mode § Press the 9 key from the Program Menu This feature provides a few special test to display the Mode screen. modes for specific applications: § Standard: normal test mode where a § Press the number key for the mode of sample is placed directly onto the pan choice. -
Page 41: Program Name
Program Name Each program is stored by a unique program name. Your analyzer may be preprogrammed with a default set of programs or a set customized for your company. Program names can be alphanumeric and have some characters. To change or set the program name: 0 5 / 0 1 / 2 0 1 1 0 2 : 2 4 P M §... -
Page 42: Create A New Program
Create a New Program Delete Program At times you may want to delete The analyzer will store 60 drying pro- grams. New programs can be created a drying program that you will no and stored for routine usage. All drying longer need. -
Page 43: Configuring The Printout
Configuring the Printout Print All Programs To print all programs with parameters: § From the Program Manage menu, press Print Current Program To print the parameters of the current the 8 key. The list of programs with program as shown in the top left corner parameters will be printed. -
Page 44: Data Log
Data Log The analyzer will store the last 999 test results. Results can easily be sorted, viewed on the display or printed. In addition, you can perform statistical analysis on sorted or selected results for viewing or printing. Sorted data may be also downloaded. Note The default setting for the data log is Off. -
Page 45: Device Information
§ Toggle the Select All or Clear All soft To select by date range: § From the Data Log menu screen, press key to select or deselect all data in order the 3 key for Select by date range to go to define a known starting point. -
Page 46: Modify Operators
Modify Operators our analyzer may be programmed with a custom list of operators specific for your company. Operators can be alphanumeric and contain various characters. To change or set operator names: § Press the 3 key from the Setup menu to display the current list of operators. -
Page 47: Graphing
To return to the Percent|Time graph: Graphing § From either the Weight|Time or Your analyzer is able to display and Temp|Time graphs, press the % (result) print a graph of the current or last test. soft key. Three styles of graphs are available: –... -
Page 48: Results Printout Format
Results Printout Format LMP110S Moisture Analyzer Module 1: M30604026 The printout format is used with the internal printer Program 1: Default (optional) or the serial communications port. UNITS: Moisture MODE: Standard START DELAY: 0 sec M2 TEMP1: 105C, Std TIME1: Off The printout format may be customized by choosing TEMP2: Off TIME2: Off... - Page 49 Interval print A complete printout format is shown to the left: Header line 1 Header line 2 Header line 3 LMA110S Moisture Analyzer Module 1: M30604026 Operator: John Smith Sample ID: 1 Calibration external: 06/01/2011 09:00 AM Last temp cal: 05/13/2011 08:20 AM...
- Page 50 0 5 / 0 1 / 2 0 1 1 0 2 : 2 4 P M To edit or change header lines: H e a d e r § From the Results Printout menu press the 1 key. 1 . H e a d e r l i n e 1 2 .
-
Page 51: Setting The Time And Date
Setting the Time and Date The time and date along with the date format will need to be set to your local time on setup. The date will automatically roll to the next year. The analyzer will set the day of the week automatically. To set the time and date (and format): §... -
Page 52: Communication Ports
§ From the Setup Menu screen, press the entered via a personal computer inter- 6 key or highlight the Communication faced to the LMA110S, all setup and Ports menu using the navigation keys operational functions of the analyzer and press the Enter key. -
Page 53: Serial Command List
Serial Command List Command Format Limit Description Response Format Range Test Setting Commands SET UNITS MOISTURE UNITS MOISTURE SOLIDS UNITS SOLIDS VOLATILES UNITS VOLATILES MOISTURE/DRY UNITS MOISTURE/DRY WEIGHT UNITS WEIGHT SET TEMP1 + Float (0-210) 0=OFF TEMP1 x 25-210C SET TEMP2 + Float (0-210) 0=OFF TEMP2 x 25-210C... - Page 54 Command Format Limit Description Response Format Range GET TIME1 Float (0-99.9) 0=OFF TIME1 xx.x GET TIME2 Float (0-99.9) 0=OFF TIME2 xx.x GET FACTOR Float FACTOR x.xxx GET OFFSET Float OFFSET x.xxx GET PLACES Integer (2 or 3) PLACES x GET SLOPE Float (0.0 - 9.99) SLOPE x.xxx GET SLOPETIME...
- Page 55 Command Format Limit Description Response Format Range SET DATEFORMAT 0-1 DATEFORMAT 0 SET PASSNUM xxxxx PASSNUM xxxxx SET ACCESS 1-9 ON ACCESS 1-9 ON/OFF Security access 1-9 correspond to menu items 1-9 1-9 OFF SET OP X string OP x string Operator Names: 1-19, 15 character max.
- Page 56 Command Format Limit Description Response Format Range Results Printout Commands r t s r t s r t s r t s r t s r t s : l a 2, 5, 10, 30, 60 seconds CORPORATION 800-635-2906...
- Page 57 Command Format Limit Description Response Format Range System DO Commands DO TRANSFER MARK3 DO TRANSFER MARK2 DO CAL EXTERNAL Calibration Complete DO WEIGHT RAISE DO WEIGHT LOWER DO PROGRAMS CLEAR PROGRAMS CLEAR DO PROGRAMS SAVE PROGRAMS SAVE DO PROGRAMS ALPHABETIZE PROGRAMS ALPHABETIZE DO RECALL XXX RECALL XXX...
- Page 58 Mark 3 LTE Program Download Format Introduction: This document details the program output format for the Mark 3 LTE Moisture Analyzer. The analyzer has the capability to transfer program settings to another Mark LTE 3 or a PC. The analyzer can also be downloaded with settings from a PC. This text format is used to transfer all the information necessary to control the test conditions of a moisture analysis test.
- Page 59 Mark 2 Program Download Format Field Description Program Number (#XXX) Units (M,S,W,V,L) Ideal Weight (XX.X, Negative value indicates ideal wt. loading locked 90-110%) Temp 1 (XXX) Temp 2 (XXX) Time 1 (Seconds) Time 2 (Seconds) Standby Temp (XXX) Slope Mode (0=Actual, 1=Calc1, 2=Calc2, 3=Calc3) Slope Time (Tenths of minutes, example: 50=5.0 minutes) Slope % (XX.XXX) Start Delay of Initial Wt.
-
Page 60: Conserve Mode
Conserve Mode The Conserve Mode allows the analyzer to manage the heating elements to be turned Off when the analyzer is not in use. In addition, a time schedule can be set for each day of the week for a Sleep mode and a Wake mode. -
Page 61: Security
Security The security mode allows the analyzer to be pass code protected from making unauthorized changes or to access selectable features including the setup configuration, programs, the data log and other areas. The security mode is also where important actions can be taken, including clearing the data log or operators, as well as managing program storage or restoring the analyzer to original or factory default settings. -
Page 62: Setup Security Access
To deactivate security: § From the Setup menu screen press the 8 key or highlight Security and press the Enter key. § Type the set pass code and press the Enter key. The security protection of the analyzer will now be deactivated. -
Page 63: Clear Data Log
Clear Data Log The data log holds 999 results. Periodically it may become full or you may elect to clear all current results in the data log. Security must be deactivated to perform this function. To clear the data log: §... -
Page 64: Restore Factory Defaults
Restore Factory Defaults At some time it may be necessary to return the analyzer to factory default settings. Security must be deactivated to perform this function. To restore factory defaults: § From the Security Menu screen, press the 5 key or highlight Restore factory defaults and press the Enter key to display a confirmation screen. - Page 65 Clear All Programs Load User Programs To clear all programs: If the user selectable programs become § From the Security Menu screen, press altered, the last stored backup set of the 6 key or highlight Manage program programs may be re-loaded from the storage and press the Enter key to dis- archive.
-
Page 66: Transfer Programs
The analyzer has been designed for storage and press the Enter key to dis- easy uploading or downloading of all play the Manage program storage programs from other Sartorius moisture screen. analyzers to the Mark 3 LTE. The fol- lowing combination of analyzers with §... -
Page 67: Audio, Video And Language
Audio, Video and Language The analyzer audio and video appearance may to adjusted to your desired taste or lighting conditions. Audio Adjustments An audio beep may be activated or turned off for a keystroke, when adding sample during the test mode or at the end of a test. -
Page 68: Video Contrast Adjustment
Video Contrast Adjustment To change the video contrast: § From the Audio & Video screen, press the 4 key for Video contrast to display the Video contrast screen. § Press a number key between 1 and 9 to change. 0 5 / 0 1 / 2 0 1 1 0 2 : 4 3 P M V i d e o c o n t r a s t A smaller number will make the screen appear 1 ) L e v e l... -
Page 69: Service
§ Adjusting the temperature § Establishing a calibration schedule § Troubleshooting and diagnostics (Factory secured area, under the guidance of Sartorius Service personnel only) System This screen will display important information about your analyzer including model, serial number, soft- ware version, dates of last calibration and adjust- ment, installation date and MAC address. -
Page 70: Calibration | Adjustment Functions
Calibration | Adjustment Functions Calibrate Balance The balance of the analyzer should be calibrated and adjusted on installation and then periodically at some interval consistent with your quality program (one year is typical). The balance may be calibrated manually with a known external calibration weight. The analyzer also allows you to set a calibration interval that will remind you when calibration is due. - Page 71 § Press Print to obtain a calibration report or Arrow 0 5 / 0 1 / 2 0 1 1 0 2 : 4 0 P M C a l i b r a t e e x t e r n a l key to exit to the Service menu.
- Page 72 To schedule calibration/adjustment: § From the Calibrate balance screen, press the 2 key 0 5 / 0 1 / 2 0 1 1 0 2 : 4 0 P M S c h e d u l e c a l i b r a t i o n for Schedule calibration to display the Schedule 1 ) O f f 2 ) 1 d a y...
-
Page 73: Heater Adjustment
Heater Adjustment Adjust Temperature or Verify Temperature The temperature of the analyzer should be verified and adjusted as needed periodically at some interval consistent with your quality program (one year is typical). To perform an adjustment the optional temperature calibration and adjustment kit is needed. Installation of the temperature bowl: §... - Page 74 § To initiate an automatic temperature calibration and 0 5 / 0 1 / 2 0 1 1 0 2 : 4 0 P M A u t o t e m p c a l adjustment, press the 5 for Automatic Temp Cal. Cal 1 The screen will change to the Temperature screen.
- Page 75 § The automatic temperature adjustment report is 0 5 / 0 1 / 2 0 1 1 2 0 2 : 4 3 P M T e m p a d j u s t d o n e printed after the adjustment process. P r e a d j u s t 8 0 : 7 9 A d j u s t e d 8 0 : P r e a d j u s t 1 5 0 : 1 4 4...
- Page 76 To change the temperature adjustment schedule: § From the Service menu, press the 3 key to display the Adjust Temperature screen. § Press the 3 for Adjust schedule. The screen will 0 5 / 0 1 / 2 0 1 1 0 2 : 5 0 P M S c h e d u l e c a l i b r a t i o n change to the Schedule temp adjust screen.
-
Page 77: Concentration Mode
Concentration Mode The Mark 3 LTE is able to determine To select the concentration mode: § Press the 9 key from the Program menu Total Suspended Solids in low solids samples, such as for wastewater sam- to display the Mode screen. ples. -
Page 78: Multi-Module Mode
Multi-module Mode The multi-module mode allows one Multi-module screen description: § Heater module icon: Separate display of operator to simultaneously control up to two heater modules connected to a heater module information including: single Control Module. This is possible § Status: warm-up, test done, pass/fail, by connecting each heater module to a Mod Comm port on the back of the minutes in test... - Page 79 Each heater module can run a test inde- Note pendent from the other heater modules Certain functions are not available in by recalling a program from the pro- the multi-module mode including: gram list and initiating a test. The pro- Interval print and graphing.
-
Page 80: Cleaning
Cleaning § Remove and clean the recessed area Recommended care under the pan shield: For best performance and reliable – Remove the pan support and pan usage, the analyzer requires periodic shield. cleaning. – Remove the two screws holding the Danger perforated plate. -
Page 81: Dispoal
In Germany and many other countries, Sartorius AG takes care of the return and legally compliant disposal of its electrical and electronic equipment on its own. These products may not be... -
Page 82: Specifications
Specifications Display of Results 0.001 % Balance Resolution 0.001 grams Balance Capacity 40 grams Reproducibility of the Sample weight = 1g : 0.1% measurement Sample weight = 5g : 0.02% Balance Repeatability ±1.0 mg Method of Measurement Loss on Drying Modular Configuration Control and heater modules (optional: up to 2 heater modules) Heat Source... -
Page 83: Accessories (Options)
Accessories (Options) Moisture analyzer accessories are available for purchase directly from Sartorius or the local distributor that you purchased the Mark 3 LTE Moisture Analyzer from. Description Sample filter pad, 90mm round Box/200 6906941 Mark 3 Lg Volume Sample Pan... -
Page 84: Regulatory Compliance
Sartorius equipment complies with the following EC and for connections of cables not sup- Directives and European Standards: plied by Sartorius and must check and, if necessary, correct these modifications. Council Directive 2004/108/EEC: On request, Sartorius will “Electromagnetic compatibility provide information on the minimum (EMC)”... - Page 85 Notes...
- Page 86 Notes...
- Page 88 Sartorius Corporation 5 Orville Dr. Bohemia, NY 11716 info@sartorius-omnimark.com www.sartorius.us Tel (800) 835-3211 Fax (631) 253-5263 JW · W3A000.CP · KT Publication No.: 98040-699-09 Rev. D...
Need help?
Do you have a question about the LMA110S and is the answer not in the manual?
Questions and answers