
Related Manuals for Sartorius LMA200PM


Summary of Contents for Sartorius LMA200PM
- Page 1 Operating Instructions Sartorius Microwave Moisture Analyzer Model LMA200PM 98648-015-60 98648-015-60...
-
Page 2: Table Of Contents
Switching on the LMA200PM ......6 Operating Design........7 A built-in, low-noise thermal printer records the results of analy- sis on a user-defined GLP-compliant printout. -
Page 3: Warnings And Safety Precautions
– Do not operate the moisture analyzer unless the cover, hinge, near systems or equipment with magnetic materials. seal and safety lock are undamaged and fully functional – Do not set up the LMA200PM near flammable materials or gas lines. Do not operate the LMA200PM with the cover open. -
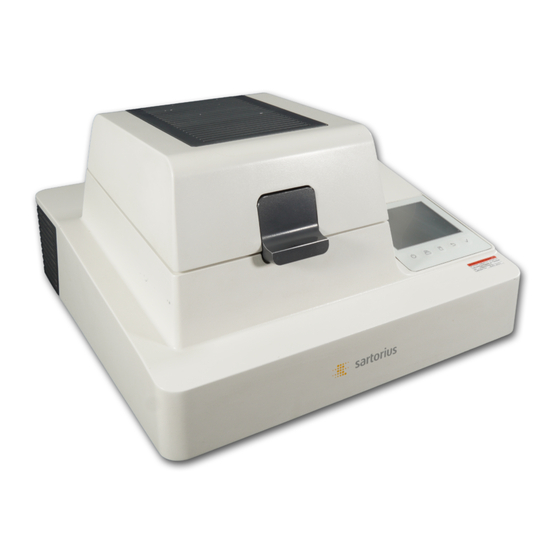
Page 4: General View Of The Moisture Analyzer
Make sure that no liquid enters the analyzer housing. EMI-protective seal. General View of the Moisture Analyzer Pos . Designation Pos . Designation LMA200PM Protective plug/transport locking device Safety lock Adapter Printer/printer compartment Sample retainer Touchscreen: 1/4 VGA display; 5.7” operating panel... -
Page 5: Getting Started
Getting Started The LMA200PM moisture analyzer consists of magnetron, weighing module, display and control panel and printer. The moisture analyzer is powered over an external power cord. Furthermore, the analyzer has an Ethernet interface, an RS-232 interface and a PS/2 socket. -
Page 6: Connecting The Moisture Analyzer To Ac Power
If it will remain unused for a long period, use the on/off switch (17) to switch it off. Warmup Time To deliver exact results, the weighing system in the LMA200PM moisture analyzer must warm up for at least 30 minutes after initial connection to AC power or after a relatively long power outage. -
Page 7: Operating Design
Operating Design Operation of the LMA200PM follows a standardized “philosophy” which is described below. Keys and Display The moisture analyzer is operated using either the keys and the touchscreen, or using an optional PC keyboard. This manual describes operation using the analyzer’s keys and display. -
Page 8: Operation
Operation Info line Bar graph line (in this example: Analysis and Test Functions checkweighing bar graph) The display (shown here on the right) is Measured value line divided into six areas. These are named in the list at the far right, and described Text line 1 in detail below. - Page 9 Menu Operation Status line The operating menu display is divided Menu line 1 into three areas (see illustration on the Menu line 2 right): Menu line 3 Menu line 4 Menu line 5 Status line: Menu line 6 The status line indicates the source of Menu line 7 the information displayed, in a format similar to a directory path.
-
Page 10: Output
Output Database Functions Messages The LMA200PM moisture analyzer has Messages are displayed at the time the three databases: event triggering the message occurs The following options are available – Program database (on top of the analyzer display). Some for data output (see also “General View –... -
Page 11: Configuration
The Setup menu is divided into the Setting the Language following sections: You can choose from 5 languages for – Manage programs printouts and display: You can configure your LMA200PM (administrators, supervisors) – English moisture analyzer to meet individual – Evaluation of results – German requirements by entering user data and –... - Page 12 Example: Defining a new user (Name: Jones) and access controls for the “Supervisor” user group Prerequisite: Administrator rights Step Key (or instruction) Display/output 1. Open the Setup menu Tap the Setup line With: administrator rights: Manage programs Evaluation of results Configuration Calibration Security management...
-
Page 13: Configuring Parameters In The Setup Menu
Configuring Parameters You can save up to 999 results datasets in the results database. in the Setup Menu Cancelled analysis runs are not saved. Once the database contains 999 data- Purpose sets, a permanent error message To adapt the moisture analyzer to meet is shown and new datasets cannot be individual requirements by selecting stored until all existing datasets have... -
Page 14: Configuration Menu
– Device – Results* – Print parameters* – Print formats* Device: You can enter or modify data affecting the following areas of LMA200PM operation: – Date and time* – Serial interfaces* – Built-in printer Selection: Program name “Ketchup” – RS-232 interface plus date and user name –... -
Page 15: Overview Of User Privileges
“Cooling down” is displayed until – Users are logged out automatically if the LMA200PM is disconnected from power. the analyzer has returned to operating Pressing the on/off key to set the analyzer in standby mode does not log the user off. -
Page 16: Overview Of Parameters In The Setup Menu
Overview of Parameters in the Setup Menu Setup Manage programs* See the chapter entitled “Operation” Evaluation of results View/print results Statistics on selected results Select results Program name (short) See page 17 by date by user individual Configuration Device Date and time* See page 17 Serial interfaces* See page 18... - Page 17 Parameters in the Setup Menu Evaluation of results - Select results; Configuration - Device Setup Input Evaluation of results Select results Program short name Alphanum. by date From Date Date by user User name Alphanum. individual Setup Configuration Device Date and time* Time format 24 hours 12 hours...
- Page 18 Parameters in the Setup Menu Configuration - Results Configuration - Printing parameters Configuration - Print formats Setup Configuration Device Serial Built-in interfaces* printer RS-232 Printout Protocol XON/XOFF parameters RTS/CTS 2-wire No protocol Baud rate 300 bd 600 bd 1,200 bd 2,400 bd 4,800 bd 9,600 bd...
- Page 19 Parameters in the Setup Menu Configuration - Results Configuration - Printing parameters Configuration - Print formats Setup Configuration Results* Sample ID Autoincremental Start no. 0 to 9999 Numeric Batch Evaluation of results Printing parameters* Automatic printout Interval 0.1 to 10.0 min Header 1 Header 2 Header 3...
- Page 20 Parameters in the Setup Menu Security management - Modify user data Setup Security management* Modify Edit User Group Operator user data users Supervisor Administrator 0, 1111 to 9999 0, 1111 to 9999 (repeat PIN input) Configure User Group Operator new user name Supervisor Administrator...
-
Page 21: Operation
Operation Setting the Drying Parameters Purpose Adapt the moisture analyzer’s software to the special requirements of products. Parameters can be configured individually for each program. Drying Parameters (Overview) Setup Input Manage Load programs programs* Change Short name Short name Alphanum. current Additional identification Long name... - Page 22 Shutoff Automatic Semi-auto: absolute Loss 1 to 50 mg Interval 1 to 99 s Semi-auto: percent. Loss 0.1 to 9.9 % Interval 1 to 99 s Time 0.1 to 10.0 min Manual Semi-auto: humidity Loss 0.1 to 9.9 % Interval 1 to 99 s Weight value res.
-
Page 23: Features
The program database in the the radiated energy. LMA200PM can store up to 320 drying – Off: programs. To view a list of available Relatively dry samples – with a moisture... - Page 24 Delete program* Shutoff Result/display mode You can choose from a variety of modes The following units can be selected for for ending the analysis: displaying analysis results: You can delete any drying program. – Automatic – Moisture (%M) – Semi-automatic, absolute –...
- Page 25 Prerequisite: Program: “Ketchup” with following settings: Mode: Standard, Process: Standard, Level: 30%, End: Automatic Step Key (or instruction) Display/output 1. Switch on the LMA200PM Press the power switch on the right-hand side of the analyzer 2. Open the list of programs...
- Page 26 Step Key (or instruction) Display/output 9. Open the hinged cover Open the LMA200PM Prompt (green background): Add sample to pad Remove the pads 10. Add sample Trickle ketchup onto glass fiber pad Spread ketchup evenly Place the second pad on the ketchup 11.
-
Page 27: External Calibration/Adjustment
Prerequisite: Login with user privileges (with the default settings, administrator rights are required; see table on page 15). Step Key (or instruction) Display/output 1. Switch on the LMA200PM Press the power switch on the right-hand side of the analyzer 2. Login as Administrator... -
Page 28: Data Output Functions
In addition to the data interfaces (see – User name the chapter entitled Data Interfaces”), – Date and time the LMA200PM offers the following output options: – LMA200PM display Bar graph – Built-in printer The bar graph is shown during weighing LMA200PM Display and acts as a user guide. - Page 29 ––––––––––––––––––––––––––––––––––––––––– 28.11.2007 16:41:46 Print Parameters Sartorius Microwave You can define whether data and sen- Moisture Analyzer sor values are printed automatically LMA200PM-000EU Rel. 01.00.00 and configure up to three header lines Serial no. 12345678 under: ––––––––––––––––––––––––––––––––––––––––– Prg. ketchup Setup > Configuration >...
-
Page 30: Data Interfaces
Parity: connecting cable to connect an external printer. Stop bits: Caution: Do not use Sartorius cables with order Pin Assignments and Connector Diagram number 7357312 or 7357315! Pin 1: Not connected Pin 2: Data output (TxD) Pin 3: Data input (RxD) - Page 31 Pin 6 Not connected Read mode options: Single read Redundancy**: 3 times redundant PC Keyboard Operation of the LMA200PM using an * Factory settings (defaults) given in external PC keyboard is analogous to pointed brackets < >. operation with the analyzer controls.
-
Page 32: Saving Data
Ethernet Interface The LMA200PM is equipped with a port for connection to an Ethernet network. This enables remote operation in a browser window, over a local network or the Internet. Configure the following settings for remote operation: – Device name –... -
Page 33: Troubleshooting Guide
Troubleshooting Guide Error messages are shown in the text line or measured value line of the display. Display Cause Solution No segments shown No AC power is available Check the AC power supply AC adapter not plugged in Connect AC adapter to the wall outlet (mains) Fuses are defective Replace the fuses... -
Page 34: Inserting A Glass Fiber Pad
Inserting a Glass Fiber Pad § Open the cover § Use the forceps to place the glass fiber pad on the sample retainer. § Make sure the pad is level. Removing a Glass Fiber Pad Note: Immediately following analysis, the sample chamber and the sample are still hot. To avoid injury, observe the warnings and safety precautions included in these instructions. -
Page 35: Care And Maintenance
(unplug the equipment Do not open the LMA200PM moisture from the wall outlet (mains)) and lock it analyzer while it is carrying current. in a safe place to ensure that it cannot be Allow approximately 10 seconds to used. -
Page 36: Specifications
Thermal printer, 40 characters per line Data interfaces 1 serial RS-232 interface, 1 Ethernet port Power source 230 V, 50 Hz, 1200 VA (LMA200PM-000EU) 115 V, 60 Hz, 1200 VA (LMA200PM-000US) 2 + 10 A/T (5 + 20 mm) Fuse... -
Page 37: Dimensions (Scale Drawings)
Dimensions (Scale Drawings) All dimensions given in mm... - Page 39 Sartorius Lab Instruments GmbH & Co. KG Otto-Brenner-Strasse 20 37079 Goettingen, Germany Phone: +49.551.308.0 Fax: +49.551.308.3289 www.sartorius.com The information and figures contained in these instructions correspond to the version date specified below. Sartorius reserves the right to make changes to the technology, features, specifications and design of the equipment without notice.
Need help?
Do you have a question about the LMA200PM and is the answer not in the manual?
Questions and answers
how do I change the power