OHAUS Scout Instruction Manual
Rs232 interface
Hide thumbs
Also See for Scout:
- Instruction manual (78 pages) ,
- Service manual (51 pages) ,
- Instruction manual (13 pages)
Advertisement
Quick Links
Advertisement

Related Manuals for OHAUS Scout


Summary of Contents for OHAUS Scout
- Page 1 ® Scout RS232 Interface INSTRUCTION MANUAL...
-
Page 3: Interface Installation
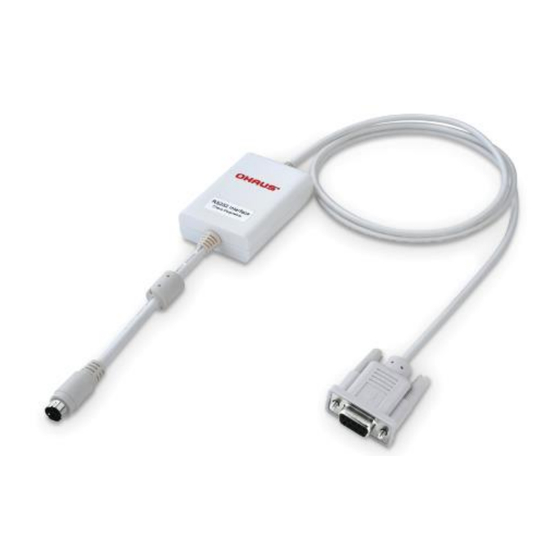
RS232 Interface EN-1 INTRODUCTION This Interface Kit is for use with OHAUS Scout STX, SPX, SKX and SJX series products. INTERFACE INSTALLATION Install the Interface module on the mini DIN port (round connector) located at the rear side of the balance as shown. During this process, please make sure the balance is powered off. -
Page 4: Setup Definitions
EN-2 RS232 Interface For SPX, SKX and SJX Balances: r.S.2.3.2 Upon installation, the balance will show [ ] during the power sequence. PRINT RS232 Reset: no, yes Reset: no, yes Stable: off, on Baud Rate: 1200…9600…115200 A.Print: Parity: 7 even, 7 odd, 7 none, On.Stable 8 none interval... - Page 5 RS232 Interface EN-3 For STX Balances: Upon installation, the STX balance will show RS232 icon ( ) in the upper right corner. Menu added Function Communication |--RS232 |--Baud Rate Set the baud rate (bits per second). Set the data bits, stop bit, and parity. |--Transmission Set the flow control method.
- Page 6 The RS232 Interface Kit cable terminates with a 9 pin Sub-D female connector. Active pins: Pin 2 = TXD, Pin 3 = RXD, Pin 5 = Ground. The Interface connector can connect directly to a computer, an OHAUS printer and other printers.
- Page 7 Set Molar Mass in g/mol . Print Molar Mass 0 = print unstable data, 1 = print stable only xFMT 0 = New Print format (default) ; 1 = Scout Pro Print format 0 = disable response; 1 = enable response.
- Page 8 EN-6 RS232 Interface ACCESSORIES For a complete listing of OHAUS printers and other accessories, contact OHAUS Corporation or visit www.ohaus.com. COMPLIANCE This device complies with Part 15 of the FCC Rules. Operation is subject to the following two conditions: (1) this device may not cause harmful interference, and (2) this device must accept any interference received, including interference that may cause undesired operation.
- Page 12 OHAUS Corporation 7 Campus Drive Suite 310 Parsippany, NJ 07054 USA Tel: +1 973 377 9000 Fax: +1 973 944 7177 With offices worldwide www.ohaus.com *30269073* P/N 30269073 A © 2015 OHAUS Corporation, all rights reserved Printed in China...
Need help?
Do you have a question about the Scout and is the answer not in the manual?
Questions and answers