U-tec Ultraloq U-Bolt Pro Installation And User Manual
Hide thumbs
Also See for Ultraloq U-Bolt Pro:
- User manual ,
- User manual ,
- Installation and user manual (40 pages)
Table of Contents
Advertisement
Available languages
Available languages
Advertisement
Table of Contents

Related Manuals for U-tec Ultraloq U-Bolt Pro


Summary of Contents for U-tec Ultraloq U-Bolt Pro
- Page 1 Ultraloq U-Bolt Pro Installation and User Guide (V1.4)
- Page 2 Before using all Ultraloq products, please read all applicable terms, rules, policies and usage provisions found at www.u-tec.com/company/privacy. By using your Ultraloq, you agree to be bound by the U-tec Privacy Policy. Need Help? For technical documents and more Please visit www.u-tec.com/support Email: support@u-tec.com...
- Page 3 Screwdriver User Guide Drill Template Fold Drill Template Doblar (V1.6) Plantilla de Perforación (V1.6) Ultraloq U-Bolt Pro Face of the door Edge of the door Cara de la puerta Borde de la puerta User Guide (V1.0) Centerline ” (60 mm) ”...
- Page 4 Installation Guide Installation Video Please scan this QR code to watch the easy step by step installation video before attempting to install Ultraloq U-Bolt Pro. Or you can also view the webiste directly. www.u-tec.com/lock/U-bolt_pro/guide 1. Preparing Door Check the door’s dimensions.
- Page 5 2. Installing Bolt and Strike Step 1 Install Bolt into the door. Make sure the UP icon goes up. ” ” Note: Bolt is set for backset initially. It can be adjusted to if needed. Step 2 Install Strike into the door frame. Adjust the Bolt basket length - 4 -...
- Page 6 3. Installing Exterior Assembly Step 1 Carefully break o cylinder tailpiece at required mark for your door thickness. ” ” Thickness ≦ ≦ ” ” Thickness ≦ ≦ 2” ” Thickness ≦ ≦ Caution: Use two pairs of pliers as shown or tailpiece will be damaged. After installing the cover plate, there should be 1 or 2 pieces over the Assembly Mounting Plate hole.
- Page 7 Step 2 Keep Bolt retracted and the cylinder tailpiece horizontal. Install Exterior Assembly. Please do not insert the mechanical key. Step 3 Align its two sticks with two holes on Bolt. The cable goes through the hole below Bolt. HORIZONTAL 4.
- Page 8 5. Installing Interior Assembly Step 1 Remove the battery cover of the Interior Assembly. Step 2 Insert the connector of the cable to the socket on Interior Press the connector in firmly until it is Assembly. completed seated Step 3 Rotate the knob and keep it in a vertical position to stay unlocked.
- Page 9 6. Installing the Batteries and Performing the Door Handing Process This step will teach your lock the orientation of your door and is crucial to lock operation. Step 1 Rotate the knob and keep it in a horizontal position to stay locked. Locked Step 2 Insert 4 AA Alkaline Batteries.
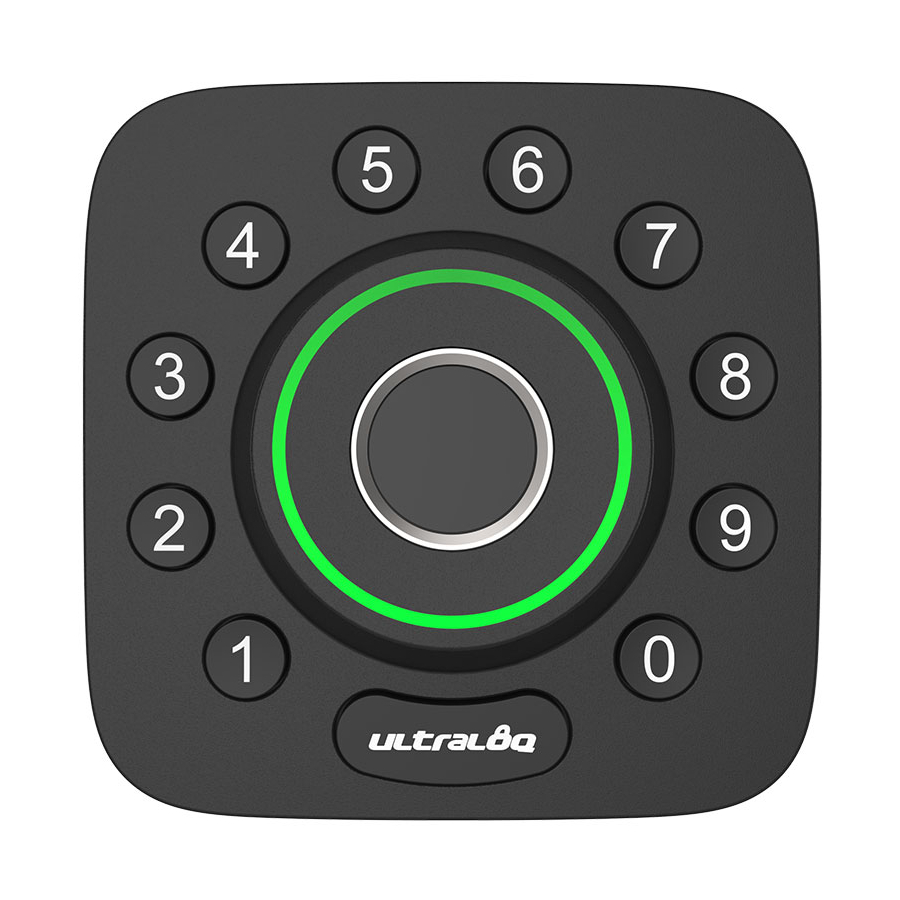
- Page 10 User Guide User Guide Video Please watch our easy step by step User Guide video before attempting to use your Ultraloq U-Bolt Pro Smart Lock. Or you can also view the webiste directly. www.u-tec.com/lock/U-bolt_pro/guide 1. Product Overview 1.1 Exterior Anti-peep Keypad...
- Page 11 1.2 Interior Battery Cover Battery Compartments LED Indicator Knob Reset Button Reset Button Used to reset the lock to Factory Default settings. If the lock was paired to App, please must click "Delete" to remove the device from App. Battery Compartments Used to insert 4 AA alkaline batteries.
- Page 12 Step 4 Pair the lock in the App and start to use it. Note: Please refer to the guide in U-tec App for more information. DON’T WANT TO USE THE APP? Please go to page 15 for programming guide for Standalone Mode.
- Page 13 Note: You can press Ultraloq Button to turn on Keypad backlight. • Fingerprint Place your nger on Fingerprint Reader to unlock. • Smartphone Use your smartphone to unlock. Please refer to the guide in U-tec App. U-Bolt Pro - 12 -...
- Page 14 Please note all data will be erased if you reset U-Bolt Pro to factory default. If you are using U-tec App as Owner, please click “Delete and Reset” to remove the lock from your U-tec Account, then use a Reset Needle to push the Reset Button (at the bottom of Interior Assembly) for around 3 seconds until you hear one long beep and two short beeps.
- Page 15 Please keep Bolt unlocked and press "0" button for 3 seconds until LED turns green and "0" button blinks. This can also be set in U-tec App and Auto Lock timing can be programmed between 10 seconds to 5 minutes. Factory Default timing is 30 seconds.
- Page 16 4. Standalone Mode Programming Guide It is recommended to use U-tec App to program your lock. If you don’t have a smartphone or don’t want to use the App, you can use the programming instructions below. Warning Standalone Mode is NOT available after the lock is registered in App! Please reset the lock to Factory Default Mode rst to program your lock in Standalone Mode.
- Page 17 Enter the User Code again 2 beeps with green light and press Success All lights o 4.3 Add Fingerprint in Standalone Mode Operation Indicator 2 beeps with ashing Hold for 3 sec blue light Enter 4-8 digit Admin Code 2 beeps with green light, and press then steady blue light light...
- Page 18 Please note all data will be erased if you reset U-Bolt Pro to factory default. If you are using U-tec App as Owner, please click “Delete and Reset” to remove the lock from your U-tec Account, then use a Reset Needle to push the Reset Button (at the bottom of Interior Assembly) for around 3 seconds until you hear one long beep and two short beeps.
- Page 19 Normal User and Temporary User? Owner is the person who owns U-Bolt Pro and registers it in U-tec App originally. Owner has all privileges. Admin can always unlock via ngerprint, code or App. Admin can add or delete Admin and Users, control all lock settings and view logs.
- Page 20 Ultraloq U-Bolt Pro Guía de Instalación y Uso (V1.4 )
- Page 21 Términos y Políticas de Ultraloq Antes de usar cualquier producto Ultraloq, por favor lea todos los términos, reglas, políticas, y disposiciones de uso aplicables que podrá encontrar en www.u-tec.com/company/privacy. Usando su Ultraloq, usted acepta estar sujeto a la Política de Privacidad de U-tec.
- Page 22 Destornillador Guía de Uso Plantilla de Perforación Fold Drill Template Doblar (V1.6) Plantilla de Perforación (V1.6) Ultraloq U-Bolt Pro Face of the door Edge of the door Cara de la puerta Borde de la puerta User Guide (V1.0) Centerline ”...
- Page 23 Guía de Instalación Video de Instalación Por favor escanea este QR código para ver el video de instalación de paso a paso antes de intentar instalar Ultraloq U-Bolt Pro. O también podrías revisar la página web directamente. www.u-tec.com/lock/U-bolt_pro/guide 1. Preparando la puerta Chequea las dimeniones de la puerta.
- Page 24 2. Instalación de Bolt y Cerrojo Paso 1 Instala Bolt en tu puerta. Asegúrate el UP símbolo hacia arriba. Note: El Bolt es para 2 ” backset inicialmente. Se puede ajustar a 2 ” si es necesario Paso 2 Instala Cerrojo en el marco de la puerta. Ajusta la longitud de basket de bolt Tornillo C...
- Page 25 3. Instalación de ensamble Externo Paso 1 Cuidadosamente quiebra la pieza de la cola de cilindro en la marca correspondiente al espesor de tu puerta. ” ” Espesor ≦ ≦ ” ” Espesor ≦ ≦ 2” ” Espesor ≦ ≦ Precaución: Usa dos pares de alicates como se muestra o la cola del cilindro se dañará.
- Page 26 Paso 2 Manten el Cerrojo presionado y la cola del cilindro horizontal. Instala Ensamble Externo. Por favor no instales la llave mecánica. Paso 3 Alinea sus dos barras con dos ori cios en el Cerrojo. El cable pasa por el ori cio debajo del Cerrojo. Horizontal 4.
- Page 27 5. Instalación de Ensamble Interno Paso 1 Remueve la tapa de baterías de Ensamble Interno. Paso 2 Inserta el conector del cable al enchufe en ensamble interno. Presiona rmemente hasta que sea completamente asentado. Levanta Paso 3 Gira la perilla y la manten en posición vertical para ser desbloqueada.
- Page 28 6. Instalación de baterías y Proceso de calibración de manija de puerta Este paso te enseñará a bloquear la orientación de tu puerta y es crucial para la operación de la cerradura. Paso 1 Gira la perilla y la manten en posición horizontal para ser bloqueada.
- Page 29 Guía de Uso Video de Guía de Uso Por favor ve nuestro fácil video de Uso de Guía de paso a paso antes de intentar usar tu Cerradura Inteligente Ultraloq U-Bolt Pro. O también podrías revisar la página web directamente. www.u-tec.com/lock/U-bolt_pro/guide 1.
- Page 30 1.2 Interior Tapa de Baterías Compartimientos de Baterías LED Indicador Perilla Botón de Reseteo Botón de Reseteo Se usa para resetear la cerradura a ajustes predeterminados de fábrica. Si la cerradura se emparejó con la App, deberías hacer clic en "Eliminar"...
- Page 31 Paso 4 Empareja la cerradura en la App y empieza a usarla. Nota: Por favor re ere a la guía en U-tec App para más información. ¿No quieres usar la APP? Por favor ve la página 15 para guía de programación para modo Independiente.
- Page 32 Nota: Puedes apretar Botón Ultraloq para encender luz de fondo de teclado. • Huella Digital Coloca tu huella en lector de huella digital para desbloquear. • Celular Usa tu celular para desbloquear. Por favor re ere a la guía en U-tec App. U-Bolt Pro - 12 -...
- Page 33 Si estás usando U-tec App como Dueño, por favor haz clic¨Eliminar y Resetear¨ para remover la cerradura desde tu cuenta U-tec, luego usa una llave para resetear a pulsar el botón de reseteo(en la parte inferior de Ensamble Interno) para acerca de 3 segundos hasta que se oyen un largo pitido y dos cortos.
- Page 34 Por favor manten cerrojo desbloqueado y apreta botón ¨0¨ 3 segundos hasta que LED se ponga verde y botón ¨0¨ parpadee. Estos también pueden ser seteado en U-tec App y el plazo se puede con gurado entre 10 segundos y 5 minutos. Ajuste determinado de fábrica es 30 segundos.
- Page 35 4. Guía de Programación de Modo Independiente Se recomienda utilizar la aplicación U-tec para programar tu cerradura. Si no tienes un teléfono inteligente o no quieres usar la aplicación, puedes usar las instrucciones de programación a continuación. Advertencia ¡El modo independiente NO está disponible después de que la cerradura ha sido registrado en App! Por favor resetea la cerradura a modo predeterminado de fábrica primero para...
- Page 36 Entra el Código de Usuario otra 2 pitidos con luz verde vez y apreta Éxito Apagan todas luces 4.3 Añadir Huella Digital en Modo Independiente Operación Indicador 2 pitidos con luz verde Apreta 3 segundos parpadeando Entra Código de Admin de 4-8 2 pitidos con luz verde, luego luz azul estable dígitos y apreta...
- Page 37 Si estás usando U-tec App como Dueño, por favor haz clic¨Eliminar y Resetear¨ para remover la cerradura desde tu cuenta U-tec, luego usa una llave para resetear a pulsar el botón de reseteo(en la parte inferior de Ensamble Interno) para acerca de 3 segundos hasta que se oyen un largo pitido y dos cortos.
- Page 38 Administrador, Usuario normal y Usuario temporal? Propietario es la persona que posee U-Bolt Pro y la registra en la App U-tec originalmente. El propietario tiene todos los privilegios. El administrador siempre puede desbloquear mediante huella digital, código o App. El administrador puede agregar o eliminar administradores y usuarios, controlar todas las con guraciones de cerradura y ver los registros.
- Page 39 Keep Your Records Manten Tus Registros DATE ADMIN CODE FECHA CÓDIGO DE ADMINISTRADOR NAME USER CODE NOMBRE CÓDIGO DE USUARIO Will Smith 12345678 - 19-...
- Page 40 © 2019 U-tec Group Inc. U-tec and Ultraloq brands and products are trademarked and protected under law in the United States. Unauthorized use is prohibited. Ultraloq is sub-brand of U-tec Group Inc.
Need help?
Do you have a question about the Ultraloq U-Bolt Pro and is the answer not in the manual?
Questions and answers
I just replaced my batteries, how do I get it to work again I use a 4 digit code
@BRUCE Robert KRAL I forgot to mention I have a u bolt pro smart deadbolt and **** trying to figure out how to reset my combo to where it was I have a reset key that goes in the bottom of this devise
To reset the U-tec Ultraloq U-Bolt Pro, follow these steps:
1. If you are the Owner using the U-tec App, click "Delete and Reset" to remove the lock from your U-tec Account.
2. Use a Reset Needle to press the Reset Button, located at the bottom of the Interior Assembly.
3. Hold the Reset Button for about 3 seconds until you hear one long beep followed by two short beeps.
This will reset the lock to factory default, erasing all data, including stored codes. You will need to reprogram your 4-digit code after the reset.
This answer is automatically generated