ReliOn MICRO User Instruction
Hide thumbs
Also See for MICRO:
- User instruction manual (76 pages) ,
- User instruction manual (148 pages)
Table of Contents
Advertisement
Advertisement
Table of Contents

Subscribe to Our Youtube Channel
Related Manuals for ReliOn MICRO


Summary of Contents for ReliOn MICRO
- Page 1 MICRO Blood Glucose Monitoring System User Instruction Manual...
- Page 2 CAUTION • Before using any product to test your blood sugar (blood glucose), read all instructions and practice the test. • Do all quality control checks as directed and consult with a diabetes healthcare professional.
-
Page 3: Table Of Contents
Introduction ................... 5 Intended Use ..................6 Important Safety Instructions ............6 Warnings, Precautions and Limitations ..........8 Understanding the ReliOn™ Micro Blood Glucose Meter ....11 Changing the Battery..............14 Meter Set-up ..................17 Basic Rules ..................19 Audible Beep .................. 20 Year .................... - Page 4 Cleaning and Disinfecting Meter and Lancing Device ......35 Alternate Site Testing (AST) ..............41 Understanding Test Results ..............50 Performing a Control Solution Test ............55 Troubleshooting Control Solution Test ..........62 Recalling Results - Entering Memory Mode ........65 Maintenance ..................
-
Page 5: Introduction
INTRODUCTION Thank you for choosing the ReliOn™ Micro Blood Glucose Monitoring System. This system measures blood glucose in fresh capillary whole blood. Results are shown as plasma values. This makes it easy to compare the ReliOn™ Micro blood glucose meter and lab results. -
Page 6: Intended Use
Intended Use The ReliOn™ Micro Blood Glucose Monitoring System is intended for the quantitative measurement of glucose in fresh capillary whole blood samples drawn from the fingertip or palm. Testing is done outside the body (In Vitro diagnostic use). It is indicated for use at home by persons with diabetes as an aid to monitor the effectiveness of diabetes control. - Page 7 Cleaning and Disinfecting Meter and Lancing Device • All parts of the blood glucose meter and lancing device are considered biohazardous and can potentially transmit infectious diseases. • CLEANING removes dirt and other visible material. • DISINFECTING destroys organisms that can cause infection or disease such as hepatitis B, hepatitis C, and HIV.
-
Page 8: Warnings, Precautions And Limitations
Warnings, Precautions and Limitations • Before testing, it is important to wash hands with soap and warm water. Dry hands thoroughly. If you use alcohol wipes to cleanse fingers, make sure the area is dry before lancing finger. Unwashed hands or residual alcohol may lead to inaccurate readings. • Before testing, always make sure the meter is at operating temperature between 50–104°F (10–40°C). •... - Page 9 ReliOn™ Micro blood glucose results when taken at therapeutic concentrations. • The ReliOn™ Micro should not be used for the diagnosis of diabetes. • Use only fresh capillary whole blood. • Do not use the ReliOn™ Micro Blood Glucose Monitoring System to test neonates.
- Page 10 The System Includes • Meter • Carrying case • User Instruction Manual • Quick Reference Guide • Self-testing Logbook • Lancing device Carrying case • Lancets Test strips and control solution are required but not provided and must be purchased separately.
-
Page 11: Understanding The Relion™ Micro Blood Glucose Meter
UNDERSTANDING THE RELION™ MICRO BLOOD GLUCOSE METER Bottom Button Strap Hole Display Button Strap Hole Battery Compartment Test Strip Port Cover... - Page 12 NOTE • The correct unit of measurement in the U.S.A. is mg/dL. If your meter is not set to mg/dL at the time of purchase contact ReliOn™ Customer Service at 855.776.0662, 7 a.m. to 7 p.m. central time, 7 days a week.
- Page 13 ReliOn™ Confirm/Micro Plus Test Strips These test strips need only 0.3 µL (microliter) of blood. Apply blood to the sample application tip. The test strip draws in the blood by capillary action. The blood glucose reacts with the enzyme on the test strip. This produces a current proportional to the blood glucose level.
-
Page 14: Changing The Battery
Changing the Battery The ReliOn™ Micro blood glucose meter comes with one lithium battery CR2032 (or DL2032). CAUTION Replacing the battery will not delete meter settings or test results stored in the meter unless you: • Take over 1 minute to replace battery •... - Page 15 To replace battery Step 1: Turn meter off. Step 2: Remove the battery cover on the back of the meter. Step 3: Slide the battery to the right (A) and remove it (B). Step 4: Load a new battery into the meter and slide the battery to the left (C).
- Page 16 Step 5: Replace battery cover. If the clock setting has been deleted, ‘SET’ will appear on the screen. If ‘SET’ appears, set the time and date. If you do not set the time and date, all subsequent results will be stored with a test date and time of January 1, 2008, 12:00 a.m.
-
Page 17: Meter Setup
METER SETUP Meter set-up allows you to adjust the audible beep volume and to set time, date, and test averaging. Before using the ReliOn™ Micro blood glucose meter for the first time, set the time and date. Do not perform a blood glucose test until you have set up the meter. - Page 18 Setup mode Audible Beep Date and time Test average display See page 20 See page 22 See page 25...
-
Page 19: Basic Rules
Basic Rules for Meter Setup Step 1: Turn off meter. Step 2: Press the buttons at the same time for 5 seconds. A beep sounds and the meter turns on. Next, a second beep sounds and “SET” shows on the screen. Step 3: Use the button to change the setup screen. -
Page 20: Audible Beep
Setting the Audible Beep If the audible beep is turned ‘on’, the beep will sound when: • You insert a test strip into the meter • You apply blood or control solution to a test strip • The test has ended and the result is displayed •... - Page 21 Press the button to cycle through the volume levels. • ‘oFF’ (no sound) • ‘on 1’ (low) • ‘on 2’(middle) • ‘on 3’ (high) • ‘oFF’ (no sound)…, etc A beep sounds at the set volume at each step. If ‘oFF’ is set, the ‘audible beep mute (oFF)’...
-
Page 22: Year
Setting the Year In the year setup screen, the last two digits of the currently set year appears at the top of the screen. ‘yEr’ appears in the middle of (audible beep) the screen. The last two digits of the currently set year appears at the bottom of the screen and blinks. -
Page 23: Month/Day
Setting the Month Press the button to change the month. After you set the month, press the button to confirm the setting. The screen changes to the day setup screen. Setting the Day Press the button to change the day. After you set the day, press the button to confirm the setting. The screen changes to the hour setup screen. -
Page 24: Hour/Minute
Setting the Hour Press the button to change the hour. After you set the hour, press the button to confirm the setting. The screen changes to the minute setup screen. Setting the Minute Press the button to change the minute. After you set the minute, press the button to confirm the setting. The screen changes to the test averaging setup screen. -
Page 25: Test Average Display
Setting Test Average Display NOTE • ‘Lo’ results are included as 20 mg/dL in the averages • ‘Hi’ results are included as 600 mg/dL in the averages • T est results with the following symbol or flag are not part of the result average: temperature error symbol, control solution flag, or delete flag Press the button to cycle through the test averaging choices: ‘oFF’... -
Page 26: Ending Setup
Ending Setup To make further changes to setup settings, press button while ‘End’ is displayed. This will bring up the Audible Beep setup screen. You can then move through the setup mode and adjust any settings that you wish. If you are done with setup, press the button while ‘End’... -
Page 27: Blood Glucose Testing
BLOOD GLUCOSE TESTING Getting a Drop of Blood Step 1: Wash hands with soap and warm water. Dry hands thoroughly. If you use alcohol wipes to cleanse fingers, make sure the area is dry before lancing finger. Residual alcohol may lead to inaccurate readings. Step 2: Let the arm hang down for 10 to 15 seconds. Holding the arm below the heart and massaging the wrist, palm and finger makes it easier to obtain a blood drop. - Page 28 Step 5: Set the lancing device aside, and wait a few seconds for a blood drop to form. Keeping the hand warm, lowering the hand to waist level and gently massaging your wrist, palm or the base of the finger helps the flow of blood. Use a different site each time you test to help prevent soreness and calluses.
-
Page 29: Performing A Blood Glucose Test
Performing a Blood Glucose Test NOTE • Four-and-a-half minutes after test strip insertion, a beep sounds every 5 seconds. • After 5 minutes, a beep sounds and the meter turns off. • Take the unused test strip out and insert it again to turn meter back on. Step 1: Remove a test strip from the bottle. - Page 30 Step 2: The last test result will then appear. Then the code number (F-2, F-3, or F-4) will appear for three seconds followed by the Apply Blood symbol . Verify that the code number on the screen matches the code number printed on the bottle. If the code number does not match, the meter may give a false reading.
- Page 31 Step 3: Obtain a blood drop (see pages 27–28). Apply blood to the end of the test strip. Capillary action will pull the blood into the test strip. The meter will beep when it detects that blood has been applied. The meter will begin to count down.
- Page 32 If it takes longer than 20 seconds to obtain a blood sample and to touch the test strip to the blood drop, repeat Step 3. Step 4: The meter will count down showing a flashing dash. After 7 seconds, a beep sounds, and the test result is shown. Results will be shown in units of mg/dL.
-
Page 33: Flagging Test Results
Flagging Test Results Flags help you categorize and identify results. They can be used to omit specific results from result average calculations. You can attach any of the below flags to test results. These flags are then stored in the memory with the test results. Attach: Blood glucose results obtained before eating. Pre-Meal Flag Blood glucose results obtained after eating. Post-Meal Flag Control test result. These results are not part of CONT Control Test Flag your result averages (see page 25). - Page 34 Step 2: When you have selected the desired marker, remove the test strip. When you recall the result from memory, the selected marker will be displayed.
-
Page 35: Cleaning And Disinfecting Meter And Lancing Device
CLEANING AND DISINFECTING METER AND LANCING DEVICE WARNING • The meter and lancing device are for single-patient use • DO NOT share them with anyone including other family members • DO NOT use on multiple patients • All parts of the kit are considered biohazardous and can potentially transmit infectious diseases even after you have performed cleaning and disinfection.¹... - Page 36 If the meter is being operated by a second person providing testing assistance to the user, the meter and lancing device should be cleaned and disinfected prior to use by the second person. In addition, caregivers should wear gloves when testing another person’s blood. Wash hands thoroughly with soap and water after handling the meter, test strips, lancing device, or disinfecting wipes.
- Page 37 CLEANING and DISINFECTING Your Meter or Lancing Device with Germicidal Disposable Wipes Use one wipe for cleaning and a second wipe for disinfecting. The following product has been validated to CLEAN and DISINFECT your meter and lancing device. Manufacturer’s Active Product Item No.
- Page 38 CLEANING Step 1: Remove a wipe from the container. Step 2: METER: Hold the meter in an upright position with the test strip port towards the floor, and wipe down all exposed surfaces of the meter. • DO NOT WRAP THE METER IN A WIPE. • Do not oversaturate with liquid or let drops of disinfectant flow into test strip port, buttons, lens, or other meter openings.
- Page 39 DISINFECTING Two wipes must be used; one wipe to clean and a second wipe to disinfect. After cleaning your meter or lancing device, repeat steps 1, 2 and 3 using a second germicidal wipe to disinfect. Allow the meter and lancing device to remain visibly wet for the full contact time detailed below.
- Page 40 Physical signs of deterioration include • Cloudy or cracked meter lens • Cracked meter case • Debris under meter lens • Meter display missing components • Lancing device cap is cloudy or streaked • Body of lancing device shows signs of cracking, swelling, streaking, softening or brittleness Performance signs of deterioration include •...
-
Page 41: Alternate Site Testing (Ast)
ALTERNATE SITE TESTING (AST) Important Information About AST: Sites other than your fingertip may have fewer nerve endings so obtaining a blood sample from these sites may be less painful. The technique for AST is different from fingertip testing. Blood glucose testing results from sites other than your fingertip could be significantly different. Physiological differences in circulation between the fingertip and palm may result in differences in blood glucose measurements between these sites. Differences in glucose concentrations may be observed after eating, taking insulin medication, or exercise and are typically shown more quickly in the fingertip than in the palm. - Page 42 Consider AST when • Testing before a meal • You are in a fasting state • Two hours have passed since a meal • Two hours have passed since insulin dosing • Two hours have passed since physical activity Use fingertip testing •...
- Page 43 Ask your diabetes healthcare professional about recommended testing procedures when operating machinery or driving a car, as fingertip testing is usually the preferred method of testing under these circumstances. If bruising occurs, you may choose to lance a fingertip instead. Preparing to Test Your Blood Glucose From an Alternate Site Choose a Site: Select a soft, fleshy area on the palm that is free of visible veins, moles and away from bone.
- Page 44 Performing a Blood Glucose Test From an Alternate Site Step 1: Attach the clear head cap for AST to the lancing device. Insert a lancet, and cock lancing device. Step 2: Remove a test strip from the bottle. Immediately replace the bottle cap tightly. Insert the test strip as shown in the diagram.
- Page 45 Verify that the code number displayed on the screen matches the code number on the bottle of test strips used. If the code number does not match, the meter may give a false reading. If the code does not match, use a new strip. If the code still does not match, use a new bottle of test strips or call Customer Service at 855.776.0662, 7 a.m.
- Page 46 Step 3: a) Press and vigorously rub the selected area for 10 seconds until it feels warm to the touch. b) Firmly hold the cocked lancing device against the clean skin for 5-10 seconds. c) Press the release button on the lancing device to lance the skin.
- Page 47 IMPORTANT • Repeat blood draw if fluid is clear • If it takes longer than 10 SECONDS to obtain a blood sample, or if any sample has been applied to the test strip, discard the test strip and use a new test strip before proceeding. Step 4: Pick the meter up, and touch the end of the test strip to the blood sample until the reaction site is full.
- Page 48 IMPORTANT • Was the sample deep red in color and free of watery fluid? • Was the drop large enough (at least 0.3 µL)? • Did the reaction site fill with enough blood all at once? • IF NOT, REPEAT TEST. Step 5: The meter will count down, showing a flashing dash. It will display the result in 7 seconds. CONSIDER YOUR RESULT. REPEAT ALTERNATE SITE TEST • IF the blood sample appeared to be diluted with clear fluid Filled Filled • IF you did not vigorously rub the test site • I F the blood drop was not large enough to fill the reaction site •...
- Page 49 If the repeated alternate site result is still not consistent with how you feel, confirm your blood glucose level with fingertip testing. Step 6: Always record your results in your self-testing logbook along with other information such as insulin dosage, diet and exercise. The result is automatically stored in the meter memory with the time and date.
-
Page 50: Understanding Test Results
UNDERSTANDING TEST RESULTS The ReliOn™ Micro blood glucose meter is referenced to a fresh plasma sample. Your meter results may differ from clinical lab results. This is due to normal variation. To compare your meter with lab results, follow the guidelines below. - Page 51 ALWAYS wash hands with warm soapy water. Rinse and dry them before testing. ALWAYS use fresh capillary whole blood on meter tests. You may still see a difference from the lab result. This can be due to several causes. Blood glucose levels can change over short periods of time, for example due to food or stress.
- Page 52 Normal Blood Glucose Readings Expected blood glucose levels for adults without diabetes¹ • Fasting and before meals: <100 mg/dL • 1–2 hours after meals: <140 mg/dL High Blood Glucose Readings If your blood glucose is above 600 mg/dL, you will receive a ‘Hi.’ Repeat the test with a new test strip.
- Page 53 Low Blood Glucose Readings If your blood glucose is below 20 mg/dL, you will receive a ‘Lo.’ Repeat the test with a new test strip. If this message shows again, contact your healthcare professional immediately. Contact your physician for advice if test results are very low (below 70 mg/dL) or you have symptoms of low blood glucose.
- Page 54 What This Means For You Frequent blood glucose testing is the best means to track how well you are doing with your diabetes management. It helps you track the effects of medications, diet, exercise, and stress management. Blood glucose test results can also tell you if your diabetes is changing. This may alert you to adjust your treatment plan.
-
Page 55: Performing A Control Solution Test
PERFORMING A CONTROL SOLUTION TEST It is recommended to use ReliOn™ Confirm/Micro CONTROL to check if • The meter and test strips are working correctly as a system • You are testing correctly To order control solution, call ReliOn™ at 855.776.0662, 7 a.m. to 7 p.m. central time, 7 days a week. - Page 56 20–80% relative humidity • To check your technique • When the ReliOn™ Micro blood glucose meter has been dropped or stored below 32°F (0°C) or above 122°F (50°C) • When you open a new bottle of test strips IMPORTANT •...
- Page 57 (OPEN DATE) as a reminder to dispose of the opened solution after 3 months • Always replace the cap immediately after use • R eliOn™ Confirm/Micro CONTROL is not a cleaning solution. Do not clean your ReliOn™ Micro blood glucose meter with ReliOn™ Confirm/Micro CONTROL • Use the control solution between 72–82°F (22–28°C)
- Page 58 Step 1: Insert a test strip as shown in the diagram. Test strip should seat firmly into meter. The meter will turn on automatically. The full screen will come on for a moment. Make sure all symbols appear on the screen (see page 12). The last result will then appear.
- Page 59 Step 2: Press the button to enter the control mode. You will see ‘CONT’ on the upper left of the screen. A ‘CONT’ flag can also be attached when results are shown on the screen.
- Page 60 Step 3: Mix control solution by gently inverting the bottle. Remove the cap from the control solution bottle. While the Apply Blood symbol is flashing, place a very small drop on the end of the test strip. The test strip will draw up the solution and the meter will beep.
- Page 61 High (L3). Repeat Steps 1–5 with other Control Solution levels as per recommendations of your healthcare professional. To order control solution, call ReliOn™ at 855.776.0662, 7 a.m. to 7 p.m. central time, 7 days a week. NOTE • Control solution test results are not included in the averages.
-
Page 62: Troubleshooting Control Solution Test
Troubleshooting Control Solution Test If the control solution test result is out-of-range, check the following and repeat the test. Check Action If not, do the test again. Did you do the test in Insert a test strip; press the button control solution mode? for control solution mode. - Page 63 Check Action Make sure the test strip is inserted Did you insert the test strip all the way into the test strip port. firmly into the meter? See diagram on page 58. Reread ‘Performing a Control Did you follow the Solution Test’ (pages 55–61) and retest. procedure correctly? Were the test strips stored correctly (between 34–86°F [1–30°C])?
- Page 64 Does your control solution result still read outside the range printed on the test strip bottle? If yes, the system may not be working correctly. DO NOT USE the system to test your blood glucose until the control solution result is within range. If you need help, please call Customer Service at 855.776.0662, 7 a.m. to 7 p.m.
-
Page 65: Recalling Results - Entering Memory Mode
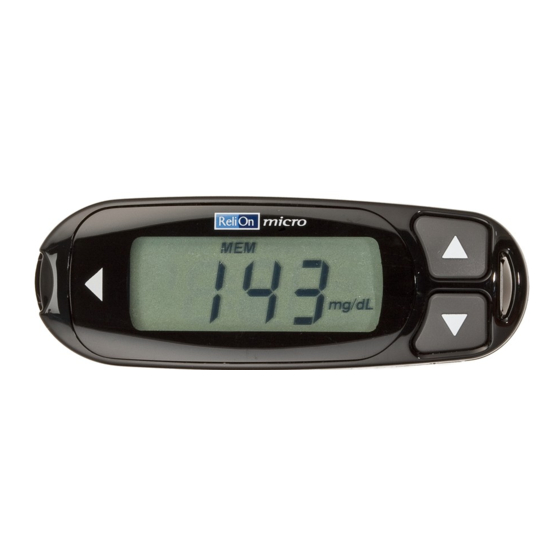
RECALLING RESULTS - ENTERING MEMORY MODE The ReliOn™ Micro blood glucose meter stores up to 50 test results. When more than 50 test results have been performed, the meter drops the oldest result each time you add a new result. Before using the memory, remove test strip from meter and make sure the meter is turned off. - Page 66 • If Test Averaging has been turned on, the average result will appear first. • If Test Averaging has been set to ‘Off,’ the display will briefly flash the number ‘1.’ The most recent test result will appear with the date and time of the test. ‘MEM’ will display at the top of the screen. This shows it is a stored result.
- Page 67 Step 3: After all test results have been reviewed, ‘End’ appears. • Press the button once to go back to the first result in the memory. You can then scroll through results in the memory again. • Press the button for 2 seconds to exit Memory and turn off the meter. You can exit Memory in this way at any time when recalling results.
- Page 68 Step 2: Hold down the button for 2 seconds to display the most recent test result. If you have turned the result average display on, the result average will appear instead of the most recent result. Step 3: Press the button to go to the ‘End’...
-
Page 69: Maintenance
MAINTENANCE Storage and Handling • Store the meter at 32–122°F (0–50°C). • Do not leave the meter in very hot or cold places. Do not leave it near a heat source (radiator) or in a car in hot or cold weather. •... - Page 70 • Do not hold test strips with your fingers for a long period of time. • D o not hold test strips with wet or dirty fingers, or you may obtain incorrect test results. Keep the meter, test strips, and other items away from young children. Small items such as test strips, lancets, and batteries are choking hazards. If swallowed, contact your physician or healthcare professional immediately. If you have technical problems or questions, please call Customer Service at 855.776.0662, 7 a.m.
-
Page 71: Display Screen And Error Messages
7 a.m. to 7 p.m. central time, 7 days a week. Contact your healthcare professional if you cannot reach Customer Service. Do not send your meter to ReliOn™ without first calling to get approval to do so. If any parts of the display screen are missing when the meter is turned on, call Customer Service at 855.776.0662, 7 a.m. - Page 72 Your blood glucose level is more than 600 mg/dL. Repeat test with new test strip. If this message shows again, contact your healthcare professional immediately. Battery power is too low for testing. Replace battery immediately. Results may not be accurate when testing with low battery symbol on.
- Page 73 The battery power is too low for testing. Test results and changes are not stored in the memory. Change the battery. See ‘Changing the battery’ on pg 14. The meter temperature is outside the acceptable range of 50–104˚F (10–40˚C). Allow the meter and test strips to warm up or cool down slowly (20 minutes) until the temperature warning symbol goes away.
- Page 74 Test strip problem. Contact bars on test strip may be dirty. Incorrect test strip used. Used test strip has been inserted. Repeat test with a new test strip. Additional blood was applied to test strip after test started. Test strip was moved during test. Insufficient blood sample. Code Number.
- Page 75 Apply Control Solution. The Apply Blood symbol flashes and ‘CONT’ appears at the top of the screen. This shows the meter is ready for you to apply control solution. Test Result. The meter shows results between 20 and 600 mg/dL. Test Average has no results stored. Test Averaging has been set to 7-day, 14-day or 30-day but there are no results stored yet in memory.
-
Page 76: Product Information
PRODUCT INFORMATION Product Specifications Test strips ReliOn™ Confirm/Micro Plus Blood Glucose Test Strips Result range 20–600 mg/dL Calibration Plasma referenced Sample size Minimum 0.3 µL Blood source Fresh capillary whole blood Hematocrit range 30–55% Test time 7 seconds Assay method Biosensor, Glucose Oxidase (Aspergillus niger sourced) Power source... -
Page 77: Warranty
Warranty You are a valued ReliOn™ Customer. It is important to us that you are completely satisfied with your ReliOn™ Micro Blood Glucose Monitoring System. ReliOn™ warrants your meter will be free from defects in materials and workmanship for a period of five years from the date of the original purchase. If during this time the meter does not work properly because of a defect in materials or workmanship, ReliOn™... - Page 78 Returns You must contact ReliOn™ Customer Service at 855.776.0662, 7 a.m. to 7 p.m. central time, 7 days a week, before returning your meter. You will be instructed how to return the meter. Returned meters without this authorization will not be accepted.
Need help?
Do you have a question about the MICRO and is the answer not in the manual?
Questions and answers