Table of Contents
Advertisement
Distributed by:
Wal-Mart Corp.
Bentonville, AR 72716, USA
Manufacturer:
Abbott Diabetes Care, Inc.
1360 South Loop Rd.
Alameda, CA 94502, USA
Customer Care: 1-800-992-3612
Call toll-free 24 hours a day, 7 days a week.
Visit us at www.relion.com
ReliOn® is a registered trademark used under license by
Abbott Diabetes Care, Inc.
Solartek and MediSense are trademarks of Abbott Group of
Companies in various jurisdictions
This product(s) and/or its use are protected by one or more of the following patents:
US5,509,410; US5,628,890; US5,727,548; US6,129,823; US6,592,745; US6,607,658; US6,736,957;
US6,764,581; US6,939,450; US6,377,894; US6,600,997; US6,773,671; US5,682,884; US6,591,125;
US7,058,437; US7,504,019; EP1,009,850B1; EP1,119,637B8; EP1,023,455B1; EP1,012,326B1;
EP1135679B1; CA2302448C; CA2346415C; and CA2351796C. Additional patents may be issued
and/or pending.
©2006-2009 Abbott
User's Guide
For in vitro diagnostic use
01/10
ART21258 Rev. A
ART21258_Rev-A-CVR.indd 1
1/6/10 9:09:34 AM
Advertisement
Table of Contents

Related Manuals for ReliOn Relion ultima


Summary of Contents for ReliOn Relion ultima
- Page 1 Distributed by: Wal-Mart Corp. Bentonville, AR 72716, USA Manufacturer: Abbott Diabetes Care, Inc. 1360 South Loop Rd. Alameda, CA 94502, USA Customer Care: 1-800-992-3612 Call toll-free 24 hours a day, 7 days a week. Visit us at www.relion.com ReliOn® is a registered trademark used under license by Abbott Diabetes Care, Inc.
-
Page 2: Table Of Contents
Table of Contents Welcome Important Things to Know about Your Blood Glucose Monitoring System Intended Use How Your Blood Glucose Monitoring System Works System Kit Contents Getting to Know Your Monitor’s Features Setting Up Your Monitor Buttons to Use Setup Options How to Set the Beeper, Date, Time, &... - Page 3 ART21258_Rev-A-Man.indd 2 1/12/10 3:38:13 PM...
- Page 4 Doing A Control Solution Test Why Do A Control Solution Test? When Is Doing A Control Solution Test Recommended? Important Information about Control Solution Testing What You Will Need How to Do Control Solution Testing Understanding Your Result Reviewing & Using Your Results What Can Your Monitor Show You? How to See Results in Memory How to See Averages...
-
Page 5: Welcome
Welcome Thank you for choosing the ReliOn® Ultima Blood Glucose Monitoring System. Important steps for using the System are inside this guide. Please read it carefully. Your new Blood Glucose Monitoring System is an important tool that can help you better manage your diabetes. Blood glucose results can help you understand your diabetes and what happens with: •... - Page 6 We offer Customer Care. If you have any questions, call Customer Care at 1-800-992-3612. We are available toll-free 24 hours a day, 7 days a week. Please read the following items before using your Blood Glucose Monitoring System: • User guide •...
-
Page 7: Important Things To Know About Your Blood Glucose Monitoring System
CHAPTER 1 Important Things Questions? to Know about Call Customer Care: Your Blood Glucose 1-800-992-3612 24 hours a day, 7 days a week Monitoring System Intended Use Your System: • Is indicated for home (lay user) or professional use in the management of patients with diabetes. -
Page 8: How Your Blood Glucose Monitoring System Works
How Your Blood Glucose Monitoring System Works When you insert a test strip into your monitor, the Apply Sample message shows on your monitor’ s display window. When a blood sample or control solution sample is applied to the test strip, the glucose reacts with the chemicals on the test strip. -
Page 9: Getting To Know Your Monitor's Features
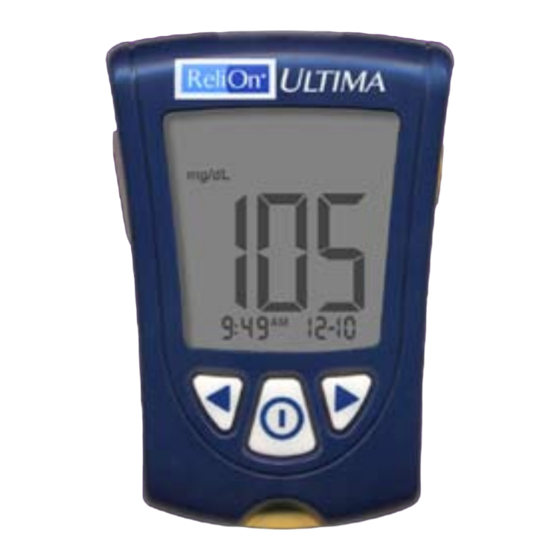
Getting to Know Your Monitor’s Features Display Backlight Display Window Window Button Back This shows: Button • Blood glucose results. • Glucose LOT numbers. • Previous test results and error messages. • Blood glucose averages. Mode Strip Forward Button Port Button IMPORTANT: Each time you turn your monitor... - Page 10 IMPORTANT: Avoid getting dust, dirt, blood, control solution, water, or any other substance in the monitor's test strip port. Strip Port This is where you insert: • A blood glucose test strip • A glucose calibrator Mode Button Use this button to: •...
-
Page 11: Setting Up Your Monitor
CHAPTER 2 Setting Up Your Questions? Call Customer Care: Monitor 1-800-992-3612 Buttons to Use 24 hours a day, 7 days a week Mode Button Forward Button Back Button Setup Options Set Beeper If the beeper is set ON, it will beep when: • The calibrator is fully inserted • The test countdown starts • The test countdown finishes... -
Page 12: How To Set The Beeper, Date, Time, & View
Set Time Format In "Set Time Format", you choose how the time shows on the monitor’s display window. Set Date Format In "Set Date Format", you choose how the month and day show on the monitor’s display window. Measurement Unit Blood glucose measurement unit is factory-set in mg/dL. -
Page 13: Set Time
To turn your monitor ON, Press and Hold the button. The beeper ON message shows on the display window. The musical notes flash on and off, and the monitor beeps. To change the beeper setting, Press and Release the button or the button once. -
Page 14: Set Date
Minutes: The Minutes flash on and off. Press and Release the button to move the minutes forward. If you go past the correct minute, Press and Release the button to move the minutes back. Press and Release the button to save the minutes and to move to Set Date. - Page 15 Month: The Month flashes on and off. Press and Release the button to move the month forward. If you go past the correct month, Press and Release the button to move the month back. Press and Release the button to save the month and to move to Set Day.
-
Page 16: Set Time Format
Set Time Format You have two choices: Choice #1 Choice #1: For the 12-hour format, AM or PM shows. Choice #2: For the 24-hour format, AM or PM does not show. To change the Time Format, Press and Release the button or the button once. -
Page 17: Blood Glucose Measurement Unit
Blood Glucose Measurement Unit Consult your healthcare professional if you have any questions about the blood glucose measurement unit. This screen shows the blood glucose measurement unit (mg/dL). Press and Release the button to return to Set Beeper. Press and Hold the button to turn your monitor off. -
Page 18: Calibrating Your Monitor
CHAPTER 3 Questions? Calibrating Your Monitor Call Customer Care: 1-800-992-3612 24 hours a day, 7 days a week Why Calibrate Your Monitor? Your monitor must be calibrated so that it can recognize the test strip you are using. Calibration ensures that your results are accurate. When to Calibrate Your Monitor • When you use the monitor for the first time. - Page 19 Remove the glucose calibrator package from the new box of test strips. Open the calibrator package. Find the three raised bumps on the calibrator package. Peel the clear cover away from the three raised bumps. Hold the calibrator with the LOT 00000 number facing you.
- Page 20 When the LOT number on the monitor display window and test strip calibrator both read LOT 00000: What It Means: Calibration is complete. What to Do: You may now monitor your blood glucose. When the LOT number on the monitor display window and calibrator DO NOT match: What It Means: Your monitor may not be calibrated correctly.
-
Page 21: How To Recall The Lot Number
How to Recall the LOT Number To recall the LOT 00000 number, Press and Hold the button. While holding the button, Press and Hold the button. The Display Check shows on the display window, then the LOT 00000 number shows with the time, month, and day of the most recent glucose calibration. -
Page 22: Monitoring Your Blood Glucose
CHAPTER 4 Questions? Monitoring Your Call Customer Care: Blood Glucose 1-800-992-3612 24 hours a day, 7 days a week What You Will Need • Blood glucose test strip with its instructions for use • Blood glucose monitor • Lancing device and a new, sterile lancet Important Information about Monitoring Your Blood Glucose •... -
Page 23: How To Monitor Your Blood Glucose
• Before you monitor your blood glucose, allow your monitor and test strip to reach the recommended operating temperature range of the test strip. The test strip operating temperature range is in the "Limitations of Procedure" section of the blood glucose test strip instructions for use. - Page 24 Push the test strip in until it stops. The monitor turns on automatically. These items show on the display window, one after the other: • Display Check – Remember to make sure that all items in the picture here show on the display window.
-
Page 25: Obtaining A Blood Drop
Obtaining A Blood Drop Use your lancing device to obtain a blood drop. Recommendations for Obtaining a Blood Drop • To obtain a sample from an alternative site (forearm, upper arm, or base of the thumb), use an appropriate alternative site Fingertip sampling lancing device. - Page 26 Lancets and Lancing Device • Lancets are for one-time use only. Use a new lancet each time you monitor. • Discard your used lancet properly. Put it in an empty puncture-resistant container, such as a plastic milk carton or detergent bottle. •...
- Page 27 Important: If the countdown does not start: What It Means: Correct You might not have applied ✔ enough blood to the test strip. What to Do: Apply a second drop of blood to the test strip. Refer to your test strip instructions for use for the number of seconds you have to apply a second drop.
-
Page 28: Understanding Your Result
Shutting Off Your Monitor Removing the test strip from the strip port turns off the monitor. You can use the opened foil packet to remove and discard your used test strip. Discard the test strip properly. Note: You may also turn the monitor off by Pressing and Holding the button. - Page 29 Result 300 mg/dL or Higher When your blood glucose result is 300 mg/dL or higher, KETONES? flashes on and off on the display window. What to Do: Monitor your blood glucose again with a new test strip. If the message appears again, follow your healthcare professional's instructions.
- Page 30 "E-4" Result What It Means: Your blood glucose may be too high to be read by the system, or there may be a problem with the test strip. What to Do: Monitor your blood glucose again with a new test strip. If E-4 shows on the display window again, contact your healthcare professional immediately.
-
Page 31: Doing A Control Solution Test
CHAPTER 5 Questions? Doing A Control Call Customer Care: Solution Test 1-800-992-3612 24 hours a day, 7 days a week Why Do A Control Solution Test? The control solution test tells you that your monitor and test strips are working correctly. A control solution test is similar to when you monitor your blood glucose, except you use a Solartek or MediSense Control Solution. -
Page 32: What You Will Need
• Do not swallow the control solution. • Do not inject the control solution or use the control solution as eye drops. For Healthcare Professionals: • Use two levels of Solartek or MediSense Control Solution to do control solution tests with each new box of test strips. - Page 33 Insert the three black lines at the end of the test strip into the strip port. Push the test strip in until it stops. The monitor turns on automatically. These items show on the display window, one after the other: •...
-
Page 34: Applying Control Solution To The Test Strip
To mark the test as a control test, Press and Release the button once. shows on the display window. Important: If you do not mark the test as a control test, it will be saved in your monitor’s memory as one of your personal blood glucose results. This could affect your blood glucose averages. - Page 35 Note: Do not remove the test strip from the monitor or disturb it during the countdown. Important: If the countdown does not start: What It Means: You might not have applied enough control solution to the test strip. What to Do: Apply a second drop of control solution to the test strip.
-
Page 36: Understanding Your Result
Discard the test strip properly. Note: You may also turn the monitor off by Pressing and Holding the button. If you do not turn your monitor off or pull the test strip out, the monitor shuts off automatically after 60 seconds. Understanding Your Result Compare the control result to the "Expected Results for Use with Solartek or MediSense Control Solutions"... -
Page 37: Reviewing & Using Your Results
CHAPTER 6 Questions? Reviewing & Using Call Customer Care: 1-800-992-3612 Your Results 24 hours a day, 7 days a week What Can Your Monitor Show You? Memory Your monitor has a memory that stores up to 450 events. This is a combination of control results, your personal blood glucose results, and other monitor information. -
Page 38: How To See Results In Memory
How to See Results in Memory Begin with your monitor turned off. Make sure there is nothing in the strip port. Press and Release the button. • The Display Check shows on the display window. • Then your most recent result shows with its unit on the monitor’s display window, along with the time, month, and day... - Page 39 A control solution result in Memory shows with a control bottle, as long as you marked the test as a control solution test. Control solution result in Memory To review previous results, Press and Release the button once per result. When you reach the last result in Memory, the display window shows three dashes.
-
Page 40: How To See Averages
How to See Averages Important: • Results that show as LO during blood glucose monitoring are included as 20 mg/dL in blood glucose averages. • Results that show as HI during blood glucose monitoring are included as 500 mg/dL in blood glucose averages. While in Memory, Press and Release the button at any... -
Page 41: Transferring Your Results To A Computer
Press and Release the button at any time to return to Memory. Press and Hold the button to turn off your monitor. Otherwise, the monitor turns off after 30 seconds. Transferring Your Results to a Computer Download of test results to a computer requires a compatible data management system. -
Page 42: Troubleshooting
CHAPTER 7 Understanding & Questions? Call Customer Care: Troubleshooting 1-800-992-3612 Error Messages 24 hours a day, 7 days a week There are times when error messages may show on your monitor’s display window. In the next few pages, we describe the error messages that may show on your monitor’s display window, what they mean, and what you need to do. - Page 43 What It What You Message Means Need to Do • Monitor error. Turn the monitor off, then repeat previous monitoring steps. • If the error message appears again, contact Customer Care. • There may be a Review the monitoring problem with the instructions.
- Page 44 What It What You Message Means Need to Do Blood applied to • Review the monitoring instructions. test strip too soon. • Monitor again with a new test strip. • If the error message appears again, contact Customer Care. Calibration/Test • Repeat the calibration strip error. using the calibrator bar that came with the test strip you are using.
- Page 45 What It What You Message Means Need to Do • Monitor error. Remove test strip, turn monitor off, and try to monitor again. • If the error message appears again, contact Customer Care. • Monitor error. Remove test strip, turn monitor off, and try to monitor again.
-
Page 46: Your Monitor's Specifications & Limitations
CHAPTER 8 Your Monitor’s Questions? Specifications Call Customer Care: 1-800-992-3612 & Limitations 24 hours a day, 7 days a week Size Length: 2.94" (7.47 cm) Width: 2.10" (5.33 cm) (top) 1.70" (4.32 cm) (bottom) Thickness: 0.64" (1.63 cm) Weight 1.41-1.62 ounces (40-46 grams) Power Source One CR 2032 Lithium (coin cell) battery... - Page 47 Functions - Blood glucose monitoring - Memory 450 events - Glucose averaging: 7-Day, 14-Day, and 30-Day Averages - Control solution marking and testing - Backlight: If ON – Stays ON during countdown; turns OFF 30 seconds after result is displayed. If OFF – Stays OFF during countdown;...
-
Page 48: Important Information About Using Blood
Important Information about Using Blood Samples from the Forearm, Upper Arm, or Base of the Thumb: • Contact your healthcare professional before you begin using any one of these alternative sites to test your blood glucose. • Sampling from any one of these alternative sites may cause minor bruising and may leave marks that go away in a short time. -
Page 49: Caring For Your Monitor
CHAPTER 9 Questions? Caring For Call Customer Care: Your Monitor 1-800-992-3612 24 hours a day, 7 days a week Cleaning Your Monitor Store your monitor in its carrying case. If the surface of your monitor gets dirty, you may clean it. Use a damp cloth and mild soap. - Page 50 How to Replace Your Meter’s Battery If your meter has a plastic tab, If your meter has no plastic tab use these directions. follow these directions. Gently push Gently push the battery the battery cover in and cover in and up with your up with your thumb.
- Page 51 Place the notches on the battery cover into the appropriate molded areas. Gently push the battery cover in and down until you hear a click. Press and Hold the button to turn your monitor on. If your monitor does not turn on, review the battery installation steps and reinstall the battery.
-
Page 52: Support
CHAPTER 10 Questions? Support Call Customer Care: 1-800-992-3612 24 hours a day, 7 days a week Support We are committed to providing you with support. If you have any questions and/or need assistance, call Customer Care: 1-800-992-3612, 24 hours a day, 7 days a week. ART21258_Rev-A-Man.indd 51 1/12/10 3:38:59 PM... - Page 53 ART21258_Rev-A-Man.indd 52 1/12/10 3:38:59 PM...
Need help?
Do you have a question about the Relion ultima and is the answer not in the manual?
Questions and answers