
Subscribe to Our Youtube Channel
Related Manuals for Scilogex D2012


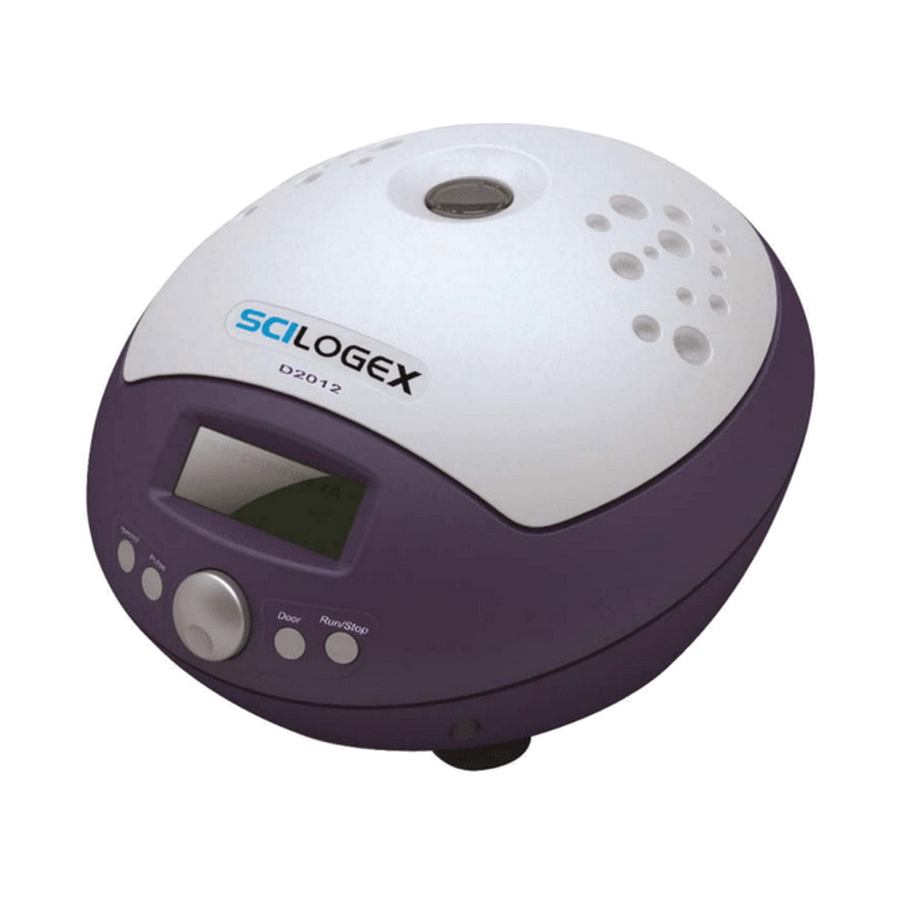
Summary of Contents for Scilogex D2012
- Page 1 USER MANUAL D2012 High Speed Mini Micro-Centrifuge SCILOGEX, LLC www.scilogex.com Before using centrifuge, please carefully read this user manual for efficient operation and safety.
-
Page 2: Table Of Contents
11. Instructions for the Rotor and Tubes ........................16 11.1 Rotor Instructions ..............................16 11.2 Tubes ..................................17 12. Calculate RCF ...............................18 13. Ordering Information ............................18 14. Warranty ................................19 14.1 Warranty of the Centrifuge............................19 14.2 Warranty of the Rotor............................19 15. After-sales Service ..............................19 www.scilogex.com Page 2... -
Page 3: Copyright
D2012 High Speed Mini Micro-Centrifuge Copyright: No part of this manual may be reproduced or transmitted without prior written permission of SCILOGEX. We can not be responsible to inform at real-time if the outline and specifications of centrifuge are subject to change for improvement. -
Page 4: Safety Reminder
● For safety purposes, do not enter within 30cm around this centrifuge when it is in operation. ● While the rotor is rotating, never release the door lock. Unauthorized repairs, disassembly or modifying the centrifuge except by our service center are strictly prohibited. www.scilogex.com Page 4... - Page 5 D2012 High Speed Mini Micro-Centrifuge CAUTION ● This centrifuge must be located on a firm and level table. ● Make sure the centrifuge is horizontal before running. ● Make sure the angle between the door and cover is greater than 70 degrees when opening the door.
-
Page 6: Specifications
Operation of centrifuge in a residential area is likely to cause harmful interference in which case the user will be required to correct the interference. www.scilogex.com Page 6... -
Page 7: Required Operation Conditions
D2012 High Speed Mini Micro-Centrifuge 3. Required Operation Conditions 3.1 Basic operation Conditions (1) Power: 110V-240V, 50Hz/60Hz, 3A. (2) Ambient temperature: 2 ~40 . (3) Relative humidity: ≤80%. (4) No vibration and airflow around. (5) No electric dust, explosive and corrosive gases around. -
Page 8: Structure
USER MANUAL 5. Structure Door lock hook Rotor LCD Display Door release hole Operation panel Foot Figure 5.1 Front view of centrifuge D2012 View Door Air vents Power inlet Power switch Figure 5.2 Rear view of centrifuge D2012 www.scilogex.com Page 8... -
Page 9: Operation Panel
D2012 High Speed Mini Micro-Centrifuge 6. Operation Panel SELECT START/STOP PULSE DOOR Figure 6-1 Operation panel Item Symbol Name Function Select button Press the button to choose the program which you want to modify. Select The speed can be accelerated and held at the set speed when pressing Pulse... -
Page 10: Rotor Preparation
● Make sure the rotor lid is securely fixed on the rotor, as well as the rotor and shaft are tightened. Otherwise, the rotor may be moved off while rotating and cause damages of the centrifuge and rotor. www.scilogex.com Page 10... -
Page 11: Operation
D2012 High Speed Mini Micro-Centrifuge 8. Operation CAUTION ● Do not push or lean against the centrifuge while it is running. ● Do not run the centrifuge when fragments or sample solutions are left in the centrifuge chamber. Always keep the centrifugal chamber clean. - Page 12 ● There is a circulating function to increase/decrease the speed values. Rotate the program button clockwise change settings from small → large → maximum → minimum. Rotate the program button anti-clockwise change settings from large → small → minimum → maximum. www.scilogex.com Page 12...
-
Page 13: Rcf Operation
D2012 High Speed Mini Micro-Centrifuge (2) Set the time ● Press button , time value flashes in the time setting mode. Select ● Rotate the program button to set running time from 30 seconds to 99 minutes. ● When the time displays HD, this is a continuous running mode. -
Page 14: Pulse Operation
●For sample leaks in the rotor, rinse the rotor with water. Apply a thin coat of silicon grease to the rotor when it is completely dry. ●The rotor should be checked every 3 months to ensure the tube and rotor holes keep are clean and apply a thin coat of silicon grease. www.scilogex.com Page 14... -
Page 15: Troubleshooting
D2012 High Speed Mini Micro-Centrifuge 10. Troubleshooting 10.1 Possible problems and solutions This centrifuge has a self-diagnostic function. If a problem occurs, an error/warning code will be displayed on the time display screen and the operator can determine the malfunction with the warning code below. -
Page 16: Instructions For The Rotor And Tubes
Maximum Allowable imbalance(*) Maximum RCF speed Rotor type code Tubes Adapters (×g) (rpm) Volume Imbalance imbalance 1.5/2.0ml 15000 15100 2.0g/ tube 5mm/ tube tube 0.2ml A12-2 A02P2 15000 15100 PCR tube 0.5ml micro A05P2 15000 15100 tube www.scilogex.com Page 16... -
Page 17: Tubes
D2012 High Speed Mini Micro-Centrifuge 11.1.3 Notice The centrifuge rotor can separate samples which density lower than 2.0 g/ml. If the separated samples density is over 2.0 g/ml, please calculate allowable speed depending on the following formula. Allow Speed (rpm) = Maximum speed × (2.0 (g/ml) /Sample density (g/ml) )1/2 11.1.4 Autoclaving... -
Page 18: Calculate Rcf
911315119999 D2012 240V/50Hz/60Hz Accessories 19400005 A12-2 Rotor kits with lid, fixing clips and O'ring, 15000rpm, 2ml*12, used with D2012 19500001 A02P2 0.2ml rotor adapter, used with A12-2 & AS24-2 rotors, 24pcs/pk 19500002 A05P2 0.5ml rotor adapter, used with A12-2 & AS24-2 rotors, 24pcs/pk www.scilogex.com... -
Page 19: Warranty
D2012 High Speed Mini Micro-Centrifuge 14. Warranty 14.1 Warranty of the centrifuge This centrifuge is guaranteed for two years from the date of delivery provided that it has been operated and maintained properly. 14.2 Warranty of the rotor The rotor is guaranteed for 5 years from the date of delivery upon manufacturer. Please pay attention, do not use the rotor once it has been corrosion or fatigue damage.
Need help?
Do you have a question about the D2012 and is the answer not in the manual?
Questions and answers