
Related Manuals for SMC Networks SMCD3USG


Summary of Contents for SMC Networks SMCD3USG
- Page 1 Install Guide SMCD3USG DOCSIS 3.0 Universal Services Gateway Copyright © 2010 by SMC Networks, Inc. 20 Mason Irvine, California 92618 All rights reserved.
- Page 2 All rights reserved Information furnished by SMC Networks, Inc. (SMC) is believed to be accurate and reliable. However, no responsibility is assumed by SMC for its use, nor for any infringements of patents or other rights of third parties which may result from its use.
- Page 3 GPL/LGPL Licenses Statement This product includes software code developed by third parties, including software code subject to the GNU General Public License (“GPL”) or GNU Lesser General Public License (LGPL”). As applicable, the terms of the GPL and LGPL, and information on obtaining access to the GPL code and LGPL used in this product, are available to you at http://gpl.smc.com/.
-
Page 4: Table Of Contents
Contents 1 INTRODUCTION ........................1 ............................. 1 ARNINGS ........................... 1 REPARATION 2 HARDWARE OVERVIEW ......................2 LED I ............................. 2 NDICATORS ........................4 RONT ANEL UTTONS 2.2.1 Finding a Misplaced DECT Handset ....................4 2.2.2 Making a Wireless Connection ....................... 4 2.2.3 Registering a DECT Handset ...................... - Page 5 6.1.1 Rebooting the Gateway Only ......................23 6.1.2 Restoring Factory Defaults ......................24 ................24 ESETTING EBOOTING BY SING ANAGEMENT APPENDIX A. SPECIFICATIONS .................... 25 APPENDIX B. COMPLIANCES ....................28...
-
Page 6: Introduction
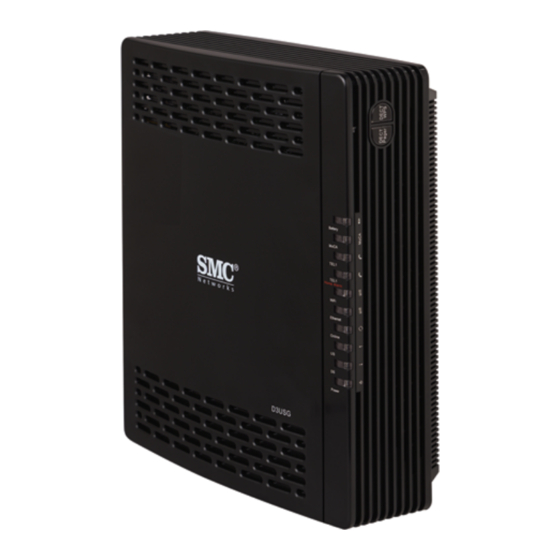
1 Introduction Congratulations on your purchase of the SMCD3USG Universal Services Gateway (hereinafter refers to as "Gateway"). The Gateway is a multimedia gateway based upon DOCSIS 3.0 technology delivering video, voice, data and enabling new home security and automation, DECT Voice and IPTB distribution services. -
Page 7: Hardware Overview
2 Hardware Overview 2.1 LED Indicators The front panel of your Gateway contains a set of light-emitting diode (LED) indicators. These LEDs show the status of your Gateway and simplify troubleshooting. There are also LEDs on the rear panel of the Gateway to show the LINK status. - Page 8 Symbol Description ON = power is supplied to the Gateway Power OFF = power is not supplied to the Gateway Blinking = scanning for DS channel ON = ranged on one or more channels Blinking = ranging is in progress ON = ranging is complete on 1 channel only OFF = scanning for DS channel Blinking = cable interface is acquiring IP, ToD, CM configuration...
-
Page 9: Front Panel Push Buttons
2.2 Front Panel Push Buttons There are two push buttons on the front side of the Gateway. One is for DECT pager and the other is for DECT Register/WPS settings. Symbol Function Type Description Press this button to page the misplaced DECT handset. Or, DECT Pager Button press this button continuously for more than ten seconds to... -
Page 10: Registering A Dect Handset
Press the DECT Register/ WPS button, this LED will blink continuously to indicate the DECT handset is registering and turn OFF after the registration is done. 2.3 Rear Panel Ports The rear panel of your SMCD3USG contains a reset button and the ports for attaching the supplied power adapter and making additional connections. ... -
Page 11: Bottom Compartments
2.4 Bottom Compartments There are three compartments on the bottom of the Gateway. One is expansion slot which containing two USB port and the other two are battery compartments. -
Page 12: Hardware Installation
3.1 Package Contents Unpack the items in your Gateway contents and confirm that no items are missing or damaged. Your package should include: One SMCD3USG Universal Services Gateway Wall-mount Kit (containing two screws and two plastic inserters) ... -
Page 13: Installing The Battery
3.2.2 Installing the Battery The Gateway supports two 2600mA rechargeable Lithium-Ion batteries for power failure backup. It provides stand-by operation for eight-hour standby and five-hour talking mode in the event of the power failure. Before you begin the installation, you must first install the batteries in your Gateway. The following description indicates you how to locate the batteries in the Gateway. -
Page 14: Connecting To The Lan
3.2.3 Connecting to the LAN Using an Ethernet LAN cable, you can connect the Gateway to a desktop computer, notebook, hub or switch. Your Gateway supports auto-MDI/MDIX, so you can use either a standard straight-through or crossover Ethernet cable. Connect either end of an Ethernet cable to one of the four LAN (Ethernet) ports on the rear panel of the Gateway. -
Page 15: Connecting The Wan
3.2.4 Connecting the WAN To connect your Gateway to a Wide Area Network (WAN) interface: Connect a coaxial cable to the port labeled MoCA/Cable on the rear panel of the Gateway from a cable port in your home or office. Use only manufactured coaxial patch cables with F-type connectors at both ends for all connections. - Page 16 Wall-mount Template 2. Measure the gap between holes with a ruler. Dimensionally confirm the template by measuring each value for accuracy before drilling holes. 3. Use a center punch to mark the center of the holes. 4. Locate the marks on the wall for the mounting holes. 5.
- Page 17 7. Using a screwdriver, turn each screw until the head protrudes from the wall. The figure below is an example for mounting Gateway on a concrete surface. • There must be at least 2.5 mm (0.10 inches) between the wall and the underside of the screw head.
-
Page 18: Configuring Your Computer For Tcp/Ip
4 Configuring Your Computer for TCP/IP After you install your Gateway, configure the TCP/IP settings on a computer that will be used to configure your Gateway. 4.1 Configuring Microsoft Windows 2000 Use the following procedure to configure your computer if your computer has Microsoft Windows 2000 installed. -
Page 19: Configuring Microsoft Windows Xp
4.2 Configuring Microsoft Windows XP Use the following procedure to configure a computer running Microsoft Windows XP with the default interface. If you use the Classic interface, where the icons and menus resemble previous Windows versions, perform the procedure under “Configuring Microsoft Windows 2000”. 1. -
Page 20: Configuring Microsoft Windows Vista
4.3 Configuring Microsoft Windows Vista Use the following procedure to configure a computer running Microsoft Windows Vista with the default interface. If you use the Classic interface, where the icons and menus resemble previous Windows versions, perform the procedure under “Configuring Microsoft Windows 2000”. 1. - Page 21 6. In the Internet Protocol Version 4 Properties dialog box, click Obtain an IP address automatically to configure your computer for DHCP. 7. Click the OK button to save your changes and close the dialog box. 8. Click the OK button again to save your changes.
-
Page 22: Configuring An Apple® Macintosh® Computer
4.4 Configuring an Apple® Macintosh® Computer The following procedure describes how to configure TCP/IP on an Apple Macintosh running Mac OS 10.2. If your Apple Macintosh is running Mac OS 7.x or later, the steps you perform and the screens you see may differ slightly from the following. -
Page 23: Configuring Your Gateway
5 Configuring Your Gateway After configuring your computer for TCP/IP using the procedure appropriate for your operating system, use that computer’s Web browser to configure your Gateway. Note: Before you configure your Gateway, observe the guidelines in the following sections. 5.1 Disabling Proxy Settings Disable proxy settings in your Web browser. -
Page 24: Disabling Firewall And Security Software
Disabling Proxy Settings in Safari The following procedure describes how to disable proxy settings in Safari. 1. Start Safari. 2. Click the Safari menu and select Preferences. 3. Click the Advanced tab. 4. In the Advanced tab, click the Change Settings button. 5. - Page 25 The Login User Password screen appears. For example: 4. In the Login screen, enter the default username mso and the default password msopassword. Both the username and password are case sensitive. 5. Click the LOGIN button to access the Gateway. The At a Glance page appears, showing network status, connected devices, software version and recent network updates information about your Gateway.
-
Page 26: Configuring Your Gateway By Using Wizard
5.5 Configuring Your Gateway by Using Wizard This automatic setup wizard is made to provide easy access and setup to the Gateway. If you are new to this device, we strongly recommend you use of the Wizard. Launch the wizard and follow the step 1 and 2 to configure necessary settings. - Page 27 Step 2: 4. In the Wizard Step 2 page, enter a name for you wireless network. 5. Select the encryption method from the drop-down list. 6. Enter the Wi-Fi network password. The length of password must meet the requirement of its encryption method.
-
Page 28: Resetting And Rebooting The Gateway
6 Resetting and Rebooting the Gateway There are two ways to reset the Gateway to the factory default settings: one way is using the Reset button on the Gateway’s rear panel and the other way is using the Web Management of the Gateway. Option Description Reset... -
Page 29: Restoring Factory Defaults
6.1.2 Restoring Factory Defaults To reset the Gateway to its original factory default settings: 1. Leave power plugged into the Gateway. 2. Find the Reset button on the back panel, then press and hold it for at least 15 seconds. 3. -
Page 30: Appendix A. Specifications
Appendix A. Specifications Battery Backup Two battery ports are provided for battery backup of lifeline services provided by DECT and the eMTA. With both batteries installed the USG can maintain up to 8 hours of standby time and 5 hours of talk time. Software upgrade and Support The USG supports 5 separately upgradeable functions including: ... - Page 31 Ports 4 ports 10/100/1000 MDI/MDIX auto sensing switch IEEE 802.11n wireless interface 2.4GHz and 5GHz 4 ports USB 2.0 Host TR-68 coloring for 4 Ethernet port Cable Interface F type female 75ohm eMTA FXS port ...
- Page 32 Content and Filtering Features Receiver Demodulation: 64/256QAM, Max speed: 38Mbps (64QAM) / 43Mbps (256QAM) per channel DOCSIS 5120kbps/10Mbps (QPSK/16QAM) DOCSIS 41.4 Mbps (64QAM)/55.2Mbps (256QAM) bounding (DOCSIS) per channel, Frequency range 91 to 857 MHz ±30 kHz (Center), DOCSIS 108 to 862 MHz ±30 kHz (Edge) 50 MHz to 1002 MHz (DOCSIS) External Power ...
-
Page 33: Appendix B. Compliances
Appendix B. Compliances FCC Interference Statement This equipment has been tested and found to comply with the limits for a Class B digital device pursuant to Part 15 of the FCC Rules. These limits are designed to provide reasonable protection against radio interference in a commercial environment. - Page 34 IMPORTANT NOTE: FCC Radiation Exposure Statement This equipment complies with FCC radiation exposure limits set forth for an uncontrolled environment. This equipment should be installed and operated with minimum distance 20cm between the radiator & your body. This transmitter must not be co-located or operating in conjunction with any other antenna or transmitter. The availability of some specific channels and/or operational frequency bands are country dependent and are firmware programmed at the factory to match the intended destination.
- Page 35 Technical Support From USA and Canada (24 Hours a Day, 7 Days a Week) Toll Free: 800-SMC-4YOU / 800-762-4968 Fax: 949-679-1481 Internet Email Address: techsupport@smc.com Driver Updates: http://www.smc.com/index.cfm?action=tech_support_drivers_downloads www.smc.com English: Technical Support information available at www.smc.com English for Asia-Pacific: Technical Support information available at smc-asia.com Deutsch: Technischer Support und weitere information unter www.smc.com Español: En www.smc.com Ud.
Need help?
Do you have a question about the SMCD3USG and is the answer not in the manual?
Questions and answers