
Subscribe to Our Youtube Channel
Related Manuals for AXIOMTEK GOT110-316


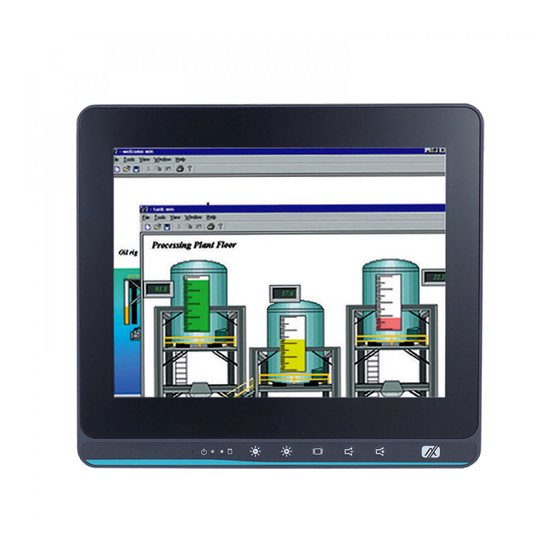
Summary of Contents for AXIOMTEK GOT110-316
- Page 1 GOT110-316 All-in-One 10.4” XGA TFT Fanless Touch Panel Computer with Intel® Celeron® Processor N3350 onboard or Intel® Pentium® Quad Core Processor N4200 User’s Manual...
- Page 2 Disclaimers This manual has been carefully checked and believed to contain accurate information. Axiomtek Co., Ltd. assumes no responsibility for any infringements of patents or rights of any third party, and any liability arising from such use. Axiomtek does not warrant or assume any legal liability or responsibility for the accuracy, completeness or usefulness of any information in this document.
-
Page 3: Safety Precautions
Most electronic components are sensitive to static electrical charge. Disconnect the power cords from the GOT110-316 Series before making any installation. Be sure both the system and the external devices are turned OFF. Sudden surge of power could ruin sensitive components. Make sure the GOT110-316 series is properly grounded. -
Page 4: Table Of Contents
GOT110-316 Specifications ..............2 1.2.1 Main CPU Board ..................2 1.2.2 I/O System ....................2 1.2.3 System Specifications ................. 3 GOT110-316 PoE PD Specifications ..........4 1.2.1 Main CPU Board ..................4 1.2.2 I/O System ....................4 1.2.3 System Specifications ................. 5 Dimensions .................. - Page 5 3.3.2 PCIE/mSATA Mini Card Configuration ............32 3.3.3 Hardware Monitor ..................33 3.3.4 ACPI Settings .................... 34 3.3.5 CPU Configuration ..................35 3.3.6 SATA Configuration ................... 36 3.3.7 USB Configuration..................37 3.3.8 Utility Configuration ................... 37 Chipset Menu ..................38 3.4.1 North Bridge ....................
- Page 6 This page is intentionally left blank.
-
Page 7: Chapter 1 Introduction
The GOT110-316 adopts a fanless cooling system which makes it suitable for environments prone to vibration. Embedded O.S. supported The GOT110-316 supports not only Windows 10, but also embedded O.S. In terms of storage device, the GOT110-316 supports an mSATA and a 2.5” SATA HDD. Industrial-grade product design The GOT110-316 was adaptively designed to be used in different industrial environments. -
Page 8: Got110-316 Specifications
One Mini-card slot (with SIM slot) One Mini-card slot (mSATA supported as an option) Storage One mSATA One 2.5” SATA HDD Power connector GOT110-316-J: 12 VDC with an external 60W AC adapter and a screw type connector; Introduction... -
Page 9: System Specifications
GOT110-316 User’s Manual 1.2.3 System Specifications 10.4” XGA (1024 x 768) LCD with LED backlight 5-wire flat resistive Fanless heat dispensing design Disk drive housing: 2.5” SATA HDD mSATA Net weight 1.8 kg (3.97 lb) ... -
Page 10: Got110-316 Poe Pd Specifications
GOT110-316 User’s Manual GOT110-316 PoE PD Specifications 1.2.1 Main CPU Board Intel® Celeron® Dual Core Processor N3350 (1.10 GHz) onboard.(Turbo Boost Disable) System memory One 204-pin DDR3L-1600 SO-DIMM socket Maximum memory up to 8 BG ... -
Page 11: System Specifications
GOT110-316 User’s Manual 1.2.3 System Specifications 10.4” XGA (1024 x 768) LCD with LED backlight 5-wire flat resistive or Projected capacitive multi-touch Fanless heat dispensing design Disk drive housing: 2.5” SATA HDD mSATA ... -
Page 12: Dimensions
GOT110-316 User’s Manual Dimensions This diagram shows you dimensions and outlines of the GOT110-316. This diagram shows you dimensions and outlines of the GOT110-316 PD I/O outlet. Introduction... -
Page 13: I/O Outlets
GOT110-316 User’s Manual I/O Outlets Please refer to Figures 1-1 and Table 1-1 for I/O locations at the bottom of the GOT110-316. Figure 1-1 Front view of the GOT110-316 Figure 1-1 Bottom view and back view of the GOT110-316 Table 1-1 Descriptions of I/O functions at the bottom of the GOT110-316... -
Page 14: Packing List
A complete bundled package of the GOT110-316-PoE-PD should contain the following item GOT110-316-PoE-PD x 1 Driver CD x1 Please contact an Axiomtek distributor immediately if you cannot find the package or any of the above-mentioned items is missing. Introduction... -
Page 15: Hardware And Installation
GOT110-316 User’s Manual Chapter 2 Hardware and Installation The GOT110-316 provides rich I/O ports and flexible expansions for users to meet different demands. The section is describing hardware installation, including the following subsections: Jumper and Connector Settings Port Definitions ... -
Page 16: Jumper Settings
2.1.1 Jumper Settings By making proper jumper settings, users can configure the board SBC87316 to suit the needs of their applications. Table 2-1 shows the default jumper settings for the GOT110-316. Table 2-1 Default jumper settings ★ Default Setting Jumper Jumper Setting ★... -
Page 17: Connector Settings
GOT110-316 User’s Manual 2.1.2 Connector Settings The connectors on the CPU Board allow the CPU Board to connect with other parts of the system. Ensure that all connectors are in place and firmly attached. Table 2-2 lists the function of each connector on the Board SBC87316. - Page 18 GOT110-316 User’s Manual USB2.0 connector: CN1, CN7 Pin Assignment Description USB Power LVDS connector: CN2 Pin Assignment Pin Description Description +12V_inverter power +12V_inverter power +12V_inverter power +12V_inverter power Backlight control Backlight enable LVDS_ID0 LVDS_ID1 LVDS_ID2 LVDS_ID3 LVDS Panel Power LVDS Panel Power...
- Page 19 GOT110-316 User’s Manual Pin Description Description LVDS_A3- LVDS_A0+ LVDS_A3+ LVDS_A1- LVDS_A1+ LVDS_CLK_A- LVDS_A2- LVDS_CLK_A+ LVDS_A2+ Cable detect eDP connector (optional with CN2): CN3 Pin Assignment Pin Description Description LVDS Panel Power LVDS Panel Power LVDS Panel Power LVDS Panel Power...
- Page 20 GOT110-316 User’s Manual SMBus connector: CN5 Pin Assignment Pin Description DATA CLOCK DIO connector: CN6 Pin Assignment Pin Description Description GPIO0 GPIO1 GPIO2 GPIO3 GPIO4 GPIO5 GPIO6 GPIO7 GPIO8 GPIO9 GPIO10 GPIO11 GPIO12 GPIO13 GPIO14 GPIO15 Hardware and Installation...
- Page 21 GOT110-316 User’s Manual Touch screen connector: CN9 Pin Assignment Pin Description SENSE OSD connector: CN11 Pin Assignment Pin Description Brightness+ Brightness- volume+ Volume- Touch or LCD ON/OFF POWER LED SATA LED Touch LED Backlight LED Hardware and Installation...
- Page 22 GOT110-316 User’s Manual SATA Power connector: CN14 Pin Assignment Pin Description +12V MIC In & Line in connector: CN15 Pin Assignment Pin Description MIC IN LINE IN _L LINE IN _R Hardware and Installation...
- Page 23 GOT110-316 User’s Manual Speaker out connector: CN17 Pin Assignment Pin Description SPKOUT_L+ SPKOUT_L- SPKOUT_R+ SPKOUT_R- Power button connector: CN20 Pin Assignment Pin Description Description PWBTN Power DC in connector (optional with CN25): CN26 Pin Assignment Pin Description DCIN DCIN Hardware and Installation...
- Page 24 GOT110-316 User’s Manual COM Port connector: COM1 Pin Assignment COM1 support RS-232/422/485 which can be selected by BIOS. RS-232 RS-422 RS-485 Data- Data+ AT/ATX switch: SW2 Pin Assignment Pin Description Disable auto power on (Default) Enable auto power on...
-
Page 25: Mountings - Panel/Wall/Desktop/Vesa
GOT110-316 User’s Manual Mountings – Panel/Wall/Desktop/VESA There are several mounting ways for the GOT110-316: Wall, desktop, VESA and panel mountings. 2.2.1 Panel-Mounting (optional) The GOT110-316 is designed for panel mount application. Step1 Sticks 4 sealing pads on the edges of chassis... -
Page 26: Wall-Mount Bracket
GOT110-316 User’s Manual 2.2.2 Wall-Mount Bracket The GOT110-316 provides VESA mount: 100 x 100 mm. Screw four screws to fix the kit in the back chassis. Step 1 Find out the holes as marked on the back side of chassis. -
Page 27: Storage Installation
GOT110-316 User’s Manual Storage Installation 2.3.1 2.5” SSD/HDD Installation The GOT110-316 provides an optional 2.5” SSD for users to install. Please refer to the following instructions for installation: Step 1 Turn off the system, and unplug the power cord. Step 2 Remove the back cover. -
Page 28: Dram Installation
Step 4 Screw the 2.5” SSD/HDD to fix SSD/HDD. DRAM Installation The GOT110-316 provides one 204-pin DDR3L SODIMM socket that supports system memory up to 8GB. Please follow steps below to install the memory modules: Step 1 Open the back cover and find out the DIMM socket on the main board (SBC87316). - Page 29 GOT110-316 User’s Manual Step 3 Insert the DRAM into the DIMM socket, and then push it down firmly until it is clipped by the socket. Step 4 Rib the mylar from the thermal pad. Step 5 assemble the RAM heatsink with two screws.
-
Page 30: Mini Card Installation
GOT110-316 User’s Manual Mini Card Installation 2.5.1 mSATA Card Installation The GOT110-316 provides one Mini card slot for users to install mSATA. Please choose slot 1 when installing an mSATA card and refer to the following instructions and illustrations: Step 1 Open the back cover and locate the mini-card slot on the main board. -
Page 31: Power Input (Ac To Dc Cable)
GOT110-316 User’s Manual Power Input (AC to DC cable) Axiomtek provides an optional cable for the DC jack connector to connect to DC source. It adopts 12V/19~24VDC. Please follow the signs on the power connector to connect DC power source. - Page 32 GOT110-316 User’s Manual This page is intentionally left blank. Hardware and Installation...
-
Page 33: Ami Bios Setup Utility
GOT110-316 User’s Manual Chapter 3 AMI BIOS Setup Utility This section provides users with detailed descriptions about how to set up basic system configuration through the AMI BIOS setup utility. Navigation Keys The BIOS setup/utility uses a key-based navigation system called hot keys. Most of the BIOS setup utility hot keys can be used at any time during the setup navigation process. -
Page 34: Main Menu
GOT110-316 User’s Manual Main Menu Figure 3-1 Main menu System Time/Date Use this option to change the system time and date. Highlight System Time or System Date using the up/ down/ left and right arrow keys (see Figure 3-1). Enter new values through the keyboard. -
Page 35: Advanced Menu
GOT110-316 User’s Manual Advanced Menu Figure 3-2 Advanced menu The Advanced menu allows users to set configurations of the CPU and other system devices. Select any item on the left to go to the sub-menus (as shown in Figure 3-2). -
Page 36: F81804 Super Io Configuration
GOT110-316 User’s Manual 3.3.1 F81804 Super IO Configuration The ‘F81804 Super IO Configuration’ page is to change the value of the Super IO Configuration. The description of the selected item will appear on the right side of the screen (as shown in Figure 3-3). For items marked with “”, please press <Enter> for further options (as shown in Figure 3-4). - Page 37 GOT110-316 User’s Manual ► Serial Port 1 (COM1) / Serial Port 2 (COM2) Serial port This option is used to enable or disable serial port COM1/COM2. Device Setting This item specifies the base I/O port address and Interrupt Request (IRQ) address of a serial port.
-
Page 38: Pcie/Msata Mini Card Configuration
GOT110-316 User’s Manual 3.3.2 PCIE/mSATA Mini Card Configuration Figure 3-11 shows the page once entering PCIE/mSATA Mini Card Configuration. There are two options to choose from: [PCIE] and [mSATA]. Figure 3-11 Entering ‘PCIE/mSATA Mini Card Configuration’ AMI BIOS Setup Utility... -
Page 39: Hardware Monitor
GOT110-316 User’s Manual 3.3.3 Hardware Monitor Figure 3-5 shows a screen reflecting the ‘PC Health Status’ of the hardware in real time. Figure 3-5 Entering ‘Hardware Monitor’ AMI BIOS Setup Utility... -
Page 40: Acpi Settings
GOT110-316 User’s Manual 3.3.4 ACPI Settings This screen is used to select options of the ACPI Configuration, and then change the value of the selected option. A description of the selected item appears on the right side of the screen. -
Page 41: Cpu Configuration
GOT110-316 User’s Manual 3.3.5 CPU Configuration Figure 3-7 shows a page of CPU configuration with the item Intel Virtualization Technology highlighted for [Enabled] or [Disabled]. Figure 3-7 Entering ‘CPU Configuration’ AMI BIOS Setup Utility... -
Page 42: Sata Configuration
GOT110-316 User’s Manual 3.3.6 SATA Configuration This screen allows users to select options for SATA Configuration, and then change the value of the selected option (see Figure 3-8). SATA Controller Highlight this item to set up SATA Controller to be [Enable] or [Disable]. -
Page 43: Usb Configuration
GOT110-316 User’s Manual 3.3.7 USB Configuration Please see Figure 3-9 to find out what items can be set up under the page of USB Configuration. Figure 3-9 Entering ‘USB Configuration’ 3.3.8 Utility Configuration Figure 3-10 shows the page once entering Utility Configuration. -
Page 44: Chipset Menu
GOT110-316 User’s Manual Chipset Menu The Chipset menu gives memory information about the North Bridge and South Bridge (see Figure 3-12). Figure 3-12 Chipset menu 3.4.1 North Bridge North Bridge memory information is shown in Figure 3-13. Figure 3-13 Entering ‘North Bridge’... -
Page 45: South Bridge
GOT110-316 User’s Manual 3.4.2 South Bridge South Bridge TXE information is shown in Figure 3-14. Figure 3-14 Entering ‘South Bridge’ AMI BIOS Setup Utility... -
Page 46: Security Menu
GOT110-316 User’s Manual Security Menu You may set the administrator/user password for the system. Figure 3-15 Security Menu AMI BIOS Setup Utility... -
Page 47: Boot Menu
GOT110-316 User’s Manual Boot Menu The Boot menu allows users to change boot options of the system. Users can highlight any of the items on the left frame of the screen to go to any particular sub menus (as shown in Figure 3-16). -
Page 48: Save & Exit Menu
GOT110-316 User’s Manual Save & Exit Menu Figure 3-17 Save & Exit Menu AMI BIOS Setup Utility... -
Page 49: Chapter 4 Drivers Installation
GOT110-316 User’s Manual Chapter 4 Drivers Installation System The GOT110-316 supports Windows 10 pro and Windows 10 IoT Enterprise. To facilitate the installation of system driver, please carefully read the instructions in this chapter before installation. 4.1.1 Windows 10 Insert the driver CD and select the “\Drivers”. -
Page 50: Driver Installation- Windows 10
GOT110-316 User’s Manual 4.2.2 Driver Installation- Windows 10 The GOT110-316 (resistive touch model ) provides a touch screen driver that users can install under the operating system Windows 10. To facilitate installation of the touch screen driver, you should read the instructions in this chapter carefully before you start installation. - Page 51 GOT110-316 User’s Manual Calibration: To adjust the display of the touch panel, click “Calibration” and follow the calibrating point to do calibration; there are five points on screen for calibration. Press OK. Drivers Installation...
- Page 52 GOT110-316 User’s Manual This page is intentionally left blank. Drivers Installation...
-
Page 53: Appendix A Watchdog Timer & Dio Programming
GOT110-316 User’s Manual Appendix A Watchdog Timer & DIO Programming About Watchdog Timer Software stability is a major issue in most applications. Some embedded systems are not watched by humans for 24 hours. It is usually too slow to wait for someone to reboot when a computer hangs. - Page 54 GOT110-316 User’s Manual Begin Begin Next Next Enable and Initialize Enable and Initialize Watchdog Timer Watchdog Timer Next Next Program “A” Program “A” Next Next Disable Watchdog Reset Watchdog Timer Timer Next Next Watchdog Timer & DIO Programming...
-
Page 55: Wdt Sample Program
GOT110-316 User’s Manual WDT Sample Program Enable WDT 1.Enable configuration: -O 2E 87 -O 2E 87 2. Select Logic device: -O 2E 07 -O 2F 07 3. WDT device enable: -O 2E FA -O 2F 01 4. Set base timer: -O 2E F6 -O 2F 0A Set reset time (Ex.0A:10 Sec/Minute) - Page 56 GOT110-316 User’s Manual Watchdog Timer & DIO Programming...
- Page 57 GOT110-316 User’s Manual Watchdog Timer & DIO Programming...
- Page 58 GOT110-316 User’s Manual This page is intentionally left blank. Watchdog Timer & DIO Programming...
-
Page 59: Appendix B Volume Control
Volume Control About Volume Control Axiomtek offers the volume control tool under Windows 7, Windows 8 and Windows 10. After installing the volume control tool, users can adjust the system volume depending on their personal needs and the amount of ambient volume in their locations. - Page 60 GOT110-316 User’s Manual Volume Control...
- Page 61 GOT110-316 User’s Manual Volume Control...
- Page 62 GOT110-316 User’s Manual Volume Control...
- Page 63 GOT110-316 User’s Manual Volume Control...
- Page 64 GOT110-316 User’s Manual Step 2 The system auto reboots when installation is complete. Volume Control...
- Page 65 GOT110-316 User’s Manual Select the “△” icon and then find the “Axiomtek” to ensure the volume driver Step 3 is installed successfully. Step 4 How to use the Volume Control: Select volume +- to adjust the system volume. Volume Control...
-
Page 66: Removing The Volume Control Tool
GOT110-316 User’s Manual Removing the Volume Control Tool Step 1 Go to Control Panel -> Programs -> Programs and Features. Select Uninstall on AxAVC_Setup. Volume Control... - Page 67 GOT110-316 User’s Manual Follow the procedure and press “Close”. Step 2 Volume Control...
- Page 68 GOT110-316 User’s Manual Step 3 The system auto reboots when uninstallation is complete. Volume Control...
Need help?
Do you have a question about the GOT110-316 and is the answer not in the manual?
Questions and answers