
Related Manuals for Saeco Phedra Evo D.A. 5P2015


Summary of Contents for Saeco Phedra Evo D.A. 5P2015
- Page 1 Vending Machine WARNING: This instruction manual is intended exclusively for specialized personnel.
-
Page 2: Main Parts
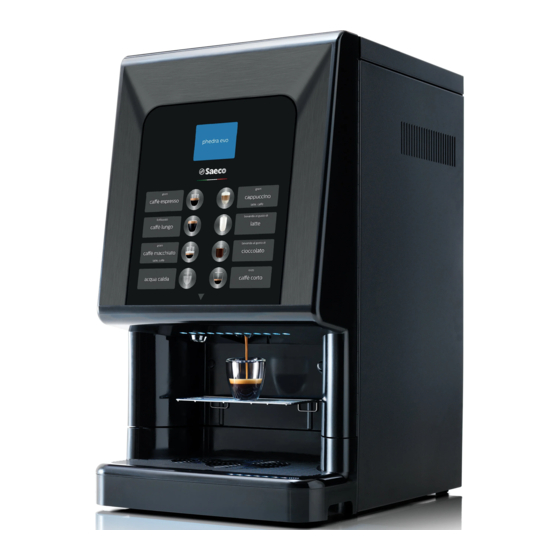
English MAIN PARTS MAIN PARTS - ESPRESSO VERSION Top door Display Front door Keypad Dispensing outlet (beverage dispensing) Water connection coupling Power cord socket... -
Page 3: Table Of Contents
English Safety switch Drain conveyor Coffee bean hopper Drip Tray Container 2/3 (instant products) Grill Adjustable powder dispensing channel Coffee grinder Instants opening CPU card Mixer Brew group Door lock Coffee grounds drawer Dispensing arm Container 1 (instant products) Coffee grounds drawer Spiral mixer... - Page 4 English MAIN PARTS - ESPRESSO WATER TANK VERSION Top door Display Front door Keypad Dispensing outlet (beverage dispensing) Power cord socket Tank funnel door...
- Page 5 English Safety switch Drain conveyor Coffee bean hopper Drip Tray Container 2/3 (instant products) Grill Adjustable powder dispensing channel Coffee grinder Instants opening CPU card Mixer Coffee grounds drawer Door lock Tank funnel door Dispensing arm Water tank Coffee grounds drawer Brew group Gusto...
- Page 6 English MAIN PARTS - ESPRESSO T.T.T. VERSION Top door Display Front door Keypad Dispensing outlet (beverage dispensing) Water connection coupling Power cord socket...
-
Page 7: Safety Switch
English Safety switch 17 Drain conveyor Coffee bean hopper 18 Drip Tray Container 2/3 (instant products) 19 Grill Adjustable powder dispensing channel 20 Coffee grinder Instants opening 21 CPU card Mixer 23 Coffee grounds drawer Door lock 24 Container 1 (instant products) Dispensing arm 25 Spiral mixer Coffee grounds drawer... - Page 8 English MAIN PARTS - CAPPUCCINO VERSION Top door Display Front door Keypad Dispensing outlet (beverage dispensing) Water connection coupling Power cord socket...
-
Page 9: Drain Conveyor
English Safety switch Drip Tray Coffee bean hopper Grill Container 2/3 (instant products) Coffee grinder Adjustable powder dispensing channel CPU card Instants opening Brew group Mixer Coffee grounds drawer Door lock Container 1 (instant products) Dispensing arm Cappuccinatore Coffee grounds drawer Hose for Cappuccinatore Drain conveyor... - Page 10 English MAIN PARTS - CAPPUCCINO WATER TANK VERSION Top door Display Front door Keypad Dispensing outlet (beverage dispensing) Power cord socket Tank funnel door...
-
Page 11: Coffee Grinder Cpu Card
English Safety switch Drip Tray Coffee bean hopper Grill Container 2/3 (instant products) Coffee grinder Adjustable powder dispensing channel CPU card Instants opening Coffee grounds drawer Mixer Tank funnel door Door lock Water tank Dispensing arm Brew group Gusto Coffee grounds drawer Cappuccinatore Drain conveyor Hose for Cappuccinatore... - Page 12 English MAIN PARTS - CAPPUCCINO T.T.T. VERSION Top door Display Front door Keypad Dispensing outlet (beverage dispensing) Water connection coupling Power cord socket...
-
Page 13: Container 2/3 (Instant Products)
English Safety switch Drip Tray Coffee bean hopper Grill Container 2/3 (instant products) Coffee grinder Adjustable powder dispensing channel CPU card Instants opening Coffee grounds drawer Mixer Container 1 (instant products) Door lock Spiral mixer Dispensing arm T.T.T. Brew group Coffee grounds drawer Cappuccinatore Drain conveyor... - Page 14 English SAFETY INSTRUCTIONS For professional use only. The use by children older than 8 years or by persons vending machine with reduced physical, mental cannot installed or sensory abilities or with lack outdoors; avoid placing it of experience and skills is areas where allowed, provided that they...
- Page 15 English Before connecting Access to the service area is appliance to water network, restricted to persons having please read and follow the knowledge practical applicable regulations in force experience of the appliance, in in your country. particular as far as safety and hygiene are concerned.
- Page 16 English CONTENTS 9.2 CAPPUCCINO WITH COLD MILK FUNCTION MAIN PARTS 9.3 WARNING SIGNALS 1 INTRODUCTION TO THE MANUAL 1.1 PREAMBLE 10 CLEANING AND MAINTENANCE 1.2 ICONS USED 10.1 GENERAL NOTES FOR CORRECT OPERATION 2 INFORMATION ON THE VENDING 10.2 CLEANING AND SCHEDULED MACHINE MAINTENANCE 2.1 INFORMATION FOR THE MAINTENANCE...
-
Page 17: Introduction To The Manual
Always refer to this manual before carrying out any operation. Manufacturer: SAECO Vending S.p.A. Località Casona, 1066 - 40041 Gaggio Montano Bologna, Italy... -
Page 18: Icons Used
English Icons Used Various kinds of warnings are contained in this manual to highlight the different hazard or competence levels. The symbol is integrated with a message suggesting use procedures or actions and providing useful information for the correct operation of the machine. Warning Indicates dangerous situations for the users, supply operators and maintenance technicians dealing either with... -
Page 19: Information On The Vending Machine
English INFORMATION ON THE VENDING MACHINE Information for the Description and Intended Use Maintenance Technician The vending machine is intended for automatic distribution of The vending machine must coffee and hot beverages (decaffeinated coffee, cappuccino, chocolate, etc.) and is programmable for every single type of be installed in a well-lit, dry dispensing dosage. -
Page 20: Vending Machine Identification
English • any tampering with parts and/or safety devices not previously When contacting authorised by the Manufacturer and performed by unauthorised personnel; technical service, always refer to this plate by • any location of the vending machine not provided in this manual. indicating technical data shown on it. -
Page 21: Technical Specifications
English Container capacity Technical Specifications Coffee beans 1 kg Hot Chocolate 1,75 kg Milk 0,65 kg Lemon tea 1,5 kg Ground coffee 0,62 kg Double Ginseng 1,85 kg Standard Ginseng 1,15 kg Standard Freeze-dried coffee 0,41 kg Standard Barley 0,36 kg Size (w x h x d) 393 x 695 x 503 mm Weight... -
Page 22: Safety
Precautionary measures to prevent human errors: regulations, SAECO VENDING has prepared a technical • make the operator aware of safety issues; file relating to the PHEDRA EVO vending machine at its premises, acknowledging the following standards in the •... -
Page 23: Operator Requirements
English The manufacturer is not Access to the service area is liable damage restricted to persons having persons property knowledge practical resulting from failure to experience of the appliance, follow safety in particular as far as safety instructions provided and hygiene are concerned. this section. -
Page 24: Residual Risks
English Maintenance technician Before brewing a beverage In case of programming or setting up operations only the make sure that Maintenance Technician can intervene by inserting the relevant key into the safety switch and resetting the previous one has already voltage even if the door is open. -
Page 25: Handling And Storage
English HANDLING AND STORAGE Unloading and Handling Storage Unloading and handling operations after transportation If the vending machine is not installed immediately, it must be carried out only by qualified personnel and using should be stored in a sheltered area, conforming to the suitable equipment. -
Page 26: Installation
English INSTALLATION Cautions Under no circumstances cover the vending machine vending machine with cloths or similar. cannot installed outdoors; avoid placing it areas where temperature is less than 2°C or more than 32°C and in particularly dump or dusty areas. should neither installed... - Page 27 English The vending machine is placed on a polystyrene base - Take the key from the dispensing outlet. protected by two polystyrene corners, a polyethylene foam sheet and a bag - and is delivered in a box. Insert the key into the lock, turn clockwise and open the door.
-
Page 28: Label Application
English Take out the product label sheet included in the customer Label application kit. Remove the labels from the product label sheet by following the pre-cut line. 5.3.1 Product labels Cut the labels as shown in the figure to make the left ones or the right ones. - Page 29 To make different labels from the ones provided in the kit, please use the "Labels" module available on our web portal "Saeco Vending Online" at www.saecovending-online.com. For printing, we suggest using paper with the following properties: 170-g matte coated paper.
- Page 30 English Phedra Cappuccino Phedra Cappuccino T.T.T. Phedra Cappuccino Water Tank...
-
Page 31: Installation Of Payment Systems
English Installation of Payment After the chosen payment Systems system has been installed, The vending machine is designed for the installation of various payment systems, such as: corresponding - parallel validator 24 V DC - executive systems (also PRICE HOLDING); parameters can be set - MDB systems;... -
Page 32: Connection To Water Mains
English Connection to water mains Connect vending machine to drinking water The pressure reducer is mains with pressure calibrated during assembly. between 0.15 MPA and Should problems occur 0.8 MPA (1.5 and 8 bar), with the calibration of the see data on the label. pressure reducer, outlet pressure value must... -
Page 33: Connection To The Electric Network
English Do not use adapters or multi-sockets. hose-sets supplied with the appliance are to be used and that old hose-sets should not be reused. Make sure that the power Connection to the Electric Network cord plug is easily reachable The Maintenance Technician, after installation. -
Page 34: Liquid Drain Setting
English Marks Use the coffee grounds conveyor C (optional) as shown in the figure. Machine front side Hole to be made Ideal position of the adjustable feet Liquid Drain Setting The appliance is setup for direct drainage of the drip tray into container in the dedicated cabinet or into another container located below the appliance. -
Page 35: Description Of Controls
English DESCRIPTION OF CONTROLS Display Button Description during Normal Operation The display shows the messages during normal operation and during the programming and maintenance phase. 6.3.1 Set 1 Pre-selection button The function connected to the button may be chosen from Keypad the following options: A. -
Page 36: Supply And Start Up
English SUPPLY AND START UP Container Configuration 7.1.2 Espresso Water Tank version 7.1.1 Espresso Version The containers delivered are designed to dispense The containers delivered the following products: are designed to dispense the following products: Instant pr. 1 not present Instant pr. - Page 37 English 7.1.3 Espresso T.T.T. version 7.1.4 Cappuccino Version The containers delivered The containers delivered are designed to dispense are designed to dispense the following products: the following products: Instant pr. 1 Instant pr. 1 Freeze-dried coffee Instant pr. 2 Milk Instant pr.
- Page 38 English 7.1.5 Cappuccino Water Tank 7.1.6 Cappuccino T.T.T. version version The containers delivered The containers delivered are designed to dispense are designed to dispense the following products: the following products: Instant pr. 1 not present Instant pr. 1 Instant pr. 2 Barley Instant pr.
-
Page 39: Instant Product Supply
English Instant product supply Coffee Bean Supply Open the vending machine front door. Open the top door. Open the vending machine front door. Open the top door. Open the cover of the container to be supplied. Remove the container cover. Pour the instant product into the container. -
Page 40: Filling The Water Tank
English Fill the tank with tap water. If the message “NO MORE COFFEE” is displayed, refill the vending machine, turn it off and then on again. Filling the Water Tank (For Water Tank version only) Open the vending machine front door. Open the top door. Remove the tank and place it under a water tap. -
Page 41: Top Door Intermediate Locking
English Top door intermediate Dose calibration locking The vending machine is delivered with standard calibration The vending machine is provided with an intermediate values set by the manufacturer. locking position for the top door in case, due to its Dose calibration can be performed by means of two location, it cannot be completely opened. -
Page 42: Coffee Grind Adjustment
English Procedure B Coffee Grind Adjustment • press the P2 key to enter the maintenance menu; Turn the ring until the required results are obtained. • Enter the Maintenance/ Boiler Refill menu and start the automatic refill cycle; After any calibration three selections are necessary before the new setting becomes effective. -
Page 43: Programming And Maintenance Menu
English PROGRAMMING AND MAINTENANCE MENU “^” Key: UP This section illustrates how By pressing this key it is possible to access the next entry inside the same level. If used after requesting the change of to set up or modify the a setting, the value of this setting increases. - Page 44 English If a password was assigned to the vending machine to enable the programming menu, message "PASSWORD 000000" will appear on the display with a flashing cursor on the first digit. Now the password should be entered using the UP and DOWN keys.
- Page 45 English 8.2.2 Structure of the 1.17.1. Brightness Programming Menu 1.18. Pulse counter 1.19. Multiple beverage ITEM NO. MENU ITEM 1.19.1. Multiple beverage SYSTEM MANAGEMENT 1.19.2. Enable Mult. bev. 1.1. VM Code 1.19.3. Free 1.2. Stops 1.20. Enable reset 1.2.1. Stop coffee C 1.21.
- Page 46 English ITEM NO. MENU ITEM 4.2.1.2. Single Prices 2.3.3.-6 Banknote Value 4.2.2. Differentiated 1 2.3.3.4. Banknote 4.2.2.1. Global price 2.4. MDB settings 4.2.2.2. Single Prices 2.4.1. Recharge enabled 4.2.3. Differentiated 2 2.4.2. Max Card Recharge 4.2.3.1. Global price 2.4.3. Max Card Value 4.2.3.2.
- Page 47 English 8.2.3 Description of Messages in the Programming Menu DISPLAY Description The SYSTEM MANAGEMENT items are: SYSTEM MANAGEMENT … 1.1. Enables an identification code to be assigned to the vending machine. VM Code 531000 Enables setting of the maximum amount of beverage or coffee. 1.2.
- Page 48 English DISPLAY Description Select YES to indicate a new filter has been installed 1.3.4. This operation returns “Remaining Qty” to the same value as “Filter Limit” and the date in Filter reset the “Last Filter Change” is changed to today’s date. 1.3.5.
- Page 49 During the first phase, a display message will request to pour the mix of water and cleaning solution (about 400 gr of water and Saeco compound). Simultaneously press the buttons corresponding to beverages 4 and 8 to start the “Wash Cycle”.
- Page 50 English DISPLAY Description Extra time (in tenths of seconds) for steam dispensing applied in case the circuit is cold, since 1.8.2.1. a reduced quantity of milk is dispensed in this case. Extra Time 1.8.2.2. It determines the delay time (in minutes) after which the preheating of the Cappuccinatore is enabled.
- Page 51 English DISPLAY Description Water compensation for coffee beverages. 1.13. The exact quantity of water dispensed by each machine depends on the construction tolerances of each water circuit component (pump, flowmeter, tubes, etc.). This menu allows you to set a correction "evening out" these differences so that the end result in the cup is always the same even if the machine is different.
- Page 52 English DISPLAY Description 1.17.1. It allows adjusting the display brightness. Brightness 1.18. Enables selection of whether the 24 V dc electromechanical pulse counter (optional - to be connected to the CPU card) has to count the coffees or all dispensed beverages. Pulse counter Coffee Allows selecting which beverages will be enabled for multiple brewing and the number of...
- Page 53 English DISPLAY Description it allows setting the message appearing on the display when the vending machine is 1.24.1. dispensing a product. Dispensing 1.24.2. It enables setting the text on the display when the vending machine stops due to a fault. Out of service Allows you to set the message appearing on the display when the pre-selection mode of 1.24.3.
- Page 54 Allows setting a password to access the maintenance menu. Important Service Password If the password is lost, you will have to contact the Saeco Vending Technical Assistance Service to regain access to the Programming Menus. 1.28. Enables selection of whether the entries of the programming menu should be shown fully or Complete menus only partially.
- Page 55 Enables access to particular functions of the MDB protocol. MDB settings … It allows disabling or enabling the possibility of performing any Saeco Card recharge operation 2.4.1. Recharge enabled By setting RECHARGE = NO the vending machine will only deduct the cost from MDB cards.
- Page 56 English DISPLAY Description Enables setting of the maximum credit level, beyond which all recharge operations (if 2.4.2. enabled) are ineffective. Max Card Recharge By setting MAX RECHARGE = 20.00, the credit on the vending machine will be transferred 10.00 to the card if the sum does not exceed 20.00. It enables to set the maximum credit level, beyond which the card is rejected by the system.
- Page 57 English DISPLAY Description 2.4.15. Allows you to disable the bill reader if there is no change. no change =no bills … 2.5. It allows the user to set the maximum credit which can be accepted by the vending machine. Once this limit has been reached, the payment systems are disabled so that no more credit can be Max credit accepted.
- Page 58 English DISPLAY Description This is the order in which the products making up the beverage are brewed. 3.3. The possible choices are: 0 =does not dispense any product 1 = dispenses product 1 2 = dispenses product 2 3 = dispenses product 3 Sequence 4 = dispenses product 4 5 = dispenses product 5...
-
Page 59: Mixer
English DISPLAY Description It defines the amount of water to be mixed with the instant powder. 3.3. Example: “3” indicates that water will be mixed with the instant product 3. “022” indicates that 22 units of water will be brewed with the instant product. The reference unit is preset by the manufacturer. - Page 60 English DISPLAY Description It enables ingredient display in pre-selection mode, component by component. 3.6.1. Enable 3.6.2. It uploads the files with the ingredients from a USB key. Read from USB KEY It displays the content of the uploaded ingredients, component by component, in the text 3.6.3.
- Page 61 English DISPLAY Description By setting CARD PRICES = YES a new menu entry will appear in PRICE MANAGEMENT, 4.2.4.1. enabling setting the price level to be applied to the product (beverage or snack) if payment Card Prices is made by card. 4.2.4.2.
- Page 62 English BOILERS TABLE Model Boiler 1 Boiler 2 Espresso Beverage and coffee boiler not present Espresso Water Tank Beverage and coffee boiler not present Espresso T.T.T. Beverage and coffee boiler not present Cappuccino Beverage and coffee boiler Steam boiler Cappuccino Water Tank Beverage and coffee boiler Steam boiler Cappuccino T.T.T.
- Page 63 English BUTTON - BEVERAGE NUMBER CONNECTION PHEDRA EVO: BUTTONS 5 AND 6 TABLE BUTTONS 5 and 6 = BEVERAGE BUTTONS 9 and 10 = PRE-SELECTION 5 and 6 Press Press Press Press PRE-SELECTION PRE-SELECTION 5+BUTTON 6+BUTTON Beverage 1 Beverage 1 Beverage 9 Beverage 17 Beverage 2...
-
Page 64: Maintenance Menu
English Maintenance menu 8.3.2 Structure of the maintenance menu The structure of the maintenance menu is indicated in ITEM NO. MENU ITEM section “Structure of the Maintenance Menu”. Maintenance 1.1. Error log The section “Description of Messages in the Maintenance 1.2. - Page 65 English 8.3.3 Description of messages in the maintenance menu DISPLAY Description This function allows to show and reset the errors that may be present. It is also possible to carry out maintenance on the vending machine. To reset the errors, use the menu under the maintenance item. Maintenance Important To correct errors see chapter “Troubleshooting”.
- Page 66 English DISPLAY Description Allows quick cooling of the boiler. 1.5. By selecting the item “ BOILER COOLING “ the VM dispenses water until the temperature detected by the sensor placed on the boiler has fallen below 50°C. Cool Down Boiler A coloured bar on the display indicates the current temperature of the boiler.
- Page 67 English DISPLAY Description 2.12. Allows resetting the statistical data. Reset by entering this menu, the user can access the reading and writing functions of the memory from and on USB key. The memory content is managed by means of files with ". M EM" extension. USB KEY functions which can also be obtained through the machine configurator available on www.
-
Page 68: Machine Ready / Free Button
English Machine Ready / Free Button Open the door, disable the safety device (see section “Safety Devices”) and press the P3 key. If pressed during the initial warm-up, this button allows inducing the “MACHINE READY” status before the boilers reach their set temperature. If pressed after the “MACHINE READY”... -
Page 69: Operation And Use
English OPERATION AND USE • the credit available is sufficient or the vending machine has The use by children older been set in free mode. If this is not the case, the display shows the message "INSERT XXX"; than 8 years or by persons with reduced physical,... -
Page 70: Cappuccino With Cold Milk Function
English Cappuccino with cold milk To avoid scalding, wait for function the end of brewing signal (Only for Cappuccino version) (the message "REMOVE This model is equipped with a special frothing system, which automatically draws milk from an external container CUP"... -
Page 71: Warning Signals
English Warning signals The table below shows a list of messages displayed during the standard operation. Message Cause Action Phedra EVO The vending machine is in stand-by. WAIT FOR Product dispensing in progress. PRODUCT REMOVE CUP Product dispensing finished. Take the product. COFFEE NOT AVAILABLE The coffee beans hopper is empty. -
Page 72: Cleaning And Maintenance
English CLEANING AND MAINTENANCE Before performing Avoid using chlorine-based maintenance and/or tablets so as to prevent cleaning operation, unplug oxidation phenomena the power cord. inside the vending machine. 10.1 General Notes for Correct Operation It is prohibited to perform The vending machine and cleaning or maintenance non-removable operations on the internal... -
Page 73: Cleaning And Scheduled Maintenance
English 10.2 Cleaning and Scheduled Maintenance All parts must be washed with lukewarm water only without using detergents or solvents that could change their shape or performance. All removable parts can not be washed in the dishwasher. During the cleaning and maintenance operations do not stress the following electrical... -
Page 74: Dispensing Arm
English 10.2.1 Maintenance Schedule COMPONENT TO BE Maintenance CLEANED Cappuccinatore See the "Manual cleaning of the Cappuccinatore" section. Display Use a cloth dampened with cleansers suitable for contact with food. Beverage dispensing outlet Use a cloth dampened with cleansers suitable for contact with food. Use a cloth dampened with cleansers suitable for contact with food. - Page 75 English Wash the brew group with lukewarm water and clean the 10.2.2 Brew Group Cleaning upper filter carefully. Remove the protection carter and disconnect the hose from the dispensing arm. Upper filter When inserting brewing group, make sure that the reference arrows are aligned.
- Page 76 English Remove the cap and the powders chute. 10.2.3 Cleaning the instant product dispenser and the mixer Disconnect the dispensing hose from the nozzle and from the dispensing arm. Turn the ring nut clockwise and remove the mixer body. Remove the fan by levering carefully with a flat screwdriver.
- Page 77 English Wash all components with lukewarm water and pay 10.2.5 Cleaning the dispensing arm particular attention not to damage the fan. Assemble the components in reverse order and connect the dispensing Disconnect the hoses from the dispensing arm. hose correctly. 10.2.4 Cleaning the containers Wash regularly using non abrasive detergents and dry with...
-
Page 78: Coffee Grounds Drawer
English Remove, empty and thoroughly clean the coffee grounds 10.2.6 Cleaning the coffee grinder drawer. Each month, clean the coffee grinder of any residues that might lead to deposits. After removing the coffee bean hopper (see section “Cleaning the Containers”), clean the coffee grinder carefully with an aspirator. - Page 79 Press the last 2 buttons at the bottom again (buttons 4 and 8). To carry on the procedure, follow the instructions displayed. Prepare the liquid solution “Saeco powder pack for milk circuit” to clean the Cappuccinatore, by mixing the powder with 400 cc of water.
- Page 80 English When all the solution has been dispensed, empty the Place the empty container into the beverage brewing container and place it back in the outlet. outlet. Press the last 2 buttons at the bottom again (buttons 4 and 8). At the end of the dispensing, empty out the container filled with water.
- Page 81 English Remove the fitting from the milk suction hose. Use the tools supplied with the machine to clean the components Cappuccinatore. Open the door. Push the buttons located on the sides and remove the Cappuccinatore. Clean the inside of the milk suction hose using the scraper, as shown in the figure.
- Page 82 English Remove the ring from the Cappuccinatore. Remove the suction tube joint from the Cappuccinatore. Wash the parts under running water. Make sure any milk deposits/residues are removed. Carry out the procedure described above in reverse order to assemble the Cappuccinatore.
-
Page 83: Non-Scheduled Maintenance
English 10.3 Non-scheduled maintenance 10.3.1 Brew group maintenance The operations described in this section are intended as an Plastic group. It is advisable to remove it and rinse example as they depend on different variables, such as: carefully with hot water on a monthly base; every 5,000 water hardness, humidity, products used, conditions and strokes and, in any case, every month all moving parts of quantity of work. -
Page 84: Software Update
English Lower filter: 10.4 Software update • unscrew the two side screws (1) and remove the upper piston stop (2) The vending machine management program is stored in the flash memory inside the CPU board. The software update can be performed by using: •... -
Page 85: Management Of Default Values
English • press and hold the P1 button on the CPU; The parameters which are affected by the Factory/Custom default functions are all those contained within Programming Menu. • Switch on the vending machine; • after the CPU beep, release the P1 button; •... -
Page 86: Troubleshooting
English TROUBLESHOOTING The following table indicates the possible error or alarm causes which may lead to a partial or total arrest of the vending machine. The following is reported for each cause: • associated code, reported in the error LOG; •... -
Page 87: Coffee Grounds Drawer
English Cause Error Code Effect Notes / Recommended Intervention MDB slave error detected Warning only Warning report only in the LOG. Slow coffee boiler warm-up Vending machine out of service Check the coffee boiler (connections, thermostats) Credit Manager warning Warning only The credit management system has overcome a possible blocking condition (credit watch-dog enabling). -
Page 88: Storage - Disposal
English STORAGE - DISPOSAL 12.1 Location Change Should the vending machine be positioned in another site it is necessary to carry out the following operations: • unplug the vending machine; • Empty the instant product containers and the coffee bean hopper •... -
Page 89: Instructions For End Of Operational Life Disposal
English INSTRUCTIONS FOR END OF OPERATIONAL LIFE DISPOSAL INFORMATION FOR THE USER in compliance with art. 13 of the Italian Legislative Decree dated 25 July 2005, no. 151 "Implementation of the directives 2002/95/EC, 2002/96/EC and 2003/108/EC on the restriction of the use of certain hazardous substances in electrical and electronic equipment, as well as waste disposal".