Table of Contents
Advertisement
Quick Links
Advertisement
Table of Contents

Subscribe to Our Youtube Channel
Related Manuals for Sherwood RX-773


Summary of Contents for Sherwood RX-773
- Page 2 INPORTANT SAFETY INSTRUCTIONS 1. Read these instructions. 11. Only use attachments accessories specified by the 2. Keep these instructions. manufacturer. 3. Heed all warnings. 12. Use only with the cart, stand, tripod, bracket, or table 4. Follow all instructions. specified by the manufacturer, or sold with the 5.
-
Page 3: Introduction
Introduction READ THIS BEFORE OPERATING YOUR UNIT This symbol is intended to alert the user to the presence of uninsulated "dangerous voltage" within the product's enclosure that may be of sufficient magnitude to constitute a risk of electric shock to persons. CAUTION : TO REDUCE THE RISK OF ELECTRIC SHOCK, DO This symbol is intended to alert the user to the presence of... -
Page 4: Table Of Contents
CONTENTS IMPORTANT SAFETY INSTRUCTIONS ......................... 2 Introduction • READ THIS BEFORE OPERATING YOUR UNIT ........................ 3 System Connections ................................ 5 Front Panel Controls ..............................10 Universal Remote Controls ............................12 • OPERATING COMPONENTS WITH REMOTE CONTROL ....................14 • REMOTE CONTROL OPERATION RANGE ........................14 •... -
Page 5: System Connections
System Connections • Please be certain that this unit is unplugged from the AC outlet before making any connections. • Be sure to observe the color coding when connecting audio, video and speaker cords. • Make connections firmly and correctly. If not, it can cause loss of sound, noise or damage to the receiver. CONNECTING ANTENNAS •... - Page 6 CONNECTING AUDIO COMPONENTS • The AUX jacks may also be connected to an additional component. • The DVD jacks may be connected to AUDIO OUT jacks of video components such as DVD player, TV, etc. • The TAPE IN/OUT jacks can be connected to audio recording equipment such as a tape deck, an MD recorder, etc. Note : Do not connect the turntable with MC type cartridge directly.
- Page 7 CONNECTING SPEAKERS • You can connect up to four pairs of speakers to this receiver and select the various combinations of speakers according to Speaker A Speaker C your tastes. (Main room) (Main room/ROOM2) • The speakers C and D can be installed in the main room as Right Left Right...
- Page 8 CONNECTING XM (only for North America) • Connect the XM terminal to the XM Mini-Tuner system (sold separately). • Position the XM Mini-Tuner system near a south-facing window to receive the best signal. When making connections, also refer to the operating instructions of the XM Mini-Tuner system.
- Page 9 For more information on future upgrades and external control, visit the Sherwood web site at www.sherwoodamerica.com or contact your dealer. • Do not disconnect the connection cable while updating the operating software, etc.
-
Page 10: Front Panel Controls
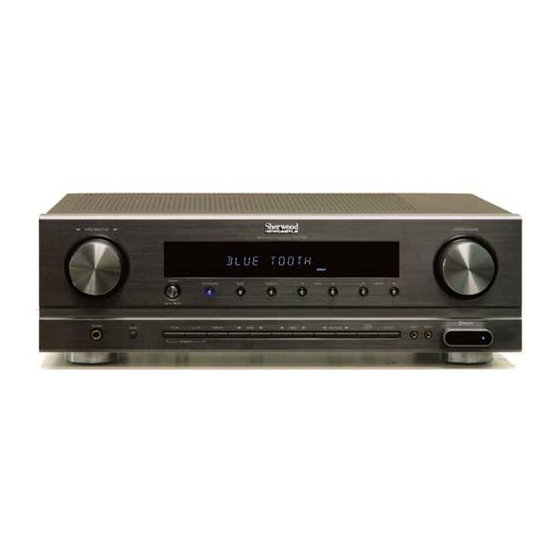
Front Panel Controls 11 9 15 18 1. POWER switch 13. TREBLE UP/DOWN (▶/◀) buttons 2. POWER ON/STANDBY button/indicator 14. BALANCE UP/DOWN (▶/◀) buttons 3. INPUT SELECTOR knob 15. TONE DIRECT button 4. BAND button 16. TONE DIRECT indicator 5. MASTER VOLUME knob 17. - Page 11 (For information on Sherwood Audio Receiver BT-R7, contact your dealer.) • The Bluetooth word mark and logos are registered trademarks owned by Bluetooth SIG, Inc. and any use of such marks by Sherwood is under license. Other trademarks and trade names are those of their respective owners.
-
Page 12: Universal Remote Controls
Universal Remote Controls This universal remote control can operate not only this receiver but also most popular brands of audio and video components such as CD players, tape decks, TVs, cable boxes, VCRs, DVD players, satellite receivers, etc. • To operate 7 components other than this receiver , you should enter the setup code for each component. (For details, refer to “USING FUNCTIONS OF REMOTE CONTROL”... - Page 13 FUNCTION TABLE of the NUMBERED BUTTONS. Notes : • Some functions for each component may not be available or may work differently. • Depending on other kinds of components that are available for each DEVICE button, some functions may not be available or may work differently, too.
-
Page 14: Operating Components With Remote Control
OPERATING COMPONENTS WITH REMOTE CONTROL REMOTE CONTROL OPERATION RANGE In case that this remote control emits the infrared beams Enter the setup code for each component other than • Use the remote control within a range of about 7 meters this receiver. -
Page 15: Using Functions Of Remote Control
"DVD" for Sherwood DVD player, "AUX" for Sherwood tape deck and "TV" for Sherwood TV respectively as its factory setup code. So, you don’t need to enter its code for each Sherwood component except in such a case that its code does not work. - Page 16 Operate the component using the corresponding Repeat the above steps 1 to 6 for each of your other function buttons. components. • If any of buttons fails to operate as they should, start from the step 1 again to enter the correct setup code. Note : •...
- Page 17 Programming the commands from other remote controls (LEARNING mode) • If the setup codes are not available for your component or you want to program a missing or special function into one button of a device, the learning function enables this remote control to learn the commands from other remote controls. Place this remote control and other remote control While "SEL"...
- Page 18 Erasing the programmed command from one button Perform the steps 3 and 4 in "Entering a setup code" While "SEL" is flickering, press the button for the procedure on page 15 to select the deleting mode command you want to erase. ("DELETE").
- Page 19 Programming a macro function • The macro function enables you to program a series of button operations(up to 15) on this remote control into a single button. • You can store up to three separate macro command sequences into "M1", "M2" and "M3" buttons. Perform the steps 3 and 4 in "Entering a setup code"...
- Page 20 Operating a macro function • Aim the remote control at the REMOTE SENSORs of the components to be controlled and press the MACRO button you want. Example : When pressing "M1" button. Notes: • The codes programmed into a MACRO button will be transmitted at an interval of 0.5 seconds.
- Page 21 Continued While the punch-through mode is displayed, repeat the To program punch-through functions under other above steps 2 and 3 to program other punch-through master device mode, repeat the above steps 1 to 4. function under the same master device mode. Operating a punch-through function •...
- Page 22 Continued While the device is displayed, press the CURSOR While the punch-through mode is displayed, repeat the UP(▲)/DOWN(▼) buttons to select the one punch- above steps 2 and 3 to erase other punch-through through deleting mode ("DELETE"), then press the function under the same master device mode.
- Page 23 Changing the transmission signal • This remote control can emit not only the infrared beams which the conventional remote control uses but also the RF(Radio Frequency) beams which are stronger than those. • When you want to control this receiver from longer distance even if there are obstacles such as walls, furniture, etc. in the way, change the transmission signal into "RF"(Radio Frequency).
-
Page 24: Operations
Operations LISTENING TO A PROGRAM SOURCE Before operation • Push the POWER switch. • This unit enters the standby mode and the POWER ON/STANDBY button lights up amber. This means that the receiver is not disconnected from the AC mains and a small amount of current is retained to support the operation readiness. - Page 25 Select the desired input source. To mute the sound. • Each time the INPUT SELECTOR knob is rotated, the • “MUTE” flickers. input source is changed as follows: • To resume the previous sound level, press this button again. TUNER PHONO AUX 2 AUX 1...
- Page 26 Adjusting the tone (bass and treble) Adjust the tone as desired. To listen to a program source without the tone effect. When adjusting the bass • “TON DIR” is displayed, “DIRECT” lights up and the sound that bypasses the tone circuitry will be heard. When adjusting the treble •...
-
Page 27: Listening To Radio Broadcasts
LISTENING TO RADIO BROADCASTS Auto tuning Select the tuner and then the desired band. Press the TUNING UP(▲, +)/ DOWN(▼, -) buttons for more than 0.5 second. • The tuner will now search until a station of sufficient strength has been found. The display shows the tuned frequency and "TUNED". - Page 28 Manual presetting • You can store up to 30 preferred stations in the memory. Tune in the desired station with auto or manual tuning. Press the (ENTER/)MEMORY button. • "MEM" is flickering for 5 seconds. Select the desired preset number (1~30) and press the (ENTER/)MEMORY button. •...
-
Page 29: Listening To Xm Satellite Radio
XM Satellite Radio (only for North America) • This receiver is the XM Ready® receiver. You can receive XM Satellite Radio® by connecting to the XM Mini-Tuner system (sold separately) and subscribing the XM service. About XM Satellite Radio for U.S. & Canadian products XM Satellite Radio offers an extraordinary variety of commercial-free music, plus the best in sports, news, talk and entertainment. - Page 30 Channel search • In the XM mode, press the TUNING UP(▲, +)/DOWN(▼, -) buttons repeatedly to select the desired channel. Direct search • Direct search is useful when you already know the channel number. In the XM mode, select the direct search mode. While displaying "XM - - -", select the desired channel number with pressing the NUMERIC (0 ~ 9) buttons.
- Page 31 Continued While displaying the selected category, select the desired channel. Presetting channels Preset search • You can store up to 30 preferred channels in the memory. • In the XM mode, select the desired preset channel. Select the desired channel with preforming channel search, direct search or category search.
-
Page 32: Recording
RECORDING • The volume, tone(bass, treble) and balance settings have no effect on the recording signals. • When you select tuner, BT-IN, CD, DVD, AUX, AUX 1, AUX 2 or PHONO as a recording source, recording can be made on the TAPE. -
Page 33: Room2 Playback
ROOM2 PLAYBACK • This function allows enjoying one source in the main room and playing another in a different room at the same time. • Even when this receiver enters the standby mode, in such a case that "R2" is dimly lit, meaning only the ROOM2 circuitry operates, the ROOM2 source can be played independently. - Page 34 Start play on the component related to the ROOM2 To mute the sound. source. Adjust the ROOM2 volume to a comfortable listening level. • While the mute function for ROOM2 is operating, "R2" is flickering. • To resume the previous sound level, press this button again.
-
Page 35: Troubleshooting Guide
Troubleshooting Guide If a fault occurs, run through the table below before taking your receiver for repair. If the fault persists, attempt to solve it by switching the receiver off and on again. If this fails to resolve the situation, consult with your dealer. -
Page 36: Specifications
Specifications AMPLIFIER SECTION • Power output, 8Ω, THD 0.7 %, 20 Hz~20 kHz, only a pair of speakers driven | 2 X 100 W • Total harmonic distortion, 8Ω, @ -3dB, 20 Hz~20 kHz | 0.05 % • Intermodulation distortion 60 Hz : 7 kHz= 4 : 1 SMPTE, 8Ω, 100 W 0.03 % •... -
Page 37: Setup Code Table
Setup Code Table Goldstar Admiral Gradiente Aiko Grunpy Akai Hallmark Alaron Harley Davidson Ambassador Harman/Kardon America Action Havard Ampro Hitachi Anam Infinity Audiovox Inteq Baysonic Belcor Bell & Howell Bradford Brockwood Broksonic Kenwood Candle Carnivale Logik Carver Luxman Celebrity Cineral Citizen Magnavox Concerto... - Page 38 Sansui Bell & Howell Sanyo Brocksonic Scimitsu Broksonic Scotch Scott Calix Sears Canon Carver Semivox Cineral Semp Citizen Sharp Colt Sherwood Craig Shogun Curtis Mathes Signature Cybernex Sony Daewoo Soundesign Denon Squareview Dynatech Starlite Electrohome Supreme Electrophonic Sylvania Emerex Symphonic...
- Page 39 Headquarter Realistic Hitachi Runco Jensen Samsung Sanky Kenwood Sansui Kodak Sanyo Scott Lloyd’s Sears Logik Semp Sharp MGN Technology Shintom Shogun Magnasonic Singer Magnavox Sony Magnin Syvania Marantz Symphonic Marta Matsushita Tatung Memorex Teac Technics Minolta Teknika Mitsubishi Thomas Motorola Toshiba Multitech Totevision...
- Page 40 Comtronics Contec Kenwood Cox Digital Megavox Digicable Mitsubishi Eagle Onkyo Eastern Panasonic Echostar Philips Electricord Pioneer Emerson Proscan Everquest Focus Samsung Garrard Sherwood Gemini Eeneral Electric Sony General Instrument Technics Theta Digital Toshiba Golden Channel Yamaha GoldStar Zenith Goodmind Hamlin...
- Page 41 General Electric Recoton General Instrument Regal Regency Hitachi Rembrandt Rodgers Hughes Runco Samsung Hughes Net.Sys Scientific Atlanta Jerrold Seren Service Electric Megnavox Shaw Megavox Sherwood Memorex Sigecom Mitsubishi Signal Motorola Signature Next Level SL Marx Panasonic Sony Pansat Sprucer Philips Starcom...
- Page 42 Primestar AUX-CD AMP Proscan Radio Shack Aiwa Carver Realistic Curtis Mathes Denon Samsung Harman/Kardon Sherwood Linn Megavox Sony Marantz Star Choice Panasonic Toshiba Philips Uniden Pioneer Zenith Sony Technics Wards AUX-MD Yamaha Sherwood 035 (for Mini Disc) AUX-HOME AUTOMATION AUX-LD...
- Page 43 Burmester Wards California Audio Lab Yamaha Carver Yorx Denon Emerson Fisher Garrard Genexxa Harman/Kardon Hitachi Kenwood Krell Linn Megavox Marantz Mission Nikko Onkyo Opimus Panasonic Parasound Philips Pioneer Proton Quasar Realistic Rotel Sansui Sanyo Scott Sears Sharp Sherwood Sony Soundesign...
Need help?
Do you have a question about the RX-773 and is the answer not in the manual?
Questions and answers