
Subscribe to Our Youtube Channel
Related Manuals for Farm King Allied 80 Series


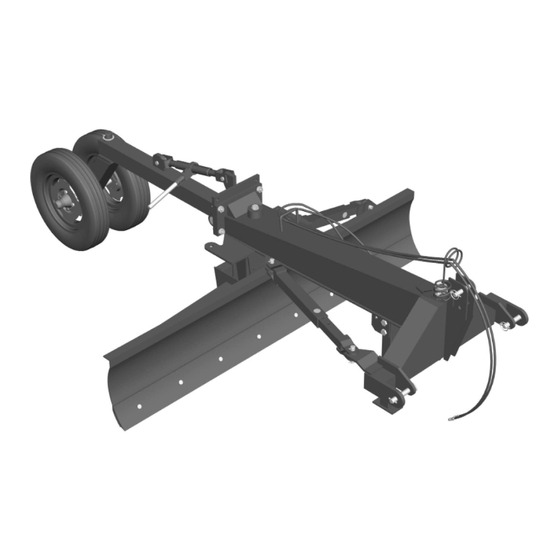
Summary of Contents for Farm King Allied 80 Series
- Page 1 OPERATOR AND PARTS MANUAL 80 Series Rear Blade 8084, 8096, 80108 Models 122019 FK345...
-
Page 3: Table Of Contents
80 Series Rear Blade Table Of Contents Manufacturer’s Statement: For technical reasons, Buhler Industries Inc. reserves the right to modify machinery design and specifications provided herein without any preliminary notice. Information provided herein is of descriptive nature. Performance quality may depend on soil fertility, applied agricultural techniques, weather conditions, and other factors. - Page 4 80 Series Rear Blade Linkages, hydraulic cylinders Gauge Wheel Gauge Wheel - Ratchet Jack Gauge Wheel - Hydraulic Cylinder SPECIFICATIONS AND SHIPPING KIT NUMBERS Specifications Hardware Torque Values WARRANTY Warranty...
-
Page 5: Warranty Registration Form
Customer / Owner Signature: Remove this Warranty Registration Form from the Operator And Parts Manual. Make two copies of the form. Send original Warranty Registration Form to Farm King. Give one copy to the customer and the dealer will keep one copy. - Page 6 Warranty Registration Form - 80 Series Rear Blade...
-
Page 7: Introduction
Farm King equipment. READ AND UNDERSTAND THIS OPERATOR AND PARTS MANUAL BEFORE OPERATING YOUR FARM KING EQUIPMENT. If you have any questions, see your Farm King dealer. This manual may illustrate options and accessories not installed on your Farm King equipment. - Page 8 Introduction - 80 Series Rear Blade...
-
Page 9: Owner's Information
Operator And Parts Manual and thoroughly understand safe and correct operating, installation and maintenance procedures. Farm King is continually working to improve its products. Farm King reserves the right to make any improvements or changes as deemed practical... -
Page 10: Equipment Identification
Introduction - 80 Series Rear Blade EQUIPMENT IDENTIFICATION GAUGE WHEELS HEIGHT ADJUST LINK TILT ADJUST LINK ANGLE ADJUST LINK KING OFFSET ADJUST LINK BLADE CUTTING HYDRAULIC THREE-POINT EDGE CONNECTIONS MOUNTS... -
Page 11: Safety
Safety - 80 Series Rear Blade SAFETY SAFETY INSTRUCTIONS Safety Rules Transport Safety Machine Requirements And Capabilities DECAL IDENTIFICATION SAFETY SIGN-OFF FORM... - Page 12 Safety - 80 Series Rear Blade...
-
Page 13: Safety Instructions
It may also be used to alert against unsafe practices. • The written instructions from Farm King include the Warranty Registration, Dealer Inspection Report, Operator And Parts Manual and decals. • Check the rules and regulations at your location. -
Page 14: Safety Rules
Safety - 80 Series Rear Blade Safety Rules Transport Safety • Read and follow instructions in this manual and the • Do not exceed 20 mph (32 kph). Reduce speed on tractor’s operators manual before operating. rough roads and surfaces. •... -
Page 15: Machine Requirements And Capabilities
Safety - 80 Series Rear Blade Machine Requirements And Capabilities • Stop the machine and engage the parking brake. Install blocks in front of and behind the rear tires of the machine. Install blocks underneath and support the equipment securely before working under raised equipment. -
Page 16: Decal Identification
Safety - 80 Series Rear Blade DECAL IDENTIFICATION 9 Ft. Model 80108 PN: 815033 (Item 2) Figure 3 Identification [Figure 3]: ALLIED 16.5” x 3.8” PN: 815035 (Item 1) 7 Ft. Model 8084 PN: 815031 (Item 2) 8 Ft. Model 8096 PN: 815032 (Item 2) -
Page 17: Safety Sign-Off Form
Untrained operators and failure to follow instructions can cause injury or death. Farm King follows the general Safety Standards specified by the American Society of Agricultural and Biological Engineers (ASABE) and the Occupational Safety and Health Administration (OSHA). Anyone who will be operating and / or maintaining the equipment must read and clearly understand ALL Safety, Operating and Maintenance information presented in this manual. - Page 18 Safety - 80 Series Rear Blade...
-
Page 19: Assembly
Assembly - 80 Series Rear Blade ASSEMBLY COMPONENT UNLOADING AND IDENTIFICATION BLADE LINKAGES GAUGE WHEEL (OPTIONAL) - Page 20 Assembly - 80 Series Rear Blade...
-
Page 21: Component Unloading And Identification
NOTE: If any components are damaged, missing or replacement parts are required, contact your Farm King Dealer. AVOID INJURY OR DEATH Assemble the equipment in the following order Keep fingers and hands out of pinch points when on a flat and level surface: assembling the equipment. -
Page 22: Blade
Assembly - 80 Series Rear Blade BLADE Figure 4 Figure 5 Remove the blade pin (Item 1) and the clamp plate Slide the arm weldment (Item 1) onto the king (Item 2) from the blade assembly [Figure 4]. pin assembly. The arm weldment is held in place using a 3-1/2”... -
Page 23: Linkages
Assembly - 80 Series Rear Blade LINKAGES Mechanical Linkages Connect the mechanical links or optional hydraulic Linkage cylinders. Inner Sleeve Outer Sleeve [Figure 7] Figure 6 Angle 905426 905425 Tilt 902707 902706 Offset 902483 902482 Hydraulic Cylinders Linkage Cylinder [Figure 7] Angle 3”... -
Page 24: Gauge Wheel (Optional)
Assembly - 80 Series Rear Blade GAUGE WHEEL (OPTIONAL) Figure 9 Figure 8 Mount the wheels (Item 1) to the hubs on the axle. Attach each wheel using four wheel bolts [Figure Grease the bushings at both ends of the arm and at the wheel hubs. -
Page 25: Operation
Operation - 80 Series Rear Blade OPERATION GENERAL INFORMATION Pre - Operation Checklist TRACTOR REQUIREMENTS ENTERING AND LEAVING THE OPERATOR’S POSITION CONNECTING TO TRACTOR Connecting Hydraulic Hoses Disconnecting Hydraulic Hoses FIELD OPERATION TRANSPORTING... - Page 26 Operation - 80 Series Rear Blade...
-
Page 27: General Information Pre - Operation Checklist
Operation - 80 Series Rear Blade GENERAL INFORMATION TRACTOR REQUIREMENTS The following information will depend on tilling Pre - Operation Checklist depth, soil type, field speed, etc. Before operating the equipment for the first time The tractor must be equipped with a Cat. 2 three and each time thereafter, check the following point hitch. -
Page 28: Entering And Leaving The Operator's Position
Operation - 80 Series Rear Blade ENTERING AND LEAVING THE CONNECTING TO TRACTOR OPERATOR’S POSITION Always inspect the tractor’s three point hitch and equipment three point mounts before connecting (see the tractor’s owner’s manual). IMPORTANT Move the tractor drawbar into the storage position or remove (if necessary) to prevent interference with operation (see the tractor’s operator’s manual for the correct procedure). -
Page 29: Connecting Hydraulic Hoses
Operation - 80 Series Rear Blade Connecting Hydraulic Hoses Disconnecting Hydraulic Hoses The Rear Blade may be equipped with the Release pressure and pull the male couplers out following hydraulic options, if applicable. to disconnect. Hydraulic offset adjustment WARNING 2. Hydraulic angle adjustment 3. -
Page 30: Field Operation
Operation - 80 Series Rear Blade FIELD OPERATION Figure 10 Move to the operator’s position, start the engine and release the parking brake. Move the tractor / equipment to the starting point of the work area. The rear blade may only be operated in the forward direction. -
Page 31: Transporting
Operation - 80 Series Rear Blade TRANSPORTING Figure 12 With the equipment connected to the tractor, enter the operator’s position. Fully raise the equipment using the tractor’s three point hitch during transporting. Comply with federal, state, local and provincial laws regarding the transport of farm equipment on public roadways. - Page 32 Operation - 80 Series Rear Blade...
-
Page 33: Maintenance
Maintenance - 80 Series Rear Blade MAINTENANCE SERVICE SCHEDULE CHART LUBRICATION Recommendations Locations DECAL IDENTIFICATION Procedure STORAGE AND RETURN TO SERVICE Storage Return To Service CLEANING... - Page 34 Maintenance - 80 Series Rear Blade...
-
Page 35: Service Schedule Chart
Maintenance - 80 Series Rear Blade SERVICE SCHEDULE CHART WARNING Instructions are necessary before operating or servicing equipment. Read and understand the Operator And Parts Manual and safety signs (decals) on equipment. Follow warnings and instructions in the manuals when making repairs, adjustments or servicing. Check for correct function after adjustments, repairs or service. - Page 36 Maintenance - 80 Series Rear Blade Troubleshooting Chart Problem Cause SERVICE PROCEDURES Exceeding recommended Slow down to recommended operating speed. operating speed. Ground clearing is uneven. Reduce travel speed and Hard / compacted soil. make additional passes. Machine buckles. Blade cutting too deep. Adjust depth.
-
Page 37: Lubrication
Maintenance - 80 Series Rear Blade LUBRICATION Locations Recommendations IMPORTANT Always use a good quality multi-purpose / lithium base grease when lubricating the equipment. • Always use a hand-held grease gun. Fluid such engine oil, hydraulic fluid, • Clean fitting before greasing, to avoid injecting dirt coolants, grease, etc. -
Page 38: Decal Identification
Maintenance - 80 Series Rear Blade DECAL IDENTIFICATION Figure 14 Procedure Remove all portions of the damaged safety sign (decal). Thoroughly clean the area with glass cleaner. Removing all adhesive residue. Allow the area to dry completely before installing the new safety sign (decal). Position the safety sign (decal) in the correct location. -
Page 39: Storage And Return To Service
Maintenance - 80 Series Rear Blade STORAGE AND RETURN TO SERVICE CLEANING Keep equipment free of any debris. Remove Storage buildup from blade. Sometimes it may be necessary to store the Clean monthly (or every 50 hours of use). equipment for an extended period of time. Below is a list of items to perform before storage. - Page 40 Maintenance - 80 Series Rear Blade...
-
Page 41: Parts Identification
Parts Identification - 80 Series Rear Blade PARTS IDENTIFICATION GENERAL PARTS INFORMATION BLADE, ARM, HITCH LINKAGES, HYDRAULIC CYLINDERS GAUGE WHEEL GAUGE WHEEL - RATCHET JACK GAUGE WHEEL - HYDRAULIC CYLINDER... -
Page 42: General Parts Information
Parts Identification - 80 Series Rear Blade GENERAL PARTS INFORMATION The parts identification section list descriptions, part numbers and quantities for all North American Base Model 80 Series Rear Blades. Contact your Farm King dealer for additional parts information. BLADE, ARM, HITCH 26 17 23 24... - Page 43 Parts Identification - 80 Series Rear Blade ITEM PART NUMBER DESCRIPTION QTY. 820406 7' BLADE ASSEMBLY - 8084 MODEL 820407 8' BLADE ASSEMBLY - 8096 MODEL 820408 9' BLADE ASSEMBLY - 80108 MODEL 967522 7' CUTTING EDGE - 8084 MODEL 967523 8' CUTTING EDGE - 8096 MODEL 900457...
-
Page 44: Linkages, Hydraulic Cylinders
Parts Identification - 80 Series Rear Blade LINKAGES, HYDRAULIC CYLINDERS ANGLE OFFSET TILT TILT OFFSET ANGLE... - Page 45 Parts Identification - 80 Series Rear Blade ITEM PART NUMBER DESCRIPTION QTY. 902482 MECHANICAL LINK - OUTER SLEEVE - OFFSET 902483 MECHANICAL LINK - INNER SLEEVE - OFFSET 905426 MECHANICAL LINK - INNER SLEEVE - ANGLE 905425 MECHANICAL LINK - OUTER SLEEVE - ANGLE 902707 MECHANICAL LINK - INNER SLEEVE - TILT 902706...
-
Page 46: Gauge Wheel
Parts Identification - 80 Series Rear Blade GAUGE WHEEL 12 13 F0333... - Page 47 Parts Identification - 80 Series Rear Blade ITEM PART NUMBER DESCRIPTION QTY. 906740 AXLE WELDMENT 906733 ARM WELDMENT 906729 WHEEL KIT BRACKET WELDMENT 906735 SWIVEL PIN WELDMENT F7110 WHEEL-15" X 4.5" X 4 BOLT 820415 5/16" X 3" COTTER PIN (PL) 967153 2"...
-
Page 48: Gauge Wheel - Ratchet Jack
Parts Identification - 80 Series Rear Blade GAUGE WHEEL - RATCHET JACK F1654 ITEM PART NUMBER DESCRIPTION QTY. 967499 RATCHET JACK... -
Page 49: Gauge Wheel - Hydraulic Cylinder
Parts Identification - 80 Series Rear Blade GAUGE WHEEL - HYDRAULIC CYLINDER F1655 ITEM PART NUMBER DESCRIPTION QTY. 24803M WHEEL KIT CYLINDER 3-1/2" X 8" X3906 SEAL KIT 816843 156" HYDRAULIC HOSE 811414 ELBOW 3/4 MORB X 3/4 MJIC 103753 1"... - Page 50 Parts Identification - 80 Series Rear Blade...
-
Page 51: Specifications And Shipping Kit Numbers
Specifications And Shipping Kit Numbers - 80 Series Rear Blade SPECIFICATIONS AND SHIPPING KIT NUMBERS SPECIFICATIONS HARDWARE TORQUE VALUES Metric Chart Imperial Chart... - Page 52 Specifications And Shipping Kit Numbers - 80 Series Rear Blade...
-
Page 53: Specifications
Specifications And Shipping Kit Numbers - 80 Series Rear Blade SPECIFICATIONS Model 8084 8096 80108 Width 7 FT. 8 FT. 9 FT. Maximum HP 80 HP 3-Point Hitch Cat. II Moldboard Thickness 1/4 IN. Boxed Reinforcement Moldboard Width 84 IN. 96 IN. - Page 54 Specifications And Shipping Kit Numbers - 80 Series Rear Blade Qty. Bundle Description Optional Mechanical / Hyd. Linkages F6680 Tilt Adjust - Mechanical Link F6683 Tilt Adjust - Hyd. Cylinder C/W Hoses F6718 Angle Adjust - Mechanical Link F6684 Angle Adjust - Hyd. Cylinder C/W Hoses F6682 Offset Adjust - Mechanical Link F6685...
-
Page 55: Hardware Torque Values
Specifications And Shipping Kit Numbers - 80 Series Rear Blade HARDWARE TORQUE VALUES Metric Chart NOTE: Do not use the values listed in the charts if a different torque value or tightening procedure is specified in this manual for a specific application. Torque values listed are for general use only. Use the following charts to determine the correct torque when checking, adjusting or replacing hardware. - Page 56 Specifications And Shipping Kit Numbers - 80 Series Rear Blade HARDWARE TORQUE VALUES (CONT’D) Imperial Chart NOTE: Do not use the values listed in the charts if a different torque value or tightening procedure is specified in this manual for a specific application. Torque values listed are for general use only. Use the following charts to determine the correct torque when checking, adjusting or replacing hardware.
-
Page 57: Warranty
Warranty - 80 Series Rear Blade WARRANTY WARRANTY... - Page 58 Warranty - 80 Series Rear Blade...
-
Page 59: Warranty
If Farm King determines that it will pay labor costs for warranty work, it will do so by issuing a credit to the dealer’s or distributor’s account. - Page 60 Warranty - 80 Series Rear Blade Warranty Requirements To be covered by warranty, each new product must be registered with Farm King within thirty (30) days of delivery to original retail purchaser. If the customer decides to purchase replacement components before the warranty disposition of such components is determined, Farm King will bill the customer for such components and then credit the replacement invoice for those components later determined to be covered by this limited warranty.
- Page 62 www.farm-king.com 1330 43rd Street North Fargo, ND, 58102 E-mail: info@buhler.com www.farm-king.com Equipment shown is subject to change without notice. ©2019 Buhler Trading Inc. Printed in USA TSX:BUI a division of Buhler Industries Inc.
Need help?
Do you have a question about the Allied 80 Series and is the answer not in the manual?
Questions and answers