Table of Contents
Advertisement
Quick Links
Advertisement
Table of Contents

Related Manuals for Asus SL1200


Summary of Contents for Asus SL1200
- Page 1 ¤ SL1200 Internet Security Router User Manual E2923/ November 2006...
- Page 2 (including damages for loss of profits, loss of business, loss of use or data, interruption of business and the like), even if ASUS has been advised of the possibility of such damages arising from any defect or error in this manual or product.
- Page 3 Technical support General support (tel): +1-502-995-0883 Online support: http://support.asus.com Notebook (tel): +1-510-739-3777 x5110 Support (fax): +1-502-933-8713 ASUS COMPUTER GmbH (Germany & Austria) Company address: Harkort Str. 25, D-40880 Ratingen, Germany General (tel): +49-2102-95990 Web site address: www.asus.com.de General (fax): +49-2102-959911 Online contact: www.asus.com.de/sales...
- Page 4 Notices Federal Communications Commission Statement This device complies with Part 15 of the FCC Rules. Operation is subject to the following two conditions: • This device may not cause harmful interference, and • This device must accept any interference received including interference that may cause undesired operation.
-
Page 5: Table Of Contents
1.3 Using this manual .............2 1.1.1 Notational conventions ..........2 1.1.2 Typographical conventions ......... 2 1.1.3 Symbols ..............2 2 Getting to Know the ASUS SL1200 ......3 2.1 Package contents .............3 2.2 Front Panel ...............3 2.3 Rear Panel ...............3 2.4 Major Features ............5 2.4.1 Firewall Features ............ - Page 6 3.3 Part 3 — Quick Configuration of ASUS SL1200 ............18 3.3.1 Buttons Used in Setup Wizard ........ 18 3.3.2 Setting up the ASUS SL1200 ........19 3.3.3 Testing Your Setup ..........25 3.3.4 Default Router Settings .......... 25 4 Using the Configuration Manager ......27 4.1 Log into the Configuration Manager ......27...
- Page 7 6 Configuring WAN Settings ........41 6.1 WAN Connection Mode ...........41 6.2 PPoE ...............42 6.2.1 WAN PPoE Configuration Parameters ........42 6.2.2 Configuring PPoE for WAN ........43 6.3 Dynamic IP ..............44 6.3.1 WAN Dynamic IP Configuration Parameters ........44 6.3.2 Configuring Dynamic IP for WAN ......44 6.4 Static IP ..............45 6.4.1 WAN Static IP Configuration Parameters ........
- Page 8 8 Configuring DDNS ..........54 8.1 DDNS Configuration Parameters ......55 8.2 Access DDNS Configuration Page ......56 8.3 Configuring HTTP DDNS Client ......57 9 Configuring Firewall/NAT Settings ....57 9.1 Firewall Overview ............58 9.1.1 Stateful Packet Inspection ........58 9.1.2 Denial of Service (DoS) Protection ......59 9.1.3 Firewall and Access Control List (ACL) ....
- Page 9 9.4.2 Access Outbound ACL Rule Configuration Page (Firewall -> Outbound ACL) ......69 9.4.3 Add Outbound ACL Rules ........75 9.4.4 Modify Outbound ACL Rules ........76 9.4.5 Delete Outbound ACL Rules ........76 9.4.6 Display Outbound ACL Rules ........77 9.5 Configuring URL Filters ...........77 9.5.1 URL Filter Configuration Parameters ......
- Page 10 10.3 Establishing VPN Connection Using Automatic Keying ........111 10.3.1 Add a Rule for VPN Connection Using Pre-shared Key ..........111 10.3.2 Modify VPN Rules ..........113 10.3.3 Delete VPN Rules ..........113 10.3.4 View VPN Rules ............114 10.4 VPN Statistics ............114 10.5 VPN Connection Examples .........115 10.5.1 Intranet Scenario - firewall + VPN and no NAT for VPN traffic ..........116 10.5.2 Extranet Scenario - firewall + static NAT +...
- Page 11 11.7 Upgrade Firmware ..........138 11.8 Reset the Internet Security Router ......139 11.9 Logout Configuration Manager ......140 12 ALG Configuration ..........141 13 IP Addresses, Network Masks, and Subnets .............145 13.1 IP Addresses ............145 13.1.1 Structure of an IP Address ........145 13.2 Network classes ..........146 13.3 Subnet masks ............145 14 Troubleshooting ..........148...
- Page 12 Configuration Page ............21 Figure 3.7 Setup Wizard - LAN Configuration Page ............. 22 Figure 3.8 Setup Wizard - DHCP Server Configuration Page ............. 22 Figure 3.9 Setup Wizard - WAN PPoE Configuration Page ............. 23 Figure 3.10 Setup Wizard - WAN Dynamic IP Configuration Page ...........
- Page 13 to Four Globally Valid IP Addresses ......61 Figure 9.2 Dynamic NAT - Four Private IP Addresses Mapped to Three Valid IP Addresses ......62 Figure 9.3 Dynamic NAT - PC-A can get a NAT Association after PC-B is disconnected ......... 62 Figure 9.4 Map Any Internal PCs to a Single Global IP Address ..........
- Page 14 Figure 9.21 Network Diagram for NAT Pool Example ....96 Figure 9.22 NAT Pool Example - Create a Static NAT Pool ............97 Figure 9.23 NAT Pool Example - Associate a NAT Pool to an ACL Rule ......... 97 Figure 9.24 Time Range Configuration Page ......99 Figure 9.25 Time Range Example - Create a Time Range ............
- Page 15 on ISR1 ..............126 Figure 10.12 Extranet Example - VPN Policy Configuration on ISR2 .......... 126 Figure 10.13 Extranet Example - Outgoing NAT Pool Configuration on ISR2 .......... 127 Figure 10.14 Extranet Example - Incoming NAT Pool Configuration on ISR2 .......... 127 Figure 10.15 Extranet Example - Outbound ACL Rule on ISR2 ..............
- Page 16 List of Tables Table 2.1 Front Panel Label and LEDs .......... 3 Table 2.2 Rear Panel Connections ..........4 Table 2.3 DoS Attacks ..............8 Table 2.4 VPN Features ............... 10 Table 3.1 LED Indicators ............. 13 Table 3.2 Default Settings Summary ........... 26 Table 4.1 Description of Commonly Used Buttons and Icons ............
- Page 17 Table 10.2 Pre-configured IKE proposals in the router ....104 Table 10.3 Pre-configured IPSec proposals in the router ..105 Table 10.4 VPN Tunnel Configuration Parameter ...... 107 Table 10.5 VPN Statistics ............114 Table 10.6 Outbound Un-translated Firewall Rule for VPN Packets on ISR1 ..........119 Table 10.7 Inbound Un-translated Firewall Rule for VPN Packets on ISR1 ..........119...
-
Page 18: Introduction
ADSL or cable modem. This user manual will show you how to set up the ASUS SL1200, and how to customize its configuration to get the most out of this product. 1.1 Features 10/100Base-T Ethernet router to provide Internet connectivity to all •... -
Page 19: Using This Manual
• Acronyms are defined the first time they appear in the text and in the Glossary. • The ASUS SL1200 is simply referred to as “the router” or "Internet Security Router". • The terms LAN and network are used interchangeably to refer to a group of Ethernet-connected computers at one site. -
Page 20: Getting To Know The Asus Sl1200
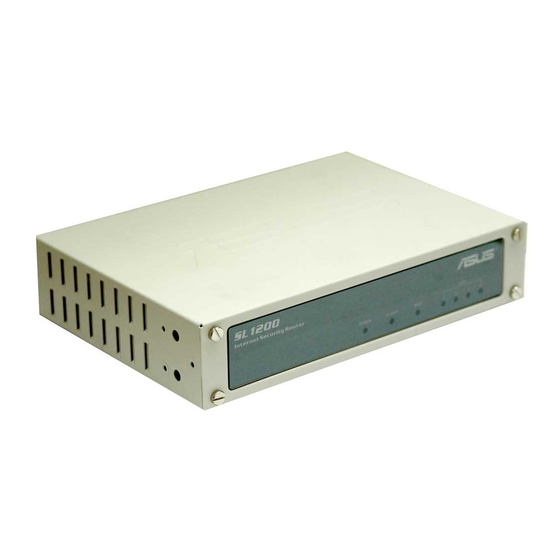
Chapter 1 - Introduction 2 Getting to Know the ASUS SL1200 2.1 Package contents Check your ASUS SL1200 package for these items: • ASUS SL1200 • Power adapter • Ethernet cable (“straight-through” type) • (Optional) console port cable (RJ-45) If any of the above items is damaged or missing, contact your retailer. -
Page 21: Rear Panel
RJ-45 serial port for console management Connects to your WAN device such as ADSL or cable modem. P1-P4 Connects to the device to your PC’s Ethernet port, or to the uplink port on your LAN’s hub/switch using the cable provided ASUS SL1200... -
Page 22: Major Features
Chapter 1 - Introduction 2.4 Major Features 2.4.1 Firewall Features The ASUS SL1200's firewall provides features to protect your network from being attacked and to prevent your network from being used as the springboard for attacks. The firewall features are: •... - Page 23 It can be used as the first line of defense in the network to block inbound packets of specific types from ever reaching the protected network. The router's firewall’s ACL methodology supports: • Filtering based on destination and source IP address, port number and protocol ASUS SL1200...
- Page 24 • User group based filters for remote access 2.4.1.2 Stateful Packet Inspection The ASUS SL1200's firewall uses “stateful packet inspection” that extracts state-related information required for the security decision from the packet and maintains this information for evaluating subsequent connection attempts.
-
Page 25: Table 2.3 Dos Attacks
2.4.1.6 Log and Alerts Events in the network, which could affect its security, are recorded in the router's System log file. Event details are recorded in the WebTrends Enhanced Log Format (WELF) format so that statistical tools can be ASUS SL1200... -
Page 26: Vpn
These risks include the lack of confidentiality of data being sent and the authenticity of the identities of the parties involved in the exchange of data. The VPN supported in the ASUS SL1200 is intended to resolve these issues. -
Page 27: Table 2.4 Vpn Features
Mode configuration for IKE Main Mode, Aggressive Mode, Quick Mode Site-to-Site VPN connection is an alternative WAN infrastructure that is used to connect branch offices, home offices, or business partners’ sites to all or portions of a company’s network. ASUS SL1200... -
Page 28: Quick Start
Chapter 3 - Quick Start Guide 3 Quick Start Guide This chapter provides the basic instructions for connecting the ASUS SL1200 to a computer or a LAN and to the Internet. • Part 1 provides instructions to set up the hardware. -
Page 29: Attach The Power Adapter
Connect the AC power adapter to the POWER connector on the back of the device and plug in the adapter to a wall outlet or a power strip. 3.1.4 Turning on the ASUS SL1200 After plugging in, the router will be automatically turn on. Turn on your ADSL or cable modem, your computer(s), and any LAN devices such as hubs or switches. -
Page 30: Part 2 - Configuring Your Computers
3.2.1 Before you begin By default, the ASUS SL1200 automatically assigns all required Internet settings to your PCs. You need only to configure the PCs to accept the information when it is assigned. -
Page 31: Windows Xp Pcs
4. If Internet Protocol (TCP/IP) does not display as an installed component, click <Install>. 5. In the Select Network Component Type dialog box, select Protocol, and then click <Add>. 6. Select Internet Protocol (TCP/IP) in the Network Protocols list, and then click <OK>. ASUS SL1200... -
Page 32: Windows ® 95, 98, And Me Pcs
You may be prompted to install files from your Windows 95, 98 or Me installation CD or other media. Follow the instructions to install the files. 6. If prompted, click <OK> to restart your computer with the new settings. ASUS SL1200... -
Page 33: Windows Nt 4.0 Workstations
You may be prompted to install files from your Windows NT installation CD or other media. Follow the instructions to install the files. After all files are installed, a window displays to inform you that a TCP/IP service called DHCP can be set up to dynamically assign IP information. ASUS SL1200... -
Page 34: Assigning Statics Ip Addresses To Your Pcs
In some cases, you may want to assign IP addresses to some or all of your PCs directly (often called “statically”), rather than allowing the ASUS SL1200 to assign them. This option may be desirable (but not required) if: •... -
Page 35: Part 3 - Quick Configuration Of Asus Sl1200
3.3 Part 3 — Quick Configuration of ASUS SL1200 This section gives instructions on logging in into the Configuration Manager, a preinstalled web-based program in the ASUS SL1200. This section also gives instructions on configuring the basic settings for your Internet connection. -
Page 36: Setting Up The Asus Sl1200
Chapter 3 - Quick Start Guide 3.3.2 Setting up the ASUS SL1200 To set up the router 1. Before accessing the Configuration Manager in the router, make sure that the HTTP proxy setting is disabled in your browser. In IE, click Tools ->... -
Page 37: Figure 3.3 Setup Wizard Home Page
Figure 3.4. Change the password, if desired. Otherwise, click <Next> to proceed to the next page. When changing passwords, make sure you enter the existing login password in the Login Password field, make any changes for the passwords and click <Apply> to save the changes. ASUS SL1200... -
Page 38: Figure 3.5 Setup Wizard - System Information
There is no need to set the date and time here unless you do not have access to a time server and you want the router to maintain its own time. ASUS SL1200... -
Page 39: Figure 3.7 Setup Wizard - Lan
Internet connection is working. Click <Next> to proceed to the next configuration page. Figure 3.7. Setup Wizard- LAN IP Configuration Page Figure 3.8. Setup Wizard - DHCP Server Configuration Page ASUS SL1200... -
Page 40: Figure 3.10 Setup Wizard - Wan Dynamic Ip
Connection Mode drop- down list (see Figure 3.9): PPPoE, Dynamic, and Static. Figure 3.9. Setup Wizard - WAN PPPoE Configuration Page Figure 3.10. Setup Wizard - WAN Dynamic IP Configuration Page ASUS SL1200... -
Page 41: Figure 3.11 Setup Wizard - Wan Static Ip
If you had previously registered a specific MAC address with your ISP for Internet connections, enter the registered MAC address and make sure you check the MAC cloning check box. • Click <Apply> to save the dynamic IP settings. Figure 3.11. Setup Wizard - WAN Static IP Configuration Page ASUS SL1200... -
Page 42: Testing Your Setup
ADSL or cable modem connection to access the Internet. To test the Internet connection, open your web browser, and type the URL of any external website (such as http://www.asus.com). The LED labeled WAN should be blinking rapidly and may appear solid as the device connects to the site. -
Page 43: Table 3.2 Default Settings Summary
192.168.1.1 LAN port on the Internet Security Router. The LAN port connects subnet mask: 255.255.255.0 the device to your Ethernet network. Typically, you will not need to change this address. See section 5.1 LAN IP Address for instructions. ASUS SL1200... -
Page 44: Using The Configuration Manager
Chapter 4 - Using the Configuration Manager 4 Using the Configuration Manager The ASUS SL1200 includes a preinstalled program called the Configuration Manager, which provides an interface to the software installed on the device. It enables you to configure the device settings to meet the needs of your network. -
Page 45: Figure 4.1 Configuration Manager Login Screen
The first time you log into the program, use these default settings: Default User Name: admin Default Password: admin You can change the password at any time. See section 11.2 Change the Login Password. The Setup Wizard page displays each time you log into the program. See Figure 4.3. ASUS SL1200... -
Page 46: Functional Layout
• To contract a group of related menus: click on the – sign next to the “opened” file folder icon, • To open a specific configuration page, click on the file icons next to the desired menu item. ASUS SL1200... -
Page 47: Commonly Used Buttons And Icons
Launches the online help for the current topic in a separate browser window. Help is available from any main topic page. Redisplays the current page with updated statistics or set- tings. Selects the item for editing. Deletes the selected item. ASUS SL1200... -
Page 48: Configuration Manager's Home Page
4.4 Overview of System Configuration To view the overall system configuration, log into Configuration Manager as administrator, and then click the System Info menu. Figure 4.4 shows the information available in the System Info page. Figure 4.4. System Information Page ASUS SL1200... -
Page 49: Configuring Lan Settings
You can change the default to reflect the set of IP addresses that you want to use with your network. The Internet Security Router itself can function as a DHCP server for your LAN computers, as described in section 5.2.3 Configuring DHCP Server, but not for its own LAN port. ASUS SL1200... -
Page 50: Lan Ip Configuration Parameters
1. Log into Configuration Manager as administrator, and then click the LAN menu. When the submenus of LAN Configuration displays, click IP submenu to display the IP Address configuration page as shown in Figure 5.1. Figure 5.1. LAN IP Address Configuration Page ASUS SL1200... -
Page 51: Dynamic Host Control Protocol (Dhcp)
Internet session. It monitors, collects, and redistributes the addresses as needed. On a DHCP-enabled network, the IP information is assigned dynamically rather than statically. A DHCP client can be assigned a different address from the pool each time it reconnects to the network. ASUS SL1200... -
Page 52: Why Use A Dhcp
You must first configure your PCs to accept DHCP informa- tion assigned by a DHCP server. 1. Log into Configuration Manager as administrator. Click LAN -> DHCP. The DHCP Configuration page displays as shown in Figure 5.2. Figure 5.2. DHCP Configuration Page ASUS SL1200... -
Page 53: Table 5.2 Dhcp Configuration Parameters
Server IP Address (op- computers that receive IP addresses from the DHCP IP tional) address pool. You do not need to enter this information un- less your network has WINS servers. 3. Click <Apply> to save the DHCP server configurations. ASUS SL1200... -
Page 54: Viewing Current Dhcp
A hardware ID of the device that leases an IP address from the DHCP server. Assigned IP Address The address that has been leased from the pool. IP Address Expired on The time when the leased address is to be terminated. ASUS SL1200... -
Page 55: Dns
LAN port IP address, the device performs DNS relay, as described in the next section. If you specify the actual DNS addresses on the PCs or in the DHCP pool, the DNS relay feature is not used. ASUS SL1200... -
Page 56: Configuration Page
LAN IP address. Similarly, if after enabling DNS relay, you specify a DNS address (other than the LAN IP address) in a DHCP pool or statically on a PC, then that address will be used instead of the DNS relay address. ASUS SL1200... -
Page 57: Viewing Lan Statistics
ISP to diagnose network and Internet data transmission problems. To view LAN IP statistics, click Statistics on the LAN submenu. Figure 5.3 shows the LAN Statistics page. Figure 5.3. LAN Statistics Page To display the updated statistics since you opened the page, click <Refresh>. ASUS SL1200... -
Page 58: Configuring Wan Settings
The router supports three modes of WAN connection – PPPoE, dynamic IP, and static IP. You may select your ISP's required connection mode from the Connection Mode drop-down list in WAN Configuration page as shown in Figure 6.1. Figure 6.1. WAN PPPoE Configuration Page ASUS SL1200... -
Page 59: Ppoe
Enter the value for the “Echo Interval” at which you want the router to send out some data periodically to your ISP. The default value of “Echo Interval” is 60 seconds. ASUS SL1200... -
Page 60: Configuring Ppoe For Wan
You will see a summary of the WAN configuration at the bottom half of the configuration page. The default gateway address is not shown immediately. Click on the WAN menu to open the WAN configuration page again. ASUS SL1200... -
Page 61: Dynamic Ip
You will see a summary of the WAN configuration at the bottom half of the configuration page. The default gateway address is not shown immediately, click on the WAN menu to open the WAN configuration page again. ASUS SL1200... -
Page 62: Static Ip
Gateway IP address provided by your ISP. It must be in the same subnet as the WAN on the router. Primary/ Secondary You must at least enter the IP address of the primary DNS server. Secondary DNS is optional. ASUS SL1200... -
Page 63: Configuring Static Ip For Wan
5. Enter the IP address of the primary DNS server. This information should be provided by your ISP. Secondary DNS server is optional. 6. Click <Apply> to save the static IP settings. You will see a summary of the WAN configuration at the bottom half of the configuration page. ASUS SL1200... -
Page 64: Viewing Wan Statistics
Internet data transmission problems. To view WAN IP statistics, click Statistics on the WAN submenu. Figure 6.4 shows the WAN Statistics page. Figure 6.4. WAN Statistics Page To see the updated statistics since you opened the page, simply click <Refresh>. ASUS SL1200... -
Page 65: Configuring Routes
You may need to define routes if your home setup includes two or more networks or subnets, if you connect to two or more ISP services, or if you connect to a remote corporate LAN. ASUS SL1200... -
Page 66: Dynamic Routing Using Routing Information Protocol (Rip)
Three options are available: Version 1, Version 2, and Both. The default setting is Version 2. RIP Version (Receive) Select the RIP version for receiving the routing information. Three options are available: Version 1, Version 2, and Both. The default setting is Both. ASUS SL1200... -
Page 67: Configuring Rip
Figure 7.1. RIP Configuration 3. Select an interface from the drop-down list via which the routing information is to be exchanged. 4. To enable or disable RIP for the specified interface, click the Enable or Disable radio button. ASUS SL1200... -
Page 68: Static Routing
Indicates which parts of the destination address refer to the network and which parts refer to a computer on the network. The default route uses a netmask of 0.0.0.0. Refer to 13.3 Subnet masks for more details on network masks. Gateway IP Address Gateway IP address ASUS SL1200... -
Page 69: Adding A Static Route
Routing Table. 2. Click <Delete> to delete the selected route. Do not remove the route for default gateway unless you know what you are doing. Removing the default route will render the Internet unreachable. ASUS SL1200... -
Page 70: Figure 7.3 Routing Table
Figure 7.3. Routing Table The routing table displays a row for each existing route containing the IP address and the subnet mask of the destination network and the IP address of the gateway that forwards the traffic to the destination network. ASUS SL1200... -
Page 71: Configuring Ddns
DNS records dynamically. In this case, the service provider updates DNS records in the DNS. The router uses HTTP to trigger this update. The router supports HTTP DDNS update with the following service providers: • www.dyndns.org • www.zoneedit.com • www.dns-tokyo.jp ASUS SL1200... -
Page 72: Figure 8.1 Network Diagram For Http Ddns
Figure 8.1. Network Diagram for HTTP DDNS Whenever the IP address of the configured DDNS interface changes, DDNS update is sent to the specified DDNS service provider. The router should be configured with the DDNS username and password obtained from the DDNS service provider. ASUS SL1200... -
Page 73: Ddns Configuration Parameters
The DDNS Configuration page displays, as shown in Figure 8.2. When you open the DDNS Configuration page, a list of existing DDNS configuration is displayed at the bottom half of the configuration page such as those shown in Figure 8.2. ASUS SL1200... -
Page 74: Configuring Http Ddns Client
7. Enter the username and password provided by your DDNS service providers. 8. Click <Apply> to send a DNS update request to your DDNS service provider. The DNS update request will also be sent to your DDNS Service provider automatically whenever the WAN port status is changed. ASUS SL1200... -
Page 75: Configuring Firewall/Nat Settings
The firewall will open a “hole” to allow the packet to pass through if the state of the packet that belongs to an already established connection matches the state maintained by the stateful ASUS SL1200... -
Page 76: Denial Of Service (Dos) Protection
192.168.2.1, 192.168.2.1 will send an ICMP echo reply to 192.168.1.1. In the router, you do not need to create another inbound ACL rule because stateful packet inspection engine will remember the connection state and allows the ICMP echo reply to pass through the firewall. ASUS SL1200... -
Page 77: Default Acl Rules
NAT to conceal the true network address from privy eyes and provide a degree of security to the local network. The NAT modes supported are static NAT, dynamic NAT, NAPT, reverse static NAT, and reverse NAPT. ASUS SL1200... -
Page 78: Static (One To One) Nat
This means that a host will always use the same global valid IP address for all its outgoing traffic. Figure 9.1 Static NAT – Mapping Four Private IP Addresses to Four Globally Valid IP Addresses ASUS SL1200... -
Page 79: Dynamic Nat
For example, in Figure 9.3, PC B must disconnect from the Internet first to allow PC A to access Internet. Figure 9.2 Dynamic NAT – Four Figure 9.3 Dynamic NAT – PC-A can Private IP addresses Mapped to get a NAT association after PC-B is Three Valid IP Addresses disconnected ASUS SL1200... -
Page 80: Network Address And Port Translation (Napt) Or
Figure 9.4 NAPT – Map Any Internal PCs to a Single Global IP Address Figure 9.5 Reverse Static NAT – Map Figure 9.6 Reverse NAPT – Relayed a Global IP Address to An Internal Incoming Packets to the Internal Host Base on the Protocol, Port Number or IP Address ASUS SL1200... -
Page 81: Reverse Static Nat
Figure 9.7, you can control (allow or deny) incoming access to computers on your LAN. Options in this configuration page allow you to: • Add a rule, and set parameters for it • Modify an existing rule • Delete an existing rule • View configured ACL rules ASUS SL1200... -
Page 82: Inbound Acl Rule Configuration Parameters
Set a priority by specifying a number for its position in the list of rules: 1 (First) This number marks the highest priority. Other numbers Select other numbers to indicate the priority you wish to assign to the rule. ASUS SL1200... - Page 83 This option allows you to set the source port to which this rule should apply. Use the drop-down list to select one of the following options: Select this option if you want this rule to apply to all applications with an arbitrary source port number. ASUS SL1200...
- Page 84 Protocol This option allows you to select protocol type from a drop-down list. Available settings are All, TCP, UDP, ICMP, AH and ESP. If you select “service” for the destination port, this option will not be available. ASUS SL1200...
- Page 85 Click on the “Enable” or “Disable” radio button to enable or disable logging for this ACL rule. Click on the “Enable” radio button if you want the traffic to go through VPN. Otherwise, click on the “Disable” radio button. ASUS SL1200...
-
Page 86: Access Inbound Acl Rule Configuration
3. Set desired action (Allow or Deny) from the Action drop-down list. 4. Make changes to any or all of the following fields: source/destination IP, source/destination port, protocol, port mapping, time ranges, application filtering, log, and VPN. See Table 9.1 for explanation of these fields. ASUS SL1200... -
Page 87: Modify Inbound Acl Rules
1. Open the Outbound ACL Rule Configuration Page. See section 9.3.2 Access Inbound ACL Rule Configuration Page. 2. Click on the icon of the rule to be deleted in the inbound ACL table or select the rule number from the “ID” drop-down list. ASUS SL1200... -
Page 88: Configuring Outbound Acl Rules
Options in this configuration page allow you to: • Add a rule, and set parameters for it • Modify an existing rule • Delete an existing rule • View configured ACL rules Figure 9.9. Outbound ACL Configuration Page ASUS SL1200... -
Page 89: Outbound Acl Rule Configuration Parameters
This option allows you to include all the computers that are connected in an IP subnet. When this option is selected, the following fields become available for entry: Address Enter the appropriate IP address. Mask Enter the corresponding subnet mask. ASUS SL1200... - Page 90 Select this option if you want this rule to apply to all applications with anarbitrary destination port number. Single, Range Select any of these and enter details as described in the Source Port section above. ASUS SL1200...
- Page 91 Click on the “Enable” or “Disable” radio button to enable or disable logging for this ACL rule. Click on the “Enable” radio button if you want the traffic to go through VPN. Otherwise, click on the “Disable” radio button. ASUS SL1200...
-
Page 92: Access Outbound Acl Rule Configuration
Figure 9.10 shows how to create a rule to allow outbound HTTP traffic. This rule allows outbound HTTP traffic to be directed to any host on the external network for a host in your LAN w/ IP address 192.168.1.15. ASUS SL1200... -
Page 93: Modify Outbound Acl Rules
Outbound ACL Configuration page. 9.4.5 Delete Outbound ACL Rules To delete an outbound ACL rule 1. Open the Outbound ACL Rule Configuration Page. See section 9.4.2 Access Outbound ACL Rule Configuration Page. ASUS SL1200... -
Page 94: Display Outbound Acl Rules
Add New Click on this option to add a new URL filter rule. Rule Number Select a rule from the drop-down list to modify its attributes. Keyword Define a keyword that should not appear in the URL. ASUS SL1200... -
Page 95: Access Url Filter Configuration Page
2. Select Add New from the ID drop-down list. 3. Enter a keyword to the Keyword field. 4. Click on <Add> to create the URL Filter rule. The new rule will then be displayed in the URL Filter Configuration Summary table. ASUS SL1200... -
Page 96: Modify Url Filter Rules
If you don’t use a proxy server for your browser, this setting will be ignored. You must disable and then enable the firewall for this change to take effect. Refer to 11.1 Configure System Services on details of enabling and disabling firewall services. ASUS SL1200... -
Page 97: Configuring Advanced Firewall Features (Firewall -> Advanced)
IP protocol value and its corresponding port number. Denial of Service (DoS): Use this option to configure DoS • parameters. This option lists the default set of DoS attacks against which the router firewall provides protection. The next sections describe usage of these options. ASUS SL1200... -
Page 98: Configuring Self Access Rules
Select the direction from which the traffic will be allowed. From LAN Select Enable or Disable to allow or deny traffic from the LAN (internal network) to the router. From WAN Select Enable or Disable to allow or deny traffic from WAN (external network) to the router. ASUS SL1200... - Page 99 HTTP traffic from the WAN port (i.e. from the external network) to the Internet Security Router. 9.6.1.4 Modify a Self Access Rule To modify a Self Access rule 1. Open the Self Access Rule Configuration page. See section 9.6.1.2 Access Self Access Rule Configuration Page. ASUS SL1200...
-
Page 100: Configuring Service List
Services are a combination of Protocol and Port number. It is used in inbound and outbound ACL rule configuration. You may use Service Configuration Page to: • Add a service, and set parameters for it • Modify an existing service ASUS SL1200... -
Page 101: Figure 9.14 Service List Configuration Page
Advanced -> Service. The Service List Configuration page displays, as shown in Figure 9.14. When you open the Service List Configuration page, a list of existing configured services is also displayed at the bottom half of the configuration page such as those shown in Figure 9.14. ASUS SL1200... - Page 102 See Table 9.5 for explanation of these fields. 4. Click on <Modify> to modify this service. The new settings for this service will then be displayed in the service list table at the bottom half of the Service Configuration page. ASUS SL1200...
-
Page 103: Configuring Dos Settings
Internet attacks such as IP Spoofing, Ping of Death, Land Attack, Reassembly and SYN flooding. For a complete list of DoS protection provided by the Internet Security Router, see Table 2.3. 9.6.3.1 DoS Protection Configuration Parameters Table 9.6 describes the configuration parameters available for DoS Protection. ASUS SL1200... -
Page 104: Table 9.6 Dos Protection Configuration Parameters
Forged packets w/ valid sequence numbers can be used to gain trust from the receiving host. Attackers can then gain access to the compromised system. This attack affects only the TCP packets originated or terminated at the router. ASUS SL1200... - Page 105 This can be found if there are lots of packet loss, degradation in speed and if the following log message is generated very often:”fragment of size less than configured minimum fragment size detected”. ASUS SL1200...
-
Page 106: Figure 9.15 Dos Configuration Page
By default, most DoS protection against all supported attack types are enabled. Figure 9.15 shows the default configuration for DoS settings. You may check or un-check individual type of attack defense to disable or enable protection against that specific type of attack. Figure 9.15. DoS Configuration Page ASUS SL1200... -
Page 107: Firewall Policy List (Firewall -> Policy List)
This option allows you to include all the computers that are connected in an IP subnet. Subnet Address Enter the appropriate IP address. Subnet Mask Enter the corresponding mask. IP Address This option allows you to configure single IP address. IP Address Enter the IP Address. ASUS SL1200... -
Page 108: Figure 9.16 Ip Pool Configuration Page
If “Subnet” pool type is selected, enter subnet address and subnet mask. If IP Address pool type is selected, enter an IP adderss. 6. Click on <Add> to create the new IP Pool. The new IP Pool will then be displayed in the IP Pool list table. ASUS SL1200... -
Page 109: Figure 9.17 Network Diagram For Ip Pool Configuration
IP pool to be deleted in the IP Pool List table or select the IP pool from the IP Pool drop-down list. 3. Click on <Delete> to delete this IP pool. 9.7.1.6 IP Pool Example Figure 9.17. Network Diagram for IP Pool Configuration ASUS SL1200... -
Page 110: Figure 9.18 Ip Pool Example - Add Two Ip Pools
IP. However, it can be used to associate to destination IP as well. As shown in Figure 9.19, MISgroup1 is not allow to play the network game, Quake-II, at all times. Figure 9.19. IP Pool Example – Deny QUAKE-II Connection for MISgroup1 ASUS SL1200... -
Page 111: Configuring Nat Pool
(corporate LAN) machines to external (Internet) network. NAT IP Address Enter NAT IP address, for the overload. Interface Select this type of NAT to specify the Dynamic Interface whose IP address should be used fo subjecting traffic to NAT. ASUS SL1200... -
Page 112: Figure 9.20 Nat Pool Configuration Page
IP address assigned for the WAN port as the NAT IP address, select the Interface pool type. 6. Click on <Add> to create the new NAT pool. The new NAT pool will then be displayed in the NAT Pool List table. ASUS SL1200... -
Page 113: Figure 9.21 Network Diagram For Nat Pool Example
NAT pool from the NAT Pool drop-down list. 3. Click on <Delete> to delete this NAT pool. 9.7.2.6 NAT Pool Example Figure 9.21 shows the network diagram for this NAT pool example. Figure 9.21. Network Diagram for NAT Pool Example ASUS SL1200... -
Page 114: Figure 9.22. Nat Pool Example - Create A Static Nat Pool
2. Associate the NAT pool to an outbound ACL rule by selecting NAT Pool from the NAT type drop-down list and then choose an existing NAT pool from the NAT pool drop-down list. Figure 9.23. NAT Pool Example – Associate a NAT Pool to an ACL Rule ASUS SL1200... -
Page 115: Configuring Time Range
Schedule drop-down list Select “Add New Schedule” to add a new schedule or select an existing schedule from the drop-down list. Days of Week Set the days for the schedule. Time (hh:mm) Set the time windows for the schedule in hh:mm format. ASUS SL1200... -
Page 116: Figure 9.24 Time Range Configuration Page
4. Select Add New Schedule from the Schedule drop-down list. 5. Select Days of Week. For example, from Sunday to Saturday. 6. Enter day hours, For example, from 08:00 to 18:00. 7. Click on <Add> to create the new schedule. ASUS SL1200... - Page 117 Time Range from the Time Range drop-down list. 3. Select the Schedule from the drop-down list. 4. Click on <Delete> to delete this schedule. 9.7.3.7 Time Range Example 1. Create a time range – see Figure 9.22. ASUS SL1200...
-
Page 118: Figure 9.25. Time Range Example - Create A Time Range
2. Associate the time range to an outbound ACL rule by selecting an existing time range from the Time Range drop-down list. Figure 9.26 shows that MISgroup1 is denied FTP access during office hours. Figure 9.26. Time Range Example – Deny FTP Access for MISgroup1 During Office Hours ASUS SL1200... -
Page 119: Firewall Statistics (Firewall -> Statistics)
9.8 Firewall Statistics – Firewall -> Statistics The Firewall Statistics page displays details regarding the active connections. Figure 9.27 shows a sample firewall statistics for active connections. To see an updated statistics, click on <Refresh>. Figure 9.27. Firewall Active Connections Statistics ASUS SL1200... -
Page 120: Configuring Vpn
Multiple proposals can be specified for a connection. If you do not specify the proposal to be used for a connection, all the pre-configured proposals will be included for that connection. ASUS SL1200... -
Page 121: Table 10.2 Pre-Configured Ike Proposals In The Router
Keys 3des-sha1- ike- 3DES Pre-shared 3600 preshared- Keys 3des-md5- ike-pre- SHA-1 Pre-shared 3600 shareddes- Keys sha1-dh1 i k e - p r e - Pre-shared 3600 shareddes- Keys md5-dh1 ike- 3DES SHA-1 Pre-shared 3600 preshared- Keys 3des-sha1- ASUS SL1200... -
Page 122: Table 10.3 Pre-Configured Ipsec Proposals In The Router
Algorithm Algorithm ipsec-esp- 3DES SHA-1 75/3600 3des-sha1 ipsec-esp- 3DES 75/3600 3des-md5 ipsec-esp- SHA-1 75/3600 des-sha1 ipsec-esp- 75/3600 des-md5 ipsec-ah- SHA-1 75/3600 sha1 ipsec-ah- 75/3600 ipsec-esp- 3DES 75/3600 3des ipsec-esp- SHA-1 75/3600 ipsec- SHA-1 75/3600 esp-sha1 ipsec- 75/3600 esp-md5 ASUS SL1200... - Page 123 This chapter includes the procedure to configure the Access List through GUI: • Basic Access List Configuration • Access List using IKE • Advanced Access List Configuration • Access List using IKE ASUS SL1200...
-
Page 124: Vpn Tunnel Configuration Parameters
This option allows you to include all the computers that are connected in an IP subnet. The following fields become available when this option is selected: Subnet Address Specify the appropriate network address. Subnet Mask Enter the subnet mask. ASUS SL1200... - Page 125 IKE Mode Main mode and aggressive mode are supported. Click the proper radio button for the desired IKE mode. Preshared Key Enter the shared secret (this should match the secret key at the other end). ASUS SL1200...
- Page 126 IKE to automatically select one (among the set of IKE pro- posals) to communicate with its peer. However, if a specific proposal is required, then it can be chosen from the list. Life Time Enter the IKE security association life time in seconds, minutes, hours or days. ASUS SL1200...
- Page 127 However, enabling this option slows down the tunnel negotia- tion. Life Times Enter the life time of IPSec security association in seconds, minutes, hours or days and kilo bytes. Default value is 3600 seconds and 75000 kilo bytes. ASUS SL1200...
-
Page 128: Add A Rule For Vpn Connection
Tunnel. The VPN Tunnel Configuration page displays as shown in Figure 10.1. When you open the VPN Tunnel Configuration page, a list of existing rules for VPN connections are also displayed at the bottom half of the configuration page such as those shown in Figure 10.1. ASUS SL1200... -
Page 129: Figure 10.1. Vpn Tunnel Configuration Page - Pre-Shared Key Mode
VPN. 8. Click on <Add> to create the new VPN rule. The new VPN rule will then be displayed in the VPN Connection Status table at the bottom half of the VPN Configuration page. ASUS SL1200... -
Page 130: Modify Vpn Rules
VPN Connection Status table. 4. Click on <Delete> to delete this VPN rule. The VPN rule deleted will be removed from the VPN Connection Status table located at the bottom half of the same configuration page. ASUS SL1200... -
Page 131: View Vpn Rules
Total number of packets passed by VPN Partial Packets Total count of partial packets Packets Currently Reassembled Number of partial packets currently being reassembled Non-First Fragments Currently in Number of non-first fragments currently in the the Engine engine ASUS SL1200... - Page 132 Total Inbound AH SAs Number of inbound AH SA’s since the system has started Total Outbound AH SAs Number of outbound AH SA’s since the system has started IKE SA IPSec SA Figure 10.2 shows all the parameters available for VPN connections. To see an updated statistics, click on <Refresh>. ASUS SL1200...
-
Page 133: Vpn Connection Examples
Configure each of the router for the Intranet scenario using the following steps: • Configure VPN connection rules. • Configure Firewall access rules to allow inbound and outbound VPN traffic. • Configure a Firewall self rule to allow IKE packets into the router ASUS SL1200... -
Page 134: Figure 10.3 Typical Intranet Network Diagram
ADSL or cable modem is not required if the two networks are connected via Ethernet connections.The setting of each configuration step is illustrated in a figure. For instructions on configuration of each step, refer to the next section for details. Figure 10.3. Typical Intranet Network Diagram ASUS SL1200... -
Page 135: Figure 10.4. Intranet Vpn Policy Configuration On Isr1
55.255.0 to 192.168.1.0/255.255.255.0 without any NAT. Table 10.6 and Table 10.7 provide the parameters to be configured for the outbound and inbound Firewall rule fields. For a general description on configuring any inbound/outbound Firewall rule, refer to sections 9.3 and 9.4. ASUS SL1200... -
Page 136: Table 10.6. Outbound Un-Translated Firewall Rule For Vpn Packets On Isr1
ID 1001. Table 10.7. Inbound Un-translated Firewall Rule for VPN Packets on ISR1 Field Value Source IP Type Subnet Address 192.168.2.0 Mask 255.255.255.0 Destination IP Type Subnet Address 192.168.1.0 Mask 255.255.255.0 None Action Allow Enable ASUS SL1200... -
Page 137: Figure 10.5. Intranet Vpn Policy Configuration On Isr2
255.255.0 to 192.168.2.0/255.255.255.0 without any NAT. Table 10.8 and Table 10.9 provide the parameters to be configured for the outbound and inbound Firewall rule fields. For a general description on configuring any inbound/outbound Firewall rule, refer to sections 9.3 and 9.4. ASUS SL1200... -
Page 138: Able 10.8 Outbound Un-Translated Firewall Rule For Vpn Packets On Isr1
ID 1001. Table 10.9. Inbound Un-translated Firewall Rule for VPN Packets on ISR1 Field Value Source IP Type Subnet Address 192.168.1.0 Mask 255.255.255.0 Destination IP Type Subnet Address 192.168.2.0 Mask 255.255.255.0 None Action Allow Enable ASUS SL1200... -
Page 139: Vpn For Vpn Traffic
To avoid routing problems in such scenario, network IP addresses must be mapped to different ones: • Network 192.168.1.0/255.255.255.0 behind ISR1 is translated to 192.168.11.0/255.255.255.0 before VPN processing. • Network 192.168.1.0/255.255.255.0 behind ISR2 is translated to 192.168.12.0/255.255.255.0 before VPN processing. ASUS SL1200... - Page 140 2. Configure DHCP pool with IP addresses from 192.168.1.10 to 192.168.1.110 on ISR2. 3. Configure WAN interface of ISR2 for IP address 123.1.1.123. 4. Add a default route on ISR2 with gateway as 212.1.1.212. 5. Save the configuration. ASUS SL1200...
-
Page 141: Figure 10.7. Extranet Example -Vpn Policy Configuration On Isr1
Figure 10.7. Extranet Example –VPN Policy Configuration on ISR1 Step 2: Configure Static NAT Pools 1. Configure outgoing static NAT pool (static-NAT) for translating addresses in range 192.168.1.1-192.168.1.254 to 192.168.11.1-192.16 8.11.254 Figure 10.8. Extranet Example – Outgoing NAT Pool Configuration on ISR1 ASUS SL1200... -
Page 142: Figure 10.9 Extranet Example - Incoming Nat Pool Configuration On Isr1
Figure 10.10. Extranet Example – Outbound ACL Rule on ISR1 2. Configure inbound Firewall rules to map the destination IP address of inbound packets from 192.168.11.x range to 192.168.1.x (defined by Incoming_NAT pool) range after the packet is processed by VPN. ASUS SL1200... -
Page 143: Figure 10.12 Extranet Example - Vpn Policy Configuration On Isr2
Refer to the section 10.3 Establish VPN Connection Using Automatic Keying to configure VPN policies on ISR2 using automatic keying with the following addresses: 1. Use 192.168.12.0/255.255.255.0 as Local Secure Group 2. Use 192.168.11.0/255.255.255.0 as Remote Secure Group Figure 10.12. Extranet Example –VPN Policy Configuration on ISR2 ASUS SL1200... -
Page 144: Figure 10.13 Extranet Example - Outgoing Nat Pool Configuration On Isr2
Figure 10.14. Extranet Example – Incoming NAT Pool Configuration on ISR2 Step 3: Configure Extranet rules 1. Configure outbound Firewall rules to map the source IP address of outbound packets from 192.168.1.x range to 192.168.12.x (defined by Outgoing_NAT pool) range before sending the packet to VPN. ASUS SL1200... -
Page 145: Figure 10.16 Extranet Example - Inbound Acl Rule
Figure 10.15. Extranet Example – Outbound ACL Rule on ISR2 2. Configure inbound Firewall rules to map the destination IP address of inbound packets from 192.168.12.x range to 192.168.1.x range after the packet is processed by VPN. Figure 10.16. Extranet Example – Inbound ACL Rule on ISR2 ASUS SL1200... - Page 146 If any of the network addresses is not correctly configured, correct the parameters and apply the configuration. • Local and remote network addresses may not be configured correctly. The network addresses used in VPN connection rule are 192.168.11.0/255.255.255.0 and 192.168.12.0/255.255.255.0 ASUS SL1200...
-
Page 147: System Management
Management -> System Services. The System Services Configuration page displays, as shown in Figure 11.1. 2. Click on the corresponding Enable or Disable radio button to enable or disable the desired services. 3. Click on <Apply> to save the changes. ASUS SL1200... -
Page 148: Change The Login Password
This username and password is only used for logging into the Configuration Manager; it is not the same as the login password you may use to connect to your ISP. Figure 11.2. Password Configuration Page ASUS SL1200... -
Page 149: Modify System Information
(where this device is located), and contact person information for this device. All fields allow only alphanumeric characters. When you are done entering system specific information, click <Apply> to save the changes. Figure 11.3. System Information Configuration Page ASUS SL1200... -
Page 150: Setup Date And Time
To view the updated system date and time 1. Log into Configuration Manager as administrator. Click System Man- agement -> Date/Time Setup. The Date/Time Configuration page displaysas shown in Figure 11.4. 2. Click <Apply> to see the updated system date and time. ASUS SL1200... -
Page 151: Snmp Setup
ASUS SL1200. Trap Address Trap message is sent by the ASUS SL1200 to tell the SNMP management station that something has happened on the router. This field is used to enter the IP address of the SNMP management station that is supposed to receive trap messages from the ASUS SL1200. -
Page 152: System Configuration Management
Management -> Configuration -> Default Settings. The Default Settings Configuration page displays, as shown in Figure 11.7. 2. Click <Apply> to set the system configuration back to factory default. The Internet Security Router will reboot to make the factory default configuration in effect. ASUS SL1200... -
Page 153: Backup System Configuration
11.6.2 Backup System Configuration To backup system configuration 1. Log into Configuration Manager as administrator. Click System Management -> Configuration -> Backup. The Backup Configuration page displays, as shown in Figure 11.8. 2. Click <Apply> to backup the system configuration. ASUS SL1200... -
Page 154: Restore System Configuration
Configuration File text box. Alternatively, you may click on <Browse> to search for the system configuration file on your hard drive. A window similar to the one shown in Figure 11.10 will pop up for you to select the configuration file to restore. ASUS SL1200... -
Page 155: Upgrade Firmware
To upgrade the image, follow this procedure: Figure 11.11. Firmware Upgrade Page 1. Log into Configuration Manager. Click System Management -> Firmware Upgrade. The Firmware Upgrade page displays as shown in Figure 11.11. ASUS SL1200... -
Page 156: Reset The Internet Security Router
Internet Security Router will reboot to make the new firmware in effect. 11.8 Reset the Internet Security Router To reset the Internet Security Router, click <Apply> in the Configuration Manager Reset page. Figure 11.12. Configuration Manager Reset Page ASUS SL1200... -
Page 157: Logout Configuration Manager
Manager Logout page. If you are using IE as your browser, a window similar to the one shown in Figure 11.14 will prompt for confirmation before closing your browser. Figure 11.13. Configuration Manager Logout Page Figure 11.14. Confirmation for Closing Browser (IE) ASUS SL1200... -
Page 158: Alg Configuration
Net2Phone UDP/6801 Net2Phone CommCenter Release 1.5.0 TCP/80 HTTP TCP/443 HTTPS UDP/53 CUSeeMe TCP/7648 CUSEEME CUSeeMe Version TCP/80 HTTP 5.0.0.043 UDP/53 Netmeeting TCP/1720 H323 UDP/53 Netmeeting with ILS TCP/1720 H323 Windows Netmeeting TCP/389 Version 3.01 UDP/53 Opengk Version 1.2.0 ASUS SL1200... - Page 159 Chats AOL Chat TCP/ 5190 AOL Instant Messenger Version TCP/80 HTTP 5.0.2938 UDP/53 ICQ Chat TCP /5191 ICQ_2000 ICQ 2000b TCP/80 HTTP NB: Application should be configured UDP/53 to use TCP/5191 TCP/ 6667 MIRC v6.02 TCP/80 HTTP UDP/53 ASUS SL1200...
- Page 160 TCP/80 HTTP UDP/53 Age Of TCP/47624 MSG1 Age of Empires, Empires(Gaming Gold Edition TCP/28801 MSN-ZONE Zone) TCP/443 HTTPS TCP/80 HTTP UDP/53 Diablo II TCP/4000 DIABLO-II DIABLO II (BATTLENET- TCP, BATTLENET-UDP) TCP/ 6112 BATTLE-NET-TCP, BATTLE-NET-UDP UDP/53 UDP/6112 Diablo II ASUS SL1200...
- Page 161 TCP/143 IMAP4 Outlook Express 5 UDP/53 SMTP TCP/25 SMTP Outlook Express 5 UDP/53 HTTPS / TLS / SSL TCP/443 HTTPS Internet Explorer 5 TCP/80 HTTP UDP/53 LDAP TCP/389 Openldap 2.0.25 UDP/53 NNTP TCP/119 NNTP Outlook Express 5 UDP/53 ASUS SL1200...
-
Page 162: Ip Addresses, Network Masks, And Subnets
The first part of every IP address contains the network ID, and the rest of the address contains the host ID. The length of the network ID depends on the network’s class (see following section). Table 13.1 shows the structure of an IP address. ASUS SL1200... -
Page 163: Network Classes
= 192-223: Class C (field1 values not shown are reserved for special uses) • A host ID can have any value except all fields set to 0 or all fields set to 255, as those values are reserved for special uses. ASUS SL1200... -
Page 164: Subnet Masks
ID bits, and thus no subnets. Such a mask is called a default subnet mask. These masks are: Class A: 255.0.0.0 Class B: 255.255.0.0 Class C: 255.255.255.0 These are called default because they are used when a network is initially configured, at which time it has no subnets. ASUS SL1200... -
Page 165: Troubleshooting
Make sure the PC and/or hub is turned on. Verify that your cable is sufficient for your network requirements. A 100 Mbit/sec network (100BaseTx) should use cables labeled Cat 5. 10Mbit/sec cables may tolerate lower quality cables. ASUS SL1200... - Page 166 Verify that the DNS server specified on the PCs is correct pages on the Internet. for your ISP, as discussed in the item above. You can use the ping utility, discussed in the following section, to test connectivity with your ISP’s DNS server. ASUS SL1200...
- Page 167 Verify that the PC’s IP address is defined as being on the same subnet as the IP address assigned to the LAN port on the Internet Security Router. Changes to Configuration Be sure to click on <Apply> button to save any changes. Manager are not being retained. ASUS SL1200...
-
Page 168: Diagnosing Problems Using Ip Utilities
Using the ping command, you can test whether the path to the switch is working (using the pre-configured default LAN IP address 192.168.1.1) or another address you assigned. You can also test whether access to the Internet is working by typing an external address, such as that for www.yahoo.com (216.115.108.243). If ASUS SL1200... -
Page 169: Nslookup
(>). At the prompt, type the name of the Internet address you are inter- ested in, such as www.absnews.com. The window displays the associate IP address you know. See Figure 14.2. C:\>nslookup Default Server: tp-dc-01.corpnet.asus Address: 192.168.28.68 > www.abcnews.com Server: tp-dc-01.corpnet.asus Address: 192.168.28.68... -
Page 170: Glossary
Short for “binary digit,” a bit is a number that can have two values, 0 or 1. See also binary. bits per second Class of Service. Defined in 802.1Q, the value range is from 0 to 7. broadcast To send data to all computers on a network. ASUS SL1200... - Page 171 2 muticast group. mask See network mask. Multicast To send data to a group of network devices. Mbps Abbreviation for Megabits per second, or one million bits per second. Network data rates are often expressed in Mbps. ASUS SL1200...
- Page 172 A set of rules governing the transmission of data. In order for a data transmission to work, both ends of the connec- tion have to follow the rules of the protocol. ASUS SL1200...
- Page 173 See also network mask. subnet mask A mask that defines a subnet. See also network mask. See TCP/IP. ASUS SL1200...
- Page 174 For Ethernet LANs, a higher grade called Category 3 (CAT 3) is used for 10BASE-T net- works, and an even higher grade called Category 5 (CAT 5) is used for 100BASE-T networks. See also 10BASE-T, 100BASE-T, Ethernet. ASUS SL1200...
- Page 175 Web site A computer on the Internet that distributes information to (and gets information from) remote users through web browsers. A web site typically consists of web pages that contain text, graphics, and hyperlinks. See also hyperlink, web page. ASUS SL1200...
Need help?
Do you have a question about the SL1200 and is the answer not in the manual?
Questions and answers