Advertisement
Quick Links
Quick
Start Guide
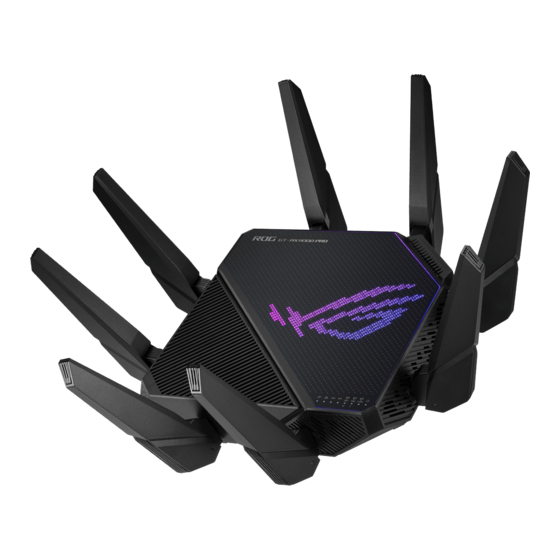
GT-AX11000 Pro
ROG Rapture GT-AX11000 Pro
Tri-band Gaming Router
Router Setup Steps
01
Prepare your Modem
Unplug the power of cable / DSL modem.
1
Unplug
If you are using DSL for internet,
you will need your username
/ password from your Internet
service provider (ISP) to properly
configure your router.
Install your Router
02
Plug the adapter into the DCIN port, and press the Power switch.
1
– Via app
[App] On your iOS or Android mobile device, go
3
to the app store, search for ASUS Router, and
download the app.
– Or via web browser
[Wired] Connect your PC to a LAN port at
3
the back side of the router using an additional
network cable.
10GE Port WAN Type Setup Steps
01
Set up 10GE WAN connection
– Under factory defaults
Connect to the 10GE port
Connect the modem to the 10GE port with a network
cable.
E19983_GT-AX11000_Pro_one-page_QSG.indd 1
E19983_GT-AX11000_Pro_one-page_QSG.indd 1
Connect your modem to the
2
WAN port at the back side of the
router with the network cable
provided.
Power on the modem. Plug
3
modem to the power outlet and
power on.
Modem back
[App] On your iOS or Android mobile device, tap Settings > WiFi,
4
connect to the default network SSID shown on the product label on
the back side of the router. Or scan the QR code on the product label
to connect the default network SSID.
[Wireless] Connect to the network with default SSID
shown on the product label on the back side of your
router "ASUS_XX".
Login and Connect
[ASUS Setup Wizard] Select "Manual Setting".
1
Hardware Explanations
USB
3.0 port
Reset button
USB
Power (DCIN) port
2.0 port
2.5 / 1GE WAN
(Internet) port
Power
switch
LAN ports
Specifications:
DC Power adapter
DC Output: +19V with max 3.42A current
DC Output: +19.5V with max 3.33A current
Operating Temperature 0~40
C
Storage
o
Operating Humidity
50~90%
Storage
Check the modem LED lights to ensure the connection is active.
4
Modem back
The power LED will light up when the hardware is ready.
2
5
* XX refers to the last two
_
digits of 2.4GHz MAC
address. You can find it
on the label on the back
of your ROG router.
[Wired / Wireless] Open a web browser.
4
You will be redirected to the ASUS Setup Wizard. If not, navigate to
http://router.asus.com.
Follow the instructions to
complete the setup.
[ASUS Setup Wizard] Select "10G Ethernet", then follow the instructions
2
to complete the setup of SSID and login information.
5GHz-2/ 5GHz-1/
2.4GHz
WiFi LED
2.5 / 1GE
LAN
10GE
WPS
10GE port
LED
LED
WAN (Internet)
LED
LED
WPS button
0~70
C
o
20~90%
Modem front
[App] Launch ASUS Router App and follow
the instructions to complete the setup.
Power LED
LED button (LED key)
3/4/2022 3:38:02 PM
3/4/2022 3:38:02 PM
Advertisement

Related Manuals for Asus GT-AX11000 Pro


Summary of Contents for Asus GT-AX11000 Pro
- Page 1 [Wired / Wireless] Open a web browser. shown on the product label on the back side of your the back side of the router using an additional You will be redirected to the ASUS Setup Wizard. If not, navigate to router “ASUS_XX”. network cable.
- Page 2 The radiated output power of the ASUS Wireless Device is below the Innovation, Science and Economic Development Canada radio frequency exposure limits. The ASUS Wireless Device should be used in such a manner such that the potential for human contact during normal operation is minimized.
Need help?
Do you have a question about the GT-AX11000 Pro and is the answer not in the manual?
Questions and answers