Table of Contents
Advertisement
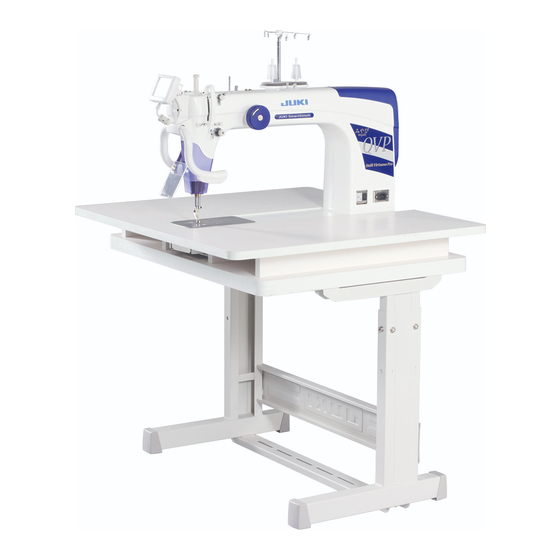
Lockstitch machine with a long arm and a thread trimmer
J-350QVP
INSTRUCTION MANUAL
Attention :
Congratulations on your purchase of a JUKI sewing machine.
Please be sure to read this Instruction Manual before operating the sewing machine
to ensure safe operation. Please be sure to keep the Instruction Manual so that you
can read it whenever necessary.
JUKI website: http://www.juki.com
EN
Advertisement
Table of Contents

Related Manuals for JUKI J-350QVP


Summary of Contents for JUKI J-350QVP
- Page 1 INSTRUCTION MANUAL Attention : Congratulations on your purchase of a JUKI sewing machine. Please be sure to read this Instruction Manual before operating the sewing machine to ensure safe operation. Please be sure to keep the Instruction Manual so that you can read it whenever necessary.
-
Page 2: Important Safety Instructions
In order to use your machine safely, be sure to read the Instruction Manual for the Sure Stitch for JUKI J-350QVP provided by Grace Company for how to install the machine on the frame, how to con- nect the stitch regulator and how to operate the machine. - Page 3 Congratulations on your purchase of a JUKI sewing machine. Please be sure to read safety precautions in "To use the sewing machine safely" in the Instruction Manual before use to fully understand the functions and operating procedures of the sewing ma- chine so as to use the sewing machine for a long time.
-
Page 4: How To Carry The Sewing Machine
HOW TO CARRY THE SEWING MACHINE How to take out the sewing machine CAUTION If you pull up the sewing machine by holding presser regulating screw section A, the sewing machine can break. In addition, be aware that the presser regulating screw can break if a physical impact is given to it. -
Page 5: Grounding Instructions
GROUNDING INSTRUCTIONS This product must be grounded. In the event of malfunction or breakdown, grounding provides a path of least resistance for electric current to reduce the risk of electric shock. This product is equipped with a cord having an equipment-ground- ing conductor and a grounding plug. -
Page 6: Table Of Contents
CONTENTS IMPORTANT SAFETY INSTRUCTIONS ...........1-2 HOW TO CARRY THE SEWING MACHINE ..........3 GROUNDING INSTRUCTIONS ..............4 Specifications ....................6 Accessories ....................6 Principal Parts ....................7 Name and Function of each component..........8-12 Winding the bobbin ................13-16 Attaching the needle ................... 16 Threading the machine ................17 Adjusting the thread tension ..............18-19 Presser foot lifting lever ................ -
Page 7: Specifications
Specifications Description Specification Sewing speed Max. 2,200 sti/min Needle bar stroke 35 mm Lift of presser foot 4.5 mm Needle GB 134R Lubricating oil New Defrix Oil No.1 Dimensions of sewing machine 22.2W x 46.0H x 73.0L (cm) Weight of sewing machine 26 kg Rated power supply / Power consumption AC100V-AC240V/1.2A-0.8A, 50/60Hz... -
Page 8: Principal Parts
Principal Parts 1. Thread trimmer retaining plate 2. Thread guide base 3. Presser foot pressure regulator 4. Thread tension dial 5. Lamp (built-in type) 6. Hand pulley 7. Bobbin winder 8. Spool holder disk 9. Bobbin winder side anchor 10. Bobbin presser 11. -
Page 9: Name And Function Of Each Component
Name and Function of each component Power cord Insert the electric power cord plug into the corresponding inlet. CAUTION Turn OFF the power switch before insertion/removal of any cords and any plugs. Perform these following steps before you are not using your sewing machine. - Page 10 Installing the thread stand ❷ CAUTION Turn OFF the power switch. Always must be disconnected plug from socket-outlet. 1. Insert bobbin winder spool holder disk ❷ into spool holder ❶ . Fix ❶ the former with setscrew ❸ . 2. Set bobbin winder seat ❹ and two anti-vibration cones ❺ on spool holder ❶...
- Page 11 Panel cord binding procedure CAUTION Turn OFF the power switch. Always must be disconnected plug from socket-outlet. ❶ Remove two setscrews from the presser regulator cover. ❶ Remove the presser regulator cover. ❷ Arrange the panel cord as illustrated in the figure. Then, secure the cable with a cable clip band.
- Page 12 Presser foot pressure regulator and its indicator Increase Decrease CAUTION Augmentation Diminution Aumenta Disminuye Turn OFF the power switch. Turning the presser foot pressure regulator adjusts the pressure of the presser foot. Adjusting the presser foot height ❶ CAUTION Turn OFF the power switch. ❷...
- Page 13 Adjusting the presser foot stroke It is possible to adjust the presser foot stroke. Remove presser regulator cover. Loosen nut ❶ . Shift block ❷ upward to increase the stroke, or downward to ❶ decrease it. ❷ To increase the stroke more, change the position of setscrew ❸...
-
Page 14: Winding The Bobbin
Winding the bobbin Thread stand thread guide spool cap ❸ in place ❺ Bobbin winder Bobbin winder side anchor ❶ ❹ Spool holder Positioning latches disk ❷ Thread guide base Bobbin presser Bobbin winding shaft Thread trimmer retaining plate Installing the thread guide. CAUTION Turn OFF the power switch. - Page 15 CAUTION Hook cover Keep hand away from the handwheel while the sewing machine is running. Turn OFF the power switch. Always must be disconnected plug from socket-outlet. Take out the bobbin case. Bring up the needle. Take out the bobbin case. Take out the bobbin from the bobbin case.
- Page 16 Upon completion of winding the bobbin. Return the bobbin presser to its home position. Take out the bobbin. Trim the thread with the thread cutting knife. Loading the bobbin into the bobbin case. Snap in the bobbin case latch, and put the bobbin into the bobbin case so that the bobbin runs clockwise.
-
Page 17: Attaching The Needle
Adjusting the thread guide base Good Thread unevenly wound around the bobbin would badly affect the bobbin thread tension. Loosen the screw of the thread guide base to make adjust- ment. Thicker toward downside Move up Loosens Thicker toward upside Move down Tightens Attaching the needle... -
Page 18: Threading The Machine
Threading the machine CAUTION Turn OFF the power switch before threading or passing thread. ❶ * Bring the thread take-up ❼ to the upper end of its stroke. ❷ Then, pass the thread through it. ❼ Thread take-up ❻ ❽ ❺... -
Page 19: Adjusting The Thread Tension
* Adjust the needle thread tension in accordance with the bobbin Increase Tension adjusting thread tension. screw * The bobbin case for the J-350QVP is an exclusive JUKI part. Please consult the JUKI dealers when you purchase it. Decrease Proper thread tension ·... -
Page 20: Presser Foot Lifting Lever
Tension controller No. 1 When tension nut No. 1 ❶ is turned to the right A, the remaining length of thread after thread trimming is shortened. When it is turned to the left B, the remaining length of thread is lengthened. ❶... -
Page 21: Setup And Operation
Setup and operation Basic Operating Procedures Stand-up type Select the operation usage on the LCD screen operation panel The J-350QVP is installed with JUKI SMART STITCH. Select the standing-use type by pressing button, or the sitting-use type by pressing button. - Page 22 <1. Stand-up type> ① Setting the maximum Sewing Speed You can set the maximum sewing speed in 5% increments. ② Setting the Stitch Mode ・ Cruise Stitch Mode When you press the "start button" on the right handlebar, the machine will sew at the minimum sewing speed that has been set.
- Page 23 ・ Manual Stitch Mode When you press the "start button" on the right handlebar, the machine will sew at the sewing speed that has been set. * Non-regulated mode. JSS does not function. ③ Trimming Thread When you press this button, Upper and lower threads are trimmed automatically.
- Page 24 When you press the "start button" on the right handlebar, the sewing machine will start sewing according to your settings. When you press the "start button" again, the sewing machine will stop sewing. CAUTION ・ Don’t put any heavy objects on the quilting frame and don’t put a load heavier than normal sewing.
- Page 25 <2. Sit-down type> ① Setting the maximum Sewing Speed You can set the maximum sewing speed in 5% increments. ② Setting the Stitch Mode ・ Cruise Stitch Mode When you depress the foot controller, the machine will sew at the minimum sewing speed that has been set. When you move the material, the machine will sew automatically with a sewing speed so that the set "Stitch per Inch"...
- Page 26 ③ Trimming Thread When you press this button, threads are trimmed automatically. ④ Auto Thread Trimming When the sewing machine is stopped, the automatic thread trimmer operates. ⑤ Operation and needle up/down operation When you press part A of the foot controller (pedal), the sewing machine will start sewing.
- Page 27 ・ Setting the Foot Pedal When you depress the pedal, the sewing machine runs. When you release the pedal, the sewing machine stops. ・ Kick ON/OFF function Using the on/off function. Depress and release pedal to activate JSS. Depress and release pedal again to deactivate JSS. * In the case the sewing machine is held in the stop state for a while after having set the KICK to the ON state, the KICK will be automatically turned OFF.
- Page 28 * The thread amount varies depending on the type of thread. Use the table for rough indication. J-350QVP Bobbin estimate counter (Rough indication) (Reference) Thread amount of a fully-wound bobbin This is the amount of thread fully wound on a bobbin when the bobbin estimate counter is used.
-
Page 29: Maintenance
Maintenance Replacing the blind seal CAUTION Turn OFF the power switch. Always must be disconnected plug from socket-outlet. 1. Remove two setscrews ❷ and ❸ from LED cover ❶ . Then, the LED cover can be lowered. 2. Rip off the stained blind seal. Put new blind seal ❹ in place. ❸... - Page 30 Cleaning the sensor CAUTION Avoid the use of alcohol, benzene, thinner, etc. for cleaning the sensor. Wipe the lens surface clean with a piece of soft dry cloth approxi- mately once a day. Sensor Sensor Lubricating the machine CAUTION Bring the red marker dot to the right front. 1.
-
Page 31: Troubles And Corrective Measures
Troubles and Corrective Measures If sewing difficulties occur, make sure the instructions are correctly followed. If a problem still exists, the reminders below help to solve it. If the sensor fails, the error message will be displayed. (Error message indicates which sensor has failed.) If the error message is displayed, please contact your distributor. - Page 32 2-11-1,TSURUMAKI,TAMA-SHI, TOKYO,206-8551,JAPAN PHONE : (81)42-357-2341 : (81)42-357-2379 Copyright © 2018 JUKI CORPORATION. • All rights reserved throughout the world. 000918...
Need help?
Do you have a question about the J-350QVP and is the answer not in the manual?
Questions and answers
The screen went off on my machine and now it will not run
Is there any kind of chart that indicates what thread weight goes with what needle size?
I need to replace the cords on my juki longarm. How do I find the part number?