
Related Manuals for JUKI Jtron JTR-DLU5490/SHU Series


Summary of Contents for JUKI Jtron JTR-DLU5490/SHU Series
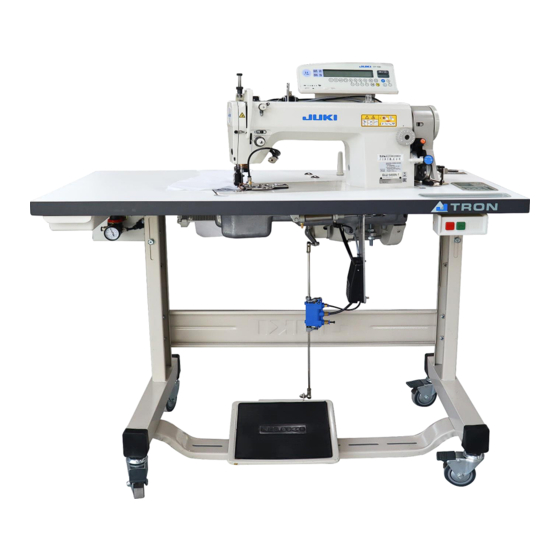
- Page 1 Shirt Bottom Hemming Sewing Unit JTR-DLU5490/SHU Series INSTRUCTION MANUAL No.JTR000 DLU5490SHU-TM...
-
Page 2: Table Of Contents
CONTENTS CONFIGURATION OF THE MACHINE SPECIFICATION INSTALLATION PREPERATION FOR OPERATION ADJUSTMENT ASSEMBLING UPPER FEED SYSTEM CAUSES AND COUNTERMEASURES... -
Page 3: Configuration Of The Machine
❶ ❽ MACHINE HEAD AIR VALVE ❷ ❾ CP180 PANEL DRAWER ❸ ❿ CHASSIS GROUP AIR REGULATOR ❹ ⓫ THREAD STAND CONTROL BOX(P1022) ❺ ⓬ MOTOR KNEE SWITCH ❻ ⓭ UPPER FEED SYSTEM PEDAL ❼ ⓮ ATTACHMENT JUKI CONTROL BOX... -
Page 4: Specification
Min : 1,5mm Max: 3,5mm at delivery 2,5mm NEEDLE TYPE GB / DPX5 / #12 GAUGE P1022 FABRIC CUTTNG SYSTEM ORIGINAL JUKI CUTTING SYSTEM SEWING SPECIFICATIONS THIN TO MEDIUM THICKNESS TARGET PROCESS SHIRT HEMMING ATTACHMENT DELIVERY 6MM (Optional : 4-5-7) AIR PRESSURE Min: 0.5 MPa / Max: 1.0 Mpa... -
Page 5: Installation
INSTALLATION 3.1) The machine is delivered as below 3.2) Connecting the power supply. The machine is not supplied with a power plug. It is therefore necessarry for you to select to plug that maches the receptacle availabe under a given operating environment and attach it to the power cable. - Page 6 3.3) Connect the air tube to the air regulator. 4) PREPARATION FOR OPERATION 4.1) Please put the Juki genuine oil 7 from upper cover of the machine head. (Please refer to machine head instructions –DLU5490N-7) 4.2) Lower bobbing case thread should be properly squeezed.(not so loose also not so tight) 4.3) After wrapping the shirt hem and clamping it with the presser foot, sew a few stitches.
- Page 7 4.4) Adjustment of Upper Transport 4.4.1) Stitch Lenght Adjustments The stitch step adjustment(1) should be done as min : 1,5mm Max: 3,5mm at delivery 2,5mm 4.4.2) Upper Transport Adjustments Adjust the upper transport length using adjustment bar(2) to reduce sewing wrinkles.
- Page 8 4.4.3) Upper Transport Limiter Adjustments When the knee switch is switched ON, the upper transport length can be increased up to this upper transport limiter. This will make curves (e.g. A) easier to turn and reduce sewing wrinkles, prevent stitch lengths from shortening.
-
Page 9: Adjustment
ADJUSTMENT 5.1) P1022 Gauge Adjustments Step 1 : Remove the screw Step 2 : Remove the presser foot from the gauge Step 3 : Adjust with an Allen key so that Step 4 : Loosen two screws (4) and adjust the positional the end of the presser foot (1) is aligned relationship between the guide (2) and needle (3) as shown on with the end of the guide (2). - Page 10 5.2) Presser Foot Height Adjustments Step 1 : Remove the screw Step 2 : Turn clockwise to the end as the picture Step 4 : Tighten the screw with a little play in the direction of rotation. Step 3 : Center the screw in the slot...
-
Page 11: Assembling Upper Feed System
ASSEMBLING UPPER FEED SYSTEM 6.1) When the machine head was lean, adjust the upper transport system as number 0.While zigzag arm was pressing, move on to the next step(6.2). 6.2) While the wire is slightly tightened, pinpoint the place(1-2) with a pencil. Then drill the demonstrated points. -
Page 12: Causes And Countermeasures
CAUSES AND COUNTERMEASURES Q.1) Fabric gets loose when sewing at the hemming area. A1) When upper puller becomes insufficient at the turning points , the upper limit should be activated via knee switch. Q.2) Fabric gets curled away when sewing in the hemming area. A2) This incident occurs when the upper transport pulls excessively or too light. - Page 13 8500 NW 17TH STREET, SUITE 100, DORAL, FL 33126-1035, U.S.A. PHONE (1)305-594-0059 HTTP https://juki.com Company Name : JUKI MIDDLE EAST (JUKI SINGAPORE PTE. LTD. UAE BRANCH) OFFICE NO, 2511. BLOCK A JAFZA 1, PO BOX 18031, JEBEL ALI, DUBAI UAE PHONE (971)4-8833228 (971)4-8833230 HTTP http://www.juki.com.sg...
Need help?
Do you have a question about the Jtron JTR-DLU5490/SHU Series and is the answer not in the manual?
Questions and answers