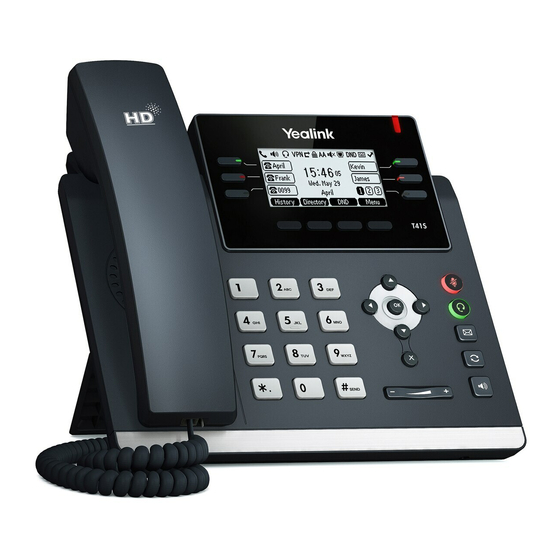
Yealink SIP-T41S User Manual
Dect desk phone
Hide thumbs
Also See for SIP-T41S:
- User manual ,
- Quick start manual (24 pages) ,
- Quick user manual (5 pages)

Related Manuals for Yealink SIP-T41S


Summary of Contents for Yealink SIP-T41S
- Page 2 Yealink and/or its respective suppliers are not responsible for the suitability of the information contained in this document for any reason. The information is provided “as is”, and Yealink does not provide any warranty and is subject to change without notice. All risks other than risks caused by use of the...
- Page 3 The EULA for this product is available on the Yealink Support page for the product.
- Page 4 GNU GPL INFORMATION Yealink DECT desk phone firmware contains third-party software under the GNU General Public License (GPL). Yealink uses software under the specific terms of the GPL. Please refer to the GPL for the exact terms and conditions of the license.
-
Page 5: Table Of Contents
Table of Contents Table of Contents About This Guide............... 1 In This Guide ..........................1 Getting Started ................1 Package Contents ........................1 Optional Accessories ......................2 Installing the DD Phone ......................2 Attaching the Stand or the Wall Mount Bracket ..............3 Connecting the Handset and Headset ..................3 Connecting the Power Adapter ....................4 Attaching the DD10K ......................4 Installing the Base Station .......................4... - Page 6 User Guide for the DECT Desk Phone Configuring Static IP Address .................... 17 Configuring Static DNS When DHCP is Enabled ..............18 Checking System Status ......................18 Registering Accounts ......................20 Adjusting Volume ......................... 20 Phone Lock ........................... 21 Phone Lock Types ......................21 Activating the Phone Lock ....................
- Page 7 Table of Contents Phone Reboot ........................47 Base PIN (Administrator Password) ..................47 Base Reset ..........................48 Phone Reset .......................... 48 Auto Provision ........................49 Call Features ................51 Placing Calls .......................... 51 Placing Internal Calls ......................52 Placing External Calls ......................52 Answering Calls ........................
- Page 8 User Guide for the DECT Desk Phone Display Issue ......................... 79 Update & Reset Issue ......................79 Log Issue ..........................80 Appendix ................. 85 Appendix A - Time Zones ..................... 85 Appendix B - Menu Structure ....................86 viii...
- Page 9 About This Guide You can turn Yealink SIP-T41S/T42S IP phone to the DECT desk phone (hereinafter referred to as DD phone) by using a DECT dongle kit DD10K. The DD phone acts as a handset for the W60B base station.
- Page 10 User Guide for the DECT Desk Phone...
-
Page 11: About This Guide
The following components are included in your DD phone package and DD10K package: DD Phone Package (Combination Package) T41S Package W60B Package DD10K Package 1 SIP-T41S IP Phone 1 W60B Base Station 1 DD10K 1 Handset 1 Base Stand 1 Quick Start Guide... -
Page 12: Optional Accessories
Headset Wireless Headset Adapter EHS36 Note We recommend that you use the accessories provided or approved by Yealink. The unapproved third-party accessories may result in poor performance. Installing the DD Phone This section introduces how to install the DD phone. -
Page 13: Attaching The Stand Or The Wall Mount Bracket
Yealink Wall Mount For more information on how to attach the wall mount bracket, refer to Quick Installation Guide for Yealink IP Phones Connecting the Handset and Headset You can use EHS36 to connect a compatible wireless headset to the phone. For more information... -
Page 14: Connecting The Power Adapter
User Guide for the DECT Desk Phone Connecting the Power Adapter We recommend that you use the Yealink original power adapter, since the third-party power Note adapter may cause the damage to the phone. Attaching the DD10K Installing the Base Station You have two options for power and network connection of the base station. -
Page 15: Switching Between Dd Phone Mode And Sip Mode
Switching between DD Phone Mode and SIP Mode You can switch between SIP mode and DD phone mode quickly on SIP-T41S/T42S phone: SIP mode: the phone acts as a SIP phone, and you can use all features for SIP phone over an IP ... -
Page 16: Switching From Sip Mode To Dd Phone Mode
User Guide for the DECT Desk Phone Switching from SIP Mode to DD Phone Mode Before using an IP phone as a DECT desk phone, you should enable the DD phone mode first. If you attach the DD10K when the phone is powered off, the phone switches to DD phone mode automatically after starting up. -
Page 17: Overview
Overview Overview This chapter provides the overview of the phone and base station. Topics include: Phone Hardware Overview Base Station Hardware Overview Phone Screen and Icons User Interfaces Phone Hardware Overview Hardware Description Hardware features description: Item Description Shows a screen with backlight that enables you to view menus... -
Page 18: Power Led Indicator
Secures the handset in the handset cradle when you mount the phone vertically. For more information on how to adjust the Reversible Tab Yealink Wall Mount Quick Installation reversible tab, refer to Guide for Yealink IP Phones Connects or disconnects the phone from the phone line. The... -
Page 19: Line Key Led
Overview LED Status Description Slowly flashing red (1s) The phone receives a voice mail. The phone is powered off. The phone is idle. The phone is busy. The call is placed on hold or is held. The call is muted. Line Key LED Line key LED (default) LED Status... -
Page 20: Base Station Hardware Overview
User Guide for the DECT Desk Phone Base Station Hardware Overview After the base station starts up successfully and a DD phone is registered to the base station, all LEDs on the base station glow green in sequence. Hardware features description: Item Description •... -
Page 21: Phone Screen And Icons
Overview Phone Screen and Icons Before you use the phone, you may need to understand some important information on the state of your phone, such as idle screen layout and icons. Idle Screen Display If the DD phone is registered to a base station and is assigned an outgoing line, the idle screen will be displayed as below. -
Page 22: Icon Instructions
User Guide for the DECT Desk Phone Icon Instructions The following table describes icons appearing on the LCD screen: Icon Description Internal handset number, from handset 1 to handset 8 Signal strength indicator, from one bar (weak) to five bars (strong) No Reception Headset Mode Hands-free Speakerphone Mode... -
Page 23: Phone User Interface
Overview The user interface on the DD phone. The user interface in a web browser on your computer. The keypad and LCD screen constitute the phone user interface, which allows the user to execute all call operation tasks and some basic configuration changes directly on the DD phone. In addition, you can use the web user interface to access some configuration settings. - Page 24 User Guide for the DECT Desk Phone...
-
Page 25: Basic Operations
Basic Operations Basic Operations This chapter provides you with the basic operation instructions of the DD phone. Topics include: Entering Characters Phone Registration Basic Network Settings Checking System Status Registering Accounts Adjusting Volume Phone Lock ... -
Page 26: Phone Registration
User Guide for the DECT Desk Phone Phone Registration If you purchase the W41P package, the T41S DD phone is registered to the W60B by default, so you can skip the registration process. If you purchase the DD10K package, you should manually register the DD phone to one base station. -
Page 27: Basic Network Settings
Basic Operations Press the OK soft key to de-register the DD phone. Basic Network Settings The base station attempts to contact a DHCP server in your network to obtain valid network settings (for example, IP address, subnet mask, gateway address, and DNS address) by default. The DD phone supports either or both IPv4 and IPv6 addresses modes, but IPv6 is disabled by default. -
Page 28: Configuring Static Dns When Dhcp Is Enabled
User Guide for the DECT Desk Phone Press the Save soft key. Wrong network settings may result in inaccessibility of your phone and may also have an impact Note on your network performance. For more information on these parameters, contact your system administrator. - Page 29 Basic Operations IPv4 uses a 32-bit address. IPv6 is an updated version of the current Internet Protocol to meet the increased demands for unique IP addresses, using a 128-bit address. Phone status (IPv4 status or IPv6 status, MAC address, OTA version, network information, and phone ...
-
Page 30: Registering Accounts
User Guide for the DECT Desk Phone Registering Accounts The base station supports up to eight lines. You can register an account for each line via web user interface. To register an account via web user interface: Click Account->Register. Select the desired account from the pull-down list of Account. Select Enabled from the pull-down list of Line Active. -
Page 31: Phone Lock
Basic Operations Phone Lock You can lock your phone temporarily when you are not using it. This feature helps to prevent unauthorized outgoing calls, or prevent people from viewing or modifying your private information, such as call lists or directory. Phone Lock Types Phone lock type consists of the following: Menu key: The Menu soft key is locked. -
Page 32: Changing The Phone Unlock Pin
User Guide for the DECT Desk Phone Press the Save soft key. When the phone is locked, the LCD screen prompts “Phone locked.” and displays the icon Changing the Phone Unlock PIN The default phone unlock PIN is 123. You can change the PIN as required. To change the PIN via phone user interface: Press Menu->Settings->Basic Settings->Change PIN. -
Page 33: Customizing Soft Keys
Basic Operations Customizing Soft Keys The default soft keys on the idle screen are “History”, “Directory”, “DND”, and “Menu”. You can customize the functions of the soft keys. You can use soft keys to invoke frequently used functions, or to create menu shortcuts to access frequently used phone settings. - Page 34 User Guide for the DECT Desk Phone...
-
Page 35: Phone Settings
Phone Settings Phone Settings This chapter provides you with some instructions on how to change the settings of your phone. Topics include: Phone Name Language Ring Tones Key Tone Backlight Time & Date Contact Management ... -
Page 36: Language
User Guide for the DECT Desk Phone Press the Save soft key. Phone name is also configurable via web user interface at the path Account->Handset Name. Language Both DD phone and web user interface support the following nine languages: English, French, German, Italian, Polish, Portuguese, Spanish, Turkish, and Russian. -
Page 37: Setting A Ring Tone For A Specific Account
Phone Settings Setting a Ring Tone for a Specific Account You can select a unique ring tone for incoming calls of a specific account. Note A ring tone for a specific account takes effect on the incoming lines that assigned to the DD phone. -
Page 38: Time & Date
User Guide for the DECT Desk Phone Time & Date The time and date display on the idle screen of your DD phone. By default, the phone obtains the date and time from the Simple Network Time Protocol (SNTP) server. Setting the Time and Date Manually If your phone cannot obtain the time and date from the SNTP server, you need to configure the time and date manually. -
Page 39: Configuring The Dst
Phone Settings The following table lists the available date formats: Example (2018-04-04) Date Format WWW MMM DD Wed, Apr 04 DD-MMM-YY 04-Apr-18 YYYY-MM-DD 2018-04-04 DD/MM/YYYY 04/04/2018 MM/DD/YY 04/04/18 DD MMM YYYY 04 Apr, 2018 WWW DD MMM Wed, 04 Apr To configure the time and date format for a specific DD phone via phone user interface: Press Menu->Settings->Basic Settings->Time &... - Page 40 User Guide for the DECT Desk Phone If the selected location uses daylight saving time, the Start Date, End Date and Offset(minutes) fields will be filled with time automatically. All of them are read-only. Click Confirm. The phone will use the daylight saving time of the selected location. If the location you select does not use daylight saving time, the fields of Start Date, End Date Note and Offset(minutes) will be left blank.
-
Page 41: Contact Management
Phone Settings Mark the radio box of DST by Week in the Fixed Type field. Select the desired date from the pull-down lists of Start Date and End Date. Enter the offset time (in minutes) in the Offset(minutes) field. Click Confirm. Note Please refer to Appendix A - Time Zones... - Page 42 User Guide for the DECT Desk Phone refer to Remote Phone Book. To add a contact to the local directory manually via phone user interface: Press the Directory soft key or Menu->Directory->Local Directory. Press the Add soft key. Enter the name and the office, mobile or other numbers in the corresponding fields. Press the Add soft key.
-
Page 43: Blacklist
Phone Settings To delete all contacts via phone user interface: Press the Directory soft key or Menu->Directory->Local Directory. Press the Options soft key, and then select Delete All. A message pops up to confirm that you want to delete all contacts. Press the OK soft key. -
Page 44: Remote Phone Book
User Guide for the DECT Desk Phone Enter the office number in the Office Number field. Press the Add soft key. Editing a Blacklist Contact You can change information for your blacklist contacts at any time. To edit a blacklist entry via phone user interface: Press Menu->Directory->Blacklist. - Page 45 Phone Settings Enter the name in the Display Name field. Click Confirm. Note All DD phones that are registered to the base station can access to the remote phone book. You can enable the DD phone to present the caller/callee identity stored in the remote phone book when receiving/placing a call.
-
Page 46: Call History Management
User Guide for the DECT Desk Phone To place a call from the remote phone book: Press Menu->Directory->Remote Phone Book. Select the desired remote phone book. Select the desired contact from the remote phone book. Do one of the following: If only one number for the contact is stored in the local directory, press the Send soft key to dial out the number. -
Page 47: Recent Call In Dialing
Phone Settings Press the Delete soft key. The selected entry is deleted successfully. To delete all entries from the call history via phone user interface: Press the History soft key. Press the Options soft key, and then select Delete All. A message pops up to confirm that you want to delete all the records. -
Page 48: Replace Rule
User Guide for the DECT Desk Phone Dial Now Area Code Block Out Basic expression syntaxes you need to know: The dot “.” can be used as a placeholder or multiple placeholders for any character. Example: “12.” would match “123”, “1234”, “12345”, “12abc”, etc. An “x”... - Page 49 Phone Settings Enter the desired line ID in the Account field or leave it blank. Click Add. When you enter the number “1” using the keypad and then dial out using the configured account, the phone will dial out “104” instead. The valid value of the “Account”...
-
Page 50: Dial Now
User Guide for the DECT Desk Phone Dial Now You can configure one or more dial now rules (up to 100) on your DD phone. When the dialed number matches the dial now string, the number will be dialed out automatically. To add a dial now rule via web user interface: Click Settings->Dial Plan->Dial Now. -
Page 51: Area Code
Phone Settings Enter the time between 0 and 14 (seconds) in the Time Out for Dial Now Rule field. Click Confirm. Note Dial now rule and time out for dial now rule are configurable via web user interface only. Dial now rule is applicable for all DD phones registered to the base station. Area Code Area codes are also known as Numbering Plan Areas (NPAs). -
Page 52: Block Out
User Guide for the DECT Desk Phone 15, the phone will add the area code before the number and dial out (01156789). Note The default values of the minimum and maximum lengths are 1 and 15. Area code is configurable via web user interface only. Area code is applicable to all DD phones registered to the base station. -
Page 53: Outgoing Lines
Phone Settings Lock. Note Contact your local phone service provider for available emergency numbers in your area. The DD phone also supports the emergency dialplan, which allows users to make emergency calls if the phone is locked or unregistered. For more information, contact your system administrator. To specify emergency numbers via web user interface: Click Features->Phone Lock. -
Page 54: Incoming Lines
User Guide for the DECT Desk Phone Check the desired checkbox of the account from Line No.&Name field for the corresponding phone in the Handset No. field. (Optional) Select the default outgoing line from the pull-down list of Default. The default outgoing line is the first line you selected. You can only select the line number you have checked for the phone, or it will not take effect. - Page 55 Phone Settings line(s). You can assign incoming lines to all DD phones registered to the same base station on your phone. To assign incoming line to phone via web user interface: Click Account->Number Assignment. Check the desired checkbox of the account from Line No.&Name field for the corresponding phone in the Handset No.
-
Page 56: Key As Send
User Guide for the DECT Desk Phone Select Accept from the desired line field. Press the Save soft key. Key As Send You can set the “#” key or “*” key to perform as a send key while dialing. To configure key as send via web user interface: Click Features->General Information. -
Page 57: Placing A Call Using Speed Dial Key
Phone Settings Placing a Call Using Speed Dial Key To place a call using the speed dial key via phone user interface: Press the Speed Dial key when the phone is idle. Base Reboot In some instances, you may need to reboot the base station to refresh the settings. To reboot the base station via phone user interface: Press Menu->Settings->Advanced Settings (default password: 0000) ->Reboot Config->Base Reboot. -
Page 58: Base Reset
User Guide for the DECT Desk Phone Press the Save soft key. Base PIN is also configurable via web user interface at the path Security->Base PIN. Note We recommend you to set the new PIN in random and cannot be easily guessed. Base Reset You can reset the base station to factory settings. -
Page 59: Auto Provision
Phone Settings Auto Provision You can trigger the auto provisioning using the wizard. After you enter the user name and password in the wizard and confirm to perform an update, the base station tries to connect to the RPS (Redirection and Provisioning Service) server. - Page 60 User Guide for the DECT Desk Phone...
-
Page 61: Call Features
Call Features Call Features This chapter provides operating instructions of the call features. Topics include: Placing Calls Answering Calls Ending Calls Redialing Calls Call Mute Call Hold/Resume Call Waiting Do Not Disturb (DND) ... -
Page 62: Placing Internal Calls
User Guide for the DECT Desk Phone Using the headset During a call, you can alternate among Speakerphone, Headset, or Handset mode by pressing the Speakerphone key, the Headset key, or by picking up the handset. The call duration and far-site’s information (name or phone number) are visible on the LCD screen. Placing Internal Calls You can make free internal calls between the DD phones/handsets registered to the same base station. -
Page 63: Answering Calls
Call Features Pick up the handset, press the Speakerphone key, or the HEADSET key. Then enter a number or select a contact. If multiple lines are assigned to your phone as outgoing lines, press the Line soft key to select the desired line. -
Page 64: Ending Calls
User Guide for the DECT Desk Phone To answer a call using the hands-free speakerphone mode: Press With the handset on-hook and headset mode deactivated, you can press the Answer soft key or the line key on which receives an incoming call. To answer a call using the headset: Press With the headset mode activated, you can press the Answer soft key or the line key on which... -
Page 65: Call Mute
Call Features Press or the Send soft key. To delete an entry from the redial number list: Press when the phone is idle to access the redial number list. Highlight the desired entry. Press the Delete soft key. To delete all entries from the redial number list: Press when the phone is idle to access the redial number list. -
Page 66: Call Waiting
User Guide for the DECT Desk Phone desired call. Press the corresponding line key to retrieve the call. Call Waiting Call waiting allows you to receive another call when there is already an active call on your phone. If it is disabled, the new incoming call will be rejected automatically. -
Page 67: Call Forward
Call Features Press the OK soft key Press the Save soft key. The associated line icon will change to , and the icon will appear in the status bar. The phone will reject all incoming calls to this line, and the LCD screen will display the missed call icon in the status bar. -
Page 68: Call Transfer
User Guide for the DECT Desk Phone If Always Forward is selected, there is no prompts display on the LCD screen when the line receives an incoming call. The incoming call is logged in the call history list. Call forward is configurable via web user interface at the path Features->Forward&DND. Call forward feature may be overridden by the server settings. -
Page 69: Conference Call
Call Features To transfer a call to another party when there are two calls on the phone: Place a call to user A. Place another call to user B using the same line. Two calls are established on the phone. Select the desired call (for example, the call with user A). -
Page 70: Network Conference
User Guide for the DECT Desk Phone Network Conference You can use network conference feature to conduct a conference with multiple parties. The maximum number of the parties depends on the server. To use this feature, you need to configure the network conference URI and conference type in advance. Contact your system administrator for the conference URI. -
Page 71: Call Park
Call Features When the new party answers the call, press the Conf soft key to add the new party to the conference. Repeat steps 5 to 7 until you have added all intended parties. How to set up a network conference call on specific servers may be different from introduced above. Contact your system administrator for more information. -
Page 72: Transfer Mode
User Guide for the DECT Desk Phone If Enabled is selected, the Park soft key will display on the LCD screen during a call. (Optional) Enter the call park code in the Call Park Code field. It is configured for the Park soft key. (Optional) Enter the park retrieve code in the Park Retrieve Code field. -
Page 73: Anonymous Call
Call Features Select Enabled from the pull-down list of Call Park. If Enabled is selected, the Park soft key will display on the LCD screen during a call. (Optional) Enter the call park code in the Call Park Code field. It is configured for the Park soft key. -
Page 74: Anonymous Call Rejection
User Guide for the DECT Desk Phone Press the Save soft key. Anonymous call is configurable via web user interface at the path Account->Basic. To place an anonymous call: Use the specific line on the phone to place a call. The destination phone prompts an incoming call from anonymous. - Page 75 Call Features To configure anonymous call rejection feature for a specific line via phone user interface: Press Menu->Features->Anonymous Call. Select the desired line from the Line ID field. Select Enabled from the Local Anonymous Rejection field. Press the Save soft key. Anonymous call rejection is configurable via web user interface at the path Account->Basic.
-
Page 76: Voice Mail
User Guide for the DECT Desk Phone Voice Mail You can leave voice mails to someone else. You can also receive and listen to voice mails via phone user interface. Voice mail feature ensures that you will never miss any important messages. When receiving a new voice mail, the icon appears on the LCD screen with the number of unread voice mails, and the power LED slowly flashes red. -
Page 77: Shared Call Appearance (Sca)
Call Features Select the account which you want to set. Enter the voice mail access code (for example, *4). Press the Save soft key. Voice mail access codes must be predefined on the system server. Contact your system Note administrator for the more information. To listen to voice mails: When the phone receives a new voice mail and the power LED indicator slowly flashes red, you can press... -
Page 78: Configuring Sca Feature
User Guide for the DECT Desk Phone Configuring SCA Feature You can configure a primary account on your phone and other alternate accounts on other phones. For example, party A and party B share the account 4603, party A registers the primary account 4603, party B registers the alternate account 4603_1, and party C registers the account 4605. - Page 79 Call Features To configure the primary account via web user interface: Register the primary account 4603. Click Advanced, select Share Call Appearance from the pull-down list of Shared Line. Click Confirm.
-
Page 80: Using Sca Feature On The Phone
User Guide for the DECT Desk Phone To configure the alternate account via web user interface: Register the alternate account 4603_1. (Enter the primary account 4603 in the Register Name field). Click Advanced, select Share Call Appearance from the pull-down list of Shared Line. Click Confirm. - Page 81 Call Features Using Public Hold To place an SCA call on public hold: Press the Hold soft key. The line key LEDs on your phone slowly flash green. In addition, the line key LEDs on another phone for the shared line slowly flash red. The call can be retrieved on either your phone or the other phone on the shared line.
-
Page 82: Multicast Paging
You can specify up to 31 multicast listening addresses and channels. The following describes 31 paging channels: 0: You can broadcast audio to channel 0. Note that the Yealink phones running old firmware version (old paging mechanism) can be regarded as listening to channel 0. It is the default channel. - Page 83 Call Features Select the desired channel from the pull down list of Channel. Click Confirm. To configure a default codec for multicast paging via web user interface: Click Features->General Information. Select the desired codec from the pull-down list of Multicast Codec. Click Confirm.
-
Page 84: Receiving Rtp Stream
User Guide for the DECT Desk Phone Receiving RTP Stream You can configure the phone to receive a Real Time Transport Protocol (RTP) stream from the pre-configured multicast address(es) and channel(s) without involving SIP signaling. You can specify up to 31 multicast addresses and channels that the phone listens to on the network. RTP stream is listened in the speakerphone mode by default. -
Page 85: Using Multicast Paging
Call Features Select the desired channel to listen from the pull-down list of Channel. Click Confirm. The priorities of listening addresses are predefined: 1 with the highest priority, 31 with the lowest. Note Multicast listening addresses are configurable via web user interface only. Using Multicast Paging To send RTP stream when the receiver’s phone is idle: Press Menu->Features->Paging List. - Page 86 User Guide for the DECT Desk Phone...
-
Page 87: Troubleshooting
Please contact your vendor or local distributor for help. If you cannot get a support from them, please send a mail which includes problem description, test result, your country, and phone’s SN to Support@yealink.com. Why does the network indicator on the base station slowly flash? It means that the base station cannot get an IP address. -
Page 88: Call Issue
User Guide for the DECT Desk Phone Call Issue Why can’t the phone receive calls? Ensure that the DND mode is not activated. Refer to Do Not Disturb (DND). Ensure that Always Forward feature is not enabled. Refer to Call Forward. -
Page 89: Display Issue
Troubleshooting Display Issue Why does the phone prompt the message “Unregistered!”? Check the registration status of your DD phone. If your phone is not registered to the base station, register it manually. Refer to Phone Registration. Why does the phone prompt the message “Not In Range”? Ensure that the base station is properly plugged into a functional AC outlet. -
Page 90: Log Issue
User Guide for the DECT Desk Phone The upgrading will take a few minutes. Note Do not refresh or close the browser, or power off during the phone upgrading. How to upgrade dongle firmware? You can easily upgrade dongle firmware after the phone has been upgraded to the latest firmware. To upgrade dongle firmware via phone user interface: Assemble the DD10K. - Page 91 Troubleshooting Recreate the error to be documented in the trace. Click Stop to stop the capture. Click Export to open file download window, and then save the file to your local system. How to export system log? We may need you to provide a system log or boot log to help analyze your problem. To export the system log to a local PC via web user interface: Click Settings->Configuration.
- Page 92 User Guide for the DECT Desk Phone Select sys.log from the pull-down list of Export Local Log. Click Confirm. Reproduce the issue. Click Export to open the file download window, and then save the file to your local system. You can also export the system log to a syslog server. Contact your system administrator for more information.
- Page 93 Troubleshooting Click Start to begin capturing signal traffic. The system log level will be automatically set to 6. Reproduce the issue. Click Stop to stop the capture. The system log level will be reset to 3. Click Export to open file download window, and then save diagnostic files to your local system. A diagnostic file named allconfig.tgz is successfully exported to your local system.
- Page 94 User Guide for the DECT Desk Phone...
-
Page 95: Appendix
Appendix Appendix Appendix A - Time Zones Time Zone Time Zone Name Samoa United States-Hawaii-Aleutian, United States-Alaska-Aleutian -9:30 French Polynesia United States-Alaska Time Canada(Vancouver,Whitehorse), Mexico(Tijuana,Mexicali), United States-Pacific Time Canada(Edmonton,Calgary), Mexico(Mazatlan,Chihuahua), United States-MST no DST, United States-Mountain Time Canada-Manitoba(Winnipeg), Chile(Easter Islands), Mexico(Mexico City,Acapulco), United States-Central Time Bahamas(Nassau), Canada(Montreal,Ottawa,Quebec), Cuba(Havana), United States-Eastern Time... -
Page 96: Appendix B - Menu Structure
User Guide for the DECT Desk Phone Time Zone Time Zone Name Japan(Tokyo), Korea(Seoul), Russia(Yakutsk,Chita) +9:30 Australia(Adelaide), Australia(Darwin) Australia(Brisbane), Australia(Hobart), Australia(Sydney,Melboume,Canberra), Russia(Vladivostok) +10:30 Australia(Lord Howe Islands) New Caledonia(Noumea), Russia(Srednekolymsk Time) +11:30 Norfolk Island New Zealand(Wellington,Auckland), Russia(Kamchatka Time) +12:45 New Zealand(Chatham Islands) Tonga(Nukualofa) +13:30 Chatham Islands...
Need help?
Do you have a question about the SIP-T41S and is the answer not in the manual?
Questions and answers