
Related Manuals for suprema FaceStation 2


Summary of Contents for suprema FaceStation 2
- Page 1 USER GUIDE FaceStation 2 English Version 1.0 EN 102.00.FS2 V1.00A...
-
Page 2: Table Of Contents
Safety Instructions Contents Safety Instructions ..................4 Introduction ...................... 6 Components ..............................6 Name and function of each part ....................... 7 Cables and connectors ........................... 9 Correct face registration and authentication method................10 Cautions for registering a face ......................10 Cautions for authenticating a face .................... - Page 3 Safety Instructions Event Log ....................... 25 Search Log ..............................25 Detail View Log ............................25 Delete All Logs ............................25 View Log Usage ............................26 Troubleshooting .................... 27 Checklist before reporting a failure ......................27 Product specifications .................. 28 Dimensions ..............................29 FCC compliance information ..............
-
Page 4: Safety Instructions
• If the proper power supply is not used, the product may not operate properly. Use a separate power supply for the Secure I/O 2, electric lock, and FaceStation 2, respectively. • If connecting and using the power supply to these devices together, the devices may malfunction. - Page 5 These may cause product failure. FaceStation 2 uses a capacitive screen and buttons. If the environment is moist from wet weather, or the product surface is smeared with a large amount of water, wipe the product off with a dry towel before using it.
-
Page 6: Introduction
(2 pins 1 EA, 3 pins 1 EA, 4 pins 4 EA) Quick guide Ω resistor Drilling template (1 EA) Note • Components may vary according to the installation environment. • For additional content regarding product installation, visit the Suprema website (www.suprema.co.kr) and view the installation guide. -
Page 7: Name And Function Of Each Part
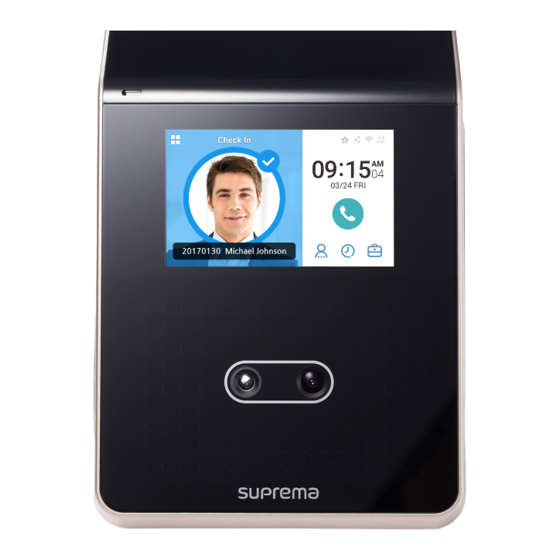
Introduction Name and function of each part RF card authentication unit Microphone LCD screen Camera IR camera TTL input (4 pins) RS-485 (4 pins) Relay (3 pins) Wiegand input (4 pins) Power supply (2 pins) Wiegand output (4 pins) Ethernet USB memory slot Mini USB cable slot Speaker... - Page 8 Introduction Power supply (2 pins) Connects the power supply cable. Ethernet Connects the Ethernet cable. Wiegand input (4 pins) Connects the Wiegand input cable. Wiegand output (4 pins) Connects the Wiegand output cable.
-
Page 9: Cables And Connectors
Introduction Cables and connectors Power Name Color PWR +VDC Red (white stripe) PWR GND Black (white stripe) Relay Name Color RLY NO White RLY COM Blue RLY NC Orange RS-485 Name Color 485 TRXP Blue 485 TRXN Yellow 485 GND Black SH GND Gray... -
Page 10: Correct Face Registration And Authentication Method
Introduction Correct face registration and authentication method Cautions for registering a face • When registering a face, maintain a distance of 40cm to 80cm between the device and the face. • Be careful not to change the facial expression. (smiling face, drawn face, wink, etc.) •... -
Page 11: Admin Menu
Admin Menu Admin Menu All Menus Press and authenticate with the Admin level credential. Select the desired menu. Note • If the administrator has not been designated, the menu screen will be displayed when you press... -
Page 12: User
User User Registering user information The user information, including the face, can be registered. Press and authenticate with the Admin level credential. Press User > . The face registration wizard will begin. To proceed with the face registration wizard, press Next. To skip, press Skip and go to step 5. If you have pressed Next, register the face according to the instructions on the screen. - Page 13 User Note • When registering a face, maintain a distance of 40cm to 80cm between the device and the face. • Be careful not to change the facial expression. (smiling face, drawn face, wink, etc.) • If you do not follow the instructions on the screen, the face registration may take longer or may fail. •...
-
Page 14: Modifying User Information
User Modifying user information ’ User Management or Administrator can modify the registered user information. A user s face or card can be added, and the PIN and level can be modified. Press and authenticate with the Admin level credential. Press User >... -
Page 15: Authentication
Authentication Authentication Auth Mode Modifying Auth Mode You can set the authentication method and schedule according to each credential. Press and authenticate with the Admin level credential. Press AUTHENTICATION > Auth Mode. Press to add an auth mode or press an auth mode you wish to modify. Pressing the icon will delete the selected credential, and pressing will display an addable credential on the screen. -
Page 16: Delete Auth Mode
Authentication Delete Auth Mode Press and authenticate with the Admin level credential. Press AUTHENTICATION > Auth Mode. Press and select an item to delete. When you press OK, the selected item will be deleted. Add Auth Mode Press and authenticate with the Admin level credential. Press AUTHENTICATION >... -
Page 17: Face Recognition
Authentication Face Recognition Change settings regarding face authentication. Press and authenticate with the Admin level credential. Press AUTHENTICATION and then modify the items below Face Recognition. • Security Level: Set the security level for 1:N authentication. • Group Matching: Check whether or not to use Group Matching. If Group Matching is used, you can increase the authentication speed by ’... -
Page 18: Network
Network Network Network Settings You can change the network settings of the device. Ethernet Press and authenticate with the Admin level credential. Press NETWORK > Ethernet. • DHCP: Set whether or not to use DHCP. If DHCP setting is disabled, the user can modify Device Port, IP Address, Gateway, Subnet Mask, and DNS. -
Page 19: Wireless
Network Wireless Press and authenticate with the Admin level credential. Press NETWORK > Wireless. The list of available networks for connection will be displayed. Select the network to which you wish to connect and enter the password. When you press OK, the connection to the wireless network will be made. -
Page 20: Serial Settings
Network Serial Settings RS-485 Press and authenticate with the Admin level credential. Press NETWORK and then modify the items below Serial Setting. • RS-485: Select the RS-485 mode. • Baud Rate: Select the desired baud rate. -
Page 21: Display & Sound
Display & Sound Display & Sound You can change the display and sound settings of the device. Press and authenticate with the Admin level credential. Press DISPLAY & SOUND. Change the desired item. • Home Screen: Select items to be displayed in the background of the home screen. When Custom is selected for Style, the user can modify the Home Screen directly. -
Page 22: Device
Device Device Interphone Set the account and extensions of SIP interphone. Press and authenticate with the Admin level credential. Press DEVICE > Interphone. When Enable is set for Interphone, you can set the SIP account and the extensions. Ensure to set each item correctly. Relay You can set the open time and the input port of the exit button in the device. -
Page 23: Device Info
Device • Time Sync: Synchronize the server and the time. If you wish to synchronize the server and the time, enable Time Sync. • Date Format: Set the date format. You can select among YYYY/MM/DD, MM/DD/YYYY and DD/MM/YYYY. • Time Format: Set the time format. You can select either 24-Hour or AM/PM. Device Info You can view the model name, firmware version of Device ID, and MAC address. -
Page 24: Factory Default
Device To reset all device settings, select All settings and press OK. To reset all settings except for network settings, select Keep Network Settings and press OK. Note • When you reset, the operator level will be reset as well. After resetting, make sure to set the operator level again. •... -
Page 25: Event Log
Event Log Event Log Search Log You can set a condition and search a log. Press and authenticate with the Admin level credential. Press EVENT LOG. Press and change the condition. When you press OK, a log that matches the condition will be displayed on the screen. Detail View Log Press and authenticate with the Admin level credential. -
Page 26: View Log Usage
Event Log View Log Usage You can check the status of log usage. Press and authenticate with the Admin level credential. Press EVENT LOG. Press... -
Page 27: Troubleshooting
I close the door. installation company. • FaceStation 2 is equipped with a built-in battery; however, if power is not The time has suddenly become supplied for a long period of time, the built-in battery may die, causing the time Time incorrect. -
Page 28: Product Specifications
Product specifications Product specifications Category Feature Specification Biometric Face • FS2-D: 125kHz EM & 13.56Mhz MIFARE, MIFARE Plus, DESFire/EV1, FeliCa, NFC RF Option • FS2-AWB: 125kHz EM, HID Prox & 13.56Mhz MIFARE, MIFARE Plus, DESFire/EV1, FeliCa, Credential iCLASS SE/SR, NFC, BLE RF read range MIFARE/DESFire/iCLASS : 50 mm / EM/HID Prox/Felica: 30 mm, BLE: 50 mm Supported... -
Page 29: Dimensions
Product specifications Dimensions (Unit: mm) -
Page 30: Fcc Compliance Information
This product is CE marked according to the provisions of the R&TTE Directive (1999/5/EC). Suprema Inc. hereby declares that this product is in compliance with the essential requirements and other relevant provisions of Directive 1999/5/EC. This device is a class 1 radio device according to the directive. -
Page 31: Appendices
• Do not use a Suprema product in situations related to medical, rescue of human lives, or maintenance of life, as a person may be injured or killed due to product malfunction. If an accident occurs while a consumer is using the product under the situations described as... - Page 32 www.supremainc.com www.supremainc.com...
Need help?
Do you have a question about the FaceStation 2 and is the answer not in the manual?
Questions and answers