Advertisement
Daikin Control Module – Commercial (SKY) and industrial (VRV) series
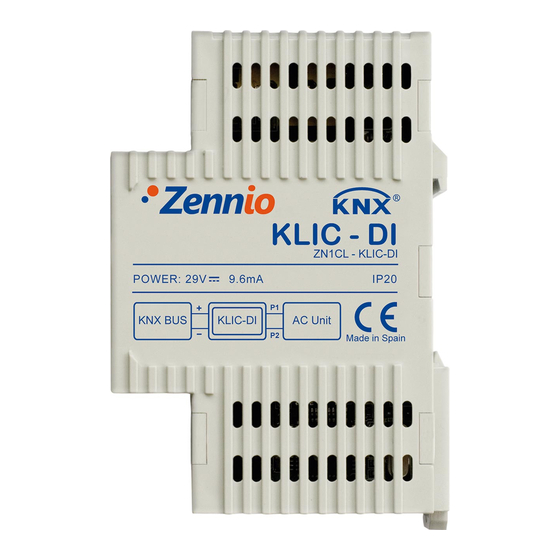
ZN1CL – KLIC‐DI
INTRODUCTION
KLIC-DI is an interface that allows a bidirectional communication between a KNX domotic system and the commercial
air-conditioning units of the series Sky Air and VRV systems manufactured by Daikin.
This device controls all basic functionalities of this type of air conditioning machines as well as it handles Daikin error
codes and communication errors that may arise.
MASTER CONTROL VS. SLAVE CONTROL
The great majority of internal units of SKY and VRV systems are controlled with a wired control that is connected to
the terminal P1/P2 available in these units.
KLIC-DI is compatible with the use of wired controls. Nevertheless, it is important to establish one of these controls as
master control and the other as slave control. This way, if the wired control is the master, KLIC-DI must be configured
as slave in the parameterization of the device and vice versa, if the KLIC-DI is the master control, the wired control
must be configured as slave.
Note: For configuring the Daikin wired control as master or slave: remove the casing
of the control, locate the switch marked as M/S (master/slave) in the PCB and select
the position of the switch. This switch is usually located in the lower left-hand corner
or in the upper right-hand corner. It is necessary to remove the bus and connect it
again in order to set the new configuration.
It is hardly recommended to check the configuration of the wired control when
carrying out the installation.
INSTALLATION
KLIC-DI is a device of reduced dimensions (90 x 60 x 35 mm) with two terminals for integrating air conditioning
machines of the series SKY and VRV from Daikin in a KNX domotic system:
EIB connector, for its connection to KNX system
bus.
P1/P2
terminal,
conditioning internal unit through a 2-wired cable
with cross-section area lower than 0.75mm
Nr
Description
1
EIB connector
Programming and checking LED. For more
2
information about the color code, look up the
manual
3
Programming button
4
2-wire communication terminal
This device does not require any external power supply, since it is fed through the KNX bus.
For installing the KLIC-DI, the device must be connected to KNX bus, through the EIB connector, in the same way as
any KNX device.
© Zennio Avance y Tecnología S.L.
for
its
connection
Edition 2
to
air-
2
.
For further information
Technical Note: Installation Note
www.zennio.com
Page. 1 of 3
Advertisement
Table of Contents

Related Manuals for Zennio KLIC-DI


Summary of Contents for Zennio KLIC-DI
- Page 1 KLIC-DI is compatible with the use of wired controls. Nevertheless, it is important to establish one of these controls as master control and the other as slave control. This way, if the wired control is the master, KLIC-DI must be configured as slave in the parameterization of the device and vice versa, if the KLIC-DI is the master control, the wired control must be configured as slave.
- Page 2 P1/P2 located in one side of the KLIC-DI (this connector is included as accessorize with the device). If a Daikin wired control is included in the installation, the device KLIC-DI can be also connected to the terminal P1/P2 of the wired control.
- Page 3 It is not possible to connect in series the internal units For carrying out a joint control of the A/C units, it is and control them from only one KLIC-DI recommended to install a touch panel Z38i Page. 3 of 3 ©...
Need help?
Do you have a question about the KLIC-DI and is the answer not in the manual?
Questions and answers