Avaya VSP 9000 Technical Configuration Manual
Avaya virtual services platform
with coraid etherdrive srx-series
storage appliances
Hide thumbs
Also See for VSP 9000:
- Technical configuration manual (137 pages) ,
- Technical configuration manual (152 pages) ,
- Technical configuration manual (32 pages)
Table of Contents
Advertisement
Quick Links
Advertisement
Table of Contents

Related Manuals for Avaya VSP 9000


Summary of Contents for Avaya VSP 9000
- Page 1 Virtual Services Platform 9000 Engineering >Avaya Virtual Services Platform 9000 with Coraid EtherDrive SRX-Series Storage Appliances Technical Configuration Guide Avaya Data Solutions Document Date: December 2010 Document Number: NN48500-611 Document Version: 1.1...
- Page 2 Avaya customers and other parties through the Avaya Support Web site: http://www.avaya.com/support Please note that if you acquired the product from an authorized reseller, the warranty is provided to you by said reseller and not by Avaya. Licenses THE SOFTWARE LICENSE TERMS AVAILABLE ON THE AVAYA WEBSITE, HTTP://SUPPORT.AVAYA.COM/LICENSEINFO/...
- Page 3 Abstract This Technical Configuration Guide describes a solution comprised of the Avaya Virtual Services Platform 9000 and Coraid EtherDrive storage appliances. During interoperability testing, two Coraid SRX EtherDrive SAN storage appliances successfully received and stored data transmitted from the Avaya Virtual Services Platform 9000 over 10 GbE links.
- Page 4 Revision Control Date Version Revised By Remarks December 2010 B. Azimi Initial Draft VSP 9000 with Coraid EtherDrive SRX-Series Dec 2010 Storage Appliances TCG...
-
Page 5: Table Of Contents
Test Case 12 – Simulate primary CP failure to test failover ............28 5.12 Test Case 13 –Simulate HBA failure ..................29 5.13 Test results ............................30 Conclusion ............................33 Additional Resources .......................... 34 VSP 9000 with Coraid EtherDrive SRX-Series Dec 2010 Storage Appliances TCG... -
Page 6: Figures
Figure 4 – Vdbench results for test cases 7 to 12 ..................31 Figure 5 – EDM port statistics (screen 1) ....................31 Figure 6 – EDM port statistics (screen 2) ....................32 VSP 9000 with Coraid EtherDrive SRX-Series Dec 2010 Storage Appliances TCG... -
Page 7: Tables
Tables Table 1 – Hardware and Software Versions ....................12 Table 2 – Storage Appliance Configuration ....................20 VSP 9000 with Coraid EtherDrive SRX-Series Dec 2010 Storage Appliances TCG... - Page 8 Italic text in a Courier New font indicates text the user must enter or select in a menu item, button or command: VSP_CoreA:1#show running-config Output examples from Avaya devices are displayed in a Lucida Console font: VSP_CoreA:1#show sys-info General Info : SysDescr : VSP-9012 (3.0.0.0_B325) (PRIVATE)
-
Page 9: Introduction
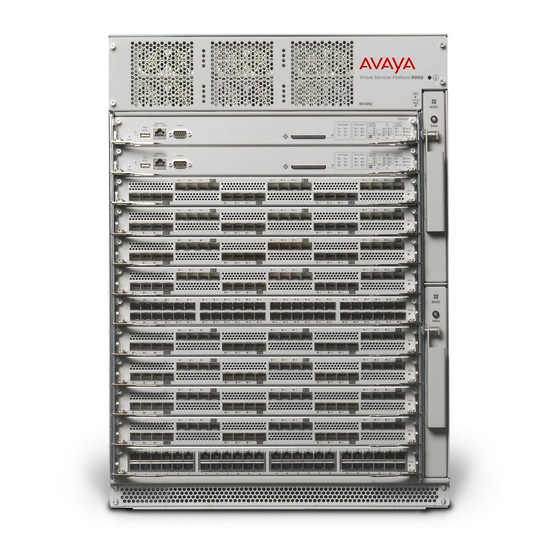
9000 (VSP 9000) and the Coraid EtherDrive™ SRX4200 Ethernet SAN array. The VSP 9000 is a new Ethernet Switching platform for Super Large Campus environments and Enterprise Data Centers. This platform offers an unmatched architecture that scales from an initial 8.4 Terabits per second to an Industry-leading 27 Terabits per second. -
Page 10: Interoperability Testing
Interoperability testing The interoperability testing focused primarily on verifying throughput under normal conditions and then simulating various fault conditions to test high availability. During interoperability testing, the VSP 9000 communicated with two Coraid EtherDrive SRX-Series storage appliances. Coraid uses RAID technology as a method of logically treating several hard drives as one unit to improve performance and/or provide redundancy. -
Page 11: Reference Configuration
2. Reference configuration Figure 1 shows a sample storage area network (SAN) configuration with an VSP 9000, five PC servers and two Coraid EtherDrive SRX-Series storage appliances. All communication between these devices is over 10 GbE links in a layer two topology. All of the 10 GbE connections use SFP+ connectors with multimode fiber. -
Page 12: Equipment And Software Validated
25 x 300GB SATA drives 5 x Coraid 10G, dual port, SFP+ HBA Cards (1 per server) Vdbench verification software Table 1 – Hardware and Software Versions VSP 9000 with Coraid EtherDrive SRX-Series Dec 2010 Storage Appliances TCG... -
Page 13: Storage Area Network Configuration
Coraid EtherDrive SRX-Series storage appliances Virtual Services Platform 9000 configuration This section describes how to configure the VSP 9000. To allow for full utilization of the network for SAN storage, Coraid recommends isolating SAN storage networks from other network traffic. -
Page 14: Configuring Vlans Using Edm
VLAN 100. The following steps show how to configure the VLAN using EDM: Select Configuration > VLAN > VLANs > Basic. Double click on the PortMembers for VLAN 1: Uncheck ports 1/1-1/9 and 6/1-6/9 then click OK: VSP 9000 with Coraid EtherDrive SRX-Series Dec 2010 Storage Appliances TCG... - Page 15 Create a new VLAN by clicking Insert: Set the Id to 100 then optionally specify a Name. Click ‘…’ to assign PortMembers: Select ports 3/1-3/9 and 6/1-6/9 then click OK: VSP 9000 with Coraid EtherDrive SRX-Series Dec 2010 Storage Appliances TCG...
-
Page 16: Enable Jumbo Frames
Enable jumbo frame supportwith the MTU set to at least 9600 bytes. To configure the MTU to 9600 bytes using EDM: Select Configuration >Edit>Chassis > Chassis. Set the MTUSize to 9600 then click Apply: VSP 9000 with Coraid EtherDrive SRX-Series Dec 2010 Storage Appliances TCG... -
Page 17: Multiple Spanning Tree Protocol
Multiple Spanning Tree Protocol By default MSTP is enabled globally on the VSP 9000 and is enabled on all ports. To enable fast convergence when a device is connected to the VSP 9000, the 10 GbE ports will be configured for edge mode. -
Page 18: Server Configuration
Server configuration This section describes how to configure the PC servers, which must run a 64-bit OS. The Avaya Data Solutions Test Lab setup uses five PC servers running CentOS 5.5 (x64-bit version). You also have to install Coraid HBA cards in each PC server. The Coraid HBA provides functionality similar to a NIC card. -
Page 19: Figure 3 - Coraid Parallel Path Utilization W/O Mpio
Figure 3 – Coraid parallel path utilization w/o MPIO For Coraid HBA support information, go to Coraid EtherDrive: Ethernet SAN for Virtualization, Cloud, and Enterprise Storage at http://www.coraid.com/support/customer_support. VSP 9000 with Coraid EtherDrive SRX-Series Dec 2010 Storage Appliances TCG... -
Page 20: Etherdrive Srx-Series Storage Appliance Configuration
EtherDrive SRX-Series storage appliance configuration In the Avaya Data Solutions Test Lab setup, there are two Coraid EtherDrive SRX-Series storage appliances. Between the EtherDrive SRX appliances are five different RAID arrays so that each PC server writes to its own RAID. The RAID types are: RAID 1, RAID 5 and RAID 10 arrays. -
Page 21: Test Methodology
5) Test Case 5 – Restore VSP 9000 module by replacing module 3. 6) Test Case 6 – Simulate VSP 9000 module 3 failure by disabling module with ACLI. 7) Test Case 7 – Restore VSP 9000 module by re-enabling module 3 with ACLI. -
Page 22: Test Case 1 - Baseline Test
Launch Firefox to read the results. accurate. Confirm that the error log contains no errors. Also confirm that the data verification confirms that all data was verified and accounted for. VSP 9000 with Coraid EtherDrive SRX-Series Dec 2010 Storage Appliances TCG... -
Page 23: Test Case 2 - Individual Hba Link Failure
Vdbench should validate all data and Confirm that all data is validated the error log in the output directory Pass and the error log has no errors. should be empty. VSP 9000 with Coraid EtherDrive SRX-Series Dec 2010 Storage Appliances TCG... -
Page 24: Test Case 4 - Simulate Module Failure By Removing Module 3
Test Case 4 – Simulate module failure by removing module 3 The objective of this test case is to simulate a VSP 9000 module failure by removing module 3 and then validating that each PC continues to read and write to their RAID. -
Page 25: Test Case 6 - Simulate Module Failure By Disabling The Module
Test Case 6 – Simulate module failure by disabling the module The objective of this test case is to simulate VSP 9000 module failure by disabling module 3 with the ACLI and then validating that each PC continues to read and write to their RAID. -
Page 26: Test Case 8 - Simulate Module Failure By Removing Module 6
Test Case 8 – Simulate module failure by removing module 6 The objective of this test case is to simulate VSP 9000 module failure by removing module 6 and then validating that each PC continues to read and write to their RAID. -
Page 27: Test Case 10 - Simulate Primary Cp Failure To Test Ha
VSP with VSP. Pass flags Remove the master CP on the Standby CP should come up as VSP 9000, the standby CP should master. Pass come up as the master. Confirm that Vdbench doesn't notice the failure and continues reading and writing data to the storage array. -
Page 28: Test Case 12 - Simulate Primary Cp Failure To Test Failover
VSP with show boot config VSP. Pass flags. Remove the master CP on the Standby CP should come up as VSP 9000, the standby CP should master. Pass come up as the master. Confirm that Vdbench doesn't notice the failure and continues reading and writing data to the storage array. -
Page 29: Test Case 13 -Simulate Hba Failure
Pass to see what the threshold is for a established as the threshold where the complete failover and the system system won't recover. can recover. VSP 9000 with Coraid EtherDrive SRX-Series Dec 2010 Storage Appliances TCG... -
Page 30: Test Results
6. Test results This Technical Configuration Guide describes a solution comprised of the VSP 9000 and Coraid storage appliances. After very thorough interoperability testing, all test cases were successfully completed. The following screens show the testing statistics, which confirm that this solution meets Avaya’s quality and interoperability standards. -
Page 31: Figure 4 - Vdbench Results For Test Cases 7 To 12
The following two figures show the Enterprise Device Manager (EDM) port statistics. Figure 4 shows the ingress and egress port statistics, and Figure 5 shows that there were no errors. Figure 5 – EDM port statistics (screen 1) VSP 9000 with Coraid EtherDrive SRX-Series Dec 2010 Storage Appliances TCG... -
Page 32: Figure 6 - Edm Port Statistics (Screen 2)
Figure 6 – EDM port statistics (screen 2) VSP 9000 with Coraid EtherDrive SRX-Series Dec 2010 Storage Appliances TCG... -
Page 33: Conclusion
7. Conclusion The Avaya Data Solutions Test Lab conducted comprehensive tests using a methodology that verified throughput under normal conditions and under various fault conditions. In general the average data rate per PC was approximately 480Mb/s, and the average data transfer size was 1MB. There were no errors observed during the testing. -
Page 34: Additional Resources
© 2010 Avaya Inc. All Rights Reserved. Avaya and the Avaya Logo are trademarks of Avaya Inc. and are registered in the United States and other countries. All trademarks identified by ®, TM or SM are registered marks, trademarks, and service marks, respectively, of Avaya Inc. All other trademarks are the property of their respective owners.
Need help?
Do you have a question about the VSP 9000 and is the answer not in the manual?
Questions and answers