Avaya VSP 9000 Technical Configuration Manual
Virtual services platform with coraid etherdrive srx-series storage appliances
Hide thumbs
Also See for VSP 9000:
- Technical configuration manual (137 pages) ,
- Technical configuration manual (152 pages) ,
- Technical configuration manual (34 pages)
Table of Contents
Advertisement
Quick Links
Virtual Services Platform 9000
and
Virtual Services Platform 7000
Engineering
>Avaya Virtual Services Platform 9000
and Avaya Virtual Services Platform
7000 with Coraid EtherDrive SRX-
Series Storage Appliances Technical
Configuration Guide
Avaya Networking
Document Date: August 2011
Document Number: NN48500-629
Document Version: 1.0
Advertisement
Table of Contents

Related Manuals for Avaya VSP 9000


Summary of Contents for Avaya VSP 9000
- Page 1 Virtual Services Platform 9000 Virtual Services Platform 7000 Engineering >Avaya Virtual Services Platform 9000 and Avaya Virtual Services Platform 7000 with Coraid EtherDrive SRX- Series Storage Appliances Technical Configuration Guide Avaya Networking Document Date: August 2011 Document Number: NN48500-629 Document Version: 1.0...
- Page 2 Avaya customers and other parties through the Avaya Support Web site: http://www.avaya.com/support Please note that if you acquired the product from an authorized reseller, the warranty is provided to you by said reseller and not by Avaya. Licenses THE SOFTWARE LICENSE TERMS AVAILABLE ON THE AVAYA WEBSITE, HTTP://SUPPORT.AVAYA.COM/LICENSEINFO/...
- Page 3 Abstract This Technical Configuration Guide describes a solution comprised of the Avaya Virtual Services Platform 9000, the Avaya Virtual Services Platform 7000, and Coraid EtherDrive storage appliances. Information in this Technical Configuration Guide has been obtained through Avaya Networking interoperability testing and additional technical discussions.
-
Page 4: Table Of Contents
Configuring VLANs using Enterprise Device Manager ................14 4.1.3 Enabling Jumbo Frames ........................16 4.1.4 Configuring Multiple Spanning Tree Protocol on the Avaya VSP 9000 ..........17 Avaya Virtual Services Platform 7000 Configuration ..............18 4.2.1 Configuring VLANs ..........................18 4.2.2... -
Page 5: Figures
Figure 7 - Avaya Networking Test Lab Configuration ................. 23 Tables Table 1 – Hardware and Software Versions ....................12 Table 2 – Storage Appliance Configuration ....................21 Avaya VSP 9000 / Avaya VSP 7000 with Coraid EtherDrive SRX-Series August 2011 Storage Appliances TCG... - Page 6 Italic text in a Courier New font indicates text the user must enter or select in a menu item, button or command: VSP_CoreA:1#show running-config Output examples from Avaya devices are displayed in a Lucida Console font: VSP_CoreA:1#show sys-info General Info : SysDescr : VSP-9012 (3.0.2.0 GA)
-
Page 7: Introduction
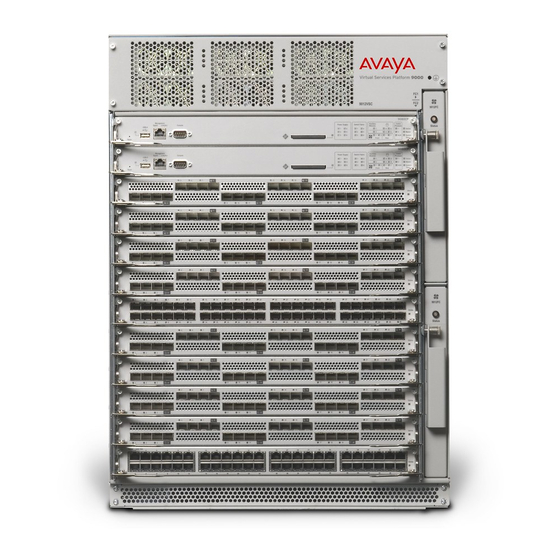
Avaya Virtual Services Platform 9000 core switches over 10 GbE links. 1.1 Avaya Virtual Services Platform 9000 The Avaya Virtual Services Platform 9000 (VSP 9000) is a new Ethernet Switching platform for Enterprise Campus environments and Enterprise Data Centers. This platform offers an unmatched switching architecture that scales from an initial 8.4 Terabits per second to an industry-leading 27 Terabits per... -
Page 8: Avaya Virtual Services Platform 7000
Figure 1 – Avaya VSP 9000 1.2 Avaya Virtual Services Platform 7000 The Avaya Virtual Services Platform (VSP 7000) is a new family of 1/10Gigabit, Top of Rack, Ethernet Switches. These high-density, high-capacity switches provide a high performance forwarding engine for data centers aggregation and small to medium core switches. -
Page 9: Coraid Etherdrive Srx Series
RAID devices with front loading, hot-swappable SATA, SAS, and SSD disk drives. Each EtherDrive SRX appliance can be used individually or in RAID sets. Figure 3 – Coraid EtherDrive SRX Storage Array Avaya VSP 9000 / Avaya VSP 7000 with Coraid EtherDrive SRX-Series August 2011 Storage Appliances TCG... -
Page 10: Interoperability And Resiliency Testing
During interoperability testing, the Avaya VSP 7000s were used as Switch Clustering edge devices in conjunction with two Avaya VSP 9000 core devices and communicated with two Coraid EtherDrive SRX-Series storage appliances. This verified the resiliency and fast failover of the Switch Clustering solution of the Avaya VSP 9000. -
Page 11: Figure 4 - San Test Bed Configuration
Figure 4 – SAN Test Bed Configuration Avaya VSP 9000 / Avaya VSP 7000 with Coraid EtherDrive SRX-Series August 2011 Storage Appliances TCG... -
Page 12: Equipment And Software Validated
This section provides configuration details for the following SAN components: • Avaya VSP 9000 • Avaya VSP 7000 • PC servers • Coraid EtherDrive SRX-Series storage appliances Avaya VSP 9000 / Avaya VSP 7000 with Coraid EtherDrive SRX-Series August 2011 Storage Appliances TCG... -
Page 13: Avaya Virtual Services Platform 9000 Configuration
4.1 Avaya Virtual Services Platform 9000 Configuration This section describes how to configure the Avaya VSP 9000. To allow for full utilization of the network for SAN storage, Coraid recommends isolating SAN storage networks from other network traffic. Note – In this test setup, STP is disabled on all connected ports for faster transition time when a ... -
Page 14: Configuring Vlans Using Enterprise Device Manager
Select Configuration > VLAN > VLANs > Basic. Double click on the PortMembers for VLAN 1: Uncheck ports 1/1-1/9 and 6/1-6/9 then click OK: Avaya VSP 9000 / Avaya VSP 7000 with Coraid EtherDrive SRX-Series August 2011 Storage Appliances TCG... - Page 15 Create a new VLAN by clicking Insert: Set the Id to 100 then optionally specify a Name. Click ‘…’ to assign PortMembers: Select ports 3/1-3/9 and 6/1-6/9 then click OK: Avaya VSP 9000 / Avaya VSP 7000 with Coraid EtherDrive SRX-Series August 2011 Storage Appliances TCG...
-
Page 16: Enabling Jumbo Frames
Enable jumbo frame support with the MTU set to at least 9600 bytes. To configure the MTU to 9600 bytes using EDM: Select Configuration >Edit>Chassis > Chassis. Set the MTUSize to 9600 then click Apply: Avaya VSP 9000 / Avaya VSP 7000 with Coraid EtherDrive SRX-Series August 2011 Storage Appliances TCG... -
Page 17: Configuring Multiple Spanning Tree Protocol On The Avaya Vsp 9000
Avaya VSP 9000 By default MSTP is enabled globally on the Avaya VSP 9000 and is enabled on all ports. To enable fast convergence when a device is connected to the Avaya VSP 9000, the 10 GbE ports will be configured for edge mode. -
Page 18: Avaya Virtual Services Platform 7000 Configuration
4.2 Avaya Virtual Services Platform 7000 Configuration Follow the steps in this section to configure the Avaya VSP 7000. To allow for full utilization of the network for SAN storage, Coraid recommends isolating SAN storage networks from other network traffic. -
Page 19: Server Configuration
100.100.50.254 4.3 Server Configuration This section describes how to configure the PC servers, which must run a 64-bit OS. The Avaya Networking Test Lab setup uses five PC servers running CentOS 5.5 (x64-bit version). The Coraid HBA and associated driver must be installed in each PC server. The Coraid HBA requires a PCI Express slot and provides functionality similar to a standard NIC. -
Page 20: Figure 6 - Coraid Parallel Path Utilization W/O Mpio
Figure 6 – Coraid Parallel Path Utilization w/o MPIO For Coraid HBA support information, go to Coraid EtherDrive: Ethernet SAN for Virtualization, Cloud, and Enterprise Storage at http://www.coraid.com/support/customer_support. Avaya VSP 9000 / Avaya VSP 7000 with Coraid EtherDrive SRX-Series August 2011 Storage Appliances TCG... -
Page 21: Etherdrive Srx-Series Storage Appliance Configuration
4.4 EtherDrive SRX-Series Storage Appliance Configuration In the Avaya Networking Test Lab setup, there are two Coraid EtherDrive SRX-Series storage appliances. Between the EtherDrive SRX appliances are five different RAID arrays so that each PC server writes to its own RAID. The RAID types are: RAID 1, RAID 5 and RAID 10 arrays. -
Page 22: Test Methodology
The Avaya Networking Test Lab conducted comprehensive tests using a methodology that verified various fault conditions. Avaya’s Switch Clustering uses the Split Multi-Link Trunking (SMLT) feature for Layer 2 Always-On Networking. A majority of the testing revolved around the use of the SMLT technology to ensure fast failover and uninterrupted access to the SAN devices. -
Page 23: Figure 7 - Avaya Networking Test Lab Configuration
Figure 7 - Avaya Networking Test Lab Configuration Avaya VSP 9000 / Avaya VSP 7000 with Coraid EtherDrive SRX-Series August 2011 Storage Appliances TCG... -
Page 24: Test Case 1 - Smlt Baseline Test
Launch Firefox to read the results. Confirm that the error log contains no errors. Also confirm that the data verification confirms that all data was verified and accounted for. Avaya VSP 9000 / Avaya VSP 7000 with Coraid EtherDrive SRX-Series August 2011 Storage Appliances TCG... -
Page 25: Test Case 2 - Simulate Smlt Port Failure (Ports 1 And 3 Active)
MAC is learning properly. Remove one port from each leg of the SMLT (ports 1 and 3). Verify that I/O continues from PC to SRX. Pass Avaya VSP 9000 / Avaya VSP 7000 with Coraid EtherDrive SRX-Series August 2011 Storage Appliances TCG... -
Page 26: Test Case 4 - Simulate Smlt Leg Failure (Ports 1 And 2 Active)
Remove Leg 2 of the SMLT. (Ports 3 and 4 are the active ports.) Verify that I/O continues from PC to SRX. Pass Avaya VSP 9000 / Avaya VSP 7000 with Coraid EtherDrive SRX-Series August 2011 Storage Appliances TCG... -
Page 27: Test Case 6 - Simulate Smlt Ports 1 And 3 Link Failover
Remove port 2 and port 4. Then plug the ports back in to simulate link failover. Verify that I/O continues from PC to SRX. Pass Avaya VSP 9000 / Avaya VSP 7000 with Coraid EtherDrive SRX-Series August 2011 Storage Appliances TCG... -
Page 28: Test Case 8 - Simulate Smlt Leg 1 Link Failover
Remove leg 2 of the SMLT. Then plug leg 2 back in to simulate link failover. Verify that I/O continues from PC to SRX. Pass Avaya VSP 9000 / Avaya VSP 7000 with Coraid EtherDrive SRX-Series August 2011 Storage Appliances TCG... -
Page 29: Test Case 10 - Simulate Broken Smlt/Mlt (Only One Port Active)
MAC tables on all switches. Remove port p1 from each PC. Verify that I/O continues from PC Pass to SRX and MAC addresses are learned properly. Avaya VSP 9000 / Avaya VSP 7000 with Coraid EtherDrive SRX-Series August 2011 Storage Appliances TCG... -
Page 30: Test Case 12 - Simulate Port Failure On Pc
Verify that I/O continues from PC Vdbench should finish with no errors to SRX. in the log file and all data should be Pass validated. Avaya VSP 9000 / Avaya VSP 7000 with Coraid EtherDrive SRX-Series August 2011 Storage Appliances TCG... -
Page 31: Test Case 14 - Simulate Smlt-Pc Port Link Failover
Pass validated. 6. Conclusion The Avaya Networking Test Lab conducted comprehensive tests using a methodology that verified throughput under normal conditions and under various fault conditions. There were no errors observed during the testing of the various fault conditions. The test lab confirmed through various scenarios that the solution passed all High Availability (HA) tests. -
Page 32: Additional Resources
© 2011 Avaya Inc. All Rights Reserved. Avaya and the Avaya Logo are trademarks of Avaya Inc. and are registered in the United States and other countries. All trademarks identified by ®, TM or SM are registered marks, trademarks, and service marks, respectively, of Avaya Inc. All other trademarks are the property of their respective owners.
Need help?
Do you have a question about the VSP 9000 and is the answer not in the manual?
Questions and answers