Table of Contents
Advertisement
Identity Engines Ignition Server
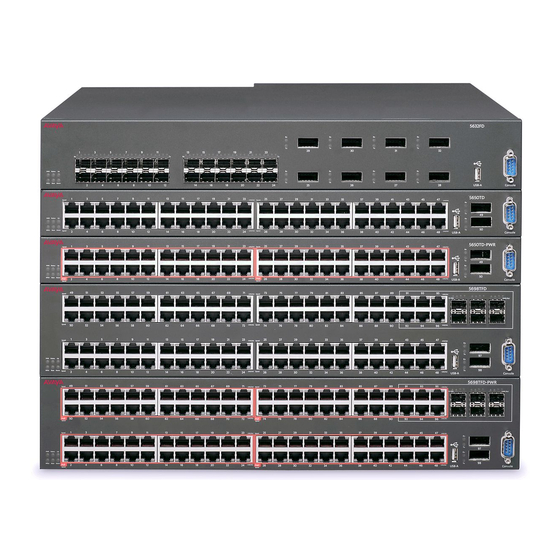
Ethernet Routing Switch
8600, 8300, 1600, 5500, 5600, 4500, 2500
Engineering
Switch User Authentication using
Identity Engines Ignition Server
Technical Configuration Guide
Avaya Data Solutions
Document Date: July 2010
Document Number: NN48500-589
Document Version: 1.1
Advertisement
Table of Contents

Related Manuals for Avaya ERS 8600


Summary of Contents for Avaya ERS 8600
- Page 1 Identity Engines Ignition Server Ethernet Routing Switch 8600, 8300, 1600, 5500, 5600, 4500, 2500 Engineering Switch User Authentication using Identity Engines Ignition Server Technical Configuration Guide Avaya Data Solutions Document Date: July 2010 Document Number: NN48500-589 Document Version: 1.1...
- Page 2 Avaya Support Web site: http://www.avaya.com/support Please note that if you acquired the product from an authorized reseller, the warranty is provided to you by said reseller and not by Avaya. Licenses THE SOFTWARE LICENSE TERMS AVAILABLE ON THE AVAYA WEBSITE, HTTP://SUPPORT.AVAYA.COM/LICENSEINFO/...
- Page 3 Abstract Revision Control Date Version Revised by Remarks 10/09/2009 Initial Release Switch User Authentication using Identity Engines Ignition Server Technical Configuration Guide [July 2010...
-
Page 4: Table Of Contents
Getting technical documentation ....................73 Getting product training ....................... 73 Getting help from a distributor or reseller ..................73 Getting technical support from the Avaya Web site ..............73 Switch User Authentication using Identity Engines Ignition Server Technical Configuration Guide [July 2010... -
Page 5: Document Updates
Italic text in a Courier New font indicates text the user must enter or select in a menu item, button or command: ERS5520-48T# show running-config Output examples from Avaya devices are displayed in a Lucinda Console font: ERS5520-48T# show running-config ! Embedded ASCII Configuration Generator Script ! Model = Ethernet Routing Switch 5520-24T-PWR ! Software version = v5.0.0.011... -
Page 6: Overview: Radius User Authentication Using Identify Engines
1. Overview: RADIUS User Authentication using Identify Engines This document provides the framework for implementing user Authentication, Authorization, and Accounting for Avaya switches. 1.1 RADIUS Support on Avaya Switches RADIUS 802.1x RADIUS 802.1x RADIUS RADIUS RADIUS authenti- (EAP) accoun-... -
Page 7: User Authentication Using Ers5600, Ers5500, Ers4500, Or Ers2500
Read-Write-Access Read-Write-All-Access In addition, on the ERS8600 only, via vendor identifier 1584 attribute type 194, if is set to a value of 0, you can enter a list of CLI commands not allowed for a user. The CLI command is entered using the RADIUS string value configured via RADIUS vendor identifier 1584 attribute type 195. -
Page 8: Ers8600 Switch Configuration Example
2. ERS8600 Switch Configuration Example For this configuration example, we will enable RADIUS user authentication on ERS8600-1 using the out- of-band management port. We will configure the Identity Engines RADIUS server with the following three users: User name with read-only access: 8600ro ... - Page 9 RADIUS source-IP when using the out-of-band management port, this feature is not supported on the out-of-band management port. Hence, if you have two CP cards, you will have to configure two RADIUS Authenticators on the RADIUS server. 2.1.2 ERS 8600 Switch: Verify Operations 2.1.2.1 Verify RADIUS Global Settings Step 1 –...
- Page 10 Via 8600-1, verify the following information: Option Verify Acct-enable Verify that the CLI accounting is set to true globally acct-include-cli- commands enable Verify that enable is set to true globally telling us that RADIUS is enabled 2.1.3 IDE Setup 2.1.3.1...
- Page 11 IDE Step 1 – IDE already has the vendor specific attributes defined (Bay Networks vendor code 1584 using attribute type 192) for the ERS8600 which can be viewed by going to Site Configuration -> Provisioning -> Vendors/VSAs -> Bay-Networks -> VSA Definitions.
- Page 12 IDE Step 3 – Via the Outbound Attribute window, type in a name for the attribute to be used for access priority (i.e. ERS8600-Access-Priority as used in this example), click the VSA radio button, select Bay-Networks via Vendor and ERS8xxx-Access-Priority via VSA. Click on OK when done IDE Step 4 –...
- Page 13 IDE Step 5 – Using the Outbound Attribute created in Step 3, we will first add an attribute value of 1 for read-only-access. Start by entering a name via the Outbound Value Name: window (i.e. 8600-ro as used in this example) and click on New IDE Step 6 –...
- Page 14 IDE Step 7 – Go to Site Configuration -> Provisioning -> Outbound Values -> New again to create the outbound attribute for read-write-access. Using the Outbound Attribute created in Step 3, we will add an attribute value of 5 for read-write-access. Start by entering a name via the Outbound Value Name: window (i.e.
- Page 15 IDE Step 9 – Go to Site Configuration -> Provisioning -> Outbound Values -> New again to create the outbound attribute for read-write-all-access. Using the Outbound Attribute created in Step 3, we will add an attribute value of 6 for read-write-all-access. Start by entering a name via the Outbound Value Name: window (i.e.
- Page 16 2.1.3.2 Add Users For this configuration example, we will add the following users. User Name Access Level 8600ro Read-Only-Access 8600rw Read-Write-Access 8600rwa Read-Write-All-Access IDE Step 1 – Start by going to Site Configuration -> Directories -> Internal Store -> Internal...
- Page 17 IDE Step 2 – Enter the user name for read-only-access via User Name: (i.e. 8600ro as used in this example) and enter the password for this user via Password and Confirm Password. Click on OK when done. If you wish, you can also change the expiry date via Password...
- Page 18 IDE Step 3 – Repeat step 2 again by clicking on New to add the read-write-access user. Enter the user name for read-write-access via User Name: (i.e. 8600rw as used in this example) and enter the password for this user via Password and Confirm Password. Click on OK when done.
- Page 19 IDE Step 4 – Repeat step 2 for the final time by clicking on New to add the read-write-all- access user. Enter the user name for read-write-all-access via User Name: (i.e. 8600rwa as used in this example) and enter the password for this user via Password and Confirm Password.
- Page 20 2.1.3.3 Add an Access Policy IDE Step 1 – Go to Site Configuration -> Access Policies -> RADIUS. Right-click RADIUS and select New Access Policy. Enter a policy name (i.e. ERS8600-Access as used in this example) and click on OK when done...
- Page 21 IDE Step 2 – Click on the policy we just created, i.e. ERS8600-Access, and click on Edit via the Authentication Policy tab IDE Step 3 – Under Edit Authentication Policy window, select NONE -> PAP Switch User Authentication using Identity Engines Ignition Server Technical Configuration Guide...
- Page 22 IDE Step 4 – Go to the Identity Routing tab and click on Edit IDE Step 5 – Check off the Enable Default Directory Set and click on OK when done. Switch User Authentication using Identity Engines Ignition Server Technical Configuration Guide...
- Page 23 IDE Step 6 – Go to the Authorization Policy tab and click on Edit IDE Step 7 – Once the Edit Authorization Policy window pops up, click on Add. First, we will add a rule for read-only-access. When the New Rule window pops up, we will name the...
- Page 24 IDE Step 8 – Click on New to add a new constraint IDE Step 9 – For this example, we are simply going to look for the read-only-user user-id. From Attribute Category, select User and scroll down and select user-id. Select Equal To with Format of None and enter the read-only-access user id, i.e.
- Page 25 IDE Step 10 – Via Actions, select Allow. From the All Outbound Values window, select the output attribute we created previously named 8600ro and click on the less-than arrow key to move the attribute to the Provision With window IDE Step 11 –...
- Page 26 IDE Step 12 – Click on New to add a new constraint IDE Step 13 – For this example, we are simply going to look for the read-write-access user- id. From Attribute Category, select User and scroll down and select user-id. Select Equal To with Format of None and enter the read-only-access user id, i.e.
- Page 27 IDE Step 14 – Via Action, select Allow. From the All Outbound Values window, select the output attribute we created previously named 8600rw and click on the less-than arrow key to move the attribute to the Provision With window IDE Step 15 –...
- Page 28 IDE Step 16 – Click on New to add a new constraint IDE Step 17 – For this example, we are simply going to look for the read-write-all-access user-id. From Attribute Category, select User and scroll down and select user-id. Select Equal To with Format of None and enter the read-only-access user id, i.e.
- Page 29 IDE Step 18 – Via Action, select Allow. From the All Outbound Values window, select the output attribute we created above named 8600rwa and click on the less-than arrow key to move the attribute to the Provision With window...
- Page 30 IDE Step 19 – When completed, you can view the complete policy by clicking on the Access Policy Summary button Switch User Authentication using Identity Engines Ignition Server Technical Configuration Guide [July 2010...
- Page 31 2.1.3.4 Add the Avaya ERS8600-1 switch as an RADIUS Authenticator For Ignition Server to process the Avaya switch RADIUS requests, each switch must be added as an Authenticator. IDE Step 1 – Go to Site Configuration -> Authenticators -> default. For this example, we will...
- Page 32 IDE Step 2 – Go to Site Configuration -> Authenticators -> default -> Nortel Switch and click on New. Switch User Authentication using Identity Engines Ignition Server Technical Configuration Guide [July 2010...
- Page 33 IDE Step 3 – Enter the settings as shown below making sure you select the policy we created previously named ERS8600-Access via Access Policy. Leave Enable Authenticator and Enable RADIUS Access checked. Click on OK when done. Switch User Authentication using Identity Engines Ignition Server Technical Configuration Guide...
- Page 34 2.1.4 Verification 2.1.4.1 Verify User Authentication You can test user authentication for the ERS8600 users configured on IDE by entering the user name and password. Step 1 – Via Ignition Dashboard, select the IP address of the Ignition Server, click on the Troubleshoot tab, go to Directory Service Debugger and select the Auth User tab.
- Page 35 Via Dashboard, verify the following information: Option Verify Results If successful, Authentication successful should be displayed 2.1.4.2 Verify user authentication from ERS switch You can view the authentication details via Ignition Dashboard which provides extensive details about the device or user.
- Page 36 Result: Switch User Authentication using Identity Engines Ignition Server Technical Configuration Guide [July 2010...
- Page 37 At minimum, verify the following items: Option Verify Authentication Result If successful, Authenticated should be displayed. If not, verify the device using the previous step and if this also fails, verify the Ignition Server configuration. Authorization Result If successful, Allow should be displayed. If not, verify the device using the previous step and if this also fails, verify the Ignition Server configuration.
-
Page 38: Part 2: Ers8600 Configuration With Specific Commands Disabled
2.2 Part 2: ERS8600 Configuration with Specific Commands Disabled In this part, we will use the same configuration used in the previous example, but, we will restrict the read- write ERS8600 user (user name = 8600rw) to deny access to the CLI QoS and Filter configuration (“config qos”... - Page 39 IDE Step 2 – Go to Site Configuration -> Provisioning -> Outbound Attributes -> New IDE Step 3 – Via the Outbound Attribute window, type in a name for the attribute to be used to restrict CLI commands (i.e. 8600-Command-Access as used in this example), click the VSA radio button, select Bay-Networks via Vendor and ERS8xxx-Command-Access via VSA.
- Page 40 IDE Step 4 – Go to Site Configuration -> Provisioning -> Outbound Attributes -> New one more time. Via the Outbound Attribute window, type in a name for the attribute to be used to list the CLI commands (i.e. 8600-Command-List as used in this example), click the VSA radio button, select Bay-Networks via Vendor and ERS8xxx-CLI-Commands via VSA.
- Page 41 IDE Step 6 – Using the Outbound Attribute created in Step 3, we will add a value of 0 to restrict CLI command access. Start by entering a name via the Outbound Value Name: window (i.e. ERS8600-Command-Access as used in this example) and click on New IDE Step 7 –...
- Page 42 IDE Step 8 – Go to Site Configuration -> Provisioning -> Outbound Values -> New again to create the outbound attribute for deny access to the CLI command „config qos‟. Using the Outbound Attribute created in Step 4, we will add a string value of “config qos”. Start by entering a name via the Outbound Value Name: window (i.e.
- Page 43 IDE Step 10 – Go to Site Configuration -> Provisioning -> Outbound Values -> New again to create the outbound attribute for deny access to the CLI command „config filter‟. Using the Outbound Attribute created in Step 4, we will add a string value of “config filter”. Start by entering a name via the Outbound Value Name: window (i.e.
- Page 44 2.2.2.2 Modify the Authorization Policy for the ERS8600 read-write user IDE Step 1 – Click on the policy created from the previous example, i.e. ERS8600-Access, click on the Authorization Policy tab, select the read-write-access via the Rule Name window, and click on Edit IDE Step 2 –...
- Page 45 IDE Step 3 – When completed, you can view the complete policy by clicking on the Access Policy Summary button Switch User Authentication using Identity Engines Ignition Server Technical Configuration Guide [July 2010...
- Page 46 2.2.3 Verification Connect to ERS8600 by using telnet with the read-write user account. ERS8600-1 – Verify operation by typing in some commands ERS-8606:5# config qos Permission denied. ERS-8606:5# config filter Permission denied. Switch User Authentication using Identity Engines Ignition Server Technical Configuration Guide...
-
Page 47: Ers5600 Switch Configuration Example
3. ERS5600 Switch Configuration Example ERS5600-1 Mgmt IP = 47.133.58.56 Core Network 47.133.56.101 Identity Engines Ignition Server For this configuration example, we will enable RADIUS user authentication on ERS500-1 using the switch management port. We will configure the Identity Engines RADIUS server with the following two users: ... -
Page 48: Ide Setup
3.2 IDE Setup 3.2.1 Configure an Outbound Attribute on Ignition Server for Service-Type The following chart displays the outbound attribute values required by the ERS5600, ERS5500, ERS4500, or ERS2500 for each access level using RADIUS attribute type 6 (Service-Type). - Page 49 IDE Step 4 – Go to Site Configuration -> Provisioning -> Outbound Values -> New IDE Step 5 – Using the Outbound Attribute created in Step 2, we will first add a value of 7 (NAS Prompt) for read-only-access. Start by entering a name via the Outbound Value Name: window (i.e.
- Page 50 IDE Step 6 – Select the Outbound Attributes name created in Step 3 (i.e. Service-type-ERS as used in this example) via the Choose Global Outbound Attribute: pull down menu. In the Value Unsigned – 32 bit window, enter 7 (i.e. value of 7 signifies NAS Prompt for read-only-access).
- Page 51 IDE Step 8 –Select the Outbound Attributes name created in Step 2 (i.e. Service-type-ERS as used in this example) via the Choose Global Outbound Attribute: pull down menu. In the Value Unsigned – 32 bit window, enter 6 (i.e. value of 6 signifies Administrative for read-write-access).
- Page 52 3.2.2 Add Users For this configuration example, we will add the following users User Name Access Level 5600ro Read-Only-Access 5600rwa Read-Write-All-Access IDE Step 1 – Start by going to Site Configuration -> Directories -> Internal Store -> Internal Users...
- Page 53 IDE Step 2 – Enter the user name for read-only-access via User Name: (i.e. 5600ro as used in this example) and enter the password for this user via Password and Confirm Password. Click on OK when done. If you wish, you can also change the expiry date via Password Expires if you do not...
- Page 54 IDE Step 3 – Repeat step 2 again by clicking on New to add the read-write-access user. Enter the user name for read-write-access via User Name: (i.e. 5600rw as used in this example) and enter the password for this user via Password and Confirm Password. Click on OK when done. If you...
- Page 55 3.2.3 Add Access Policy IDE Step 1 – Go to Site Configuration -> Access Policies -> RADIUS. Right-click RADIUS and select New Access Policy. Enter a policy name, i.e. ERS-access as used in this example and click on OK when done...
- Page 56 IDE Step 2 – Click on the policy we just created, i.e. ERS-access, and click on Edit via the Authentication Policy tab IDE Step 3 – Under Edit Authentication Policy window, select NONE -> PAP Switch User Authentication using Identity Engines Ignition Server Technical Configuration Guide...
- Page 57 IDE Step 4 – Go to the Identity Routing tab and click on Edit IDE Step 5 – Check off the Enable Default Directory Set and click on OK when done. Switch User Authentication using Identity Engines Ignition Server Technical Configuration Guide...
- Page 58 IDE Step 6 – Go to the Authorization Policy tab and click on Edit Switch User Authentication using Identity Engines Ignition Server Technical Configuration Guide [July 2010...
- Page 59 IDE Step 7 – Once the Edit Authorization Policy window pops up, click on Add. First, we will add a rule for read-only. When the New Rule window pops up, we will name the rule read-only as shown below IDE Step 8 –...
- Page 60 IDE Step 8 – For this example, we are simply going to look for the read-only-user user-id. From Attribute Category, select User and scroll down and select user-id. Select Equal To with Format of None and enter the read-only-access user id, i.e. 5600ro as used in this example, in the Static Value window as shown below.
- Page 61 IDE Step 9 – Via Action, select Allow. From the All Outbound Values window, select the output attribute we created above named ERSro and click on the less-than arrow key to move the attribute to the Provision With window IDE Step 10 –...
- Page 62 IDE Step 11 – Click on New to add a new constraint IDE Step 12 – For this example, we are simply going to look for the read-write user-id. From Attribute Category, select User and scroll down and select user-id. Select Equal To with Format of None and enter the read-write user id, i.e.
- Page 63 IDE Step 13 – Via Actions, select Allow. From the All Outbound Values window, select the output attribute we created above named 5600rwa and click on the less-than arrow key to move the attribute to the Provision With window...
- Page 64 IDE Step 18 – When completed, you can view the complete policy by clicking on the Access Policy Summary button Switch User Authentication using Identity Engines Ignition Server Technical Configuration Guide [July 2010...
- Page 65 3.2.4 Add the Avaya ERS5600-1 switch as an RADIUS Authenticator For Ignition Server to process the Avaya switch RADIUS requests, each switch must be added as an Authenticator. IDE Step 1 – Go to Site Configuration -> Authenticators -> default. For example, we will create new container named Avaya Switch by right clicking default and selecting Add Container.
- Page 66 IDE Step 2 – Go to Site Configuration -> Authenticators -> default -> Nortel Switch and click on New. Switch User Authentication using Identity Engines Ignition Server Technical Configuration Guide [July 2010...
- Page 67 IDE Step 3 – Enter the settings as shown below making sure you select the policy we created above named ERS-access via Access Policy. Leave Enable Authenticator and Enable RADIUS Access checked. Click on OK when done. Switch User Authentication using Identity Engines Ignition Server Technical Configuration Guide...
-
Page 68: Verification
3.3 Verification 3.3.1 Verify User Authentication You can test user authentication for the ERS5600 users configured on IDE by entering the user name and password. Step 1 – Via Ignition Dashboard, select the IP address of the Ignition Server, click on the Troubleshoot tab, go to Directory Service Debugger and select the Process Request tab. - Page 69 3.3.2 Verify user authentication from ERS switch You can view the authentication details via Ignition Dashboard which provides extensive details about the device or user. Step 1 – In Dashboard, select the IP address of the Ignition Server and click on the Monitor tab, go to Log Viewer, and select the Access tab.
- Page 70 Result: Switch User Authentication using Identity Engines Ignition Server Technical Configuration Guide [July 2010...
- Page 71 At minimum, verify the following items: Option Verify Authentication Result If successful, Authenticated should be displayed. If not, verify the device using the previous step and if this also fails, verify the Ignition Server configuration. Authorization Result If successful, Allow should be displayed. If not, verify the device using the previous step and if this also fails, verify the Ignition Server configuration.
-
Page 72: Software Baseline
Publication Number Description Identity Engines NIEIS_6.0_Doc_Collection_20090706, Rev 02 Ignition Server Software Ignition Server, Release 6.0 Release 6.0 – Document Collection Avaya Ethernet ERS2500_4.2_Doc_Collection_20090302 Ethernet Routing Switch 2500 Routing Switch 2500 Software Release 4.2 Series Release 4.1 Document Collection Avaya Ethernet ERS4500_5.3_Doc_Collection_20090731... -
Page 73: Customer Service
6. Customer service Visit the Avaya Web site to access the complete range of services and support that Avaya provides. Go www.avaya.com or go to one of the pages listed in the following sections. 6.1 Getting technical documentation To download and print selected technical publications and release notes directly from the Internet, go to www.avaya.com/support.
Need help?
Do you have a question about the ERS 8600 and is the answer not in the manual?
Questions and answers