Table of Contents
Advertisement
Quick Links
Download this manual
See also:
User Manual
Advertisement
Chapters
Table of Contents

Related Manuals for BK Medical Flex Focus 1202


Summary of Contents for BK Medical Flex Focus 1202
- Page 1 Advanced User Guide Type 1202 Flex Focus Ultrasound Systems English BB1946-S November 2018 For Professional Users Only...
- Page 2 Any modification of or installation of software without written permission from BK Medical will immediately void any warranty supplied by BK Medical. Such changes will also void any service contract and result in charges to the customer for restoration of the original Flex Focus 1202 Ultrasound System.
-
Page 3: Table Of Contents
Contents Chapter 1 Before You Begin ............11 Chapter 2 The User Interface . - Page 4 Local Patient Archiving System ........51 Reviewing Documents.
- Page 5 Color Submodes ..........79 Color Coding of Flow.
- Page 6 Calculating PSAD..........103 Using the Brachy Pro Package .
- Page 7 Color Mode (CFM)......... . . 133 Doppler Mode.
- Page 8 New Presets ..........158 Default Pro Packages and Presets.
- Page 9 Configuring the Flex Focus 1202 ........
- Page 10 Display Areas and Info Boxes ........265 Prioritizing the Display of Measurements and Settings .
-
Page 11: Before You Begin
Chapter 1 Before You Begin This user guide is for all versions of the Flex Focus 1202 Ultrasound System. Instructions apply to systems with a keyboard and systems with a touch screen and touch control panel. The Flex Focus 1202 User Guide includes an overview of all the documentation available for the system, including different user guides. - Page 12 12 Chapter 1 November 2018 Flex Focus 1202 Advanced User Guide (BB1946-S)
-
Page 13: The User Interface
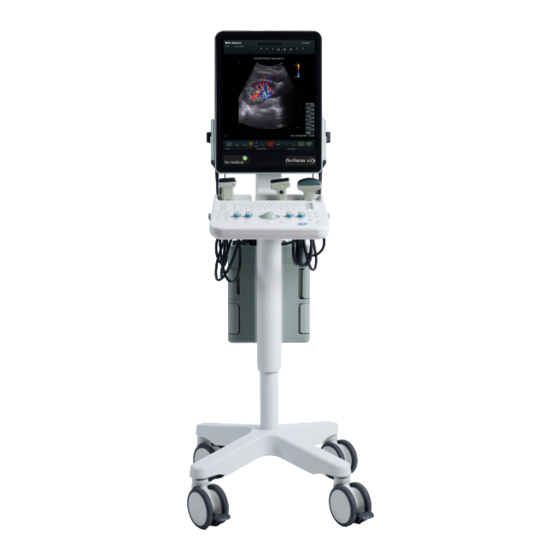
Advanced key Workflow tabs NOTE: Keyboard is a fourth workflow tab available on systems with a touch control panel. Figure 2-1. The monitor user interface for the Flex Focus 1202. Flex Focus 1202 Advanced User Guide (BB1946-S) The User Interface... -
Page 14: Selecting A Transducer
Figure 2-2. Finding a Pro Package from the list of all Pro Packages. For information about examination types, see Chapter 8, “Pro Packages” on page 93. 14 Chapter 2 November 2018 Flex Focus 1202 Advanced User Guide (BB1946-S) -
Page 15: Patient Information
You can customize which measurement and image data are displayed, where they are Customizing displayed on the monitor, and the font size for measurements. For more information about this customization, see Appendix E, “Configuring the Flex Focus 1202” or consult your BK representative. Workflow Tabs Workflow tabs follow the typical workflow of a patient examination. - Page 16 It contains controls for the measurements and annotations that are set up for the examination type. Click More Meas., More Bodymarks or More Labels to see more measurements More or annotations than are immediately shown on individual screen keys. 16 Chapter 2 November 2018 Flex Focus 1202 Advanced User Guide (BB1946-S)
- Page 17 For example, pressing Shift and A results in an upper-case A. For the same time same result on the on-screen keyboard, you press the keys one at a time: first Shift, Flex Focus 1202 Advanced User Guide (BB1946-S) The User Interface...
-
Page 18: Keyboard And Touch Control Panel
Shift + Accent , for E) Shift + n ñ (or Ñ) fn+ Accent , for N) Shift + e ê (or Ê) Shift + fn+ Accent , for E) 18 Chapter 2 November 2018 Flex Focus 1202 Advanced User Guide (BB1946-S) -
Page 19: Controls On The Monitor
This may take a few seconds. Autofocus Ensure that the focal range is centered in the displayed image. Flex Focus 1202 Advanced User Guide (BB1946-S) Controls on the Monitor... - Page 20 Depth + Increase maximum tissue depth shown (decrease image magnification). You can configure this so that it increases magnification. D. Freq. Change Doppler frequency. 20 Chapter 3 November 2018 Flex Focus 1202 Advanced User Guide (BB1946-S)
- Page 21 On the image tab, click Advanced. On the System tab, enter name of hospital or Hospital Name institution. Adjust hue in 3D viewer. Import Licenses Import license keys from a file. Flex Focus 1202 Advanced User Guide (BB1946-S) Controls on the Monitor...
- Page 22 Specify the transparency (opacity) of a structure in 3D rendering view. Orientation Display or hide orientation markers in 3D volumes. Double-click in the image to select and drag it. 22 Chapter 3 November 2018 Flex Focus 1202 Advanced User Guide (BB1946-S)
- Page 23 (within the range) in more detail. NOTE: The wall filter value will be changed automatically when you change the PRF value. Sculpture Turn sculpting of the 3D cube on and off. Flex Focus 1202 Advanced User Guide (BB1946-S) Controls on the Monitor...
- Page 24 NOTE: When you change image orientation, you may need to adjust the TGC settings for the B-mode image. Undo Undo latest action for measurements, annotations, or sculpting. Update See update on control panel. Toggle between B-mode and Doppler. 24 Chapter 3 November 2018 Flex Focus 1202 Advanced User Guide (BB1946-S)
- Page 25 Activates the X-Shine function for best needle visibility. Toggle between On+, On- and Off. Xtal / Plane Change crystal on 2052. Change imaging plane on 8848. Zoom Zoom 3D volume. Flex Focus 1202 Advanced User Guide (BB1946-S) Controls on the Monitor...
- Page 26 26 Chapter 3 November 2018 Flex Focus 1202 Advanced User Guide (BB1946-S)
-
Page 27: Working With The Image
When you freeze the image, the date and time displayed on the monitor are also Date and time of frozen frozen, so the time displayed on a printed image is the time the image was frozen, not image the time it was printed. Flex Focus 1202 Advanced User Guide (BB1946-S) Working with the Image... -
Page 28: Partial Freeze And The Update Key
The 2 views in a split screen can both be imaging simultaneously; in this case, freezing and unfreezing affect both images. To turn simultaneous imaging on and off: Click Simultan. • 28 Chapter 4 November 2018 Flex Focus 1202 Advanced User Guide (BB1946-S) -
Page 29: Labels And Bodymarks
Long click the label you want to remove. • To edit a label on the image: Click the label on the image and type the changes you want. • Flex Focus 1202 Advanced User Guide (BB1946-S) Working with the Image... -
Page 30: Bodymarks
Unless you delete it or replace it with a new one, a bodymark will remain on the monitor until you change Pro Packages or begin to image a new patient. 30 Chapter 4 November 2018 Flex Focus 1202 Advanced User Guide (BB1946-S) -
Page 31: Cine
Freeze the image, and when the Measure and Mark tab opens, click • Advanced. Cine indicators are displayed at the upper right of the tab, depending on the active pro package. Flex Focus 1202 Advanced User Guide (BB1946-S) Working with the Image... -
Page 32: Using Cine In M-Mode Or Doppler Mode
Make measurements on the image or save it in the usual way. When you move a cine image after you make a measurement, the measurement NOTE: result remains, but the markers disappear (because the underlying image is different). 32 Chapter 4 November 2018 Flex Focus 1202 Advanced User Guide (BB1946-S) -
Page 33: Video Display
NOTE: information about purchasing the PiP option, see the Product Data sheet. To run the PiP software, you must have a license from BK Medical. For information about activating the PiP option, see “Licenses” on page 250. Picture in Picture (PiP) lets you view two types of images at the same time, on the same monitor: an ultrasound image and a video image. -
Page 34: Using Pip
PiP Window Contents Not Active Video from external video signal Active Ultrasound image Table 4-1. Contents of the PiP window when it opens. To turn off PiP: Click PIP. • 34 Chapter 4 November 2018 Flex Focus 1202 Advanced User Guide (BB1946-S) - Page 35 Click inside the PiP window and then press to increase or decrease the • window frame size. When you are finished, the PiP window changes size to fit the frame. Flex Focus 1202 Advanced User Guide (BB1946-S) Working with the Image...
- Page 36 36 Chapter 4 November 2018 Flex Focus 1202 Advanced User Guide (BB1946-S)
-
Page 37: Making Measurements
Repeat this until you have positioned all the markers for the measurement. The look of the markers themselves and of any lines that connect them depend NOTE: on what you are measuring. Flex Focus 1202 Advanced User Guide (BB1946-S) Making Measurements... -
Page 38: B-Mode And Color Mode Measuring Tools
When the first marker is positioned, a second one appears for you to position. Pressing the Measure key starts a distance measurement. NOTE: 38 Chapter 5 November 2018 Flex Focus 1202 Advanced User Guide (BB1946-S) - Page 39 If you have chosen to measure 2 angles, additional markers appear for you to measure another angle (beta) with the first line. Flex Focus 1202 Advanced User Guide (BB1946-S) Making Measurements...
- Page 40 Figure 5-3. Using the circle measuring tool. After the markers have been positioned, you can move any of them by clicking and dragging to a new location. Click again. 40 Chapter 5 November 2018 Flex Focus 1202 Advanced User Guide (BB1946-S)
- Page 41 Figure 5-6. Drawing an ellipse. The first 2 markers determine a line that is used as the axis of rotation if you use the ellipse to measure volume. Flex Focus 1202 Advanced User Guide (BB1946-S) Making Measurements...
- Page 42 All markers positioned. First marker selected. First marker repositioned. All markers positioned. Third marker selected. Third marker repositioned. Figure 5-8. Repositioning markers in an ellipse you have drawn. 42 Chapter 5 November 2018 Flex Focus 1202 Advanced User Guide (BB1946-S)
- Page 43 Figure 5-10. Drawing a polygon. After the markers have been positioned, you can move any of them by clicking and dragging to a new location. Click again. Flex Focus 1202 Advanced User Guide (BB1946-S) Making Measurements...
- Page 44 A drawing cursor appears. Drag it to where you want to start drawing. Click. A second marker appears where you clicked. Drag it to draw the shape you want. 44 Chapter 5 November 2018 Flex Focus 1202 Advanced User Guide (BB1946-S)
-
Page 45: Doppler Mode Measuring Tools
Position first marker. First marker positioned; Second marker positioned; position second marker. measurement terminated. Figure 5-15. Positioning 2 point markers on a Doppler mode image. Flex Focus 1202 Advanced User Guide (BB1946-S) Making Measurements... - Page 46 Click again when you have positioned it where you want it. All lines positioned. First line selected. First line repositioned. Figure 5-18. Moving a vertical line marker you have placed on a Doppler mode image. 46 Chapter 5 November 2018 Flex Focus 1202 Advanced User Guide (BB1946-S)
- Page 47 When you have finished drawing, click the drawing cursor. Position starting point. Trace is drawn. Starting point positioned; draw trace. Figure 5-19. Drawing a freehand curve on a Doppler image. Flex Focus 1202 Advanced User Guide (BB1946-S) Making Measurements...
- Page 48 48 Chapter 5 November 2018 Flex Focus 1202 Advanced User Guide (BB1946-S)
-
Page 49: Documentation
Open the Patient window (see page 60). Enter patient information to start the exam. Click Capture to capture the current 2D frozen image, with any measurements. If the system is scanning, a clip capture will be started. Flex Focus 1202 Advanced User Guide (BB1946-S) Documentation... -
Page 50: Capturing 2D Images
Capturing 3D Data Sets 3D data sets are automatically saved to the patient archiving system. Saving Reports To save a report to the patient archiving system, click Save in the report. 50 Chapter 6 November 2018 Flex Focus 1202 Advanced User Guide (BB1946-S) -
Page 51: Local Patient Archiving System
Click the document thumbnail in the browser. • The frame around the document turns blue. To select or deselect all documents in the browser: On the Documentation tab, click All or None. • Flex Focus 1202 Advanced User Guide (BB1946-S) Documentation... - Page 52 DICOM printer or to a video printer. Closes current exam. Click Enter Patient... to start a new exam. End Exam Table 6-1. Documentation screen keys. 52 Chapter 6 November 2018 Flex Focus 1202 Advanced User Guide (BB1946-S)
-
Page 53: Viewing And Editing Video Clips
To view externally stored documents: Insert a CD/DVD or insert a USB storage device into the USB connector on the left side of the keyboard. Click the CD/USB tab at the bottom of the Archive window. Flex Focus 1202 Advanced User Guide (BB1946-S) Documentation... -
Page 54: Viewing Exported Documents On An External Computer
Explorer to view the contents of your external storage medium. ® Open the folder called Codec. Right-click the file called lagarith.inf and click Install. The codec is installed. Lagarith version 1.3.27.0 is required. NOTE: 54 Chapter 6 November 2018 Flex Focus 1202 Advanced User Guide (BB1946-S) -
Page 55: Exporting Data
See “Using CD/DVDs” on page 56 and “Using a Network Drive” on page 58. Archiving must be done to an empty CD/DVD. After you have archived NOTE: documents to a CD, you cannot use the same CD again for archiving. Flex Focus 1202 Advanced User Guide (BB1946-S) Documentation... -
Page 56: Using Cd/Dvds
If you try to copy or archive documents and the total size, including what is already in the staging area, is too big to fit on a CD/DVD, you are informed that you cannot copy the documents to the staging area. 56 Chapter 6 November 2018 Flex Focus 1202 Advanced User Guide (BB1946-S) - Page 57 Figure 6-3. The staging area browser in the Burn CD window. The list on the left side contains a list (labeled with the time) of selections you have put in the staging area. Flex Focus 1202 Advanced User Guide (BB1946-S) Documentation...
-
Page 58: Using Usb Storage Devices
To access the network drive from the system, you need to log on to the network using your network username and password. There are 3 ways you can do this: 58 Chapter 6 November 2018 Flex Focus 1202 Advanced User Guide (BB1946-S) -
Page 59: The Archive Window (Examination List And Patient Information)
Press the Patient key or click the patient ID at the top of the monitor. In the window that opens, click the Archive tab. A list of examinations is displayed, including each examination for each patient. Each row represents one examination of one patient. Flex Focus 1202 Advanced User Guide (BB1946-S) Documentation... -
Page 60: Patient Information
Click More, then Start new exam without clearing the image. • Examination List The Examination List contains patient IDs, names, and other information about patients in the patient archive, including the date of the last examination. 60 Chapter 6 November 2018 Flex Focus 1202 Advanced User Guide (BB1946-S) - Page 61 Patients with committed Not applicable All patients with committed documents documents. Patients with discontinued Not applicable All patients with discontinued examinations examinations. Table 6-3. Ways to select the patients displayed in the Examination List. Flex Focus 1202 Advanced User Guide (BB1946-S) Documentation...
-
Page 62: Deleting Documents Or Exams From The System
All local documents for the exam are deleted. The exam is deleted in the patient archive if documents for the patient have not been externally archived (that is, if they only appeared locally in the patient archiving system). 62 Chapter 6 November 2018 Flex Focus 1202 Advanced User Guide (BB1946-S) -
Page 63: Starting A New Examination From The Examination List
Open the Archive window and click Pause Exam. • To resume a paused examination: Open the Archive window. From the Examination List, select an exam with the status Pause. Click Resume Exam. Flex Focus 1202 Advanced User Guide (BB1946-S) Documentation... -
Page 64: Password Protection Of The Patient Archiving System
If you have clicked Emergency in the login window, do not send pictures to a NOTE: PACS because they will be identified as EmergencyID and you will not be able to identify pictures from different patients. 64 Chapter 6 November 2018 Flex Focus 1202 Advanced User Guide (BB1946-S) -
Page 65: Hard Disk Quota
See page 53 for more information. Creating a Report To create a report: On the Documentation tab, click Report. • Flex Focus 1202 Advanced User Guide (BB1946-S) Documentation... - Page 66 Comments put in the Patient window appear in the report. You can type in up to 4 lines of remarks on the first page of the report. 66 Chapter 6 November 2018 Flex Focus 1202 Advanced User Guide (BB1946-S)
-
Page 67: Editing A Report
You cannot use an office printer directly with the USB connector on the system. The only printers you can connect directly to the system are ones listed as approved in the Product Data information. See also the Safety chapter in the Flex Focus 1202 User Guide. -
Page 68: Printing Thumbnail Images
Click the x in the top right corner of the list menu to close the menu and save your changes. See Appendix E, “Configuring the Flex Focus 1202” for more details. You cannot use the printer while running on battery power. Capture the NOTE: images and select them later for printing when you are again using normal power. -
Page 69: Imaging Modes
(AIUM/NEMA and IEC) (see the acoustic output section in the Flex Focus 1202 User Guide), but you may want to set a lower TI limit for some purposes. There are 2 types of settings you can vary: Tissue type (TIS –... -
Page 70: B-Mode
To adjust focal range: Point at the Focus indicator and press +/-. • Click one of the focus boundary indicators. Drag it and click, or press +/-. • 70 Chapter 7 November 2018 Flex Focus 1202 Advanced User Guide (BB1946-S) -
Page 71: Gain
: The TGC curve operates on the monitor image, not on the ultrasound echo. NOTE Therefore, if you move or resize the image, you may have to readjust the TGC curve. Flex Focus 1202 Advanced User Guide (BB1946-S) Imaging Modes... -
Page 72: Zoom
To adjust the depth: On the Image tab, click Depth + or Depth -. • Place the cursor in the image field and press the +/- key on the keyboard. • 72 Chapter 7 November 2018 Flex Focus 1202 Advanced User Guide (BB1946-S) -
Page 73: Gray Scales
To return from a combined mode to B-mode only: Press the B-Mode key. • Pressing the key several times lets you toggle back and forth between B-Mode NOTE: B-mode and any combined mode. Flex Focus 1202 Advanced User Guide (BB1946-S) Imaging Modes... -
Page 74: Ama - Automatic Mode Adjustment
AMA can be used in B-mode, Color mode and Doppler mode. B-Mode In B-mode, the parameters that AMA adjusts are: Line density • Extended resolution • Number of focal zones • Multibeam • 74 Chapter 7 November 2018 Flex Focus 1202 Advanced User Guide (BB1946-S) -
Page 75: Tissue Harmonic Imaging (True Echo Harmonics - Teh)
TEH can be used only with transducers that support harmonic imaging. Each Preset that permits TEH has default settings for overall gain, TGC gain, contour level, and contrast level for tissue harmonic imaging. Flex Focus 1202 Advanced User Guide (BB1946-S) Imaging Modes... -
Page 76: Smooth
X-Shine uses an adjustment of ACI (Angular Compound Imaging) plus improved focusing to help the user visualize the needle during interventional procedures. A needle icon indicates where you will get the best visibility. 76 Chapter 7 November 2018 Flex Focus 1202 Advanced User Guide (BB1946-S) - Page 77 X-Shine is available as an option (license) on specific models. See the Product Data Sheet for which models. Figure 7-2. Image showing the X-shine icon and inserted needle Flex Focus 1202 Advanced User Guide (BB1946-S) Imaging Modes...
-
Page 78: Activate X-Shine Imaging
You can add the X-Shine buttons to the monitor controls on the screen. Choose one of the X-Shine keys and also add the Needle Strength key to improve needle visibility: Figure 7-4. X-Shine slider button, X-Shine Toggle and Needle Strength slider 78 Chapter 7 November 2018 Flex Focus 1202 Advanced User Guide (BB1946-S) -
Page 79: Color Mode And Power Mode
• Variance • Velocity + Variance • Vector Flow Imaging (VFI) • Two submodes are available in Power mode imaging: Power (power Doppler) • Power + Direction (directional power Doppler) • Flex Focus 1202 Advanced User Guide (BB1946-S) Imaging Modes... -
Page 80: Color Coding Of Flow
Doppler spectrum. The color bar is different in the 2 Power submodes. In Power + Direction, the bar is vertical but the intensity changes in the horizontal direction. 80 Chapter 7 November 2018 Flex Focus 1202 Advanced User Guide (BB1946-S) -
Page 81: Vector Flow Imaging (Vfi)
NOTE: and the 8822 vascular transducer, and certain Pro Packages and Presets. It requires a Vector Flow Imaging license from BK Medical. It is recommended only to use Vector Flow Imaging up to a depth of 30 mm of the... - Page 82 Saturation/Brightness = Speed The center of the square is black. Black indicates zero flow. 82 Chapter 7 November 2018 Flex Focus 1202 Advanced User Guide (BB1946-S)
-
Page 83: Using Vfi
(toward or away from the transducer), especially in low flow situations with correspondingly low PRF. These artifacts will not affect the color mode (CFM) image, so it is important to check in B-mode. Flex Focus 1202 Advanced User Guide (BB1946-S) Imaging Modes... -
Page 84: Streamlined Vfi Workflow
Inverting the Doppler spectrum (when needed) • Selecting the appropriate Scale/PRF (Pulse Repetition Frequency) • Adaptively adjusting Doppler sample volume size (PW gate) • Assisted Volume Flow Measurement • 84 Chapter 7 November 2018 Flex Focus 1202 Advanced User Guide (BB1946-S) -
Page 85: Assisted Doppler Gate Placement
Pressing Doppler Gate will also adjust the Doppler baseline. If the initial Scale/PRF is far from correct, or the Doppler baseline is not adjusted correctly, it may be necessary to press Doppler Gate more than once. Flex Focus 1202 Advanced User Guide (BB1946-S) Imaging Modes... -
Page 86: Assisted Volume Flow Rate Estimation
WARNING VFI-w6 Check to make sure that the Doppler spectrum does not alias. Otherwise, the real-time Doppler volume flow measurement may not be precise. spectrum aliasing 86 Chapter 7 November 2018 Flex Focus 1202 Advanced User Guide (BB1946-S) -
Page 87: Asymmetric Doppler Gate Cross
Outline of VFI Workflow The screen capture below outlines the main features of the VFI workflow: Asymmetric Doppler gate Volume flow rate estimation Figure 7-11. Outline of VFI workflow. Flex Focus 1202 Advanced User Guide (BB1946-S) Imaging Modes... -
Page 88: Doppler Mode - Spectral Doppler
The dotted line represents the Doppler line. The lines at right angles to Fig 7-13 (a) that show the Doppler gate. A diagonal line (relative to the Doppler line) indicates a sample volume Fig 7-13 (b) with angle correction. 88 Chapter 7 November 2018 Flex Focus 1202 Advanced User Guide (BB1946-S) -
Page 89: Adjusting The Doppler Mode Image
HPRF (high PRF) is automatically used. When HPRF is active, the Doppler line shows the actual sample volume, and false sample volumes (shown dotted). See Fig 7-13 on page 88. The false sample volumes should always be placed outside a vessel. Flex Focus 1202 Advanced User Guide (BB1946-S) Imaging Modes... -
Page 90: Sweep Speed
B-mode image, they are applied to the M-mode image. The M-Mode Image When M-mode is selected, the monitor is divided into two windows (see Fig 7-14). You can adjust how the two windows are displayed. 90 Chapter 7 November 2018 Flex Focus 1202 Advanced User Guide (BB1946-S) -
Page 91: M-Mode Line
When you have changed the setup, you can save it as a new Preset. To save a Preset: On the Image tab, click Advanced. Then click Save. The Save Preset window appears. Flex Focus 1202 Advanced User Guide (BB1946-S) Imaging Modes... - Page 92 Pro Package. (Puncture guide or brachy matrix settings will be saved as part of the setup.) Click Save. 92 Chapter 7 November 2018 Flex Focus 1202 Advanced User Guide (BB1946-S)
-
Page 93: Pro Packages
Read have read the warnings in the Puncture and Brachytherapy section of the Safety puncture and brachy- chapter in the Flex Focus 1202 User Guide. therapy warnings WARNING P-w1 Before you start imaging, verify that the type number or name of the transducer and the... -
Page 94: Presets
Continue to position all needed markers. After you have positioned all the markers, the result appears on the left side of the monitor, at the bottom (see Fig 2-1 on page 13). 94 Chapter 8 November 2018 Flex Focus 1202 Advanced User Guide (BB1946-S) -
Page 95: Doppler Measurements
The correct placement of vascular calculation markers is indicated in the figure; their abbreviations are as follows: Start systole Minimum diastole Peak systole End diastole End systole Flex Focus 1202 Advanced User Guide (BB1946-S) Pro Packages... -
Page 96: Stenosis
ST Dist 2 – Measures the residual lumen of the vessel. • The ST Dist value is updated continuously on the monitor; if you move one of the markers, you reposition the markers. 96 Chapter 8 November 2018 Flex Focus 1202 Advanced User Guide (BB1946-S) -
Page 97: Vf (Volume Flow)
Figure 8-2. Measuring TAM on the Doppler spectrum. To measure TAM or TAMX using the automatic Doppler curve: Click Auto and make sure that TAM or TAMX is selected. Flex Focus 1202 Advanced User Guide (BB1946-S) Pro Packages... -
Page 98: Ri And Pi (Resistance Index And Pulsatility Index)
RI (Resistance Index) To calculate RI and the A/B and B/A ratios, place one marker to measure Peak Systolic Frequency (PS) and one to measure End Diastolic Frequency (ED). 98 Chapter 8 November 2018 Flex Focus 1202 Advanced User Guide (BB1946-S) -
Page 99: Real-Time Measurements
Real-Time Measurements The following measurements can be made and displayed in real time so that they are continually updated during imaging: • • • • TAMX • • • • Flex Focus 1202 Advanced User Guide (BB1946-S) Pro Packages... -
Page 100: Noise Limit
Carotid Measurements Structured Reporting You can measure velocities and ratios at three sites: proximal, mid and distal. 100Chapter 8 November 2018 Flex Focus 1202 Advanced User Guide (BB1946-S) -
Page 101: Calculations
For detailed instructions for using the measuring tools, see “Measurements and Calculations” on page 37. For more information about Doppler measurements, see “Doppler Measurements” on page 95. Flex Focus 1202 Advanced User Guide (BB1946-S) Pro Packages... -
Page 102: Calculating Volumes
(AT) and longitudinal plane (AL). To make an empirical volume calculation: On the Measure and Mark tab, click Ellipse and draw an ellipse to outline the organ. 102Chapter 8 November 2018 Flex Focus 1202 Advanced User Guide (BB1946-S) -
Page 103: Calculating Psad
NOTE: puncture and sure you have read the warnings in the Puncture and Brachytherapy section of the brachy- Safety chapter in the Flex Focus 1202 User Guide. therapy warnings For information about calculating PSAD with the Brachy Pro Package, see PSAD “Calculating PSAD”... -
Page 104: Calculating Volumes
To make a planimetry calculation: Record a B-mode image at the far end of the organ. Move the transducer back one step. Freeze the image. On the Measure and Mark tab, click Pr-Planimetry. 104Chapter 8 November 2018 Flex Focus 1202 Advanced User Guide (BB1946-S) - Page 105 The largest area that can be seen. • The two sections must be: At right angles to each other. • At right angles to the transducer axis. • Taken from the same transducer position. • Flex Focus 1202 Advanced User Guide (BB1946-S) Pro Packages...
-
Page 106: Performing A Biopsy Or Puncture Procedure (Including Brachytherapy)
Click the Type number or brachy matrix name displayed at the top of the image area. Click the puncture guide or brachy matrix you want. To remove the brachy matrix from the monitor: Press the Puncture Guide key. • 106Chapter 8 November 2018 Flex Focus 1202 Advanced User Guide (BB1946-S) - Page 107 You can set up the system so that a vertical 0 line is always visible, along with NOTE: the markers as shown in Fig 8-6. User-Definable Brachy Matrix and Ruler You can also define your own brachy matrix and ruler. See page 243. Flex Focus 1202 Advanced User Guide (BB1946-S) Pro Packages...
-
Page 108: Using The Ob, Gyn, And Gyn Follicles Pro Packages
Nuchal translucency measurements require special training. See the caution in the Measurements section of the Safety chapter in the Flex Focus 1202 User Guide. 1. This system is not market cleared by the FDA for IVF use in the USA. -
Page 109: Calculation Methods
Here is an example of a report. A previous BPD measurement was entered in the Patient window to be used as a basis for the curves. The reports on the system will not look exactly like the one illustrated here. NOTE: Flex Focus 1202 Advanced User Guide (BB1946-S) Pro Packages... - Page 110 Figure 8-8. Campbell BPD curve in OB report. Fig 8-9 shows the position of the AC measured today compared to AC reference curves based on the BPD measured previously. 110Chapter 8 November 2018 Flex Focus 1202 Advanced User Guide (BB1946-S)
- Page 111 The report page shown in Fig 8-11 shows how much the fetal weight measured today deviates from the fetal weight expected for today’s gestational age. Today’s gestational age is predicted from the previously measured BPD and the elapsed time. Flex Focus 1202 Advanced User Guide (BB1946-S) Pro Packages...
- Page 112 Current FW Figure 8-11. Warsof fetal weight curve in OB report. 112Chapter 8 November 2018 Flex Focus 1202 Advanced User Guide (BB1946-S)
-
Page 113: Vascular Pro Package
Please see Getting Started with Flex Focus for basic controls. Read transducer user guides for more information before doing biopsies. Read Care and Cleaning for sterilization instructions. Read Flex Focus 1202 User Guide before using the system. Contents Presets •... -
Page 114: Setting Up The Patient - Patient Id
The shape of the TGC curve is temporarily displayed to the right of the image as a curved vertical line. Split Screen Adjust imaging in full screen before using split. Imaging changes in one screen do not affect the other screen. 114Chapter 9 November 2018 Flex Focus 1202 Advanced User Guide (BB1946-S) -
Page 115: Color Mode (Cfm)
To use VFI - Vector Flow Imaging: On the Color tab, click the Submode screen key. Click VFI to select it as the submode. You must have a license from BK Medical ApS to use VFI. VFI is only NOTE: available for some transducers. -
Page 116: Volume Flow
NOTE: means that clicking it will cause a drop-down list to be displayed. 1. VF (auto) means Volume Flow based on Auto TAM, where TAM is Time Average Mean. 116Chapter 9 November 2018 Flex Focus 1202 Advanced User Guide (BB1946-S) -
Page 117: Labels
To set a default position for system labels (labels that you click to select): Position label on image. System labels Click Advanced and then click on circle on top right of label. Click Settings... Flex Focus 1202 Advanced User Guide (BB1946-S) Vascular Pro Package... -
Page 118: Bodymarks
Drag it to the position you want, and click again. Setting default position: Position bodymark on image. Click Advanced and then click on circle on top right of bodymark. Click Settings... Click Set as Default Position. 118Chapter 9 November 2018 Flex Focus 1202 Advanced User Guide (BB1946-S) -
Page 119: Measurements And Calculations
Check boxes can be used to record the state of the blood vessel: COMP. Compression SPONT. Spontaneous PHASIC Phasic AUGM. Augmentation REFLUX Reflux This information can be recorded in a report. Flex Focus 1202 Advanced User Guide (BB1946-S) Vascular Pro Package... -
Page 120: Using Reports
(for example, RFA PS). Place cursor at peak systole and click. Peak systolic velocity (PS) is displayed. Using Reports Setting up a report: On the Documentation tab, click Report. 120Chapter 9 November 2018 Flex Focus 1202 Advanced User Guide (BB1946-S) - Page 121 Edit the report if you need to. You can edit in the report itself or on the editing Edit a report measurement tab for the report. To change a measurement, click the number (measurement). In the figure below, that means click on 57.3. Flex Focus 1202 Advanced User Guide (BB1946-S) Vascular Pro Package...
-
Page 122: Capturing And Documenting Images
Capturing Frozen Images Saving (capturing) images to system hard disk: Freeze the image. Click Capture. Thumbnail of saved image appears in the document browser at the top of the monitor. 122Chapter 9 November 2018 Flex Focus 1202 Advanced User Guide (BB1946-S) -
Page 123: Copying And Archiving
The images are printed. To open a thumbnail image and then print it: Double-click the thumbnail image to open it. On the Measure and Mark tab, click Print. Flex Focus 1202 Advanced User Guide (BB1946-S) Vascular Pro Package... -
Page 124: Customization Examples
Click the x in the top right corner of the list menu to close the menu and save your changes. See Appendix E, “Configuring the Flex Focus 1202” for more details. You cannot use the printer while running on battery power. Capture the NOTE: images and select them later for printing when you are again using normal power. -
Page 125: Making A New Screen Key
Click on circle top right of screen key. See the drop-down menu of possible choices. Select the label or bodymark you want by clicking on the circle next to it in the list. Flex Focus 1202 Advanced User Guide (BB1946-S) Vascular Pro Package... - Page 126 Make sure the image is not frozen. Click Advanced, then Customize. Click the Labels/Marks tab, and then, in the window that appears, the Miscellaneous tab. Uncheck Clear Labels on Unfreeze. 126Chapter 9 November 2018 Flex Focus 1202 Advanced User Guide (BB1946-S)
-
Page 127: Vascular Measurement Abbreviations
Left Common Femoral Vein Valve Closure Time LSFJ VCT Left Saphenofemoral Junction Valve Closure Time LFVp VCT Left Femoral Vein Proximal Valve Closure Time LFVm VCT Left Femoral Vein Mid Valve Closure Time Flex Focus 1202 Advanced User Guide (BB1946-S) Vascular Pro Package... -
Page 128: Artery Measurements
Right Bypass Graft Proximal Anastomosis Peak RBGAp PS Systole RBGAd PS Right Bypass Graft Distal Anastomosis Peak Systole RCIA PS Right Common Iliac Artery Peak Systole REIA PS Right External Iliac Artery Peak Systole 128Chapter 9 November 2018 Flex Focus 1202 Advanced User Guide (BB1946-S) - Page 129 Left Popliteal Artery Peak Systole LPTAd PS Left Posterior Tibial Artery Distal Peak Systole LPTAm PS Left Posterior Tibial Artery Mid Peak Systole LPTAp PS Left Posterior Tibial Artery Proximal Peak Systole Flex Focus 1202 Advanced User Guide (BB1946-S) Vascular Pro Package...
-
Page 130: Where To Find More Information
Label, Bodymark, and Measurement” and Appendix E, “Configuring the Flex Focus 1202”) The tables and formulas that the system uses for calculations are in the Technical Data (BZ2100) on the User Documentation CD. 130Chapter 9 November 2018 Flex Focus 1202 Advanced User Guide (BB1946-S) -
Page 131: Cardiac Pro Package
Please see Getting Started with Flex Focus for basic controls. Read transducer user guides for more information before doing biopsies. Read Care and Cleaning for sterilization instructions. Read Flex Focus 1202 User Guide before system use. Contents Presets •... -
Page 132: Presets
B-Mode key on the keyboard. Transducer Orientation Trans Transducer 8837 Sag - Transducer mark to right shoulder • 8837 Trans – Mark to left shoulder • 132Chapter 10 November 2018 Flex Focus 1202 Advanced User Guide (BB1946-S) -
Page 133: M-Mode
Adjust gain by turning the Doppler Mode key or using the Gain screen control. Press the Doppler Angle key to activate the Doppler angle control, then adjust the angle with +/- key or trackball. Flex Focus 1202 Advanced User Guide (BB1946-S) Cardiac Pro Package... -
Page 134: Annotations
To set a default position for system labels (labels that you click to select): Position label on image. System labels Click Advanced and then click on circle on top right of label. 134Chapter 10 November 2018 Flex Focus 1202 Advanced User Guide (BB1946-S) -
Page 135: Bodymarks
Measurements and Calculations Basic Cardiac Measurements LVV (Left Ventricular Volume) • EF (Ejection Fraction) PFV (Peak Flow Velocity) • PG (Pressure Gradient) VTI (Velocity Time Integral) • PG (Pressure Gradient) Flex Focus 1202 Advanced User Guide (BB1946-S) Cardiac Pro Package... -
Page 136: Lv V (Left Ventricular Volume)
Figure 10-1. M-Mode/LV Volume measurements. If you want to calculate BSA (Body Surface Area), click BSA and enter patient height and weight (in metric units) in the text box that appears. 136Chapter 10 November 2018 Flex Focus 1202 Advanced User Guide (BB1946-S) - Page 137 When you are finished, click (press Select key). Calculations will be shown automatically on the screen for: EdV (End Diastolic Volume) • EsV (End Systolic Volume) • EF (Ejection Fraction) • SV (Stroke Volume) • Flex Focus 1202 Advanced User Guide (BB1946-S) Cardiac Pro Package...
-
Page 138: Doppler Mode Measurements
Freeze Doppler spectrum. Measurement line appears. Place line at beginning of Doppler waveform. Another measurement line appears. Place this line at the end of the Doppler waveform. A cursor appears. 138Chapter 10 November 2018 Flex Focus 1202 Advanced User Guide (BB1946-S) -
Page 139: Hr (Heart Rate)
These marker positions are used to calculate amplitudes (CE, DE and CA), slopes (DE and EF), and the CA:CE ratio. HR (Heart Rate) In M-mode: In advanced screen, freeze M Mode image. Click LV tab. Flex Focus 1202 Advanced User Guide (BB1946-S) Cardiac Pro Package... -
Page 140: Cardiac Output
HR (with the desired number of beats to measure) and rename it. Cardiac Output Click CO (Cardiac Output) and measure the diameter for LVOT in B-mode. Figure 10-5. B-mode LVOT measurement. Click Color and/or Doppler. 140Chapter 10 November 2018 Flex Focus 1202 Advanced User Guide (BB1946-S) -
Page 141: Using Reports
Reports can be saved as documents or captured NOTE: as images but cannot be printed directly from the thumbnails. In either case, open the thumbnail to print from the monitor. Flex Focus 1202 Advanced User Guide (BB1946-S) Cardiac Pro Package... -
Page 142: Capturing And Documenting Images
To print an image displayed on the monitor: Print images displayed on Press the Print key on the keyboard. • monitor You can customize how the Print key works. 142Chapter 10 November 2018 Flex Focus 1202 Advanced User Guide (BB1946-S) -
Page 143: Customization Examples
Click the x in the top right corner of the list menu to close the menu and save your changes. See Appendix E, “Configuring the Flex Focus 1202” for more details. You cannot use the printer while running on battery power. Capture the NOTE: images and select them later for printing when you are again using normal power. -
Page 144: Customizing Labels And Bodymarks Using Advanced Mode
• AMA is On. This means that both the frame rate and resolution are • automatically preserved when depth or color box size are changed. M-mode measurements only • 144Chapter 10 November 2018 Flex Focus 1202 Advanced User Guide (BB1946-S) -
Page 145: Fate Measurements
Place the cross at the highest systolic excursion. Click MAPSE again. Place the next cross at the lowest diastolic excursion. The vertical distance is now measured between the two crosses. Flex Focus 1202 Advanced User Guide (BB1946-S) Cardiac Pro Package... -
Page 146: Where To Find More Information
Redefining screen keys and configuring the appearance of on-screen • information, keys, input fields, etc. (Appendix D, “Redefining Screen Keys – Label, Bodymark, and Measurement” and Appendix E, “Configuring the Flex Focus 1202”) 146Chapter 10 November 2018 Flex Focus 1202 Advanced User Guide (BB1946-S) - Page 147 The tables and formulas that the system uses for calculations are in the Technical Data (BZ2100) on the User Documentation CD. Flex Focus 1202 Advanced User Guide (BB1946-S) Cardiac Pro Package...
- Page 148 148Chapter 10 November 2018 Flex Focus 1202 Advanced User Guide (BB1946-S)
-
Page 149: Neuro Pro Package
Please see Getting Started with Flex Focus for basic controls. Read transducer user guides for more information before doing biopsies. Read Care and Cleaning for sterilization instructions. Read Flex Focus 1202 User Guide before system use. Contents Presets •... -
Page 150: Setting Up The Patient - Patient Id
The shape of the TGC curve is temporarily displayed to the right of the image as a curved vertical line. Split Screen Adjust imaging in full screen before using split. Imaging changes in one screen do not affect the other screen. 150Chapter 11 November 2018 Flex Focus 1202 Advanced User Guide (BB1946-S) - Page 151 Changes you make to the offset of a programmable puncture guide will affect ALL Offset programmable puncture guides. This could lead to incorrect puncture lines for a different changes guide than the one you wanted to change. Flex Focus 1202 Advanced User Guide (BB1946-S) Neuro Pro Package...
-
Page 152: Color Mode (Cfm)
When an annotation screen key is colored (different from the default color), it NOTE: means that clicking it will cause a drop-down list to be displayed. 152Chapter 11 November 2018 Flex Focus 1202 Advanced User Guide (BB1946-S) -
Page 153: Labels
To set a default position for system labels (labels that you click to select): Position label on image. System labels Click Advanced and then click on circle on top right of label. Flex Focus 1202 Advanced User Guide (BB1946-S) Neuro Pro Package... -
Page 154: Bodymarks
Click it or click near it, so that a frame around it turns blue. Drag it to the position you want, and click again. Setting default position: Position bodymark on image. 154Chapter 11 November 2018 Flex Focus 1202 Advanced User Guide (BB1946-S) -
Page 155: Measurements And Calculations
A marker appears to use for measuring Width. Use the trackball to move the marker to the start position and click. Position the second marker and click to finish the Width measurement. Flex Focus 1202 Advanced User Guide (BB1946-S) Neuro Pro Package... -
Page 156: Using Reports
Click Cine Play on the right side of the monitor and press the +/- key to turn it on and off. The Document Browser Captured images are displayed as thumbnails in the document browser at the top of the monitor. 156Chapter 11 November 2018 Flex Focus 1202 Advanced User Guide (BB1946-S) -
Page 157: Capturing Images
Printing Images Displayed on the Monitor To print an image displayed on the monitor: Print images displayed on Press the Print key on the keyboard. • monitor You can customize how the Print key works. Flex Focus 1202 Advanced User Guide (BB1946-S) Neuro Pro Package... -
Page 158: Customization Examples
Click the x in the top right corner of the list menu to close the menu and save your changes. See Appendix E, “Configuring the Flex Focus 1202” for more details. You cannot use the printer while running on battery power. Capture the NOTE: images and select them later for printing when you are again using normal power. -
Page 159: Default Pro Packages And Presets
Select the key name (for example, Labels clear all) from the drop-down list that appears. Press Fn+C to save your new configuration and leave Configuration Mode. Flex Focus 1202 Advanced User Guide (BB1946-S) Neuro Pro Package... -
Page 160: Customizing Labels And Bodymarks Using Advanced Mode
• automatic communication of changes in ultrasound settings • Contact with the Company Contact your Brainlab representative, who can help you with the setup. 160Chapter 11 November 2018 Flex Focus 1202 Advanced User Guide (BB1946-S) -
Page 161: Setting Up The Equipment
1 GB/s LAN minimum) transducer compatible with IGSonic for BK Medical: Craniotomy transducer • (8862) or Burr hole transducer (8863) transducer adapter for IGSonic for BK Medical with IGSonic reference array • license for IGSonic for BK Medical. •... -
Page 162: Connecting To Brainlab Curve™ Or Kick™ Cranial Navigation System
Restart the ultrasound system. Connecting to Brainlab Curve™ or Kick™ Cranial Navigation System Flex Focus Connections NOT USED Transducer connectors LAN connector Figure 11-5. Flex Focus LAN and transducer connectors 162Chapter 11 November 2018 Flex Focus 1202 Advanced User Guide (BB1946-S) - Page 163 To connect using S-video: Connecting via S-video Connect the S-video output from the Flex Focus DVI/VGA to S-video • Converter Kit to the S-video input on the Brainlab Curve system. Flex Focus 1202 Advanced User Guide (BB1946-S) Neuro Pro Package...
- Page 164 S-video Converter Kit to the S-video inputs on the Brainlab Kick system. via S-video Figure 11-10. The Y-cable for connecting S-video from the DVI/VGA to S-video Converter Kit to the Kick system. 164Chapter 11 November 2018 Flex Focus 1202 Advanced User Guide (BB1946-S)
- Page 165 Flex Focus. Test the Established Connections Make sure that the connection works, that is, that the Brainlab system can see the input from the Flex Focus. Flex Focus 1202 Advanced User Guide (BB1946-S) Neuro Pro Package...
-
Page 166: Where To Find More Information
Label, Bodymark, and Measurement” and Appendix E, “Configuring the Flex Focus 1202”) The tables and formulas that the system uses for calculations are in the Technical Data (BZ2100) on the User Documentation CD. 166Chapter 11 November 2018 Flex Focus 1202 Advanced User Guide (BB1946-S) -
Page 167: 3D Imaging
The 3D function of the Flex Focus can be purchased as an option. For more information, see the Flex Focus Product Data sheet that accompanies this user guide. To run the 3D software, you must have a license from BK Medical ApS. For information about activating the 3D option, see “Licenses” on page 250. -
Page 168: Controlling Transducer Movement
If there is a mismatch, the resulting volume can be mirrored. After you acquire the image, you must check the reconstructed volume to make sure that it is a correct representation of the data. 168Chapter 11 November 2018 Flex Focus 1202 Advanced User Guide (BB1946-S) -
Page 169: 3D Imaging Overview
Acquisition – see page 172 • Viewing – see page 173 • Working with the 3D image – see page 174 • Save, Capture and Close – see page 182 • Flex Focus 1202 Advanced User Guide (BB1946-S) 3D Imaging... -
Page 170: Preparations
Check all the connections. Connect the mover, if needed. Choose the Preset you want. Optimize the 2D image. You cannot turn on 3D if the image is frozen. Unfreeze the NOTE: image 170Chapter 11 November 2018 Flex Focus 1202 Advanced User Guide (BB1946-S) -
Page 171: Adjusting The Image Capture Settings
Be especially careful if you have changed the orientation (either up/down or left/right) of the 2D image (changed its orientation). In this case, the system will not make any automatic adjustments of orientation before 3D acquisition. The effect Flex Focus 1202 Advanced User Guide (BB1946-S) 3D Imaging... -
Page 172: Acquisition
After you have acquired a 3D data set, it is displayed as a volume in the image area. You can select various ways of viewing the volume, and you can use various tools and settings to enhance the image. 172Chapter 11 November 2018 Flex Focus 1202 Advanced User Guide (BB1946-S) -
Page 173: Viewing A 3D Data Set
Measure (only in Cube view) – Shows or hides the measurement lines or • boundaries on the volume, the Measurement menu (on the right side of the monitor), and Measurement results (on the left side of the monitor). Flex Focus 1202 Advanced User Guide (BB1946-S) 3D Imaging... -
Page 174: Working With The 3D Image
You can then move the tilted cut plane in and out (slice) as described before. Moving the Volume To move the volume: Move the cursor so that it is inside the volume. Hold down the Shift key and the Select key. 174Chapter 11 November 2018 Flex Focus 1202 Advanced User Guide (BB1946-S) -
Page 175: Annotating A 3D View
Move the cursor to where you want the label. Type the label. Click. (You can drag the label to reposition it before you click; however, after you click, you cannot edit the label, only delete it.) Flex Focus 1202 Advanced User Guide (BB1946-S) 3D Imaging... -
Page 176: User Views
Delete the user view that is currently selected. appear below Del. Figure 11-5. Options for User Views. The 6 Data Presentation Views There are 6 different ways you can view the 3D data set. 176Chapter 11 November 2018 Flex Focus 1202 Advanced User Guide (BB1946-S) -
Page 177: Cube View
When you click (or double-click, in the case of a polygon) the final point for the measurement, a number appears next to the lines you have drawn. The number is used to label the measurement results. The results appear under the image. Flex Focus 1202 Advanced User Guide (BB1946-S) 3D Imaging... - Page 178 To make a volume measurement on a 3D Cube: Click Volume on the 3D General tab. Click Step and set the distance between slices of the cube that will be used for the volume measurements. 178Chapter 11 November 2018 Flex Focus 1202 Advanced User Guide (BB1946-S)
-
Page 179: Render View
Click Volume again to finish the volume measurement. For information about accuracy of measurements on acquired and NOTE: reconstructed planes, see the Flex Focus 1202 User Guide. WARNING 3D-w1 Measurements obtained with the 3D system and used in diagnosis must be carefully and thoughtfully performed to ensure accurate quantitative assessment. - Page 180 The longer you hold the Select key down, the more surface is removed. Release the Select key when you are finished. Displaying Sculpture Results Click Display to toggle between a view showing the result of sculpting and the unsculpted view. 180Chapter 11 November 2018 Flex Focus 1202 Advanced User Guide (BB1946-S)
-
Page 181: Mip View
This view has three orthogonal plane views and a view showing the positions of these intersecting planes within the volume. The planes can be moved by adjusting them in the intersecting view. Flex Focus 1202 Advanced User Guide (BB1946-S) 3D Imaging... -
Page 182: 6-Up View
User Views, measurements and the result of sculpting. Capture – Saves the 3D volume document to the system hard disk. • Close – Closes the 3D viewer. • 182Chapter 11 November 2018 Flex Focus 1202 Advanced User Guide (BB1946-S) -
Page 183: Dicom
The filename of an exported document specifies the date and time the image was captured. For example, 2D_20131022_135426_FV12345.dcn would be the label on an 2D image of patient FV12345 that was captured on October 22, 2013 at 1:54:26 P.M. (13:54:26). Flex Focus 1202 Advanced User Guide (BB1946-S) DICOM... -
Page 184: Archiving To A Pacs
A document was not sent successfully. Table 12-1. DICOM status indicators. If you click the DICOM status indicator, the DICOM Status window appears. Figure 12-1. The DICOM status window. 184Chapter 12 November 2018 Flex Focus 1202 Advanced User Guide (BB1946-S) -
Page 185: Deleting A Document
If you try to start or resume examinations on patients with discontinued examinations, you will be prompted to choose between these options: Continue the existing examination • Delete existing examination and start a new • Cancel • Flex Focus 1202 Advanced User Guide (BB1946-S) DICOM... - Page 186 186Chapter 12 November 2018 Flex Focus 1202 Advanced User Guide (BB1946-S)
-
Page 187: Appendix A Glossary
A function that lets you review a series of previously acquired images. Select Click (long) Pointing at an on-screen control and pressing the key for at least 1 second. See Getting Started with Flex Focus. Flex Focus 1202 Advanced User Guide (BB1946-S) - Page 188 Adjusting the depth of a zoomed image changes the magnification even though the transducer surface is not necessarily visible at the top of the image. 188Appendix A November 2018 Flex Focus 1202 Advanced User Guide (BB1946-S)
- Page 189 International Electrotechnical Commission. image review See cine. Intraoperative – during a surgical operation. In vitro fertilization. NOTE: This system is not market cleared by the FDA for IVF use in the USA. Flex Focus 1202 Advanced User Guide (BB1946-S)
- Page 190 A technique to control the image area by using time delays on an array transducer. Pulsatility index. planimetry Measuring the surface area and perimeter of an object by tracing its boundaries. Point of interest. 190Appendix A November 2018 Flex Focus 1202 Advanced User Guide (BB1946-S)
- Page 191 Start systole. steering You can steer the Doppler beam of a linear transducer to vary the beam angle. This can be useful for examining flow in blood vessels parallel to the transducer surface. Flex Focus 1202 Advanced User Guide (BB1946-S)
- Page 192 Time Average Max. T-area Transverse Area. True echo harmonics. BK Medical ApS’s trademarked term for its pulse inversion tissue harmonic imaging system. Time gain control. The TGC curve determines variable amplification applied to echoes from different depths in the tissue.
-
Page 193: Appendix B Measurement Abbreviations
Adenoma (H, L, Vol or W) Amniotic Fluid Index Aortic Valve All (M-Mode) Alpha1 Alpha1 Angle Alpha2 Alpha2 Angle using 180° Alpha3 Alpha3 Angle using 360° ALSs Aortic Valve Leaflet Separation, systole. Angle Angle Flex Focus 1202 Advanced User Guide (BB1946-S) - Page 194 Beta2 Angle using 180° Beta3 Beta3 Angle using 360° Bladder Bladder Outline Bladder (H, L, Vol or W) Bladder Neck Descent Biparietal Diameter BPD - Campbell Campbell Biparietal Diameter 194Appendix B November 2018 Flex Focus 1202 Advanced User Guide (BB1946-S)
- Page 195 CRL - Hansmann Hansmann Crown Rump Length CRL - Hobbins Hobbins Crown Rump Length CRL - Jeanty Jeanty Crown Rump Length CRL - Persson Persson Crown Rump Length CRL - Robinson Robinson Crown Rump Length Flex Focus 1202 Advanced User Guide (BB1946-S)
- Page 196 FD 3 (3) Follicle Diameter (3 distances, distance 3) Femur Length FL/AC Femur Length / Abdominal Circumference FL/BPD Femur Length / Biparietal Diameter FL - Campbell Campbell Femur Length 196Appendix B November 2018 Flex Focus 1202 Advanced User Guide (BB1946-S)
- Page 197 FW - Warsof (AC,BPD) Warsof Fetal Weight Gestational age. Gamma1 Gamma1 Angle Gamma2 Gamma2 Angle using 180° Gamma3 Gamma3 Angle using 360° Gleason Score Gleason Score Gestational Sac GS 1 Gestational Sac (1 distance) Flex Focus 1202 Advanced User Guide (BB1946-S)
- Page 198 IVC VCT Inferior Vena Cava Valve Closure Time IVSd Interventricular Septal Thickness, diastole IVSs Interventricular Septal Thickness, systole Kidney (H, L, Vol or W) Length L Ellipse Empiric Longitudinal Ellipse 198Appendix B November 2018 Flex Focus 1202 Advanced User Guide (BB1946-S)
- Page 199 Left Common Carotid Artery Distal Peak Systole LCCAm ED Left Common Carotid Artery Mid End Diastole LCCAm PS Left Common Carotid Artery Mid Peak Systole LCCAp ED Left Common Carotid Artery Proximal End Diastole Flex Focus 1202 Advanced User Guide (BB1946-S)
- Page 200 Left Internal Carotid Artery Mid Peak Systole LICAp ED Left Internal Carotid Artery Proximal End Diastole LICAp PS Left Internal Carotid Artery Proximal Peak Systole LFAd Dia Left Femoral Artery Distal Vessel outside diameter 200Appendix B November 2018 Flex Focus 1202 Advanced User Guide (BB1946-S)
- Page 201 Left Boyd's Perforating Vein Vessel outside diameter LPerf-B VCT Left Boyd's Perforating Vein Valve Closure Time LPerf-C Dia Left Cockett's Perforating Vein Vessel outside diameter LPerf-C VCT Left Cockett's Perforating Vein Valve Closure Time Flex Focus 1202 Advanced User Guide (BB1946-S)
- Page 202 Left Posterior Tibial Vein Proximal Vessel outside diameter LPTVp VCT Left Posterior Tibial Vein Proximal Valve Closure Time LSClav ED Left Subclavian Artery End Diastole LSClavA PS Left Subclavian Artery Peak Systole 202Appendix B November 2018 Flex Focus 1202 Advanced User Guide (BB1946-S)
- Page 203 Left Ventricular Outflow Tract Diameter, systole LVOT PFV Left Ventricle Outflow Tract Peak Flow Velocity LVPEP Left Ventricle Pre-ejection Period LVPWd Left Ventricle Posterior Wall Thickness, diastole LVPWs Left Ventricle Posterior Wall Thickness, systole Mean Abdominal Diameter Flex Focus 1202 Advanced User Guide (BB1946-S)
- Page 204 Osaka Fetal Weight from Clinical Gestational Age Peak A Atrial Contraction Peak E Early Diastolic Flow PEP/ET LV Pre-ejection period/LV Ejection time Ratio Persson Persson Fetal Weight from Clinical Gestational Age 204Appendix B November 2018 Flex Focus 1202 Advanced User Guide (BB1946-S)
- Page 205 Prostate Outline Peak Systole PS/ED Peak Systolic End Diastolic Ratio Prostate-Specific Antigen PSAD PSA density: PSA divided by prostate volume PSUA Peak Systole Uterine Artery RATV Dia Right Anterior Tibial Vein Vessel outside diameter Flex Focus 1202 Advanced User Guide (BB1946-S)
- Page 206 Right Common Iliac Vein Vessel outside diameter RCIV VCT Right Common Iliac Vein Valve Closure Time RDPA Dia Right Dorsalis Pedis Artery Vessel outside diameter RDPA PS Right Dorsalis Pedis Artery Peak Systole Real-Time Real-Time 206Appendix B November 2018 Flex Focus 1202 Advanced User Guide (BB1946-S)
- Page 207 RGSV-C VCT Right Great Saphenous Vein of Calf Valve Closure Time RGSV-T Dia Right Great Saphenous Vein of Thigh Vessel outside diameter RGSV-T VCT Right Great Saphenous Vein of Thigh Valve Closure Time Flex Focus 1202 Advanced User Guide (BB1946-S)
- Page 208 Right Profunda Femoris Vein Vessel outside diameter RPFVp VCT Right Profunda Femoris Vein Valve Closure Time RPopA Dia Right Popliteal Artery Vessel outside diameter RPopA PS Right Popliteal Artery Peak Systole 208Appendix B November 2018 Flex Focus 1202 Advanced User Guide (BB1946-S)
- Page 209 Right Soleal Vein Vessel outside diameter RSL VCT Right Soleal Vein Valve Closure Time R Thy-H Right Thyroid Height R Thy-L Right Thyroid Length R Thyroid Vol. Right Thyroid Vol. (Proc) R Thy-V Right Thyroid Volume Flex Focus 1202 Advanced User Guide (BB1946-S)
- Page 210 Empiric Transversal Ellipse T Empiric Empiric Transversal T Freehand Empiric Transversal Freehand Time Average Mean Velocity by Manual Trace TAPSE Tricuspid Annular Plane Systolic Excursion Tibia Length THAP Thorax Anteroposterior Distance 210Appendix B November 2018 Flex Focus 1202 Advanced User Guide (BB1946-S)
- Page 211 Velocity Time Integral Aortic Valve VTI LVOT Velocity Time Integral Left Ventricle Outflow Tract VTI MV Velocity Time Integral, Mitral Valve VTI PV Velocity Time Integral, Pulmonic Valve Width Williams Williams Fetal Weight from Clinical Gestational Age Flex Focus 1202 Advanced User Guide (BB1946-S)
- Page 212 212Appendix B November 2018 Flex Focus 1202 Advanced User Guide (BB1946-S)
-
Page 213: Appendix C Setting Up And Customizing Your System
DICOM setup (if licensed), page 255 • Pro Package and Presets To open the setup window for Pro Packages and Presets: Click the Pro/Setup tab. (This is the default start page when you open the • customization window. Flex Focus 1202 Advanced User Guide (BB1946-S) - Page 214 Restore factory default Presets. If you click this, a table appears where you can • select the setups to restore. Save the active Preset with a different name. • 214Appendix C November 2018 Flex Focus 1202 Advanced User Guide (BB1946-S)
-
Page 215: Doppler And M-Mode Monitor Layout
(like Freeze) to take place. Tod do this, select <Disabled>. (Pressing the button will still activate an inactive transducer, however.) The same key can have different functions in different Pro Packages. Flex Focus 1202 Advanced User Guide (BB1946-S) - Page 216 • Print (DICOM) • Zoom • Freeze • Print (PCL5) • Zoom/Pan Reset • Harmonic • Print (PCL6) • To open the Key Assignment Setup window: Click the Keys/Menus tab. • 216Appendix C November 2018 Flex Focus 1202 Advanced User Guide (BB1946-S)
-
Page 217: Assigning User-Defined Keys
Depth on the monitor and press +, the depth is increased. (This means that the magnification of the ultrasound image get smaller.) You can reverse this setting if you want to use the depth controls as magnification controls. Flex Focus 1202 Advanced User Guide (BB1946-S) -
Page 218: System Setup
You can reset the system to the factory default setup in this window. NOTE: To open the General Setup window: Click the System tab, and then, in the new window that appears, the General • tab. 218Appendix C November 2018 Flex Focus 1202 Advanced User Guide (BB1946-S) - Page 219 You can select PAL or NTSC for video output. For more information about video settings, see “Video I/O Setup” on page 228. Date/Time You can change the date and time in the usual Microsoft® Windows® Date/Time Properties Setup window. You cannot change existing time stamps. Flex Focus 1202 Advanced User Guide (BB1946-S)
-
Page 220: Clip Storage And Cine Setup
Clip Storage and Cine Setup You can use the Clip Storage and Cine Setup window to change how the Clip Browser and Cine functions work. 220Appendix C November 2018 Flex Focus 1202 Advanced User Guide (BB1946-S) - Page 221 Figure C-5. The Clip Storage and Cine Setup window when forward capture is enabled. Figure C-6. The Clip Storage and Cine Setup window when forward capture is not enabled. The options in the Clip Storage and Cine Setup window are explained in Table C-2. Flex Focus 1202 Advanced User Guide (BB1946-S)
- Page 222 When checked, cine starts when you freeze the image. (You can restore this setting to the factory default, too.) Table C-2. Settings in the Clip Storage and Cine Setup window. 222Appendix C November 2018 Flex Focus 1202 Advanced User Guide (BB1946-S)
-
Page 223: 3D Setup
Printer Setup brightness window. In this window, you can also specify whether images printed with a USB printer are archived automatically. (If the patient ID is missing, the printed image is not archived.) Flex Focus 1202 Advanced User Guide (BB1946-S) - Page 224 Consult the user guide for the printer if you are in doubt. Select the correct printer driver from the drop-down box (see Fig C-8). Click Config. The Printer Configuration window opens. 224Appendix C November 2018 Flex Focus 1202 Advanced User Guide (BB1946-S)
- Page 225 Type the printer’s IP address in the Network Address field. Click Install. The name you have given to the printer appears in the Printer Name field at the top of the window. Click Close. Flex Focus 1202 Advanced User Guide (BB1946-S)
-
Page 226: Password Setup
To open the Network Drive Setup window: Click the System tab, and then, in the new window that appears, the Network • Drive tab. Figure C-11. The Network Drive Setup window. 226Appendix C November 2018 Flex Focus 1202 Advanced User Guide (BB1946-S) -
Page 227: Version Information
Click Export. A log file is created and copied to your USB device. To send it to the Service department at BK Medical, zip the file and send it to support@bkmedical.com. Video I/O Setup Video I/O format (NTSC or PAL) is changed in the General Setup window (see page 219). - Page 228 90°; this cannot be changed from the system. You must adjust this on the external equipment to avoid seeing the video image rotated. Figure C-14. Cloned video display if external monitor is not rotated. 228Appendix C November 2018 Flex Focus 1202 Advanced User Guide (BB1946-S)
-
Page 229: Battery Support Setup
External Video Out disabled (inactive) Monitor turns off “freezes” Systems without battery support LCD backlight decreases, “freezes” monitor stays on Table C-3. Power Save Mode on systems with and without battery support. Flex Focus 1202 Advanced User Guide (BB1946-S) -
Page 230: Miscellaneous System Setup
• lifespan. This is also considered better for the environment. Here, charging is inhibited if a battery charge level is greater than 80%. For more information about using the battery support, see Flex Focus 1202 User Guide. Miscellaneous System Setup You can use the Miscellaneous System Setup window to customize a variety of functions. - Page 231 Figure C-16. The Miscellaneous System Setup window. Flex Focus 1202 Advanced User Guide (BB1946-S)
-
Page 232: Measurements
Use the Curve Setup window (page 238) to define a new curve or edit an existing Defining curves one. Use the Miscellaneous Measurement Setup window (page 241) to set various measurement parameters and change the way in which measurements are displayed. 232Appendix C November 2018 Flex Focus 1202 Advanced User Guide (BB1946-S) -
Page 233: User-Defined Measurements
To open the Measurement Definition Setup window, which displays a list of all user-defined measurements: Click the Measurements tab and then the other Measurements tab. • Figure C-17. The Measurement Definition Setup window. You have the following options in the Measurement Definition Setup window. Flex Focus 1202 Advanced User Guide (BB1946-S) - Page 234 Edit.) The following window appears (when you click New). Select a template that the measurement will be based on. (This step does not appear if you are editing an existing measurement.) 234Appendix C November 2018 Flex Focus 1202 Advanced User Guide (BB1946-S)
- Page 235 Select dependencies, one at a time. (Gestational age measurements skip this step and go to Step 6.) That is, click Insert and select the measurements whose results will be used by the new measurement. Click Next and jump to Step 7. Flex Focus 1202 Advanced User Guide (BB1946-S)
- Page 236 <tool name>.<dependency result name> <tool name>.<dependency result name>,ARG_LIST Table C-7. Formula syntax for measurements. Click Finish. (If the formula contains errors, you will not be able to continue until you correct them.) 236Appendix C November 2018 Flex Focus 1202 Advanced User Guide (BB1946-S)
-
Page 237: Curves
You use the Curve Setup window to define a curve or to edit an existing user-defined one. To open the Curve Setup window: Click the Measurements tab and then the Curve tab. • Flex Focus 1202 Advanced User Guide (BB1946-S) - Page 238 If the selected curve is user-defined, you can edit the information in the fields. The actual values of the curve are listed below the other information fields. 238Appendix C November 2018 Flex Focus 1202 Advanced User Guide (BB1946-S)
- Page 239 There is no limit to the number of values you can enter to define a curve. Table C-8. Information fields in the Curve Setup window. You have the following options in the Curve Setup window. Flex Focus 1202 Advanced User Guide (BB1946-S)
-
Page 240: Miscellaneous Measurement Setup
You can only edit curves that you have defined. Curves that come with the NOTE: system cannot be edited. Miscellaneous Measurement Setup To open the Miscellaneous Measurement Setup window: Click the Measurements tab and then the Miscellaneous tab. • 240Appendix C November 2018 Flex Focus 1202 Advanced User Guide (BB1946-S) -
Page 241: Marks (Bodymarks, Labels, Puncture Guides)
Marks (Bodymarks, Labels, Puncture Guides) You can customize the bodymark and label setup. You can also change the offset of a programmable brachy matrix puncture guide or set up a brachy ruler. Flex Focus 1202 Advanced User Guide (BB1946-S) -
Page 242: Bodymark Setup
Label Setup To open the Label Setup window: Click the Labels/Marks tab, and then, in the window that appears, the Label • Catalogs tab. Figure C-21. The Label Setup window. 242Appendix C November 2018 Flex Focus 1202 Advanced User Guide (BB1946-S) -
Page 243: Transperineal Matrix, Brachy Matrix And Ruler, And Programmable Puncture
If the box is not checked, a brachy ruler will never be displayed with a sagittal view, but you will still be able to see and use the biopsy guides for sagittal views, where appropriate Flex Focus 1202 Advanced User Guide (BB1946-S) - Page 244 To define a new matrix or edit an existing user-defined matrix: In the Brachy Matrix Setup window, click New, or select an existing measurement and click Edit. The following window appears. 244Appendix C November 2018 Flex Focus 1202 Advanced User Guide (BB1946-S)
- Page 245 (holes per cm), and the horizontal and vertical offset of the matrix. The system calculates the number of rows and columns and the hole spacing in each direction. When the both offsets are 0, the matrix looks like this: Flex Focus 1202 Advanced User Guide (BB1946-S)
- Page 246 (holes/cm) and the horizontal and vertical offset of the ruler. The system calculates the number of rows and columns and the hole spacing in each direction. When the both offsets are 0, the matrix looks like this: 246Appendix C November 2018 Flex Focus 1202 Advanced User Guide (BB1946-S)
- Page 247 Matrix Alignment and Calibration WARNING B-w4 To avoid harming the patient, check the needle alignment (and recalibrate if neccessary) before each use. The best accuracy that can be expected is a 3mm deviation. NOTE: Flex Focus 1202 Advanced User Guide (BB1946-S)
- Page 248 If the echo is superimposed on the dot in the matrix on the monitor, then insert a needle through B4 and F4. If the echo for the needles in these holes are also in the correct position, no further adjustment is required. 248Appendix C November 2018 Flex Focus 1202 Advanced User Guide (BB1946-S)
-
Page 249: Miscellaneous Marks Setup
Click the Labels/Marks tab, and then, in the window that appears, the • Miscellaneous tab. Select the Pro Package in the left pane and make your changes under Setup in • the right pane. Figure C-23. The Miscellaneous Marks Setup window. Flex Focus 1202 Advanced User Guide (BB1946-S) -
Page 250: Licenses
Figure C-24. The License Manager window. Type the license key in the fields in the Add License box. Click Apply License. The Licenses in system list is updated. Close the License Manager window. 250Appendix C November 2018 Flex Focus 1202 Advanced User Guide (BB1946-S) -
Page 251: Importing And Exporting System Configurations
Figure C-25. The Export/Import window opened to the Pro Packages. To export a Pro Package or system setting: From the list on the left, select the item you want to export. Click Export. Flex Focus 1202 Advanced User Guide (BB1946-S) - Page 252 Delete Pro Package. Under System Settings, you can export or import 3D presets • Bodymarks • DICOM (if licensed) • General Settings • Gui Control Assignments • Labels • Video • 252Appendix C November 2018 Flex Focus 1202 Advanced User Guide (BB1946-S)
-
Page 253: Importing Or Exporting Presets
CD/DVD or a USB storage device. You are prompted for a file name to which the Presets will be saved. The selected Presets are saved, with their existing names, as part of the named file. Flex Focus 1202 Advanced User Guide (BB1946-S) - Page 254 In the right-hand list, select the Pro Package you want to import them to, or click New Pro Package to create a new one to contain the imported setups. 254Appendix C November 2018 Flex Focus 1202 Advanced User Guide (BB1946-S)
-
Page 255: Dicom Setup
DICOM is not installed on the Flex Focus as a default. You must purchase a DICOM Installing and setting up license from BK Medical ApS before a qualified service technician can install DICOM on your system. The 1202 Service Manual contains instructions for service personnel to use when setting up your DICOM system. - Page 256 256Appendix C November 2018 Flex Focus 1202 Advanced User Guide (BB1946-S)
-
Page 257: Appendix D Redefining Screen Keys - Label, Bodymark, And Measurement
Close the menu by clicking the X in the upper right corner or clicking anywhere outside the menu. : A B-mode measurement can only be changed to another B-mode NOTE measurement, and a D-mode measurement can only be changed to another D-mode measurement. Flex Focus 1202 Advanced User Guide (BB1946-S) -
Page 258: Other Settings
Position it on the monitor in what you want to be the default position. Click the right circle on the key to open the Key Definition window. (See Fig D-1.) Click Settings, then Set as default position. 258Appendix D November 2018 Flex Focus 1202 Advanced User Guide (BB1946-S) - Page 259 Close the Key Definition menu. Click Advanced to turn it off. You are prompted to save your changes. Be sure to turn off Advanced after you make changes because otherwise they NOTE: will not be saved. Flex Focus 1202 Advanced User Guide (BB1946-S)
- Page 260 260Appendix D November 2018 Flex Focus 1202 Advanced User Guide (BB1946-S)
-
Page 261: Appendix E Configuring The Flex Focus 1202
To redefine an existing key: On the key, click the small circle in the top left corner (see Fig E-1.) A menu appears for editing the key (as shown with the ETD key sample in Fig E-2.) Flex Focus 1202 Advanced User Guide (BB1946-S) - Page 262 When you are in Configuration mode, you can identify the keys that are visible in Visibility of keys Basic mode – they have a filled circle in top left corner (as shown in Fig E-3.) 262Appendix E November 2018 Flex Focus 1202 Advanced User Guide (BB1946-S)
-
Page 263: Unavailable Spaces
The fields on the Imaging tabs are divided into two sections. The lower section is Keys in lower section common to all mode tabs and appears regardless of what mode tab is in the upper appear on all section. imaging tabs Flex Focus 1202 Advanced User Guide (BB1946-S) -
Page 264: Special 3D Mode Tab
When you are reviewing a clip or image, clicking Report, or connecting a USB device, an extra menu appears above the Documentation tab as shown (and circled) in Fig E-8. Figure E-8. The extra Documentation tab menu. 264Appendix E November 2018 Flex Focus 1202 Advanced User Guide (BB1946-S) -
Page 265: Patient Dialog
You can view and work with the display areas of the monitor when in Configuration mode; the display areas are outlined by dotted lines. See Fig E-10. Flex Focus 1202 Advanced User Guide (BB1946-S) - Page 266 – or if you don't have the tabs shown at all – you Configuration can make it available by having it displayed in an info box. mode 266Appendix E November 2018 Flex Focus 1202 Advanced User Guide (BB1946-S)
-
Page 267: Prioritizing The Display Of Measurements And Settings
To copy tabs and softkeys (GUI controls) from one Pro Package to another: Insert the memory stick in the system. Click Customize…, select the Import/Export tab. Select the Pro Package. Click the System Settings tab. Select GUI Control Assignments. Click Export. Flex Focus 1202 Advanced User Guide (BB1946-S) - Page 268 Go to the Import/Export tab on the second system and click the System Settings tab. 10 Select GUI Control Assignments and click Import. The controls will be imported into whatever Pro Package is open on the NOTE: second system. 268Appendix E November 2018 Flex Focus 1202 Advanced User Guide (BB1946-S)
-
Page 269: Index
Index tilting a plane 174 Numerics untracked freehand 168 2D images, saving 50 user views 176 volume measurement 178 2050 transducer 168 warning about measurements 169 2052 transducer 168 ways to view a data set 176 4-Up view 181 Wire Frame 173 6-Up view 182 Zoom 173 8818 transducer 168... - Page 270 to a network drive 56 brightness of key labels 217 to a PACS 65 brightness of monitor, adjusting. See Getting Start- to CD, wait to delete from hard disk 65 ed.book array transducer 187 Burn CD window 57 Auto (Cardiac measurement) 187 automatic curve tracing 100 Doppler mode 89 Capture while not scanning (setup) 222...
- Page 271 always export codec with 222 child 238 capture while not scanning 222 creating a new 240 clear buffer on freeze 222 editing an existing 240 clear buffer on start timer 222 parent 238 clear buffer on unfreeze (setup) 222 type 239 clip storage options 222 Curve Setup window enable storage 222...
- Page 272 images in 122 measuring PI automatically 99 manipulating thumbnails 51 measuring PI manually 99 document browser tools 52 measuring RI 99 documents placing marker to measure RI 98 copying to a CD or USB storage device 55 real-time measurements 99 deleting 62 EDC (measurement) 189 viewing externally stored 53...
- Page 273 focus position, adjusting (B-mode) 70 format of copied 54 FOI (field of interest) 189 freezing and unfreezing 27 follicle diameter measurements 109 image orientation, adjusting 19 format image review. See cine. archived documents 54 images copied documents 54 format 54 DICOM 54 imaging 30 exported documents 54...
- Page 274 MD (minimum diastole) MPPS (definition) 190 correct placement of marker 95 multiple clips in pulsatility index 98 capturing (screen control) 20 measuring PI manually 99 setting file length of each clip 222 real-time measurement 99 setting total recording length of all clips in a se- mean trace curve quence 222 automatic 97...
- Page 275 definition 190 power mode saving to 55 directional 79 PAL 219 Power + Direction 79 parent curve 238 Power save mode 229 partial freeze 28 power supply cord 191 password preset restrictions 226 caution about identical names 255 superuser default 226 exporting 253 password protection importing 254...
- Page 276 performing 106 Save (in Curve Setup window) 240 puncture line 106 Save Diagnostic Setup window 91 warning about changing offset of programmable saving puncture guides or brachy matrixes 151 2D images 50 warning to verify puncture guide number 151 3D data sets 50 puncture guide Diagnostic Setups 91 verify that number is correct on monitor 106...
- Page 277 system triplex. See combination mode. logging in 64 True Echo Harmonics. See tissue harmonic imaging. using without logging in 64 system settings exporting 251 urology measurements importing 252 empirical method 102 HWL 102 ejecting storage device 58 definition 97 storage device, exporting to 252 real-time measurement 99 user-defined keys, setting up 215 ways to measure 97...
- Page 278 video video clips 53 output modes 228 VL (measurement) 211 video clips volume flow measurement warning about diameter capturing 50 markers (VFI) 86 format 54 volume flow rate estimation, assisted (VFI) 86 format of copied 54 volume flow, calculating 97 joining 52 volume measurement (3D), making 178 saving 50...
Need help?
Do you have a question about the Flex Focus 1202 and is the answer not in the manual?
Questions and answers