Advertisement
Quick Links
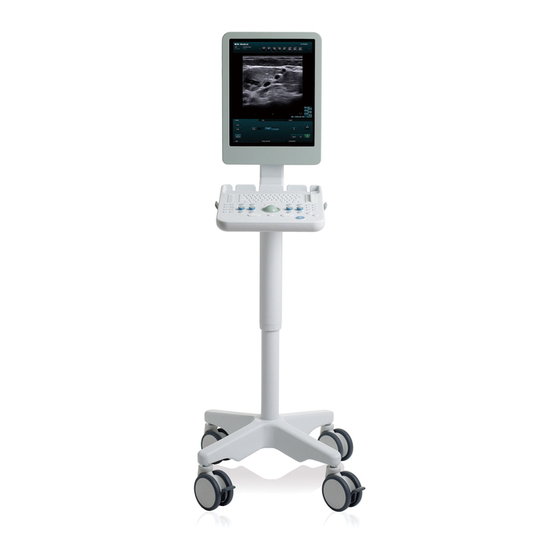
Setup Guide for System 1202
Setup Guide
for System
Flex Focus 1202
1 General Description ............................................................................................................2
2 Unpacking the scanner .......................................................................................................3
3 Mount the scanner and connect cables ..............................................................................6
4 Changing Language and System Time.............................................................................13
BI1200-E
1 of 14
Advertisement

Subscribe to Our Youtube Channel
Related Manuals for BK Medical Flex Focus 1202


Summary of Contents for BK Medical Flex Focus 1202
- Page 1 Setup Guide for System 1202 Setup Guide for System Flex Focus 1202 1 General Description ......................2 2 Unpacking the scanner .......................3 3 Mount the scanner and connect cables ................6 4 Changing Language and System Time................13 BI1200-E 1 of 14...
-
Page 2: General Description
Setup Guide for System 1202 General Description IMPORTANT: The installation procedure must be carried out only by B-K service personnel or their authorised representatives, who are aware of the hazards involved. All scanners leaving the factory are configured for mains voltage 115/220V, European TV standard (PAL) 50Hz - 625 lines and English language. -
Page 3: Unpacking The Scanner
Setup Guide for System 1202 Unpacking the scanner 1. Cut the black straps and open the cardboard box from the top. 2. If any transducers/accessories are ordered with the system, it may be secured in the top as shown below or a filler box may be used to stabilize the top area. BI1200-E 3 of 14... - Page 4 Setup Guide for System 1202 3. Remove the packaging material from the top and remove the cardboard box. 4. Cut the black straps and the tape holding the cardboard boxes. UA1210/UA1214 5. Remove one by one all the protective packaging material from the scanner. (this drawing can also be used as reference for repackaging the scanner) UA1210/UA1214 BI1200-E...
- Page 5 Setup Guide for System 1202 6. lift the cart of the plastic tray and remove all the plastic bags. UA1210 / UA1214 BI1200-E 5 of 14...
-
Page 6: Mount The Scanner And Connect Cables
Setup Guide for System 1202 Mount the scanner and connect cables 1. Mount the scanner on the docking unit BI1200-E 6 of 14... - Page 7 Setup Guide for System 1202 2. Remove the cable cover BI1200-E 7 of 14...
- Page 8 Setup Guide for System 1202 3. Ensure that the correct fuses are installed - 4A TH Standard units Units with battery Support Check that the mains cable is connected Connect the mains cable BI1200-E 8 of 14...
- Page 9 Setup Guide for System 1202 5. Insert the two (or four) batteries on units with Battery support. If only two batteries are used, they should be inserted in pairs - either two at the top or two at the bottom BI1200-E 9 of 14...
- Page 10 Setup Guide for System 1202 6. Video, USB, Audio and LAN (DICOM ) connectors Video in Video out DVI-I out LAN /DICOM Audio out To comply with IEC60601-1 the network connection to the scanner must be isolated from the hospital network (Medical 230 V isolation).
- Page 11 Setup Guide for System 1202 For Mobile Keyboard/Touch Docks without Battery Support: The cables can either go out from the top or the bottom of the docking column To change the position column-cover should be removed and the cable put behind the cover.
- Page 12 Setup Guide for System 1202 9. Remount the cable cover Check that the lock screw is positioned like Make sure that the cable are not blocking the cable Illustrated cover lock Mount the cable cover so that there is about 0.5 cm Gently hit the cable cover from the button sliding it to the final position - both vertically and horizontal into the final position...
-
Page 13: Changing Language And System Time
Setup Guide for System 1202 Changing Language and System Time 1. Turn on the scanner and wait for it to complete the boot up sequence 2. Click on the Image tab Then Click on Advanced Click on Customize 5. Select System BI1200-E 13 of 14... - Page 14 Setup Guide for System 1202 6. Select the Language 7. Click Adjust Date and Time. to adjust to local time 8. Restart the scanner by turning it off and then on BI1200-E 14 of 14...
Need help?
Do you have a question about the Flex Focus 1202 and is the answer not in the manual?
Questions and answers