Stanley ProSet PB3400 Service Manual
Structural rivet tool
Hide thumbs
Also See for ProSet PB3400:
- Instruction manual (233 pages) ,
- Service manual (52 pages) ,
- Accessories manual (13 pages)
Table of Contents
Advertisement
Advertisement
Table of Contents

Related Manuals for Stanley ProSet PB3400


Summary of Contents for Stanley ProSet PB3400
- Page 1 Service Manual...
-
Page 4: Table Of Contents
STANLEY Engineered Fastening. The information provided is based on the data known at the moment of the introduction of this product. STANLEY Engineered Fastening pursues a policy of continuous product improvement and therefore the products may be subject to change. The information provided is applicable to the product as delivered by STANLEY Engineered Fastening. -
Page 5: Safety Definitions
The term “power tool” in the warnings refers to your mains-operated (corded) power tool or battery-operated (cordless) power tool. • Do not use outside the design intent of Placing STANLEY Engineered Fastening Blind Fasteners. • Use only parts, fasteners, and accessories recommended by the manufacturer. -
Page 6: Important Safety Instructions For All Battery Chargers
• Do not modify the tool in any way. Any modification to the tool is undertaken by the customer and will be the customer’s entire responsibility and void any applicable warranties. Disconnect the battery from the tool before performing any maintenance, attempting to adjust, fit or remove a nose •... -
Page 7: Important Safety Instructions For All Battery Packs
NOTICE: Under certain conditions, with the charger plugged into the power supply, the exposed charging contacts inside the charger can be shorted by foreign material. Foreign materials of a conductive nature such as, but not limited to, steel wool, aluminium foil or any build-up of metallic particles should be kept away from charger cavities. Always unplug the charger from the power supply when there is no battery pack in the cavity. -
Page 8: Specific Safety Instructions For Lithium-Ion (Li-Ion)
WARNING: Never attempt to open the battery pack for any reason. If battery pack case is cracked or damaged, do not insert into charger. Do not crush, drop or damage battery pack. Do not use a battery pack or charger that has received a sharp blow, been dropped, run over or damaged in any way (i.e., pierced with a nail, hit with a hammer, stepped on). -
Page 9: Specifications
DeWALT/POP-Avdel charger may make them Risk of electric shock. burst or lead to other dangerous situations. STANLEY Engineered Fastening policy is one of continuous product development and improvement and we reserve the right to change the specification of any product without prior notice. - Page 10 2.1.2. Model PB3400 2.0Ah PB3400 4.0Ah Weight kg [lbs] 2.1 [4.63] 2.4 [5.29] Length mm [in] 336 [13.2] 336 [13.2] Height mm [in] 255 [10.0] 255 [10.0] Stroke mm [in] 30 [1.181] 30 [1.181] Pulling Force N [lbf] 18,000 [4047] nom.
-
Page 11: Placing Specifications
2.2. PLACING SPECIFICATIONS 4.8mm 6.4mm 8.0/9.0 Rivet Type 6.0 mm [3/16´´] [1/4´´] OPEN END ● ● ● CLOSED END ● AVEX®/STAVEX® ● ● AVINOX®/AVIBULB® ● ● ● HR/HT ● ● INTERLOCK® ● Hemlok® ● KLAMP-TITE®/KTR ● BULBEX®/LS/TL ● MONOBOLT® ● ●... -
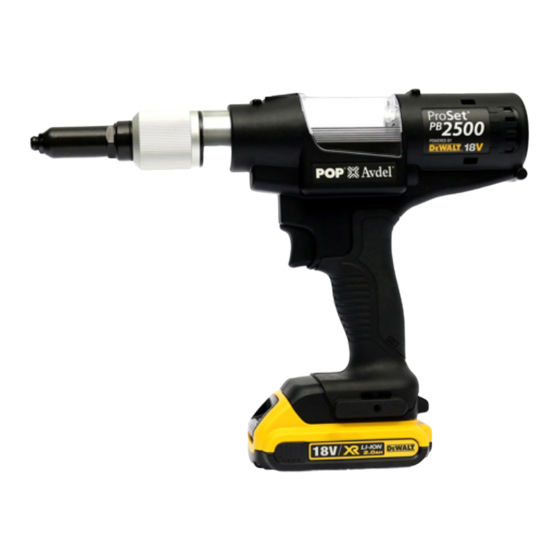
Page 12: Main Components List
2.4. MAIN COMPONENTS LIST (for complete tool explosion and Bill of Material please see service manual) Nose pieces Charger lamp Nose housing Charger Nose housing nut Battery charger connection Collector lock Jaw guide Collector shutter Jaws Quick release collector Jaw pusher Shutter guide sleeve Spring Motor housing... -
Page 13: Tool Use & Set Up
3. Tool Use & Set up The PB Series of tools are designed for installation of STANLEY Engineered Fastening Blind Fasteners. DO NOT use under wet conditions or in presence of flammable liquids or gases. READ ALL SAFETY WARNINGS AND INSTRUCTIONS BEFORE PUTTING TOOL INTO SERVICE. -
Page 14: Chargers
• NOTE: The Tail Guide that comes installed on the tool as purchased matches the installed Nose Piece. Ref. Nose Piece chart (page 12) for the actual Tail Guide part number. • Insert mandrel guide (V) into pulling head (T) •... -
Page 15: Battery Packs
Lithium-Ion Battery Packs only STANLEY Engineered Fastening PB Series Li-Ion tools are designed with an Electronic Protection System that will protect the battery against overloading, overheating or deep discharge. -
Page 16: Proper Hand Position
WARNING: To reduce the risk of serious personal injury, ALWAYS hold securely in anticipation of a sudden reaction. 5.1. Proper Hand Position Proper hand position requires one hand on the main handle (I) fig. 1. 5.2. Tool Operation Installing a blind rivet (fig. 8) To install a blind rivet •... -
Page 17: Servicing The Tool
• Pull the mandrel collector (E2) up and away from the tool, tilting the collector slightly back to prevent mandrels from falling out. • To replace the collector, slide it back into the tool with the opening facing the front of the tool. •... -
Page 18: Spare Parts - Tools
Mount the spring (S) • • Mount the jaw pusher(R) and the jaws (Q) • Press front clutch (U) and tighten the jaw guide (P). Release front clutch (U). Mount the nose housing (B). Tighten the nose housing nut (C). •... -
Page 19: Jaws, Jaw Guide, Jaw Pusher And Jaw Pusher Spring
7. Jaws, Jaw Guide, Jaw Pusher and Jaw Pusher Spring SA Mandrel Guide, 8 or 6 SA Jaw Pusher, 8 or 6 Jaw Guide Jaws SA Jaw Pusher,8K Jaw Pusher Spring BOM for Jaws, Jaw Guide, SA Jaw pusher and Jaw Pusher Spring JAWS PRG540-44 1SET... - Page 20 Jaws Jaw Guide Put the Jaws into the Jaw Guide (as shown) so that the teeth are on the inside. Jaw Guide Jaws After inserting the Jaws, check that they are set correctly. Pulling Head Insert the Mandrel Guide into the Pulling Head. Mandrel Guide...
- Page 21 Pulling Head Jaw Pusher Spring Insert the Jaw Pusher Spring into the Pulling Head. Jaw Pusher Spring Put the SA Jaw Pusher on the Jaw Pusher Spring and hold in not to fall. SA Jaw Pusher Pulling Head Jaw Guide Tighten the Jaw Guide, with Jaws, to the Pulling Head, with pulling Jaw Case Lock, by hand until it stops.
- Page 22 Jaw Guide Turn back a little until the rotation is locked by the boss of the Jaw Case Lock. Lock Jaw Case Lock Set a battery on to the tool to check the operation. Battery Check the tool operates correctly by pulling and releasing the trigger.
- Page 23 Remove the battery after checking. Memo...
-
Page 24: Sa Nose Housing And Sa Nose Piece
8. SA Nose Housing and SA Nose Piece SA Nose Housing (TP143-594) SA Nosepiece A type SA Nose Housing (TP143-643) SA Nosepiece B type BOM for SA Nose Housing and SA Nosepiece SA NOSE HOUSING TP143-594 (02780) SA NOSE HOUSING TP143-643 (02779) A type SA NOSEPIECE... - Page 25 SA Nose Housing (TP143-594) SA Nosepiece A type Tighten up the SA Nosepiece A type securely with spanners (see adjacent picture) Width across flats: 14mm and 23mm Spanner 14mm Spanner 23mm SA Nose Housing (TP143-643) SA Nosepiece B type Insert the SA Nosepiece B type on to SA the Nose Housing (TP143-643) and screw on by hand.
- Page 26 Nose Hosuing Nut Apply grease to the inside of Nose Housing Nut (see adjacent picture). Apply grease Mast Hosuing SA Nose Hosuing Insert the SA Nose Housing on to the Mast Housing of the tool. Mast Hosuing SA Nose Hosuing Tighten the SA Nose Housing on to the thread of the Mast Housing by hand.
-
Page 27: Operation Test And Appearance Check
9. Operation Test and Appearance check Operation Check Set 30 rivets of 8 size steel to check: The tool does not slip Rivet setting is done in one stroke There is no protruding mandrels There is no abnormal noise ... -
Page 28: Accessories
10. Accessories JP (JAPAN) Model number PB3400-JP1831 PB3400-JP1832 BATTERY PACK DCB183-JP(1PC) ←(2PCS) CHARGER DCB115-JP ← SA NOSEPIECE, 8F TP143-646 ← SA NOSEPIECE, 8P TRM00115 ← SA NOSE HOUSING TP143-643 ← SCREW WRENCH TP144-682 ← FOAM SPACER TRM00194(1PC) ←(2PC) PB3400-JP INSTRUCTION MANUAL ←... - Page 29 QW (EASTERN EUROPE) Model number PB3400-QW1831A PB3400-QW1832A PB3400-QW1821A PB3400-QW1822A BATTERY PACK DCB183-XJ(1PC) ←(2PCS) DCB182-XJ(1PC) ←(2PC) CHARGER DCB115-QW ← ← ← SCREW WRENCH TP144-682 ← ← ← FOAM SPACER TRM00194(1PC) ←(2PC) INSTRUCTION MANUAL TRM00202 ← ← ← GB (GREAT BRITAIN) Model number PB3400-GB1831 PB3400-GB1832 PB3400-GB1821...
-
Page 30: Exploded View
11. Exploded View PB3400-JP, XE, XD... - Page 31 PB3400-NA, QW, GB...
-
Page 32: Bom
12. BOM PB3400-JP Description Description Accessories TP144-593 SA Nosepiece, 811 DPN900-074 O ring DCB183-JP Battery Pack 2.0Ah 1 or 2 TP143-642 Nosepiece, 811 DCB115-JP Charger TP144-645 TP142-633 Kit Box DPN276-001 Jaw Guide TP143-643 SA Nose Housing PRG540-44 Jaws 1set TP143-646 SA Nosepiece, 8F TRM00502 SA Jaw Pusher, 8... - Page 33 PB3400-NA Description Description Accessories TP143-646 SA Nosepiece, 8F DPN900-074 O ring DCB203-NA Battery Pack 2.0Ah 1 or 2 TP143-644 Nosepiece, 8F DCB115-NA Charger TP144-645 TRM00140 SA Kit Box DPN276-001 Jaw Guide TP143-652 SA Nosepiece, 8M PRG540-44 Jaws 1set TP144-682 Screw Wrench TRM00502 SA Jaw Pusher, 8 DCB204-NA...
- Page 34 PB3400-QW Description Description Accessories TP143-646 SA Nosepiece, 8F DPN900-074 O ring DCB183-XJ Battery Pack 2.0Ah 1 or 2 TP143-644 Nosepiece, 8F DCB115-QW Charger TP144-645 TRM00141 SA Kit Box DPN276-001 Jaw Guide TP144-655 SA Jaw pusher, 8K PRG540-44 Jaws 1set TP144-682 Screw Wrench TRM00502 SA Jaw Pusher, 8...
- Page 35 PB3400-GB Description Description Accessories TP143-646 SA Nosepiece, 8F DPN900-074 O ring DCB183-XJ Battery Pack 2.0Ah 1 or 2 TP143-644 Nosepiece, 8F DCB115-GB Charger TP144-645 TRM00142 SA Kit Box DPN276-001 Jaw Guide TP144-655 SA Jaw pusher, 8K PRG540-44 Jaws 1set TP144-682 Screw Wrench TRM00502 SA Jaw Pusher, 8...
- Page 36 PB3400-XE Description Description Accessories DPN276-001 Jaw Guide PRG540-44 Jaws 1set DCB183-XJ Battery Pack 2.0Ah 0 or 2 TRM00502 SA Jaw Pusher, 8 DCB115-XE Charger TRM00418 Jaw pusher, 8 TRM00143 SA Kit Box TP144-597 O ring TP144-682 Screw Wrench TP144-600 Jaw Pusher Spring DCB182-XJ Battery Pack 4.0Ah 0 or 2...
- Page 37 PB3400-XD Description Description Accessories DPN276-001 Jaw Guide PRG540-44 Jaws 1set DCB183-XJ Battery Pack 2.0Ah 0 or 2 TRM00502 SA Jaw Pusher, 8 DCB115-XD Charger TRM00418 Jaw pusher, 8 TRM00144 SA Kit Box TP144-597 O ring TP144-682 Screw Wrench TP144-600 Jaw Pusher Spring DCB182-XJ Battery Pack 4.0Ah 0 or 2...
-
Page 38: Troubleshooting Guide
13. Troubleshooting Guide Symptom Cause Remedy Tool does not operate when switch Battery is defective Replace battery is pressed. Battery is not fully charged Charge battery Battery is not fully seated Remove battery and re-insert. Reset tool to home. Battery pack has reached operating Remove battery &... - Page 39 Cannot insert rivet Incorrect Nose Piece for rivet. Refer to Accessories Manual. Select and install correct nose piece Broken rivet stems jammed in Nose Service and clean Nose Assembly. Equipment. Refer to Accessories Manual. Check Nose Equipment is correct for rivet Broken rivet stems jammed in Pulling Empty Stem Collector and clear...
- Page 40 171116-1...
Need help?
Do you have a question about the ProSet PB3400 and is the answer not in the manual?
Questions and answers