
Subscribe to Our Youtube Channel
Related Manuals for Techni Mobili RTA - 2336


Summary of Contents for Techni Mobili RTA - 2336
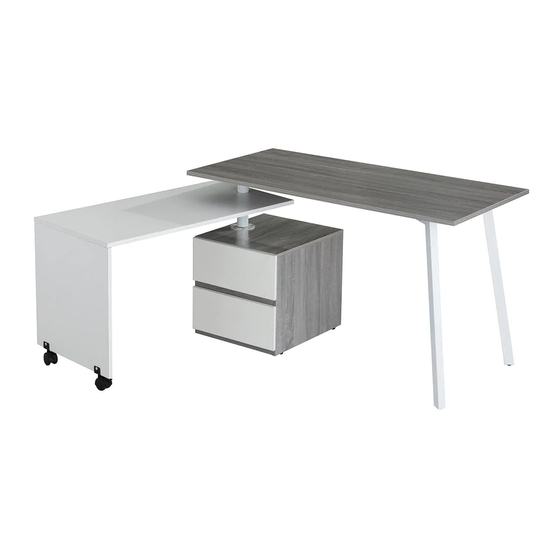
- Page 1 ASSEMBLY INSTRUCTIONS MODEL RTA - 2336 Thanks for purchasing one of our products. Please read carefully the assembly instructions before the installation. Please save this manual for future reference. MODEL RTA-2336...
- Page 2 RTA-2336...
-
Page 3: Parts List
RTA-2336 PARTS LIST Right Panel Left Panel Bottom Panel Bottom Front Panel X2 SETS Right Left Middle Front Panel Back Panel Top Panel Slider Bottom Drawer Front Top Drawer Front Drawer Left Panel Drawer Right Panel Panel Panel... - Page 4 RTA-2336 Drawer Back Panel Drawer Bottom Panel Drawer Connect Studs Support Tube Rotating Structure Big Table Top Front Structure Back Structure Short Connect Tube Long Connect Tube Small Table Top Big Side Panel Support Structure Caster...
-
Page 5: Screws List
RTA-2336 SCREWS LIST PART QTY. PART QTY. ITEM ITEM 3X15 MM 6X25 MM 6X40 MM Φ16MM 4X14 MM 6X15 MM 4X35 MM 6X20 MM 6X40 MM 6X50 MM... - Page 6 RTA-2336...
-
Page 7: Assembly Steps
RTA-2336 ASSEMBLY STEPS: & Use screws D to assemble the Drawer Connects (15) Use screws A to assemble the Drawer Connects (15) to the Top Drawer Front Panel and Bottom Drawer to the Drawer Left and Right Panels (11 & 12). Front Panel (9 &... - Page 8 RTA-2336 Insert the Studs (16) to the Left Panel, Right Panel, Back Structure and Front Structure (1,2,20 & 21). Right Left SCREWS 3X15 MM 8PCS Grab 2 sets of the Flat Sliders (8) and use screws A to assemble them to the Left & Right Panels (1 & 2) as shown. The wheel on the sliders go facing to the FRONT and the screw goes on the hole after the wheel as shown.
- Page 9 RTA-2336 SCREWS 6X40 MM 4PCS First screw bolts B to the Bottom Front Panel and Back Panel (4 & 5), then assemble the Bottom Panel (3) as shown and as explained in page 5. SCREWS 6X40 MM First screw bolts B to the Left Panel (1) and Right Panel (2), then assemble the Bottom Panel, Bottom Front Panel, Back Panel and 14PCS Middle Front Panel (3,4,5 &...
- Page 10 RTA-2336 P.10 Use screws G to assemble the Long Connect Tube (23) to the Back Structure and Front Structure (20 & 21). SCREWS 6X40 MM 4PCS Use screws F to assemble the Short Connect Tube (22) to the Back Structure and Front Structure (20 &...
- Page 11 RTA-2336 P.11 Use screws H to assemble the Back Structure, Front Structure and Long Connect Tube (20,21 & 23) to the Big Table Top (19). SCREWS 6X50 MM 6PCS First screw bolts B to the Small Table Top (24), then assemble it to the Big Side Panel (25) as shown and as explained in page 5.
- Page 12 RTA-2336 P.12 SCREWS 4X14 MM 8PCS 6X25 MM 2PCS Use screws C to assemble the Support Tube (18) to the Small Table Top (24). 2PCS Use screws I & J to assemble the Casters (27) to the Big Side Panel (25). Use screws D to assemble one of the part 17E to the Small Table Top (24).
- Page 13 RTA-2336 P.13 Use Allen Wrench to assemble the Rotating Structure (17) as shown. SCREWS 6X25 MM 4PCS 4PCS Use screws I, J & K to assemble the Rotating Structure (17) to the Top Panel (7) as shown. Φ 16 MM 4PCS...
- Page 14 RTA-2336 P.14 SCREWS Use screws D to assemble the Rotating Structure (17) 6X15 MM to the Big Table Top (19). 4PCS Tighten any and all screws. Insert the drawers into the cabinet, starting with the bottom drawer. You might have to insert it at a downward tilted angle.
-
Page 15: Care And Maintenance
CARE AND MAINTENANCE English - DO NOT EXPOSE THE SURFACES TO DIRECT SUNLIGHT OR EXTREME ENVIRONMENTAL CONDITIONS. ANY DAMAGE RESULTING FROM SUCH EXPOSURE IS NOT COVERED BY THE PRODUCT’S WARRANTY. - THE PREFERABLE METHOD TO CLEAN THE SURFACES IS TO WIPE THEM USING A SOFT CLOTH DAMPENED WITH A SOLUTION SOAP AND WATER, THEN DRY WITH A CLEAN TOWEL.
Need help?
Do you have a question about the RTA - 2336 and is the answer not in the manual?
Questions and answers