Table of Contents
Advertisement
Available languages
Available languages
FE9163
Oven
Instructions for use, maintenance and installation
Four
Mode d'emploi, entretien et installation
Backofen
Gebrauchs-, instandhaltungs- und
Installierungsanweisungen
Forno
Istruzioni d'uso, manutenzione ed installazione
Horno
Instrucciones de uso, manutención y instalación
Forno
Instruções de uso, manutenção e instalação
Advertisement
Chapters
Table of Contents

Subscribe to Our Youtube Channel
Related Manuals for ROSIERES FE9163


Summary of Contents for ROSIERES FE9163
- Page 1 FE9163 Oven Instructions for use, maintenance and installation Four Mode d’emploi, entretien et installation Backofen Gebrauchs-, instandhaltungs- und Installierungsanweisungen Forno Istruzioni d’uso, manutenzione ed installazione Horno Instrucciones de uso, manutención y instalación Forno Instruções de uso, manutenção e instalação...
-
Page 3: Table Of Contents
Table of Contents Technical specification Page 3 Preparing the oven Page 4 Control panel Page 5 Description of control panel symbols Page 6 Using the spit Page 7 Using the grill Page 7 Electronic programmer Page 8-9 Cleaning the removable glass panel Page 10 Removing the oven door Page 10... -
Page 5: Technical Specification
Dear Customer, Thank you for choosing One of our products. We are sure that it will satisfy all your requirements and guarantee excellent results at all times. It is important to carefully follow the instructions for correct use of the appliance. The manufacturer will not be liable for damage to property or injury to persons caused by faulty or incorrect installation. -
Page 6: Preparing The Oven
- children or incapable people may only use the appliance under supervision - adapters, multiple sockets and extension cables should not be used. - in case of faults and/or malfunctions, switch off the appliance; do not attempt to repair it yourself. If the cable is damaged, replace it immediately as follows: - open the terminal board cover, remove the power cable and replace it with one of a relative length with rubber insulation (H05RR-F) and sufficiently large for the rated power of the appliance. -
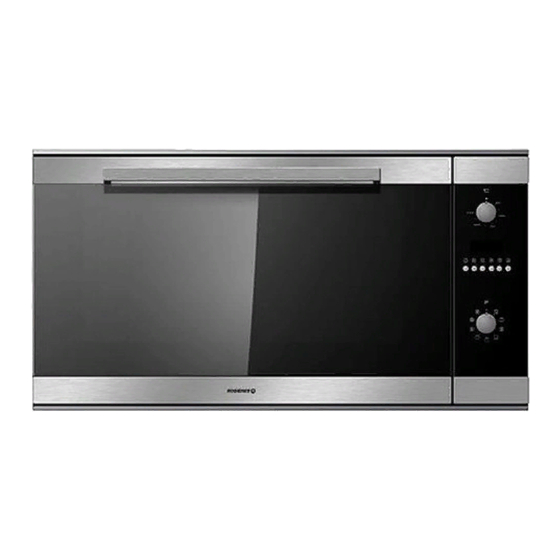
Page 7: Control Panel
1 - Thermostat 2 - Selector 3 - Electronic programmer 4 - Power supply pilot light 5 - Temperature pilot light 250°C... -
Page 8: Description Of Control Panel Symbols
Description of control panel symbols - Oven light - Upper + lower heating element - Lower heating element - Upper heating element - Grill heating element - Grill + fan heating element - Upper heating element + lower heating element + fan - Ventilated circular heating element - Ventilated defrosting Using the oven... -
Page 9: Using The Spit
Using the spit (fig. 1) Insert the spit rod "A" into the drive unit and the groove "B" into the bend "C". Turn the plastic handle "D" anticlockwise and slide the rack into the oven runners ensuring that the rod "E" slots into the hole "F". The spit rack must always be fitted in the middle of the oven (second position from bottom). -
Page 10: Electronic Programmer
Electronic Programmer Timer Cooking time with automatic function End of cooking time Move back numbers in all programs Move ahead numbers in all programs Automatic program Duration and manual mode Fig. 2 Minute control Settings After pressing a function button, the required time can be set via the +/- keys. For quicker regulation, keep the required key pressed. - Page 11 Semi-automatic operation and end of cooking time Press the end of cooking time key and set the required time by means of the +/- keys. The symbol A and the symbol of the saucepan will light up. The relay output will be activated. If clock = end of cooking time, the relay and saucepan symbol will switch off.
-
Page 12: Cleaning The Removable Glass Panel
Oven door Fig. 3 Clean the oven do or using non-abrasive products. The glass panel can be easily removed and cleaned by unscrewing the four screws at the side (fig. 3 ). Removing the oven door To make it easier to clear the oven, the door may be removed. -
Page 13: Cleaning And Maintenance
Cleaning and maintenance Important: before carrying out maintenance on the oven, it must always be unplugged from the power supply or disconnected from the mains via the electrical system master switch. The stainless steel and enamelled parts will keep their finish if cleaned with water or using specific products, drying them thoroughly. -
Page 14: Instructions For Building In
Instructions for building in the oven (fig. 6) The oven can be housed below the worktop or in a column unit by means of 4 screws. Follow the drawing below. Fig. 6 IMPORTANT To ensure the built-in appliance works correctly, the unit must correspond to certain characteristics. - Page 15 Index Données techniques Page 15 Préparation du four Page 16 Tableau des commandes Page 17 Description des symboles du tableau Page 18 Utilisation du tournebroche Page 19 Conseils pour l'utilisation du gril Page 19 Programmateur électronique Page 20-21 Nettoyage du verre interne amovible Page 22 Démontage de la porte du four Page 22...
- Page 17 Cher client, nous vous remercions d'avoir choisi un de nos appareils. Nous sommes sûrs qu'il répondra à toutes vos exigences et vous donnera entière satisfaction. Nous vous prions de suivre attentivement les indications pour utiliser correctement l'appareil. Le constructeur décline tonte responsabilité pour les dommages aux choses et aux personnes causés par une installation défectueuse et impropre.
- Page 18 - ne pas toucher l'appareil avec les pieds mouillés ou humides - ne pas utiliser l'appareil pieds nus - ne pas laisser que des enfants ou d'autres personnes incapables utilisent l'appareil sans sur- veillance - en général, on déconseille l'utilisation d'un adapteur, d'une prise multiple ou d'une rallonge - en cas de panne, et/ou mauvais fonctionnement de l'appareil, l'éteindre et ne pas le manipuler.
- Page 19 1 - Thermostat 2 - Commutateur 3 - Programmateur électronique 4 - Voyant tension 5 - Voyant température 250°C...
- Page 20 Description des symboles qui se trouvent sur le tableau des commandes - Lumière du four - Résistance supérieure + inférieure - Résistance inférieure - Résistance supérieure - Résistance gril - Résistance gril + ventilateur - Résistance supérieure + résistance inférieure + ventilateur - Résistance circulaire à...
- Page 21 Comment utiliser le tournebroche Fig. 1 Placer la broche "A" dans le logement correspondant et la cannelure "B" dans le creux de la grille "C". Dévisser le manche en plastique "D" dans le sens contraire aux aiguilles d'une montre. Placer ensuite la grille dans les guides du four en veillant à ce que la tige "E" rentre dans le trou "F".
- Page 22 Programmateur électronique Avertisseur sonore Temps de cuisson avec fonctionnement automatique Fin du temps de cuisson Régression dans tous les programmes Progression dans tous les programmes Programme automatique Durée et mode manuel Fig. 2 Contrôle des minutes Réglages Appuyer sur une touche de fonction et saisir le temps voulu à l’aide des touches +/-. Le réglage est plus rapide si on continue à...
- Page 23 Fonctionnement semi-automatique et heure de fin de cuisson Appuyer sur la touche de l'heure de fin de cuisson et saisir l'heure voulue avec les touches +/-. Le symbole A et celui de la casserole s'allument. La sortie du relais s'active. Si l'horloge correspond à...
- Page 24 Porte du four Fig. 3 Nettoyer la porte du four sans utiliser de produits abrasifs. Dévisser les deux vis latérales pour enlever la vitre du four et la nettoyer (Fig. 3). Démontage de la porte Pour faciliter le nettoyage du four, il est possible de démonter la porte.
- Page 25 Nettoyage et entretien du four Important: Avant de procéder au nettoyage du four, débrancher l'appareil ou couper le courant de la ligne d'alimentation en actionnant l'interrupteur général. Les parties en acier inoxydable et celles émaillées seront toujours comme neuves en les nettoyant avec de l'eau ou des produits spécifiques et en les essuyant soigneusement.
- Page 26 Indications pour l'installation du four dans le meuble (Fig. 6) Le four peut être installé sous le plan de travail ou dans un meuble à colonne avec 4 vis. Suivre scrupuleusement les indications fournies sur le dessin de la Fig. 6. Fig.
- Page 27 Inhalt Technische Daten Seite 27 Vorbereitung des Backofens Seite 28 Schalterblende Seite 29 Beschreibung d. Symbole auf der Schalterblende Seite 30 Benutzung des Spießes Seite 31 Ratschläge zur Benutzung des Grills Seite 31 Elektronischer Programmierer Seite 32-33 Reinigung der abnehmbaren Glassscheibe Seite 34 Abmontieren der Backofentür Seite 34...
-
Page 29: Technische Daten
Sehr geehrter Kunde, wir danken Ihnen dafür, daß Ihre Wahl auf eines unserer Produkte gefallen ist und sind sicher, daß dieses Gerät vollauf Ihren Bedürfnissen entsprechen und hervorragende Leistungen erbringen wird. Wir raten Ihnen, die vorliegenden Gebrauchsanweisungen genau zu befolgen, um unsere Produkte richtig zu nutzen. -
Page 30: Vorbereitung Des Backofens
- darf das Gerät nicht mit bloßen Füßen benützt werden - darf nicht erlaubt werden, dass das Gerät ohne Überwachung von Kindern oder Unfähigen benützt wird - wird generell vom Gebrauch von Adaptern, Vielfach-Steckdosen und Verlängerungen abgeraten - muss das Gerät im Falle von Defekt und/oder Betriebsstörung abgeschaltet und es dürfen keine Eingriffe an ihm ausgeführt werden. -
Page 31: Schalterblende
1 - Thermostat 2 - Funktionsschalter 3 - Elektronischer Programmierer 4 - Kontrollicht Stromspannung 5 - Kontrollicht Temperatur 250°C... -
Page 32: Beschreibung D. Symbole Auf Der Schalterblende
Beschreibung der Symbole auf der Schaltblende - Backofenbeleuchtung - Ober- und Unterhitze - Unterhitze - Oberhitze - Grill - Grill und Gebläse - Oberhitze + Unterhitze + Gebläse - Umluftgebläse - Abtauen mit Gebläse Ratschläge zur Backofenbenutzung Um gute Brat- und Backergebnisse zu erreichen ist es ratsam, den Backofen etwa 10 Minuten auf Maximaltemperatur vorzuheizen. -
Page 33: Benutzung Des Spießes
Wie man den Spieß benutzt (Abb. l) Die Spießspitze “A” in die Drehvorrichtung stecken und dabei gleichzeitig die Vertiefung “B” auf die Gittereinbuchtung “C” legen. Nun den Plastikgriff “D” entgegen dem Uhrzeigersinn abschrauben. Man kann nun das Gitter in die Ofenschienen schieben, wobei man darauf achten muß, daß der Stab “E” in das Loch “F” eingeführt wird. - Page 34 Elektronischer Programmierer Timer Back- oder Bratzeit bei automati- scher Funktionsweise Ende der Back-Bratzeit Läuft in der Nummerierung aller Programmierungen rückwärts Läuft in der Nummerierung aller Programmierungen vorwärts Automatisches Programm Dauer und Funktionsweise Abb. 2 Handbetrieb Minutenkontrolle Einstellungen Nachdem man die Funktionstaste gedrückt hat, kann man die gewünschte Dauer mit Hilfe der Taten +/- einstellen.
- Page 35 Der Relaisausgang wird aktiviert. Wenn Uhrzeit und Ende der Brat-/Backzeit übereinstimmen, schalten sich das Relais und das Kochtopfsymbol aus. Das akustische Signal tritt in Funktion und das Symbol A beginnt zu blinken. Halbautomatische Funktionsweise und Ende der Brat-/Backzeit Die Taste für Ende der Brat-/Backzeit drücken und die gewünschte Uhrzeit mit Hilfe der Tasten +/- einstellen.
-
Page 36: Reinigung Der Abnehmbaren Glassscheibe
Backofentür Abb. 3 Die Backofentür ohne Scheuermittel reinigen. Die Glasscheibe der Backofentür kann leicht abgenommen und so bequem gereinigt werden, indem man die zwei seitlichen Schrauben abschraubt. (Abb. 3) Abmontieren der Ofentür Zur Reinigung des Backofens kann man die Ofentür abmontieren. -
Page 37: Reinigung Und Instandhaltung Des Backofens
Reinigung und Instandhaltung des Backofens Wichtig: Bevor man mit Instandhaltungsmaßnahmen beginnt, den Stromstecker aus der Steckdose ziehen oder die Stromzufuhr ganz unterbrechen. Die Komponenten aus rostfreiem Stahl und mit Emaillebeschichtung bleiben wie neu, wenn man sie mit Wasser und spezifischen Produkten reinigt und danach sorgfältig trockenwischt. Man sollte die Benutzung von chlorhaltigen Produkten oder Chlorlösungen, Natronlauge, Scheuermitteln, Salzsäure, Essig und anderen kratzenden Produkten vermeiden. -
Page 38: Anweisungen Zum Einbau In Küchenmöbel
Anweisungen zur Installierung des Backofens im Küchenmöbel (Abb. 6) Der Backofen kann unter der Arbeitsplatte eingebaut oder mit 4 Schrauben in einer Säule untergebracht werden. Genau die aus Abb. 6 zu entnehmenden Anweisungen befolgen. Abb. 6 WICHTIG Um den einwandfreien Betrieb des Einbaugeräts zu gewährleisten, muss das Einbaumöbel geeignete Eigenschaften haben. - Page 39 Indice Dati tecnici Page 39 Preparazione del forno Page 40 Cruscotto comandi Page 41 Descrizione simboli cruscotto Page 42 Uso del girarrosto Page 43 Consigli per l’uso del grill Page 43 Programmatore elettronico Page 44-45 Pulizia vetro interno estraibile Page 46 Smontaggio della porta forno Page 46 Sostituzione della lampadina...
-
Page 41: Dati Tecnici
Gentile cliente La ringraziamo per aver scelto uno dei nostri prodotti. Siamo certi che esso risponderà a tutte le sue esigenze, dandoLe sempre ottimi risultati. Pertanto La invitiamo a seguire attentamente le istruzioni per un corretto utilizzo del prodotto. Il produttore non è responsabile di danni a cose e persone causati da un'istallazione difettosa e impropria. -
Page 42: Preparazione Del Forno
- non permettere che l'apparecchio sia usato dai bambini o da incapaci, senza sorveglianza. - in generale è sconsigliabile l'uso di adattatori, prese multiple e prolunghe. - in caso di guasto e/o di cattivo funzionamento dell'apparecchio, spegnerlo e non manometterlo. In caso di danneggiamento del cavo, provvedere tempestivamente alla sua sostituzione secondo le seguenti indicazioni: - aprire il coperchio morsettiera, togliere il cavo di alimentazione e sostituirlo con uno di lunghezza... -
Page 43: Cruscotto Comandi
1 - Termostato 2 - Commutatore 3 - Programmatore elettronico 4 - Luce spia tensione 5 - Luce spia temperatura 250°C... -
Page 44: Descrizione Simboli Cruscotto
Descrizione dei simboli presenti sul cruscotto comandi - Luce forno - Resistenza superiore + inferiore - Resistenza inferiore - Resistenza superiore - Resistenza grill - Resistenza grill + ventilatore - Resistenza superiore + resistenza inferiore + ventilatore - Resistenza circolare ventilata - Scongelamento ventilato Consigli per l'utilizzo del forno Per ottenere buoni risultati, si consiglia di preriscaldare il forno alla massima temperatura per 10... -
Page 45: Uso Del Girarrosto
Come si usa il girarrosto (Fig. 1) Inserire l'asta spiedo "A" nel rinvio, e di conseguenza la gola "B" nell'incavo della griglia "C". Fatto questo svitare in senso antiorario il manico in plastica "D". Ora è possibile inserire la griglia nelle guide del forno, facendo attenzione che l'asta "E"... - Page 46 Programmatore elettronico Timer Tempo di cottura con funzionamento automatico Fine del tempo di cottura Avanza nella numerazione in tutte le programmazioni Retrocede nella numerazione in tutte le programmazioni Programma automatico Fig. 2 Durata e modo manuale Controllo dei minuti Impostazioni Dopo aver premuto un pulsante di funzione, si può...
- Page 47 Funzionamento semi automatico e ora di termine cottura Premere il tasto dell'ora di termine cottura e impostare l'ora desiderata con i tasti +/-. I simboli A e della pentola si illuminano. L’uscita del relè si attiva. Se orologio = ora di termine cottura, il relè e il simbolo della pentola sono spenti. Il segnale acustico entra in funzione e il simbolo A lampeggia.
-
Page 48: Pulizia Vetro Interno Estraibile
Porta forno Fig. 3 Pulire la porta del forno senza utilizzare sostanze abrasive. Il vetro della porta può essere utilizzato facilmente rimosso e pulito svitando le due viti laterali (Fig. 3). Smontaggio della porta forno Per facilitare la pulizia del forno è possibile smontare la porta. -
Page 49: Pulizia E Manutenzione Del Forno
Pulizia e manutenzione Importante: Prima di procedere alla manutenzione del forno occorre staccare sempre la spina dalla presa di corrente o togliere la corrente dalla linea di alimentazione a mezzo del- l'interruttore generale dell'impianto elettrico. Le parti in acciaio inox e smaltate rimarranno sempre nuove se si avrà cura di pulire con acqua o usando prodotti specifici, asciugandole accuratamente. -
Page 50: Istruzioni Per L'installazione Nel Mobile
Istruzioni per l'installazione del forno nel mobile (Fig. 6) Il forno può essere alloggiato sotto il piano di lavoro, oppure a colonna con 4 viti. Seguire scrupolosamente le informazioni date dal disegno fig. 6. Fig. 6 IMPORTANTE Per garantire un buon funzionamento dell'apparecchio da incasso è necessario che il mobile sia di caratteristiche adatte. - Page 51 Índice Datos técnicos Página 51 Preparación del horno Página 51 Tablero de mandos Página 52 Descripción de los símbolos del tablero Página 53 Cómo se usa el asador rotativo Página 54 Cómo se usa el grill Página 54 Programador electrónico Página 55-56 Puerta del horno Página 57...
-
Page 53: Datos Técnicos
Estimado cliente, Les agradecemos por haber elegido uno de nuestros productos y esperamos que obtengan las mejores prestaciones de este electrodoméstico. Por lo tanto le sugerimos que sigan atentamente las instrucciones y las sugerencias de este manual para la correcta utilización de nuestros productos. El Frabricante declina toda responsabilidad por daños a personas y ocsas debidas a una instalación defectuosa o impropria del aparato. -
Page 54: Tablero De Mandos
1 - Termostato 2 - Selector 3 - Programador electrónico 4 - Luz indicadora tensión 5 - Luz indicadora temperatura 250°C... -
Page 55: Descripción De Los Símbolos Del Tablero
Descripción de los símbolos presentes en el tablero de mandos - Luz horno - Resistencia superior + inferior - Resistencia solera - Resistencia techo - Resistencia grill (con asador si está previsto) - Resistencia grill + ventilador (con asador si está previsto) - Resistencia superior + resistencia inferior + ventilador - Resistencia circular ventilada - Descongelación ventilada... -
Page 56: Cómo Se Usa El Asador Rotativo
Cómo utilizar el asador rotativo Introducir el asta “A” en el dispositivo de contramarcha y luego la garganta “B” en el encaje de la parilla “C”. Terminada esta operación, desenroscar en el sentido contrario a las agujas del reloj el asa de plástico “D”. -
Page 57: Programador Electrónico
Programador electrónico Timer Tiempo de cocción con funciona- miento automático (duración) Fin del tiempo de cocción (hora fin cocción) Retroceder en la numeración de todas las programaciones Avanzar en la numeración de todaslas programaciones Programa automático Fig. 2 Duración y modo manual Control de los minutos Establecimiento datos Después de haber apretado el botón de función, se puede establecer el tiempo deseado con las teclas... - Page 58 Funcionamiento semiatomático y hora fin de cocción Pulsar la tecla de la Hora Fin cocción y establecer la hora deseada con las teclas +/-. Los símbolos A y el de la cazuela se iluminan. La salida del relé se activa. Si el reloj señala la hora de fin cocción, el relé...
-
Page 59: Puerta Del Horno
Puerta del horno Fig. 3 El cristal de la puerta se puede desmontar fácilmente y limpiarlo desenroscando los 4 tornillos laterales. Desmontaje de la puerta del horno Para facilitar la limpieza del horno es posible desmontar la puerta. Con la puerta abierta al máximo, insertar los ganchos «... -
Page 60: Limpieza Y Mantenimiento Del Horno
Limpieza y matenimiento del horno Importante: Antes de empezar a efectuar las operaciones de mantenimiento del horno, es necesario extraer el enchufe de la toma de corriente o sacar la corriente de la línea de alimentación utilizando el interruptor general del sistema eléctrico. Las partes de acero inoxidable y las partes esmaltadas permanecerán siempre nuevas si tiene cuidado en limpiarlas sólo con agua o utilizando productos específicos y secándolas después con mucha precaución. -
Page 61: Instrucciones Para Una Correcta Instalación
Instrucciones para una correcta instalación El horno tiene que estar instalado en un hueco estándar de 900 mm, como se indica en la fig. 6, ya sea debajo de una encimera, ya sea colo-cado en una columna. Para asegurar una ventilación suficiente del horno es aconsejable colocar una rejilla de ventilación en la parte superior del horno según se indica en la fig. - Page 63 Índice Dados técnicos Página 63 Preparação do forno Página 63 Painel de comandos Página 64 Descrição dos símbolos do painel Página 65 Uso do espeto Página 66 Uso do grelhador Página 66 Programador electrónico Página 67-68 Limpeza do painel de vidro amovível Página 69 Desmontagem da porta do forno Página 69...
-
Page 65: Dados Técnicos
Caro Cliente. Os nossos agradecimentos por ter escolhido um dos nossos produtos. Estamos certos que corresponderá às suas expectativas, garantindo-lhe sempre optimos resultados. É importante seguir atentamente as instruções para um uso correto do aparelho. O fabricante não é responsável pelos danos materiais e pessoais causados por uma instalação defeituosa ou incorreta. -
Page 66: Painel De Comandos
1 - Manipulo do Termostato 2 - Manipulo do selector de funções 3 - Programador electrónico 4 - Visor luminoso de funcionamento 5 - Visor luminoso de temperatura 250°C... -
Page 67: Descrição Dos Símbolos Do Painel
Descrição dos símbolos do Painel de comandos - Luz do forno - Resistência superior + inferior - Resistência inferior - Resistência superior - Resistência do grelhador (com espeto se fornecido ) - Resistência do grelhador + ventoinha (com espeto se fornecido) - Resistência superior + resistência Inferior + ventoinha - Resistência circular ventilada - Descongelação ventilada... -
Page 68: Uso Do Espeto
Uso do espeto Inserir a ponta do espeto "A" no lugar correspondente e a ponta estriada “B" na concavidade da grelha "C". Rodar o punho plástico "D" no sentido horário aos ponteiros do Relógio. Colocar em seguida a grelha nas guias do forno verificando que a haste "E" entre no orifício "F". Colocar sempre a grelha do espeto no meio do forno na segunda posição (a contar de baixo) em relação às guias laterais. -
Page 69: Programador Electrónico
Programador electrónico Tempo Tempo de cozedura com funcionamento automático Fim de tempo de cozedura Recuo na numeração dos diferentes programas Avanço na numeração dos diferentes programas Programa automático Fig. 2 Duração e modo manual Controlo dos minutos Regulações Depois de pressionar o botão de função, regular o tempo desejado pelas teclas + ou - . Para uma regulação mais rápida, carregar continuamente no botão escolhido. - Page 70 Funcionamento semi-automático e fim de tempo de cozinhado Carregar no botão de fim de cozinhado e escolher o tempo desejado com as teclas + ou - . Aparece o símbolo A e o símbolo da panela acende-se. O visor de saída activa-se. Se relógio = fim de cozinhado, o visor e o símbolo da panela apagam.
-
Page 71: Limpeza Do Painel De Vidro Amovível
Porta de forno Fig. 3 Limpar a porta do forno sem utilizar produtos abrasivos. O painel de vidro pode ser facilmente removido e limpo soltando os dois parafusos dos lados. Desmontagem da porta do forno A porta do forno pode ser desmontada para facilitar a limpeza do forno. -
Page 72: Limpeza E Manutenção
Limpeza e manutenção Importante: Antes de proceder à limpeza do forno, desligar o aparelho da tomada ou cortar a corrente desligando o interruptor geral no quadro. As partes em aço inox e esmalte permanecerão sempre novas se forem lavadas com água ou usando produtos próprios, e forem cuidadosamente secas. -
Page 73: Instruções Para Instalação Em Móvel
Instruções para instalação do forno num móvel (fig. 6) O forno deve ser instalado sob a bancada de trabalho ou em coluna e deve ser fixado por 4 parafusos “A”. Para assegurar uma boa ventilação do forno é aconselhável colocar uma grelha de ventilação na parte superior do móvel. - Page 76 COD. 1230000977...
Need help?
Do you have a question about the FE9163 and is the answer not in the manual?
Questions and answers