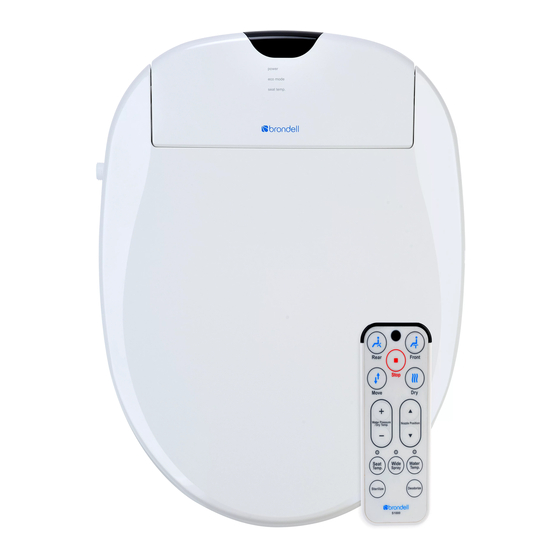
brondell Swash 1000 Owner's Manual
Hide thumbs Also See for Swash 1000:

Advertisement

O W N E R 'S MA N UA L
S1000-EW
S1000-RB
S1000-RW
S900-EW
S1000-EB
S900-RW

Advertisement

Table of Contents
loading

Summary of Contents for brondell Swash 1000

  • Page 1 O W N E R ’S MA N UA L S1000-EW S1000-RB S1000-RW S900-EW S1000-EB S900-RW...
  • Page 2: Table Of Contents

    This manual contains important safety information. Before operating the unit, please read this manual thoroughly, and retain it for future reference. TABLE OF CONTENTS Section 1 Product Features page 1 Section 2 Safety Precautions page 2-4 Section 3 Parts & Configuration page 5-7 Section 4 Installation...
  • Page 3: Product Features

    PRODUCT FEATURES Swash 900 and Swash 1000 Models: Ergonomic heated seat – with four temperature settings (High/Med/Low/Off). Instant and endless warm water – the cutting-edge instant ceramic heating system ensures an endless warm water stream for posterior and feminine washes while reducing power consumption by up to 60% over conventional storage tank systems.
  • Page 4: Safety Precautions

    Call a Brondell Service Center. • If the product produces a strange noise, a burnt smell, gets hot, or emits smoke, unplug it immediately from the electrical outlet and call Brondell. Do not use the product until it has been repaired. •...
  • Page 5 SAFETY PRECAUTIONS • If foreign material enters the product, pull the power plug out of the electrical outlet, turn off the main water valve, and call the Brondell Service Center. • Do not disassemble, repair, or modify the product yourself.
  • Page 6 SAFETY PRECAUTIONS • Do not open/close the seat cover using excessive force. • Exercise caution that urine does not come into contact with the nozzles or warm air dryer outlet – failure to do so may result in bad odors or malfunction. •...
  • Page 7: Parts & Configuration

    PARTS & CONFIGURATION The Swash 900 and the Swash 1000 have the following dimensions: The Swash 900 and 1000: Round Size 202 mm 382 mm 411 mm (7.9 inch) (15 inch) (16.2 inch) 134 mm 350 mm (5.3 inch) (13.8 inch)
  • Page 8 PARTS & CONFIGURATION Product Configuration T-valve connector Warning sticker Power cord IR sensor Production sticker Nozzles Drain plug Body (seat) sensor Quick release button Bidet seat Mounting plate Bidet hose Mesh filter...
  • Page 9 REMOTE CONTROL Spray Spray Swash 900 Swash 1000...
  • Page 10: Installation

    INSTALLATION Installation Parts 2 ea Mounting Bolt Rubber T-Valve Washer 2 ea Rubber Cone Washer T-Valve Connector 2 ea Flat Washer Bidet Hose 2 ea Barrel Nut Remote Control w/ Wall Mount Mounting Plate 2 ea Remote Screw 2 ea Adjustable Bracket 2 ea Remote Anchor 3 AAA Batteries...
  • Page 11 INSTALLATION Before Installation: Check water supply line: Check the line that connects the toilet tank to the water shut off valve. If it is a rigid pipe, you may need to purchase a flexible hose to replace it before installing the Swash. The length of the hose and the size of the connectors will vary.
  • Page 12 INSTALLATION Steps 3a & 3b Install the T-Valve with the rubber washer to the incoming water connection on the bottom of your toilet tank. Be sure that you place the flat edge of the rubber washer into the T-Valve against the metal with the raised lip facing the toilet tank connection.
  • Page 13 INSTALLATION Connect Power Plug the power cord into the electrical outlet. Important: Make sure to only use a grounded GFI (ground fault interrupter) electrical outlet. In the case of a short circuit, a grounded GFI outlet may help prevent electric shock or injury.
  • Page 14: Operation

    OPERATION Quick Reference Guide: Bidet Seat Note: Basic functions such as Rear Cleansing and Nozzle Cleaning can be used without the remote by utilizing the auxiliary buttons shown here. Seat Display Auxiliary control panel Seat Display Remote IR Receiver Receives signal from remote control Remote IR Receiver Receives signal from...
  • Page 15 OPERATION Quick Reference Guide: Remote Control ‘Wide Spray’ button Spray For the Swash 900 models the Move, Dry, Sterilize, and Deodorize functions are excluded...
  • Page 16 Medium Stream (Pink) Wide Stream (Red). ‘Dry’ button Use this button to engage 3 levels of the warm air dryer. Swash 1000 models only “Move” (Nozzle Oscillation) button This button engages the oscillation function on the front or rear nozzles during a wash cycle.
  • Page 17 OPERATION Using the Swash Important note: The wash functions and the warm air dryer function will not work unless the body sensor in the seat detects someone sitting down (skin conductivity sensor). To override the safety sensor, please refer to the section in the manual called “Configuring a Special Mode”.
  • Page 18 Wide Spray button: Concentrated Stream (Blue)-> Medium Stream (Pink) -> Wide Stream (Red). Move (Nozzle Oscillation) Function – Swash 1000 Only While the wash function is operating, press the MOVE button on the remote control to start or stop the nozzle oscillation function (moving back and forth). This provides a wider range of cleansing spray.
  • Page 19 OPERATION Warm Air Dryer Temperature – Swash 1000 Only While air dryer function is operating, press the Water Pressure/Dry Temp. button “+” and “-“ to adjust warm air dryer temperature to desired level. There are 4 levels for the warm air dryer: Low –...
  • Page 20 OPERATION (If no buttons on the Remote control are pressed for approximately 5 seconds, the remote display lights are turned off to conserve remote battery life). Selecting/Cancelling Eco Mode Press and hold down the “Power” and “Rear Cleansing” auxiliary buttons simultaneously for approximately 5 seconds until all the seat display lights start flashing.
  • Page 21: Specifications

    SPECIFICATIONS Brondell Swash S1000-EW, S1000-RW, S1000-EB, 1000-RB, S900-EW, S900-RW 16 psi – 98 psi 15” (Width) x 19.4” (Depth) x 5.66” (Height) in inches Round 15” (Width) x 20.8” (Depth) x 5.66” (Height) in inches Elongated 13.2 lbs (round) – 14.3 lbs (elongated) L: 88.7°...
  • Page 22: Maintenance

    MAINTENANCE Seat Cleaning and Removal Important: Unplug the Swash from the power source before cleaning or removing the seat. Use a soft, damp cloth and mild cleanser (such as dish soap, Simple Green or Windex) to wipe down the seat. DO NOT scrub or use harsh, abrasive products to clean the Swash. DO NOT use thinner, benzene, acidic chemicals, chloride, or hydrochloric acid detergent.
  • Page 23: Troubleshooting

    If the bidet appears to be operating abnormally, please review the troubleshooting tips before calling the Brondell Service Center as most issues are easily resolved with a few simple steps. If you are unable to resolve the issue after checking the following items, please call the Service Center at 888-542-3355 or email us at support@brondell.com.
  • Page 24 TROUBLESHOOTING Possible Solutions Problem Possible Causes The bidet seat is not working 1. Bidet not plugged in 1. Make sure the bidet is plugged in 2.Check and reset GFI outlet 2. No power to Swash 3. Check if the Remote control batteries 3.
  • Page 25 TROUBLESHOOTING Possible Solutions Problem Possible Causes Seat not heated 1. Make sure that the Seat temperature 1. Seat temperature set to off setting is on (Low- Blue light, Med- Pink 2. Resettable fuse blown light, High- Red light, Off- No light) 2.
  • Page 26: Warranty Information

    BRONDELL will not charge for labor or parts in connection with warranty repairs for the first full year from date of purchase on all products except those that may be subject to commercial use limitations.
  • Page 27 Damage or loss resulting from electrical surges, electrical outages, lightning strikes or other acts which are not the fault of Brondell or which the Product is not specified to tolerate. This warranty gives you specific legal rights. You may have other rights which vary from state to state.
  • Page 28 Brondell Customer Service: 1-888-542-3355 CONTACT INFORMATION Brondell, Inc. PO Box 470085 San Francisco, CA 94147-0085 Phone: 1-888-542-3355 Email: support@brondell.com Web: www.brondell.com WARRANTY For detailed warranty information and product registration, please go on-line at www.brondell.com Please retain receipt records for any warranty claims.

Table of Contents