Table of Contents
Advertisement
Available languages
Available languages
Advertisement
Chapters
Table of Contents

Subscribe to Our Youtube Channel
Related Manuals for brondell SWASH LT99


Summary of Contents for brondell SWASH LT99
- Page 1 Owner’s Manual SWASH LT99 / LE99 ADVANCED BIDET SEAT...
-
Page 2: Table Of Contents
LT99 / LE99 OWNER'S MANUAL Table of Contents This manual contains important safety information. Before operating the bidet, please read this manual thoroughly, and retain it for future reference. GENERAL INFO TECHNICAL INFO PRODUCT SPECIFICATIONS SAFETY INFORMATION MAINTENANCE PRODUCT INFORMATION Seat Cleaning &... -
Page 3: Safety Information
• If the product produces a strange noise, a burning smell, or emits smoke, unplug it immediately from the electrical outlet and contact Brondell. Failure to do so may result in electric shock or fire. • Do not insert any wires or sharp objects into any product gaps. This may result in electric shock, fire, or product damage. - Page 4 • Do not use the product if it is not working properly. Please unplug the product immediately, close the main water supply valve, and call the Brondell Service Center at 888-542-3355. Failure to do so may result in electric shock, fire, or flooding.
- Page 5 • Never operate this product if it has a damaged cord or plug, if it is not working properly, if it has been dropped or damaged, or dropped into water. Contact the Brondell Service Center for examination and repair.
- Page 6 SAFETY INFORMATION (IMPORTANT SAFEGUARDS) For those with certain medical or mobility issues in the bathroom, ATTENTION we recommend our Swash 1400 or Swash 1000 bidet seats, as their mounting systems are engineered for the most secure transitions from wheelchairs or walkers. GROUNDING AND GFCI OUTLET INSTRUCTIONS Ground GFCI Outlet This product should only be used with a grounded GFCI (Ground Fault...
- Page 7 SAFETY INFORMATION (IMPORTANT SAFEGUARDS) OPTIONAL GROUNDING INSTRUCTIONS This product is for use on a nominal 120V circuit, and has a grounding plug that looks like the plug illustrated in sketch A in Figure 1. A temporary adapter, which looks like the adapter illustrated in sketches B and C, may be used to connect this plug to a 2-pole receptacle as shown in sketch B if a properly grounded outlet is not available.
-
Page 8: Product Information
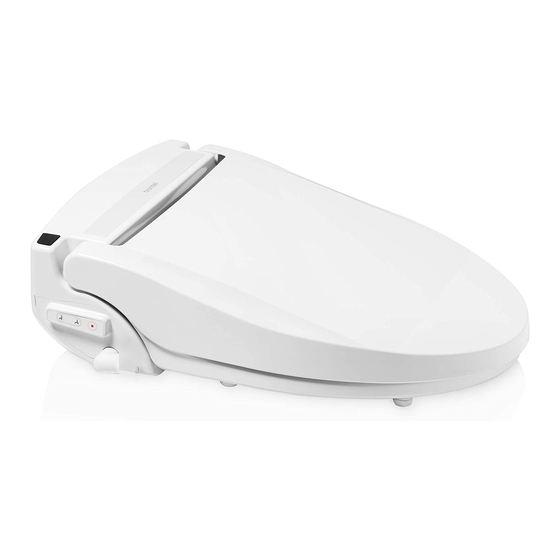
PRODUCT INFORMATION Product Features Stainless Steel Nozzle Nozzle Oscillation Stainless Steel resists soiling and bacterial The Move function provides a massaging, contamination for enhanced hygiene. oscillating cleanse during the wash cycle ensuring a thorough and comfortable wash. Posterior and Feminine Warm Water Wash Gentle Wash Function Experience the ultimate in clean with Activates a preset wash cycle at the softest... -
Page 9: Product Dimensions
PRODUCT INFORMATION Product Dimensions Elongated Top View 20.7 in 11.9 in 15.9 in 8.1 in Round Top View 19.5 in 10.6 in 8.1 in 15.9 in Required Distance Between Mounting Holes 4.72 in – 8.27 in... -
Page 10: Product Parts
PRODUCT INFORMATION Product Parts 2. Seat Sensor 3. Warm Seat 4. Warm Air Dryer (LE99 model only) 5. Nozzle Assembly 6. LED Nightlight Power Plug 8. Remote IR Receiver 9. Water Inlet with Mesh Filter 10. Drain Plug 11. Mounting Plate 12. -
Page 11: Installation Parts
PRODUCT INSTALLATION Installation Parts Mounting Bolt (2) T-Valve Connector with 2. Rubber Cone Washer (2) Rubber Washer 3. Flat Washer (2) 8. Bidet Hose 4. Nuts (2) 9. Remote Control 5. Mounting Plate 10. Remote Control Wall Mount 6. Adjustable Brackets (2) 11. -
Page 12: Before Installation
If your fixture only has top-side access to the mounting bolts that hold the seat to the toilet, you will likely need to purchase the Swash Bidet Seat Top Mount Hardware Kit, found on brondell.com. CHECK FOR A CONCEALED TOILET FILL VALVE Many modern toilets have sleek designs intended to cover and camouflage plumbing connections, which make a standard Swash installation difficult or impossible. -
Page 13: Swash Installation
PRODUCT INSTALLATION Swash Installation Please read these instructions carefully before installing the Swash. Failure to do so could result in flooding, leaking or damage to the product. NOTE: Steps may vary by type of seat and toilet 1. Existing Toilet Seat Removal a. - Page 14 PRODUCT INSTALLATION Swash Installation c. Slide rubber cone washer, flat washer, and then nut onto mounting bolts under the toilet bowl and tighten to keep mounting plate in place. 6. Connect the Bidet Hose to the Seat Connect the plastic side of the bidet hose to the water inlet. Hand-tighten to secure.
-
Page 15: Remote Control Installation
4. Connect the Bidet Hose to the male end of the Swash Filter. be purchased online at brondell.com. 5. Turn the toilet water supply valve back on. FLOW FLOW Step 2... -
Page 16: Operating The Swash
OPERATING THE SWASH LT99 / LE99 Remote Control User User Memory 1 Memory 2 Remote Control IR Signal Transmitter Stop Rear Wash / Move Front Wash / Move Strong Wash / Move Dry (LE99 model only) Water Pressure and Nozzle Position Dryer Temperature (Dryer LE99 model only) Water... - Page 17 OPERATING THE SWASH LT99 / LE99 Remote Control 1. Stop 10. Gentle Mode Button Stops all wash and dry functions Touch Gentle to initiate a two-minute currently operating. gentle wash cycle followed by a two-minute dry cycle (LE99 model only). See page 17 2.
-
Page 18: Lt99 / Le99 Auxiliary Control Panel
OPERATING THE SWASH LT99 / LE99 Auxiliary Control Panel Basic functions such as Rear and Front Wash can be used without the remote by utilizing the auxiliary buttons shown below. AUXILIARY CONTROL PANEL 1. Front Wash Button Initiates the front wash function utilizing the settings last used. Press a second time to initiate the Move function. -
Page 19: Using The Lt99 / Le99
OPERATING THE SWASH Using the LT99 / LE99 The dryer will run for two minutes and turn NOTE: The wash functions will not work off automatically. unless the sensor in the seat detects someone sitting down (with the built-in skin conductivity 1. -
Page 20: Special Mode Operations
OPERATING THE SWASH Special Mode Operations Eco Mode In this mode, the water in the tank and the seat temperature can be reduced to one of two different energy-saving settings. Standard Eco Mode: Touch Eco Mode until the red indicator light is on for Low energy-saving, and the seat and water temperature will be heated to 89.6 °F. - Page 21 OPERATING THE SWASH Special Mode Operations Activating/Deactivating Silent Mode 1. To activate Silent Mode, touch and hold “ – “ Water Pressure/Dry Temp for four seconds. A beep will sound to indicate that Silent Mode has been activated. 2. To deactivate Silent Mode, touch and hold “ – “ Water Pressure/Dry Temp for four seconds.
- Page 22 OPERATING THE SWASH Special Mode Operations Activating/Deactivating Nightlight The Nightlight is activated at the factory by default. 1. To deactivate the Nightlight, touch and hold “+” for four seconds. This function cannot be performed while sitting on the seat. 2. To activate the Nightlight, touch and hold “+” for four seconds. This function cannot be performed while sitting on the seat.
-
Page 23: Technical Info
TECHNICAL INFORMATION Product Specifications BRONDELL SWASH ADVANCED BIDET SEAT Model LT99-EW, LT99-RW / LE99-EW, LE99-RW Power Voltage 120 V, 60 Hz Power Consumption 870 W Supply Water Pressure 9.95 psi – 106.7 psi Dimensions Elongated: 15.9 in x 20.7 in x 5.7 in / Round: 15.9 in x 19.5 in x 5.7 in LT99 Weight Elongated: 11.46 lbs / Round: 11.0 lbs... -
Page 24: Maintenance
Wash off any substances that come in contact with the seat as soon as possible. If necessary, replacement seat parts can be purchased through Brondell customer support. Nozzle Cleaning 1. -
Page 25: Cleaning The Mesh Filter
MAINTENANCE Cleaning the Mesh Filter & Product Storage Cleaning the Mesh Filter Cleaning intervals will differ depending on use and water quality. It is recommended to check the filter at least once a year. 1. Turn off the water supply and hold the toilet’s flush lever down until all of the water has drained from the tank. -
Page 26: Troubleshooting
If the bidet appears to be operating abnormally, please review the troubleshooting tips before calling the Brondell Service Center as most issues are easily resolved with a few simple steps. If you are unable to resolve the issue after checking the following items, please call the Service Center at 888-542-3355, Mon–Fri, 9am–5pm PST, or email us at support@brondell.com. - Page 27 TECHNICAL INFORMATION Troubleshooting Problem Possible Cause(s) Solution(s) Low water flow or 1. Clogged filter 1. Remove, clean, and reinstall mesh filter spray pressure (see maintenance section on page 23). 2. Water supply valve not 2. Check that the water supply valve at wall is opened fully fully open.
- Page 28 TECHNICAL INFORMATION Troubleshooting Problem Possible Cause(s) Solution(s) Water leaks from 1. Water leaking from the T-Valve 1. Make sure that the rubber gasket is areas other than inserted correctly into the T-valve (flat the nozzle side down with lip pointing up towards the toilet tank connection) and firmly tighten the connector.
-
Page 29: Warranty
BRONDELL reserves the right to make such inspections as may be necessary in order to determine the cause of the defect. BRONDELL will not charge for labor or parts in connection with warranty repairs for the first three years from date of purchase on all products except those that may be subject to commercial use limitations. -
Page 30: Contact
PO Box 470085 San Francisco, CA 94147-0085 San Francisco, CA 94147-0085 Made in Korea Email: support@brondell.com Please retain receipt records for any warranty Web: www.brondell.com claims. For questions, contact Brondell Customer Service: 1-888-542-3355, Monday – Friday, 9am – 5pm PST... - Page 31 MANUAL DEL PROPIETARIO LT99 / LE99 Índice Este manual incluye información importante de seguridad. Lea este manual atentamente antes de usar el bidé y guárdelo para consultarlo en el futuro. INFORMACIÓN GENERAL INFORMACIÓN TÉCNICA ESPECIFICACIONES DEL PRODUCTO INFORMACIÓN DE SEGURIDAD MANTENIMIENTO INFORMACIÓN DEL PRODUCTO Limpieza y Desmontaje del Asiento...
- Page 32 15 amperios. • Si el cable eléctrico está dañado, no intente repararlo, modificarlo o reemplazarlo usted mismo. Comuníquese gratis con el Centro de Servicio de Brondell al 888-542-3355 o envíenos un correo electrónico a través de nuestro sitio web.
- Page 33 • No utilice el producto si no funciona correctamente. Desenchufe el producto inmediatamente, cierre la válvula principal de suministro de agua y llame al Centro de servicio de Brondell al 888-542-3355. De lo contrario, se pueden producir descargas eléctricas, incendios o inundaciones.
- Page 34 • Nunca use este producto si tiene un cable o enchufe dañado, si no funciona correctamente, si se ha caído o dañado, o si se ha caído al agua. Póngase en contacto con el Centro de servicio de Brondell para su revisión y reparación.
- Page 35 INFORMACIÓN DE SEGURIDAD (PRECAUCIONES IMPORTANTES) Para las personas con algunos problemas médicos o de movilidad en el ATENCIÓN baño, recomendamos nuestros asientos de bidé Swash 1400 o Swash 1000, ya que sus sistemas de montaje están diseñados para realizar transiciones más seguras desde sillas de ruedas o andadores. INSTRUCCIONES DE CONEXIÓN A TIERRA Y GFCI Toma de tierra GFCI Este producto solo debe usarse con un tomacorriente con conexión a tierra...
- Page 36 INFORMACIÓN DE SEGURIDAD (PRECAUCIONES IMPORTANTES) INSTRUCCIONES OPCIONALES DE CONEXIÓN A TIERRA Este producto se utiliza en un circuito con tensión nominal de 120 V y tiene un enchufe de conexión a tierra que se parece al enchufe ilustrado en el diagrama A en la Figura 1. Se puede usar un adaptador temporal, que se parece al adaptador ilustrado en los bocetos B y C, para conectar este enchufe a un receptáculo de 2 polos como se muestra en el diagrama B si no hay una...
- Page 37 INFORMACIÓN DEL PRODUCTO Especificaciones del Producto Boquilla de acero inoxidable Oscilación de la boquilla El acero inoxidable resiste la suciedad y La función Mover proporciona una limpieza la contaminación bacteriana para mejorar oscilante y de masaje durante el ciclo de lavado, lo que garantiza un lavado completo la higiene.
- Page 38 INFORMACIÓN DEL PRODUCTO Dimensiones del Producto Vista Superior Alargada 52.57 cm 30.23 cm 40.38 cm 20.57 cm Vista Superior Redonda 49.53 cm 26.92 cm 20.57 cm 40.38 cm Distancia Requerida Entre los Orificios de Montaje 11.98 cm – 21 cm...
- Page 39 INFORMACIÓN DEL PRODUCTO Piezas del producto Tapa 2. Sensor de asiento 3. Asiento con calefacción 4. Secador de aire caliente (solo modelo LE99) 5. Ensamble de boquilla 6. Luz nocturna LED Panel de control 8. Enchufe de alimentación 9. Entrada de agua con filtro de malla 10.
- Page 40 INSTALACIÓN DEL PRODUCTO Piezas de Instalación Perno de montaje (2) Conector de válvula en T con 2. Arandela de cono de goma (2) arandela de goma 3. Arandela plana (2) 8. Manguera del bidé 4. Tuercas (2) 9. Control remoto 5.
- Page 41 Esto puede causar daños a los componentes internos. MIRE NUESTRO VIDEO DE INSTALACIÓN La instalación de todos los productos Swash se puede ver por Internet en brondell.com. COMPRUEBE LA MEDIDA DE LOS PERNOS Este asiento para bidé solo se puede instalar en inodoros con orificios para pernos de 12 cm a 21 cm (para obtener más información, consulte las Dimensiones del producto en la...
- Page 42 INSTALACIÓN DEL PRODUCTO Instalación del Swash Lea atentamente estas instrucciones antes de instalar el Swash. De lo contrario, podrían surgir problemas, como inundaciones, fugas o daños al producto. IMPORTANTE: Los pasos pueden variar según el tipo de asiento e inodoro 1.
- Page 43 INSTALACIÓN DEL PRODUCTO Instalación del Swash c. Deslice la arandela de goma del cono, la arandela plana y luego la tuerca en los pernos de montaje debajo de la taza del inodoro y apriete para mantener la placa de montaje en su lugar. 6.
- Page 44 T. debe cambiar cada seis meses y se puede comprar 4. Conecte la manguera del bidé al extremo macho del filtro en línea en brondell.com. de lavado. 5. Vuelva a abrir la válvula de suministro de agua del inodoro. FLOW...
- Page 45 FUNCIONAMIENTO DEL SWASH Control Remoto LT99 / LE99 Memoria Memoria Transmisor de señal IR del control remoto usuario 1 usuario 2 Detener Lavado posterior / Cambiar Lavado frontal / Lavado fuerte / Cambiar Cambiar Secado (solo modelo LE99) Presión del agua y Posición de la temperatura de la boquilla...
- Page 46 FUNCIONAMIENTO DEL SWASH Control Remoto LT99 / LE99 10. Botón de Modo Suave 1. Detener Toque "Gentle" (Suave) para iniciar un ciclo de Detiene todas las funciones de lavado y secado que estén en funcionamiento. lavado suave de dos minutos seguido de un ciclo de secado de dos minutos (solo modelo LE99).
- Page 47 FUNCIONAMIENTO DEL SWASH Panel de Control Auxiliar LT99 / LE99 Las funciones básicas como lavado posterior y frontal se pueden usar sin el control remoto mediante los botones auxiliares que se muestran a continuación. PANEL DE CONTROL AUXILIAR 1. Botón de Lavado Frontal Inicia la función de lavado frontal conforme a la última configuración utilizada.
- Page 48 FUNCIONAMIENTO DEL SWASH Uso del LT99 / LE99 NOTA: Las funciones de lavado no funcionarán a menos que el sensor en el asiento detecte a alguien sentado (con el sensor de conductividad de la piel incorporado). Para anular el sensor del asiento, consulte las instrucciones en la página 47.
- Page 49 FUNCIONAMIENTO DEL SWASH Funcionamiento en Modo Especial Modo Ecológico En este modo, el agua en el tanque y la temperatura del asiento se pueden reducir a una de dos configuraciones diferentes de ahorro de energía. Modo ecológico estándar: presione el botón "Eco Mode" hasta que la luz indicadora amarilla esté...
- Page 50 FUNCIONAMIENTO DEL SWASH Funcionamiento en Modo Especial Activar / Desactivar el Modo Silencioso 1. Para activar el modo silencioso, toque y mantenga presionado "-" "Water Pressure/Dry Temp " durante cuatro segundos. Sonará un pitido para indicar que se ha activado el modo silencioso. 2.
- Page 51 FUNCIONAMIENTO DEL SWASH Funcionamiento en Modo Especial Activación/Desactivación de luz Nocturna La luz nocturna se activa de fábrica de manera predeterminada. 1. Para desactivar la luz nocturna, toque y mantenga "+" durante cuatro segundos. Esta función no se puede realizar mientras está sentado en el asiento. 2.
- Page 52 INFORMACIÓN TÉCNICA Especificaciones del Producto ASIENTO DE BIDÉ AVANZADO BRONDELL SWASH Modelo LT99-EW, LT99-RW / LE99-EW, LE99-RW Tensión 120 V, 60 Hz Consumo de energía 870 W Presión del suministro de agua 0.69 – 7.50 kg/cm² Alargado: 40.4 cm x 52.6 cm x 14.5 cm Dimensiones Redondo: 38.1 cm x 49.53 x 14.4 cm...
- Page 53 Lave cualquier sustancia que entre en contacto con el asiento lo antes posible. Si es necesario, las piezas de repuesto del asiento se pueden comprar a través del servicio de atención al cliente de Brondell. Nozzle Cleaning 1.
- Page 54 MANTENIMIENTO Limpieza del Filtro de Malla y Almacenamiento del Producto Limpieza del Filtro de Malla Los intervalos de limpieza variarán según el uso y la calidad del agua. Se recomienda verificar el filtro al menos una vez al año. 1. Cierre el suministro de agua y mantenga presionada la palanca de descarga del inodoro hasta que se haya drenado toda el agua del tanque.
- Page 55 Si el bidé parece estar funcionando de manera anormal, consulte los consejos para solucionar problemas antes de llamar al Centro de servicio de Brondell, ya que la mayoría de los problemas se resuelven fácilmente con unos simples pasos. Si no puede resolver el problema después de verificar los siguientes elementos, llame al Centro de servicio al 888-542-3355, de lunes a viernes, de 9:00 a.m.
- Page 56 INFORMACIÓN TÉCNICA Solución de Problemas Problema Causa posible Solución Bajo flujo 1. Filtro obstruido 1. Retire, limpie y vuelva a instalar el filtro de malla de agua o (consulte la sección de mantenimiento en la página 52). presión de pulverización 2.
- Page 57 INFORMACIÓN TÉCNICA Solución de Problemas Problema Causa posible Solución El agua se escapa 1. Fugas de agua de la válvula en T 1. Verifique que la junta de goma esté insertada de áreas distintas a correctamente en la válvula en T (lado La boquilla plano hacia abajo con el labio apuntando hacia la conexión del tanque del inodoro) y ajuste...
- Page 58 LT99, LE99 Garantía comercial Período de garantía de 1 año desde la fecha de compra original para todos los productos de Brondell. Las garantías pueden no ser aplicables a los productos que se utilizan para fines comerciales pesados, hospital u otras aplicaciones no residenciales de alto uso.
- Page 59 San Francisco, CA 94147-0085 Email: support@brondell.com Hecho en Corea Web: www.brondell.com Por favor, guarde los registros de recibos de Si tiene preguntas, póngase en contacto las reclamaciones de garantía. con Brondell Servicio al Cliente: 1-888-542-3355 (Lunes – Viernes, 9am-5pm, PST)
- Page 60 LT99/LE99 MANUEL DU PROPRIÉTAIRE Table des Matières Ce manuel contient des informations importantes portant sur la sécurité. Avant d’utiliser le bidet, lisez attentivement ce manuel et conservez-le pour le consulter ultérieurement. INFORMATIONS GÉNÉRALES INFORMATIONS TECHNIQUES SPÉCIFICATIONS DU PRODUIT INFORMATIONS SUR LA SÉCURITÉ ENTRETIEN INFORMATIONS SUR LE PRODUIT Nettoyage du Siège et Retrait...
-
Page 61: Informations Sur La Sécurité
• Si le dispositif produit un bruit étrange, une odeur de brûlé ou émet de la fumée, débranchez-le immédiatement de la prise de courant et contactez Brondell. Dans le cas contraire, vous risquez une décharge électrique ou un incendie. - Page 62 Centre de service Brondell. • N'utilisez pas le dispositif s'il ne fonctionne pas correctement. Débranchez immédiatement le dispositif, fermez l'entrée d'eau principale et appelez le Centre de service Brondell au 1 888 542-3355. Sinon, vous risquez une décharge électrique, un incendie ou un dégât d'eau.
- Page 63 • N'utilisez jamais ce dispositif si son cordon ou sa fiche est endommagé, s’il ne fonctionne pas correctement, s’il a été échappé, s’il est endommagé ou s’il est tombé dans l’eau. Contactez le Centre de service Brondell pour une inspection ou une réparation. • Maintenez le cordon à l'écart des surfaces chaudes et des bouches d'aération.
- Page 64 INFORMATIONS SUR LA SÉCURITÉ (CONSIGNES DE SÉCURITÉ IMPORTANTES) Pour les personnes qui présentent des problèmes médicaux ou de mobilité ATTENTION dans la salle de bain, nous recommandons nos sièges de bidet Swash 1400 ou Swash 1000, car leurs systèmes de montage sont conçus pour les transitions les plus sécuritaires depuis les fauteuils roulants et déambulateurs.
- Page 65 INFORMATIONS SUR LA SÉCURITÉ (CONSIGNES DE SÉCURITÉ IMPORTANTES) INSTRUCTIONS DE MISE À LA TERRE FACULTATIVES Ce produit est destiné à être utilisé sur un circuit nominal de 120 V et possède une fiche de mise à la terre qui ressemble à la fiche illustrée dans le croquis A de la figure 1.
-
Page 66: Informations Sur Le Produit
INFORMATIONS SUR LE PRODUIT Caractéristiques du Produit Buse en Acier Inoxydable Oscillation des Buse Pour une meilleure hygiène, l'acier La fonction Mouvement assure un nettoyage inoxydable résiste aux salissures et à la par massage oscillant pendant le cycle de lavage, garantissant un lavage en profondeur contamination bactérienne. -
Page 67: Dimensions Du Produit
INFORMATIONS SUR LE PRODUIT Dimensions du Produit Vue du Dessus, Modèle Allongé 52,57 cm 30,23 cm 40,38 cm 20,57 cm Vue du Dessus, Modèle Rond 49,53 cm 26,92 cm 20,57 cm 40,38 cm Distance Requise Entre les trous de Montage 11,98 cm –... - Page 68 INFORMATIONS SUR LE PRODUIT Pièces du Produit Couvercle 2. Capteur du Siège 3. Siège Chauffant 4. Sécheur à Air Chaud (modèle LE99 uniquement) 5. Assemblage de la Buse 6. Veilleuse à DEL Panneau de Contrôle 8. Fiche d' A limentation 9.
-
Page 69: Pièces Pour L'installation
INSTALLATION DU PRODUIT Pièces pour l'Installation Boulon de Montage (2) Connecteur de Valve en T Avec 2. Rondelle Conique en Caoutchouc (2) Rondelle en Caoutchouc 3. Rondelle Plate (2) 8. Tuyau de Bidet 4. Écrous (2) 9. Télécommande 5. Plaque de Montage 10. -
Page 70: Avant L'installation
Cela pourrait endommager les composants internes. REGARDEZ NOTRE VIDÉO D'INSTALLATION Tutoriels pour l'installation de tous les produits Swash disponibles en ligne sur brondell.com. VÉRIFICATION DE L'ÉCARTEMENT DES BOULONS Ce siège de bidet ne peut être installé que sur des toilettes avec une largeur de trou de boulon comprise entre 4,72 et 8,27 po (consultez la section Dimensions du dispositif à... -
Page 71: Installation Du Swash
INSTALLATION DU PRODUIT Installation du Swash Veuillez lire attentivement ces instructions avant d’installer votre Swash. Si vous ne le faites pas, il pourrait en résulter un dégât d'eau, des fuites ou des dommages au dispositif. REMARQUE : Les étapes peuvent varier selon le type de siège et de toilette. 1. - Page 72 INSTALLATION DU PRODUIT Installation du Swash c. Faites glisser la rondelle conique en caoutchouc, la rondelle plate, puis l’écrou sur les boulons de montage situés sous la cuvette de la toilette et serrez-les pour maintenir la plaque de montage en place. 6.
-
Page 73: Installation De La Télécommande
T. changé tous les six mois et peut être acheté en ligne 4. Branchez le tuyau du bidet à l'extrémité mâle du filtre du Swash. au brondell.com. 5. Rouvrez le robinet d'alimentation en eau de la toilette. FLOW FLOW Étape 2... -
Page 74: Fonctionnement Du Swash
FONCTIONNEMENT DU SWASH Télécommande LT99 / LE99 Mémoire Mémoire Émetteur de Signal Utilisateur 1 Utilisateur 2 Infrarouge de Télécommande Arrêt Lavage Arrière/ Mouvement Lavage Avant/ Lavage Puissant/ Mouvement Mouvement Séchage (modèle LE99 uniquement) Pression de l'eau et Position de Buse Température du Séchoir (modèle Dryer LE99 uniquement) -
Page 75: Télécommande Lt99 / Le99
FONCTIONNEMENT DU SWASH Télécommande LT99 / LE99 1. Arrêter 10. Bouton du Mode Doux Arrêt de toutes les fonctions de lavage et de Appuyez sur le bouton « Gentle » (doux) pour lancer séchage en cours. un cycle de lavage doux de deux minutes suivi d'un cycle de séchage de deux minutes (modèle LE99 2. -
Page 76: Panneau De Commande Auxiliaire Lt99 / Le99
FONCTIONNEMENT DU SWASH Panneau de Commande Auxiliaire LT99 / LE99 Il est possible d'utiliser les fonctions de base telles que le lavage avant et arrière sans télécommande en utilisant les boutons auxiliaires illustrés ci-dessous. PANNEAU DE COMMANDE AUXILIAIRE 1. Bouton de Lavage Avant Lance la fonction de lavage avant en utilisant les derniers réglages utilisés. -
Page 77: Utilisation Du Lt99/Le99
FONCTIONNEMENT DU SWASH Utilisation du LT99 / LE99 REMARQUE : Les fonctions de lavage ne fonctionneront que si le capteur situé dans le siège détecte une personne assise (avec le capteur de conductivité cutané intégré). Pour déroger aux indications du capteur de siège, veuillez vous reporter aux instructions de la page 76. Préparez-vous pour le Lavage Fonction de Séchoir à... -
Page 78: Fonctionnement En Mode Spécial
FONCTIONNEMENT DU SWASH Fonctionnement en Mode Spécial Mode Écologique Neutralisation du Capteur de Siège Dans ce mode, la température de l'eau dans le 1. Pour activer la neutralisation du capteur réservoir et du siège peut être réduite à l'un des de siège, maintenez le bouton Pulse deux réglages d'économie d'énergie différents. -
Page 79: Utilisateur 1
FONCTIONNEMENT DU SWASH Opérations du Mode Spécial Activation/désactivation du Mode Silencieux 1. Pour activer le Mode silencieux, maintenez enfoncé le bouton « – » de pression de l'eau/ température de séchage pendant quatre secondes. Un bip retentira pour indiquer que le Mode silencieux a été... -
Page 80: Arrêt
FONCTIONNEMENT DU SWASH Opérations du Mode Spécial Activation/Désactivation de la Veilleuse La veilleuse est activée par défaut en usine. 1. Pour désactiver la veilleuse, appuyer et maintenir enfoncé « + » pendant quatre secondes. Cette fonction ne peut pas être exécutée en étant assis sur le siège. -
Page 81: Informations Techniques
INFORMATIONS TECHNIQUES Spécifications du Produit SIÈGE DE BIDET AVANCÉ BRONDELL SWASH Modèle LT99-EW, LT99-RW / LE99-EW, LE99-RW Tension d'alimentation 120 V, 60 Hz Consommation électrique 870 W Pression d'eau d'alimentation 0,69 – 7,50 kg/cm² Allongé : 40,4 cm x 52,6 cm x 14,5 cm Dimensions Rond: 38,1 cm x 49,53 x 14,4 cm LT99 Poids Allongé : 5,2 kg / Rond : 5 kg... -
Page 82: Entretien
Lavez toutes les substances qui entrent en contact avec le siège dès que possible. Si nécessaire, il est possible d'acheter les pièces de rechange auprès du soutien client de Brondell. Nettoyage de la Buse 1. -
Page 83: Nettoyage Du Filtre En Maille
ENTRETIEN Nettoyage du Filtre en Maille, Entreposage du Dispositif Nettoyage du filtre en maille Les intervalles de nettoyage varient en fonction de l'utilisation et de la qualité de l'eau. Il est recommandé de vérifier le filtre au moins une fois par an. 1. - Page 84 Si le bidet semble fonctionner anormalement, veuillez consulter les conseils de dépannage ci-dessous avant d'appeler le Centre de service de Brondell, car la plupart des problèmes sont facilement résolus en quelques étapes simples. Si vous ne parvenez pas à résoudre le problème après avoir vérifié les conseils, veuillez appeler le Centre de service au : 1 888 542-3355, LUN–VEN, 9 h–17 h HNP ou communiquez avec nous par courriel au support@brondell.com.
- Page 85 INFORMATIONS TECHNIQUES Dépannage Problème Cause(s) possible(s) Solution(s) Faible débit 1. Filtre bouché 1. Retirez, nettoyez et réinstallez le filtre en maille (consultez la d'eau section relative à l'entretien à la page 81). ou faible pression 2. La valve d'alimentation 2. Assurez-vous que la valve d'alimentation en eau au mur est de vaporisation en eau n'est pas complètement ouverte.
- Page 86 INFORMATIONS TECHNIQUES Dépannage Problème Cause(s) possible(s) Solution(s) Fuites d'eau 1. Fuite d'eau depuis la valve en T 1. Assurez-vous que le joint en caoutchouc est provenant de zones inséré correctement dans la valve en T (côté autres que la buse plat vers le bas avec la lèvre pointée vers le raccord du réservoir de la toilette) et serrez fermement le connecteur.
-
Page 87: Garantie
A RM ainsi que la preuve d'achat. Pour obtenir le numéro d' A RM et localiser le centre de services BRONDELL le plus près de chez vous, veuillez appeler le 1 888 542-3355, du lundi au vendredi, entre 9 h et 17 h HNP. - Page 88 San Francisco, CA 94147-0085 USA San Francisco, CA 94147-0085 USA Email : support@brondell.com Fabriqué en Corée Site Web : www.brondell.com Il est important de conserver les factures pour Pour toutes questions, communiquez des réclamations sur la garantie. avec le service à la clientèle de Brondell :...
- Page 90 #20LTLE99-0115...
Need help?
Do you have a question about the SWASH LT99 and is the answer not in the manual?
Questions and answers