Table of Contents
Advertisement
Quick Links
Advertisement
Table of Contents

Related Manuals for Husqvarna Viking Platinum MN 1000


Summary of Contents for Husqvarna Viking Platinum MN 1000
- Page 1 User’s Guide K E E P I N G T H E W O R L D S E W I N G ™...
- Page 2 This household sewing machine is designed to comply with 2006/42/EC (Machinery) and UL1594. IMPORTANT SAFEGUARDS AND WARNINGS WHEN USING EMBROIDERY MACHINES, THE FOLLOWING SAFETY PRECAUTIONS MUST BE FOLLOWED TO REDUCE THE RISK OF FIRE, ELECTRIC SHOCK, AND/OR INJURY. • The embroidery machine is provided with the following warning label: •...
- Page 3 • If the embroidery machine falls to the floor, it has been splashed with or soaked in water or other liquids do NOT use it – contact your local dealer to schedule an appointment with a qualified tech- nician to service the embroidery machine. Contact your local HUSQVARNA VIKING dealer.
- Page 4 • Power cord: To prevent damage, electric shock or fire hazard, do NOT operate the embroidery machine with a damaged power cord or if power plug is not completely inserted into the electrical outlet. If the power cord is damaged, please contact your local HUSQVARNA VIKING dealer.
-
Page 5: Table Of Contents
CONTENTS Cap driver installation Quick Reference Guide/Checklist Cap station installation INTRODUCTION Hooping the cap Embroidery machine overview Attaching the cap hoop to the cap driver Front view Removing the cap hoop from the cap driver Rear view Removing the cap driver from the embroidery arm 25 Display overview Tension Embroidery hoop overview... - Page 6 How to adjust speed THREADS, STABILIZERS & NEEDLES Thread fiber choices How to bring the hoop out Rayon thread EMBROIDERY PROCESS Polyester thread Completing a flat design (start to finish) Metallic thread Prepare Cotton thread Embroider Thread consumption Completing a cap design (start to finish) Bobbin fiber choices Prepare Cotton...
-
Page 7: Quick Reference Guide/Checklist
IMPORTANT – BEFORE GETTING STARTED • Make sure the temperature of the environment machine. surrounding the machine is in between the 40°F – • Make sure the embroidery machine is not in direct 104°F (5°C – 40°C). sunlight. • In the case of lightning, make sure to turn-off the •... - Page 8 15 16 8 – INTRODUCTION...
-
Page 9: Introduction
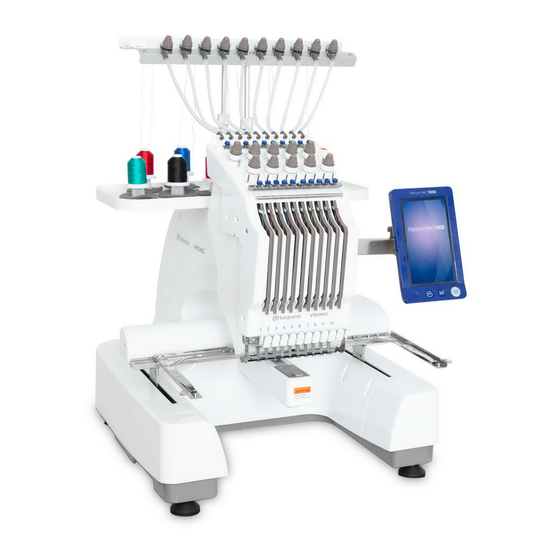
INTRODUCTION EMBROIDERY MACHINE OVERVIEW Embroidery machine may vary slightly from what is illustrated. FRONT VIEW 1. Thread stand 13. Hoop 2. Thread guides 14. Bobbin housing unit 3. Upper thread tension 15. Thread cutter 4. Thread guide tube 16. Presser foot 5. -
Page 10: Display Overview
DISPLAY OVERVIEW 1. Color Touch Screen 2. Start/Stop button 3. Thread trimming button 4. 100-degree button 5. Speaker 6. Panel arm adjusting knobs 7. Panel adjusting knob 8. USB port 9. Computer network interface (insert internet cable) EMBROIDERY HOOP OVERVIEW 1. -
Page 11: Preparation
PREPARATION UNPACK YOUR EMBROIDERY MACHINE It is recommended to keep all shipping materials. Practice safety by using two (2) people to carry the embroidery machine. 1. Carefully remove the box by pulling upwards, using the cutouts found on the sides of the box. 2. -
Page 12: Thread Stand Assembly
THREAD STAND ASSEMBLY Assemble the thread rack by inserting a spool pin in each hole. Put a sponge cushion onto each spool pin. If needed, put a plastic thread reel onto each spool pin. The plastic thread reels are used to help keep the thread spool in place as the machine runs and/or when using larger spools. -
Page 13: Getting Started
GETTING STARTED To prevent injury, keep hands and other objects away from the needle bar rack. • The main power switch is located on the back of the embroidery machine. • The “O” icon (1) turns the embroidery machine OFF. •... -
Page 14: Electronic Bobbin Winder
ELECTRONIC BOBBIN WINDER Among the accessories, you find the electronic bobbin winder. This device is commonly used in home and commercial embroidery to wind bottom thread, also known as bobbin thread. SPECIFICATIONS Packing size Product size Voltage Net weight Gross weight 355 X 90 X 115 mm 225 X 80 X 215 mm AC90~240... -
Page 15: Assembling The Bobbin Winder
ASSEMBLING THE BOBBIN WINDER Inspect the package and device for any damages. If there are no damages, install the main engine to the bottom plate, with the two screws (1). Attach the thread guide (2) and the spool pin (3) as illustrated. -
Page 16: Bobbin Overview
BOBBIN OVERVIEW 1. Bobbin 2. Tension spring 3. Opening 4. Bobbin case 5. Bobbin case release latch 6. Thread guide/Pig tail • An “L” size/style bobbin must be used for your • Open the needle plate and clean the trimming set area embroidery machine. -
Page 17: Inserting The Bobbin Case Into The Rotary Hook
INSERTING THE BOBBIN CASE INTO THE ROTARY HOOK Note: When inserting the bobbin case into the rotary hook, make sure the thread tail is no longer than 3 inches (7 cm). A longer tail can wrap around the shaft and create a buildup of thread. If the thread is not long enough, the needle will be unable to grab it. -
Page 18: Threading The Top Threads
THREADING THE TOP THREADS To complete top threading, please follow the threading instructions carefully. Incorrect threading may cause thread or needle breakage. The threading paths are numbered from 1-10, they can be threaded in any order, but must follow it’s own threading path. -
Page 19: Threading The Thread Rack
THREADING THE THREAD RACK THREADING THE NEEDLE BAR FRAME • Place a thread spool on the spool pin at the rear right. • Pass the thread over the upper thread course (11). Pull out some thread. • Pass the thread down through the right path of the •... -
Page 20: Fast Threading Of The Top Thread
FAST THREADING OF THE TOP THREAD You can quickly replace a thread spool by tying the old thread to the new thread. Follow the steps below to correctly replace a spool. 1. Clip the thread from the spool you would like to replace. -
Page 21: Flat Hoop Support
FLAT HOOP SUPPORT Your embroidery machine comes with a flat hoop support, 4 hoops and a cap attachment (see overview on page 10). Before embroidering with any of the hoops, the flat hoop support must be attached to the embroidery arm. Adjust the support to fit to the different hoop sizes. -
Page 22: Attaching The Hoop
ATTACHING THE HOOP If the hoop is not correctly attached, it may affect the presser foot, damage the embroidery machine or it can cause personal injury. Before attaching the hoop, make sure there is sufficient thread inside of the bobbin. •... -
Page 23: Hooping The Fabric
HOOPING THE FABRIC For the best embroidery results, place a layer of stabilizer beneath the fabric. When hooping stabilizer and fabric make sure that they are smooth and securely hooped. 1. Loosen the screw(s) (1) on the outer hoop (2). Remove the inner hoop (3). -
Page 24: Cap Hoop
CAP HOOP There is a special accessory allowing you to embroider on caps. There is a cap hoop (1), a cap driver (2) (placed on the machine) and one cap station (3) (placed on a table for easier hooping). CAP DRIVER INSTALLATION Tools &... -
Page 25: Hooping The Cap
HOOPING THE CAP REMOVING THE CAP HOOP FROM THE CAP DRIVER 1. Take the cap hoop and connect the open metal notch to the center tab on the cap station. 1. Release the three latches on the cap driver. 2. Slide and push the cap hoop towards the cap station. 2. -
Page 26: Tension
TENSION FACTORS THAT AFFECT THREAD TENSION • Thread color dyes affect the texture of the thread, which can affect how smoothly it slides through the embroidery machine. • Polyester threads would require nearly twice the amount of tension as rayon. •... -
Page 27: Changing The Needle
Adjust Upper Thread Tension • Rotate the tension knob clockwise to tighten the tension (1). • Rotate the tension knob counterclockwise to loosen the tension (2). Adjust Bobbin Thread Tension • Loosen/tighten the tension adjusting screw in small increments (3). CHANGING THE NEEDLE Discard old needles in a sharp-safe container. -
Page 28: Control Panel Functions
CONTROL PANEL FUNCTIONS START/STOP • Before starting to embroider your selected design, make sure that there is no object within the work area of the embroidery hoop. If the embroidery hoop collides with something, the embroidery design will misalign. • The Start/Stop button is located at the bottom right- hand corner of the control panel (1). -
Page 29: Color Touch Screen
COLOR TOUCH SCREEN THE TOUCH SCREEN The control panel is a touch-screen comprised of two sections: – The display at the top half of the screen. – The keys on the bottom half of the screen. 1. LED lamp switch – LED lamp ON/OFF switch 2. -
Page 30: Home Page - Overview
HOME PAGE – OVERVIEW 1. Design name 2. Display design stitch numbers 3. Display current number of stitches 4. Display design direction and rotation angle 5. Display design scaling 6. Display array number 7. Display X and Y position 8. Display size of embroidery frame 9. -
Page 31: Logo Selection Page - Overview
LOGO SELECTION PAGE – OVERVIEW 1. Switch to external storage 2. Switch to internal storage 3. Previous page 4. Next page 5. Delete a design 6. Save design in embroidery machine memory COLOR SEQUENCE PAGE – OVERVIEW 7. Set offset point 8. -
Page 32: Design Setting Page - Overview
DESIGN SETTING PAGE – OVERVIEW 13. X-direction scaling 14. Design rotation angle 15. Number of X-direction array 16. X-direction array space 17. Satin stitch compensation 18. Y-direction scaling 19. Design rotation angle 20. Number of Y-direction array 21. Y-direction array space 22. -
Page 33: Importing/Uploading A Design
IMPORTING/UPLOADING A DESIGN Make sure that the file intended to be uploaded into the embroidery machine is a .DST or a .VP3 file. If the file is not a .DST/.VP3 file, the embroidery machine will not recognize it. If your embroidery file is in another file type, you will need to change the file type by using the provided software. -
Page 34: Selecting A Design
SELECTING A DESIGN 1. Make sure that the embroidery status is set to unlocked. For instructions on how to set the embroidery status to unlock, see the Embroidery status section. 2. Press the file icon (1). -A new screen will display. 3. -
Page 35: Selecting The Color Sequence
SELECTING THE COLOR SEQUENCE 1. Press the color sequence icon. 2. Locate and select the desired color (2). -Select the colors according to the color stop sequence identified in the embroidery software/run sheet. -The first box will display in color. 3. -
Page 36: Needle Switch Display Icon
NEEDLE SWITCH DISPLAY ICON With this icon, users can move the machine head to a specific needle number manually. Tip: Before starting a new design, select needle #1 using the needle switch display icon (9) to help visualize the design tracing. EMBROIDERY DESIGN TRACE •... -
Page 37: Using Float Mode
USING FLOAT MODE Float is used to describe fast-forwarding or rewinding. This feature can only be accessed when the embroidery machine is on a locked embroidery status mode. To check the status of the embroidery machine, see the Embroidery status section. F.L represents floating on low speed. -
Page 38: Offsetting The Hoop On One Needle
OFFSETTING THE HOOP ON ONE NEEDLE This function is used to offset the frame on a specific needle during appliqué embroidery. 1. Press the color sequence icon (7). The color sequence page will display (8). 2. Select the needle or color you wish to add the frame out sequence to. -
Page 39: Embroidery Status
EMBROIDERY STATUS This function is used to determine if the embroidery machine is in setup mode (unlocked) or in embroidery mode (locked). To begin a new design, 1. Locate the embroidery status icon (1). 2. Identify if it is locked or unlocked. 3. -
Page 40: Adding A Font
ADDING A FONT This function is used to add a desired font to a design. Make sure that the embroidery status is unlocked. For instructions on how to set the embroidery status to unlock, see the Embroidery status section. 1. Press the menu icon (1). 2. -
Page 41: How To Abort A Job
HOW TO ABORT A JOB This function is used to abort an embroidery job in process. This process terminates the entire job. 1. Press the origin (1) icon. The following message will prompt, “Terminate embroidery and return to the origin?” 2. -
Page 42: Embroidery Process
EMBROIDERY PROCESS COMPLETING A FLAT DESIGN (START TO FINISH) PREPARE 1. Select the desired embroidery hoop. See the Embroidery hoop specifications section. 2. Place the fabric with backing onto the embroidery hoop. See the Framing fabric section. 3. Install the flat hoop support. See the Flat hoop support installation section. 4. -
Page 43: Completing A Cap Design (Start To Finish)
COMPLETING A CAP DESIGN (START TO FINISH) PREPARE 1. Install the cap driver. See the Cap driver installation section. 2. Set the cap and the backing on the cap embroidery hoop, on the cap station. See the Cap embroidery hoop section. 3. -
Page 44: 44 - Maintenance & Care
MAINTENANCE AND CARE This is the most important maintenance that needs to be completed. Repeat the following process every time before using your embroidery machine to make sure the embroidery machine runs smoothly. Wipe down the outer surface with a soft cloth and clean the bobbin with the toolkit brush. Use sewing machine oil ONLY for lubrication points (included in the toolbox). -
Page 45: Head Rail
HEAD RAIL Apply 2 or 3 drops of sewing machine oil to the metal rail (1) every week. Repeat the process on each side of the machine’s head manually, using the manual needle switch display icon (2) on your panel to needle #1, then to needle #10. -
Page 46: Thread Break
TROUBLESHOOTING THREAD BREAK EMBROIDERY DESIGN If thread breaks occur on just some of the needles, check Too high density of thread in the design can cause needle for defective needles or needles not inserted properly. deflection, which leads to thread shredding and breaks. Too If thread breaks are occurring frequently on all the sewing many stitches in a small area can cause thread breaks. -
Page 47: Timing Overview
TIMING OVERVIEW Timing refers to the synchronization of the rotary hook and the needle. Proper timing is essential for embroidery quality and to prevent issues. If the space between the needle and the hook point (1) is out of range, the thread will not catch, causing thread breaks. -
Page 48: Main Axis Not At 100 Degrees
MAIN AXIS NOT AT 100 DEGREES When your main access is not at 100 degrees, an error message will be displayed on your screen. 1. Click OK. 2. Press the 100-degree button (1). IF YOU ARE STILL RECEIVING THE ERROR MESSAGE 1. -
Page 49: Threads, Stabilizers & Needles
THREADS, STABILIZERS & NEEDLES THREAD FIBER CHOICES production efficiency • Can accept neon dyestuffs Lightweight threads are used for fine fabrics, small and delicate details and small fonts. The standard weight for • Excellent resistance to abrasion and bleaching lightweight threads is 60, 70 and 80. •... -
Page 50: Bobbin Fiber Choices
BOBBIN FIBER CHOICES • Allows for no lint • Allows 127 yards to be held on a standard style “L” • Be sure to keep the tails no longer than three (3) inches. bobbin • You might need to adjust the bobbin case, rather than •... -
Page 51: Backing/Stabilizer
BACKING/STABILIZER CUT -AWAY • Weights range from 1 oz. (light) to 3.75 oz. (heavy) • Used as stabilizer • Used for permanent support – remains permanently • Foundation for a good embroidery affixed to the fabric – excess is cut away with scissors •... -
Page 52: Needles
• Requires the use of backing on the back of the fabric to support your fabric • To remove the plastic film, tear-away the topping or use water FOAM • Adds dimension to lettering on caps for a 3D effect •... -
Page 53: Blade Size
• DBxK5 is an established standard system for an NEEDLE FINISHES embroidery machine. It is a medium point needle with • Most sewing and embroidery needles have a chromium a larger eye that allows a smoother flow of thread plating to enhance durability and appearance. through the eye of the needle. -
Page 54: Needle And Thread Matrix
NEEDLE AND THREAD MATRIX Refer to the chart below to view the application range of threads and needles used for general embroidery. Size of a needle Size of a thread U.S.A Japan Germany Cotton Silk Nylon Rayon 0.25 70 – 80 100 –... - Page 55 VIKING, KEEPING THE WORLD SEWING & Design, and PLATINUM are trademarks of Singer Sourcing Limited LLC. HUSQVARNA and the “H” Crown Device are trademarks of Husqvarna AB. © 2018 Singer Sourcing Limited LLC. All rights reserved. Please note that on disposal, this product must be safely recycled in accordance with relevant National legislation relating to electrical/ electronic products.
- Page 56 www.husqvarnaviking.com...
Need help?
Do you have a question about the Viking Platinum MN 1000 and is the answer not in the manual?
Questions and answers