Sign In
Upload
Download
Table of Contents
Contents
Add to my manuals
Delete from my manuals
Share
URL of this page:
HTML Link:
Bookmark this page
Add
Manual will be automatically added to "My Manuals"
Print this page
×
Bookmark added
×
Added to my manuals
Manuals
Brands
Husqvarna Manuals
Sewing Machine
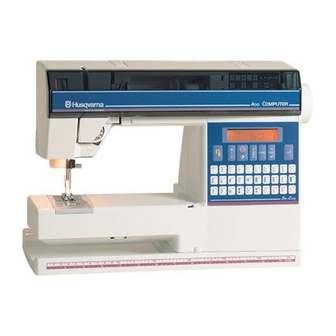
VIKING 350
Service manual
Husqvarna VIKING 350 Service Manual
Hide thumbs
1
Table Of Contents
2
3
4
5
6
7
8
9
10
11
12
13
14
15
16
17
18
19
20
21
22
23
24
25
26
27
28
29
30
31
32
33
34
35
36
37
38
39
40
41
42
43
44
45
46
47
48
49
50
51
52
53
54
page
of
54
Go
/
54
Contents
Table of Contents
Bookmarks
Table of Contents
Table of Contents
Service Tools
Directions for Use
Esd
Settings
1 The Play of the Hook Gear
2 Setting the Hook in Relation to the Feedingeccentric (after Feeding). Version 1 - One Pin
Setting the Hook in Relation to the Feedingeccentric (after Feeding). Version 2 - Two Pins
3 Belt Tension, Arm/Lower Shaft Belt
4 Belt Tension, Motor Belt
5 Presser Foot Height and Parallelism to the Stitch Plate
6 Setting the Feed Dog in Relation to the Presser Foot
7 The Centre Position of the Needle
8 Pre-Setting the Step Motor of the Needle
9 The Gap between the Needle and the Hook
10 Setting the Stitch Plate (the Hook Cover) in Relation to the Needle in the Feeding Direction
11 The Sideways Setting of the Stitch Plate (the Hook Cover) in Relation to the Feed Dog
12 The Height of the Hook
13 The Timing of the Hook in Relation to the Needle
14 The Needle Height
15 Feed Dog Height
16 Stitch Length Balance Basic Setting
17 Pre-Setting the Step Motor of the Feed Dog
Stitch Length Balance
19 Lower Thread Tension (Thread Tension of the Bobbin Case)
20 Upper Thread Tension
21 Upper Thread Tension - Only Rose, Iris
Coarse Adjustment
22 Upper Thread Tension - Embroidery Position - Only Rose, Iris
23 Upper Thread Guard - Only for Rose, Iris
24 Setting the Thread Take-Up Spring
25 Disconnection When Winding the Lower Thread
26 The Height of the Embriodery Foot - Only Rose,Iris
Service Program - 600,500,400 Series
Electronic Button Hole Balance Rose, 500, 350 and 400 Version 2
Service Program- Freesia 425/415 -Lisa -Angelica -Victoria
Electronic Button Hole Balance - Freesia 425/415 -Lisa -Angelica -Victoria
Setting the Country Code- Rose
Upper Thread Tension - Rose , Iris
Rear Cover - 350, 400 and 500
Upper Rear Cover - Lily, Rose
Lower Rear Cover - Lily, Rose
Front Cover
Transformer
Circuit Board - Circuit Diagram - for Models 350, 400 and 500
Circuit Board - Circuit Diagram- for Model Rose
Sewing Head
The Step Motor of the Needle
The Step Motor of the Thread Tension - for Rose
The Step Motor of the Feeding Unit
Feeding Unit
Hook Compl
Bobbin Winding Device
Cover Y-Slide
Cover Upper Part
Cover Lower Part
Y-Unit
X-Unit
Fault Finding Diagram - Rose Embroidery
Advertisement
Quick Links
1
Table of Contents
2
Service Tools
3
Directions for Use
4
The Play of the Hook Gear
Download this manual
SERVICE MANUAL
Printed in Sweden
Made in Sweden
Jan -2003
600,500,400,350
104 72 57-26
(Replaces 104 72 38-26)
Table of
Contents
Previous
Page
Next
Page
1
2
3
4
5
Advertisement
Table of Contents
Need help?
Do you have a question about the VIKING 350 and is the answer not in the manual?
Ask a question
Questions and answers
Related Manuals for Husqvarna VIKING 350
Lawn Mower Husqvarna Automower 115H Workshop Manual
(48 pages)
Lawn Mower Husqvarna 540 Instruction Manual
Instruction manual (30 pages)
Sewing Machine Husqvarna VIKING Viva User Manual
(39 pages)
Sewing Machine Husqvarna Huskylock 90 Operating Manual Instructions
(36 pages)
Sewing Machine Husqvarna Platinum 730 User Manual
Viking (39 pages)
Sewing Machine Husqvarna Platinum 3000 Owner's Manual
For quilting sewing machine (34 pages)
Sewing Machine Husqvarna Designer Diamond User Manual
(134 pages)
Sewing Machine Husqvarna Quilt Designer II User Manual
(82 pages)
Sewing Machine HUSQVARNA VIKING Designer EPIC User Manual
(202 pages)
Sewing Machine Husqvarna Viking Automatic 21 Service Manual
(11 pages)
Sewing Machine Husqvarna Viking Designer Sapphire 85 User Manual
(50 pages)
Sewing Machine Husqvarna VIKING 400 Service Manual
(54 pages)
Husqvarna VIKING Manual
(article)
Sewing Machine Husqvarna VIKING Lisa User Manual
(26 pages)
Sewing Machine Husqvarna VIKING RIBBON EMBROIDERY ATTACHMENT Instruction Manual
(7 pages)
Sewing Machine Husqvarna V. S. Directions For Use Manual
Family sewing manchine (20 pages)
This manual is also suitable for:
Viking 400
Viking 500
Viking 600
Table of Contents
Save PDF
Print
Rename the bookmark
Delete bookmark?
Delete from my manuals?
Login
Sign In
OR
Sign in with Facebook
Sign in with Google
Upload manual
Upload from disk
Upload from URL


Need help?
Do you have a question about the VIKING 350 and is the answer not in the manual?
Questions and answers