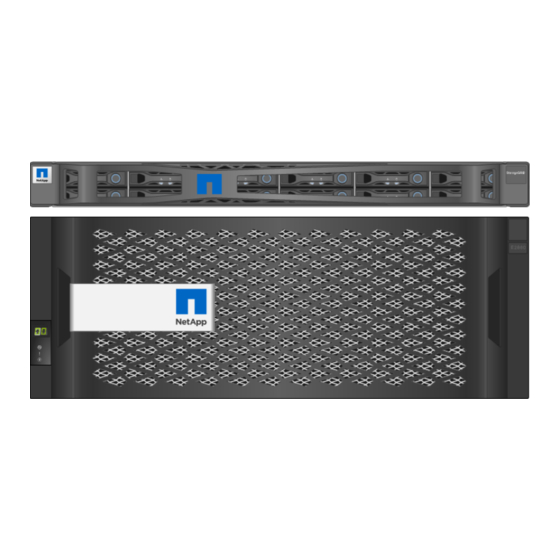
NetApp StorageGRID Webscale SG6000 Series Installation And Maintenance Manual
Hide thumbs
Also See for StorageGRID Webscale SG6000 Series:
- Manual (174 pages) ,
- Hardware installation and maintenance manual (104 pages) ,
- Hardware installation (20 pages)

Related Manuals for NetApp StorageGRID Webscale SG6000 Series


Summary of Contents for NetApp StorageGRID Webscale SG6000 Series
- Page 1 StorageGRID Webscale 11.1 ® Hardware Installation and Maintenance Guide For StorageGRID Webscale SG6000 Series Appliances December 2018 | 215-13530_B0 doccomments@netapp.com...
-
Page 3: Table Of Contents
Table of Contents | 3 Contents StorageGRID Webscale appliance overview ..........5 Controllers in the SG6000 appliance ................7 Installation overview .................. 10 Preparing for installation ................12 Preparing the site ....................... 12 Unpacking the boxes ....................13 Obtaining additional equipment and tools ..............14 Web browser requirements .................. - Page 4 4 | Hardware Installation and Maintenance Guide for SG6000 Appliances Hardware setup appears to hang ................62 Troubleshooting connection issues ................62 Unable to connect to the appliance ............... 62 Rebooting the SG6000-CN controller while the StorageGRID Appliance Installer is running ....................63 Maintaining the SG6000 appliance ............
-
Page 5: Storagegrid Webscale Appliance Overview
StorageGRID Webscale appliance overview The StorageGRID Webscale SG6000 appliance is an integrated storage and computing platform that operates as a Storage Node in a StorageGRID Webscale grid. The appliance can be used in a hybrid grid environment that combines appliance Storage Nodes and virtual (software-based) Storage Nodes. - Page 6 6 | Hardware Installation and Maintenance Guide for SG6000 Appliances The maximum raw storage available in the StorageGRID Webscale appliance is limited to drives within the single storage controller shelf. You cannot expand the available storage by adding a shelf with additional drives.
-
Page 7: Controllers In The Sg6000 Appliance
StorageGRID Webscale appliance overview | 7 Power supply (1 of 2) for SG6000-CN compute controller Connectors for SG6000-CN compute controller Fan (1 of 2) for E2860 controller shelf E-Series E2800 storage controller (1 of 2) and connectors Power supply (1 of 2) for E2860 controller shelf Controllers in the SG6000 appliance The SG6060 model of the StorageGRID Webscale SG6000 appliance includes an SG6000-CN compute controller in a 1U enclosure and two E2800 storage controllers in a 4U, 60-drive controller... - Page 8 8 | Hardware Installation and Maintenance Guide for SG6000 Appliances Port Type Interconnect 16-Gb/s Fibre Channel Connect the SG6000-CN controller to the ports 1-4 (FC), with integrated optics E2800 controllers (two connections to each E2800). Network ports 10-GbE or 25-GbE, based Connect to the Grid Network and the on cable or SFP transceiver Client Network for StorageGRID...
- Page 9 StorageGRID Webscale appliance overview | 9 Port Type Interconnect 16-Gb/s FC optical SFP+ Connect each of the E2800 controllers to ports 1 and 2 the SG6000-CN controller. There are four connections to the SG6000- CN controller (two from each E2800). Management 1-Gb (RJ-45) Ethernet •...
-
Page 10: Installation Overview
Installation overview You can install one or more StorageGRID Webscale appliances when you first deploy StorageGRID Webscale, or you can add appliance Storage Nodes later as part of an expansion. You might also need to install an appliance Storage Node as part of a recovery operation. Installing a StorageGRID Webscale appliance includes two primary phases. - Page 11 Installation overview | 11 Task Instructions Deploying an appliance Storage Node as part of Instructions for recovery and maintenance a Storage Node recovery operation Related tasks Preparing for installation on page 12 Installing the hardware on page 24 Configuring the hardware on page 35 Related information VMware installation...
-
Page 12: Preparing For Installation
StorageGRID Webscale appliance. Steps 1. Confirm that the site meets the requirements for temperature, humidity, altitude range, airflow, heat dissipation, wiring, power, and grounding. See the NetApp Hardware Universe for more information. 2. Confirm that your location provides 240-volt AC power. -
Page 13: Unpacking The Boxes
SG6060 appliance, or cables that you supply, are long enough for the planned layout. Related information NetApp Hardware Universe NetApp Interoperability Matrix Tool Unpacking the boxes Before installing the StorageGRID Webscale appliance, unpack all boxes and compare the contents to the items on the packing slip. -
Page 14: Obtaining Additional Equipment And Tools
14 | Hardware Installation and Maintenance Guide for SG6000 Appliances Back brackets and cage nuts for square-hole rack installation Cables and connectors The shipment for the StorageGRID Webscale appliance includes the following cables and connectors: Four power cords for your country Your cabinet might have special power cords that you use instead of the power cords that ship with the appliance. -
Page 15: Web Browser Requirements
Preparing for installation | 15 RJ-45 (Cat5/Cat5e/Cat6) Ethernet cables (four minimum) You need one of the following options: • One to four TwinAx cables or optical cables for the 10/25-GbE ports you plan to use on the SG6000-CN controller • One to four SFP+ transceivers for the 10/25- GbE ports if you will use optical cables and 10-GbE link speed... -
Page 16: Reviewing Appliance Network Connections
16 | Hardware Installation and Maintenance Guide for SG6000 Appliances Reviewing appliance network connections Before installing the StorageGRID Webscale appliance, you should understand which networks can be connected to the appliance. When you deploy a StorageGRID Webscale appliance as a Storage Node in a StorageGRID Webscale grid, you can connect it to the following networks: •... - Page 17 Preparing for installation | 17 The port bond modes help protect your data by providing redundant paths between StorageGRID Webscale networks and the appliance. Related tasks Configuring network links on page 44 Fixed port bond mode Fixed port bond mode is the default configuration for the 10/25-GbE ports. Callout Which ports are bonded Ports 1 and 3 are bonded together for the Client Network, if this network is used.
-
Page 18: Gathering Installation Information
18 | Hardware Installation and Maintenance Guide for SG6000 Appliances If you plan to use aggregate port bond mode: • You must specify a unique VLAN tag for each network. This VLAN tag will be added to each network packet to ensure that network traffic is routed to the correct network. •... - Page 19 Preparing for installation | 19 Information needed Your value for controller Your value for controller Static IP address you plan to use for For IPv4: For IPv4: the appliance on the management • IPv4 address: • IPv4 address: network • Subnet mask: •...
- Page 20 20 | Hardware Installation and Maintenance Guide for SG6000 Appliances Information needed Your value MAC address for the Admin Network port The MAC address label on the front of Note: the SG6000-CN controller lists the MAC address for the BMC management port. To determine the MAC address for the Admin Network port, you must add 2 to the hexadecimal number on the label.
- Page 21 Preparing for installation | 21 Information needed Your value Switch port for port 3 (Client Network for Fixed mode) Switch port for port 4 (Grid Network for Fixed mode) Table 4: Information needed to connect the SG6000-CN controller to the Grid Network The Grid Network for StorageGRID Webscale is a required network, used for all internal StorageGRID Webscale traffic.
- Page 22 22 | Hardware Installation and Maintenance Guide for SG6000 Appliances Information needed Your value Network bond mode Choose one: • Active-Backup (default) • LACP (802.3ad) VLAN tagging enabled Choose one: • No (default) • VLAN tag Enter a value between 0 and 4095: (If VLAN tagging is enabled) DHCP-assigned IP address for the Client •...
- Page 23 Preparing for installation | 23 Related tasks Cabling the appliance on page 29 Related references Controllers in the SG6000 appliance on page 7 Reviewing appliance network connections on page 16...
-
Page 24: Installing The Hardware
Sign in with your username and password. b. Select Products > My Products. c. Confirm that the new serial number is listed. d. If it is not, follow the instructions for new NetApp customers. New NetApp customer a. Click Register Now, and create an account. -
Page 25: Installing The E2860 Controller Shelf In A Cabinet Or Rack
Installing the hardware | 25 Installing the E2860 controller shelf in a cabinet or rack You must install a set of rails for the E2860 controller shelf in your cabinet or rack, and then slide the controller shelf onto the rails. Before you begin •... - Page 26 26 | Hardware Installation and Maintenance Guide for SG6000 Appliances 4. Place the back of the shelf (the end with the connectors) on the rails. 5. Supporting the shelf from the bottom, slide it into the cabinet. If you are using the handles, use the thumb latches to detach one handle at a time as you slide the shelf in.
-
Page 27: Installing Drives In The E2860 Controller Shelf
Installing the hardware | 27 Installing drives in the E2860 controller shelf After installing the E2860 controller shelf into a cabinet or rack, you must install all 60 drives into the shelf. The shipment includes two SSD drives, which you should install in the top drawer. Before you begin You have installed the E2860 controller shelf in the cabinet or rack. -
Page 28: Installing The Sg6000-Cn Controller In A Cabinet Or Rack
28 | Hardware Installation and Maintenance Guide for SG6000 Appliances Installing the SG6000-CN controller in a cabinet or rack You must install a set of rails for the SG6000-CN controller in your cabinet or rack, and then slide the controller onto the rails. Before you begin •... -
Page 29: Cabling The Appliance
Installing the hardware | 29 Do not attach the front bezel until after you power on the controller. Note: Cabling the appliance You must connect the two E2800 controllers to the SG6000-CN controller, connect the management ports on all three controllers, and connect the 10/25-GbE ports on the SG6000-CN controller to the Grid Network and optional Client Network for StorageGRID Webscale. - Page 30 30 | Hardware Installation and Maintenance Guide for SG6000 Appliances Port Type of port Function 1 FC connection ports: 16-Gb/s FC optical SFP+ Connect each E2800 controller to the SG6000-CN controller. • 4 on the SG6000-CN controller • 2 on each E2800 controller 2 BMC management port on 1-GbE (RJ-45)
-
Page 31: Connecting Power Cords And Applying Power
Installing the hardware | 31 3. Connect management port 1 (P1) on each E2800 controller (the RJ-45 port on the left) to the management network for SANtricity System Manager, using an Ethernet cable. Do not use management port 2 (P2) on the E2800 controllers (the RJ-45 port on the right). This port is reserved for technical support. -
Page 32: Viewing Boot-Up Status Codes For The E2800 Controllers
32 | Hardware Installation and Maintenance Guide for SG6000 Appliances 7. Turn on the two power switches on the back of the E2860 controller shelf. • Do not turn off the power switches during the power-on process. • The fans in the E2860 controller shelf are very loud when they first start up. The loud noise during start-up is normal. -
Page 33: Viewing Status Indicators And Buttons On The Sg6000-Cn Controller
Troubleshooting the hardware installation on page 59 Related information E5700 and E2800 System Monitoring Guide NetApp Support Viewing status indicators and buttons on the SG6000-CN controller The SG6000-CN controller includes indicators that help you determine the status of the controller, including the following indicators and buttons. - Page 34 34 | Hardware Installation and Maintenance Guide for SG6000 Appliances Related tasks Configuring the BMC interface on page 52 Related references Troubleshooting the hardware installation on page 59...
-
Page 35: Configuring The Hardware
Configuring the hardware After applying power to the appliance, you must configure SANtricity System Manager, which is the software you will use to monitor the E2800 controllers and other hardware in the E2860 controller shelf. You must also configure the network connections that will be used by StorageGRID Webscale and ensure that you can access the BMC interface for the SG6000-CN controller. - Page 36 36 | Hardware Installation and Maintenance Guide for SG6000 Appliances The login page for SANtricity System Manager appears. c. Go to step 2. If the network does not use a DHCP server (or if an IP address was not acquired from the DHCP server): a.
-
Page 37: Setting The Ip Addresses For The E2800 Controllers
Configuring the hardware | 37 Related tasks Setting the IP addresses for the E2800 controllers on page 37 Related references Web browser requirements on page 15 Setting the IP addresses for the E2800 controllers Management port 1 on each E2800 controller connects the appliance to the management network for SANtricity System Manager. - Page 38 38 | Hardware Installation and Maintenance Guide for SG6000 Appliances 5. For step 1 of the Configure Management Ports wizard, make sure Port P1 is selected, and click Next. 6. For step 2 of the Configure Management Ports wizard, configure the network settings for port 1 on controller B.
- Page 39 Configuring the hardware | 39 8. If you selected Enable IPv6: a. Click Next. b. Make sure Manually specify static configuration is selected. c. Enter an IP address, routable IP address, and router IP address. 9. Click Finish. 10. Repeat step through step to configure the IP address of management port 1 on controller A.
-
Page 40: Setting Up Santricity System Manager
1 (labeled P1) on each E2800 controller, and connect the other end to your network. Do not use management port 2 (labeled P2). This port is reserved for NetApp technical support. 12. Reconnect to SANtricity System Manager, but use the new static IP address for either controller... -
Page 41: Reviewing The Hardware Status In Santricity System Manager
Configuring the hardware | 41 c. Follow the “How To” instructions to create and manage the security key. 7. Optionally, change the administrator password. a. Select Help to access the online help for SANtricity System Manager. b. Use the Home > Storage array administration section of the online help to learn about the administrator password. -
Page 42: Configuring Storagegrid Webscale Connections
42 | Hardware Installation and Maintenance Guide for SG6000 Appliances 4. Review the information displayed for appliance hardware and confirm that all hardware components have a status of Optimal. a. Click the Hardware tab. b. Click Show back of shelf. From the back of the shelf, you can view both E2800 controllers, the battery in each E2800 controller, the two power canisters, and the two fan canisters. -
Page 43: Accessing The Storagegrid Appliance Installer
Configuring the hardware | 43 Accessing the StorageGRID Appliance Installer You must access the StorageGRID Appliance Installer to configure the connections between the appliance and the three StorageGRID Webscale networks: the Grid Network, the Admin Network (optional), and the Client Network (optional). Before you begin •... -
Page 44: Configuring Network Links
44 | Hardware Installation and Maintenance Guide for SG6000 Appliances 2. If you cannot obtain an IP address using DHCP, you can use a link-local connection. a. Connect a service laptop directly to the rightmost RJ-45 port on the SG6000-CN controller, using an Ethernet cable. - Page 45 Configuring the hardware | 45 If you plan to use Aggregate port bond mode, LACP network bond mode, or VLAN tagging: • You have connected the 10/25-GbE ports on the appliance to switches that can support VLAN and LACP. • If multiple switches are participating in the LACP bond, the switches support multi-chassis link aggregation groups (MLAG), or equivalent.
- Page 46 46 | Hardware Installation and Maintenance Guide for SG6000 Appliances Port bond Network bond Client Network disabled Client Network enabled mode mode (default) Fixed Active- • Ports 2 and 4 use an active- • Ports 2 and 4 use an (default) Backup backup bond for the Grid...
- Page 47 Configuring the hardware | 47 2. If you plan to use the 25-GbE link speed for the 10/25 GbE ports, select 25GbE from the Link speed drop-down list. The network switches you are using for the Grid Network and the Client Network must also support and be configured for this speed.
-
Page 48: Configuring Storagegrid Webscale Ip Addresses
48 | Hardware Installation and Maintenance Guide for SG6000 Appliances 5. When you are satisfied with your selections, click Save. You might lose your connection if you made changes to the network or link you are Note: connected through. If you are not reconnected within 1 minute, re-enter the URL for the StorageGRID Appliance Installer using one of the other IP addresses assigned to the appliance: http://SG6000-CN_Controller_IP:8080 Related concepts... - Page 49 Configuring the hardware | 49 Additionally, if you want to change the link configuration of a StorageGRID Webscale appliance, see the instructions for changing the link configuration of the SG6000-CN controller. Steps 1. From the menu bar of the StorageGRID Appliance Installer, click Configure Networking > IP Configuration.
- Page 50 50 | Hardware Installation and Maintenance Guide for SG6000 Appliances f. Click Save. 3. Configure the Admin Network. This section of the page appears if the Admin Network is enabled on the Link Configuration page. When you configure the Admin Network, you specify the IP address, gateway, and subnets used for Management Port 1 on the controller.
-
Page 51: Verifying Network Connections
Configuring the hardware | 51 a. If you plan to use a static IP address for the appliance on the Client Network, select Static. b. Enter the static IPv4 address, using CIDR notation. c. Click Save. d. Confirm that the IP address for the Client Network gateway is correct. If the Client Network is is enabled, the default route is displayed. -
Page 52: Configuring The Bmc Interface
52 | Hardware Installation and Maintenance Guide for SG6000 Appliances Configuring the BMC interface The user interface for the baseboard management controller (BMC) on the SG6000-CN controller provides status information about the hardware and allows you to configure SNMP settings and other options for the SG6000-CN controller. - Page 53 Configuring the hardware | 53 , use the IP address for the appliance on any StorageGRID SG6000-CN_Controller_IP Webscale network. The StorageGRID Appliance Installer Home page appears. 2. Select Advanced > BMC Configuration. The Baseboard Management Controller Configuration page appears. 3. Make a note of the IPv4 address that is automatically displayed. DHCP is the default method for assigning an IP address to this port.
-
Page 54: Accessing The Bmc Interface And Changing The Root Password
54 | Hardware Installation and Maintenance Guide for SG6000 Appliances d. Click Save. It might take a few minutes for your changes to be applied. Accessing the BMC interface and changing the root password You can access the BMC interface on the SG6000-CN controller using the DHCP or static IP address for the BMC management port. -
Page 55: Configuring Snmp Settings For The Sg6000-Cn Controller
Configuring the hardware | 55 3. Click Sign me in The BMC dashboard appears. 4. For security, immediately create your own password for the root account. a. Select Settings > User Management. b. Select the root account. c. Enter and confirm the new password, and click Save. 5. -
Page 56: Optional: Changing To Raid6 Mode
56 | Hardware Installation and Maintenance Guide for SG6000 Appliances Steps 1. From the BMC dashboard, select Settings > SNMP Settings. 2. On the SNMP Settings page, select the Enable SNMP V1/V2 checkbox, and provide a Read- Only Community String and a Read-Write Community String. The Read-Only Community String is like a user ID or password. -
Page 57: Optional: Remapping Network Ports For The Appliance
Configuring the hardware | 57 2. From the menu bar, select Advanced > RAID Mode. 3. On the Configure RAID Mode page, select RAID6 from the Mode drop-down list. 4. Click Save. Optional: Remapping network ports for the appliance You might need to remap the internal ports on the appliance Storage Node to different external ports. For example, you might need to remap ports because of a firewall issue. -
Page 58: Where To Go Next
Where to go next After installing and configuring the StorageGRID Webscale appliance, you can deploy it as a Storage Node in a StorageGRID Webscale grid. • To deploy an appliance Storage Node in a new StorageGRID Webscale grid, see the installation instructions for your platform. -
Page 59: Troubleshooting The Hardware Installation
Troubleshooting the hardware installation If you encounter issues during the installation, you might find it helpful to review troubleshooting information related to hardware setup and connectivity issues. Related tasks Hardware setup appears to hang on page 62 Related references Troubleshooting connection issues on page 62 Viewing boot-up codes for the SG6000-CN controller When you apply power to the appliance, the BMC logs a series of boot-up codes for the SG6000-CN... -
Page 60: Viewing Error Codes For The Sg6000-Cn Controller
60 | Hardware Installation and Maintenance Guide for SG6000 Appliances Code Indicates The system is checking for existing StorageGRID Webscale installation data. The StorageGRID Appliance Installer is running. StorageGRID Webscale is running. Viewing error codes for the SG6000-CN controller If a hardware error occurs when the SG6000-CN controller is booting up, the BMC logs an error code. - Page 61 Troubleshooting the hardware installation | 61 Code Indicates 0xD3 Some architectural protocols are not available 0xD4 PCI resource allocation error. Out of resources. 0xD5 No space for legacy option ROM 0xD6 No console output devices are found 0xD7 No console input devices are found 0xD8 Invalid password 0xD9...
-
Page 62: Hardware Setup Appears To Hang
62 | Hardware Installation and Maintenance Guide for SG6000 Appliances Hardware setup appears to hang The StorageGRID Appliance Installer might not be available if hardware faults or cabling errors prevent the E2800 controllers or the SG6000-CN controller from completing their boot-up processing. -
Page 63: Rebooting The Sg6000-Cn Controller While The Storagegrid Appliance Installer Is Running
Troubleshooting the hardware installation | 63 d. If the ping was successful, open a web browser. e. Enter the URL for SANtricity System Manager: https://E2800_Controller_IP The log in page for SANtricity System Manager appears. 2. If you are unable to connect to the SG6000-CN controller: a. - Page 64 64 | Hardware Installation and Maintenance Guide for SG6000 Appliances 3. Confirm you want to reboot the controller. The SG6000-CN controller is rebooted.
-
Page 65: Maintaining The Sg6000 Appliance
Maintaining the SG6000 appliance You might need to perform maintenance procedures on the SG6000 appliance. The procedures in this section assume that the appliance has already been deployed as a Storage Node in a StorageGRID Webscale grid. Steps Upgrading SANtricity OS Software on the E2800 controllers on page 65 Replacing an E2800 controller on page 67... - Page 66 66 | Hardware Installation and Maintenance Guide for SG6000 Appliances iv. Enter the password listed in the file. Passwords.txt When you are logged in as root, the prompt changes from b. Stop all StorageGRID Webscale services: service servermanager stop c. Place the SG6000-CN controller into maintenance mode: sgamaintenance The following messages are displayed on the service laptop: WARNING: All StorageGRID Webscale services on this node will be...
-
Page 67: Replacing An E2800 Controller
E2800 and E5700 SANtricity Software and Firmware Upgrade Guide E-Series and SANtricity 11.5 Documentation Center NetApp Downloads: Software Replacing an E2800 controller You might need to replace an E2800 controller if it is not functioning optimally or if it has failed. - Page 68 68 | Hardware Installation and Maintenance Guide for SG6000 Appliances Because the E2860 controller shelf has two E2800 controllers, you can replace one of the controllers while your appliance is powered on and performing read/write operations, as long as the following conditions are true: •...
- Page 69 Maintaining the SG6000 appliance | 69 b. Back up the configuration database. If a problem occurs when you remove a controller, you can use the saved file to restore your configuration. c. Collect support data for the appliance. Collecting support data before and after replacing a component ensures you can send Note: a full set of logs to technical support in case the replacement does not resolve the problem.
- Page 70 70 | Hardware Installation and Maintenance Guide for SG6000 Appliances Item Description Internal Cache Active LED Battery b. Locate the blue release latch for the battery. c. Unlatch the battery by pushing the release latch down and away from the controller. Item Description Battery release latch...
- Page 71 Maintaining the SG6000 appliance | 71 g. Insert the battery into the controller at a slight downward angle. You must insert the metal flange at the front of the battery into the slot on the bottom of the controller, and slide the top of the battery beneath the small alignment pin on the left side of the controller.
-
Page 72: Replacing Hardware Components In The E2860 Controller Shelf
72 | Hardware Installation and Maintenance Guide for SG6000 Appliances DNS/network and IP address for the controller you removed with the MAC address for the replacement controller. If the original controller did not use DHCP for the IP address, the new controller will Note: adopt the IP address of the controller you removed. -
Page 73: Replacing The Sg6000-Cn Controller
Maintaining the SG6000 appliance | 73 NetApp Documentation: Product Library A-Z Replacing the SG6000-CN controller You might need to replace the SG6000-CN controller if it is not functioning optimally or if it has failed. Before you begin • You have a replacement controller with the same part number as the controller you are replacing. -
Page 74: Replacing A Power Supply In The Sg6000-Cn Controller
74 | Hardware Installation and Maintenance Guide for SG6000 Appliances a. Locate the MAC address label on the front of the SG6000-CN controller, and determine the MAC address for the Admin Network port. The MAC address label lists the MAC address for the BMC management port. Note: To determine the MAC address for the Admin Network port, you must add 2 to the hexadecimal number on the label. - Page 75 Maintaining the SG6000 appliance | 75 About this task The figure shows the two power supply units for the SG6000-CN controller, which are accessible from the back of the controller. Steps 1. Unplug the power cord from the power supply. 2.
-
Page 76: Changing The Link Configuration Of The Sg6000-Cn Controller
76 | Hardware Installation and Maintenance Guide for SG6000 Appliances 5. Push the cam handle down to secure the power supply. 6. Attach the power cord to the power supply, and ensure that the green LED comes on. Changing the link configuration of the SG6000-CN controller You can change the Ethernet link configuration of the SG6000-CN controller. - Page 77 Maintaining the SG6000 appliance | 77 sgamaintenance The following messages are displayed on the service laptop: WARNING: All StorageGRID Webscale services on this node will be shut down. WARNING: You will have to manually exit maintenance mode before this node will resume normal operation. After running this command and waiting a few minutes for the node to reboot, browse to one of the following URLs to perform any maintenance actions, then exit maintenance mode:...
- Page 78 78 | Hardware Installation and Maintenance Guide for SG6000 Appliances You might lose your connection if you made changes to the network or link you are Note: connected through. If you are not reconnected within 1 minute, re-enter the URL for the StorageGRID Appliance Installer using one of the other IP addresses assigned to the appliance: http://SG6000-CN_Controller_IP:8080 5.
-
Page 79: Copyright Information
NetApp assumes no responsibility or liability arising from the use of products described herein, except as expressly agreed to in writing by NetApp. The use or purchase of this product does not convey a license under any patent rights, trademark rights, or any other intellectual property rights of NetApp. -
Page 80: Trademark
Trademark NETAPP, the NETAPP logo, and the marks listed on the NetApp Trademarks page are trademarks of NetApp, Inc. Other company and product names may be trademarks of their respective owners. http://www.netapp.com/us/legal/netapptmlist.aspx... -
Page 81: How To Send Comments About Documentation And Receive Update Notifications
Twitter account @NetAppDoc. You can also contact us in the following ways: • NetApp, Inc., 1395 Crossman Ave., Sunnyvale, CA 94089 U.S. • Telephone: +1 (408) 822-6000 • Fax: +1 (408) 822-4501 •... -
Page 82: Index
82 | Hardware Installation and Maintenance Guide for SG6000 Appliances Index 10/25-GbE ports bond modes cabinet changing link configuration installing appliance setting link speed requirements cables connecting to appliance included in product shipment active-backup bond mode required for installation described Client Network setting configuring IP address for appliance... - Page 83 Index | 83 setting up for the appliance errors LACP bond mode E2800 seven-segment display described SG6000-CN controller setting LEDs SG6000-CN controller Link Aggregation Control Protocol mode described replacing in E2860 controller shelf link speed feedback changing how to send comments about documentation links firmware appliance Storage Node...
- Page 84 84 | Hardware Installation and Maintenance Guide for SG6000 Appliances upgrading on E2800 controllers accessing SANtricity System Manager suggestions accessing how to send feedback about documentation configuring initial set up reviewing hardware status SG6000 appliance tools features required for installation SG6000-CN controller troubleshooting 10/25-GbE ports...
Need help?
Do you have a question about the StorageGRID Webscale SG6000 Series and is the answer not in the manual?
Questions and answers