
Related Manuals for BIRD SiteHawk SK-4500


Summary of Contents for BIRD SiteHawk SK-4500
- Page 1 SiteHawk™ Analyzer SK-4500 Operation Manual ©Copyright 2017 by Bird Technologies, Inc. Instruction Book Part Number 920-SK-4500 Rev. B SiteHawk is a trademark of Bird Electronic Corporation...
-
Page 2: Safety Precautions
Safety Precautions The following are general safety precautions that are not necessarily related to any specific part or procedure, and do not necessarily appear elsewhere in this publication. These precautions must be thoroughly understood and apply to all phases of operation and maintenance. WARNING Keep Away From Live Circuits Operating Personnel must at all times observe general safety precautions. -
Page 3: Safety Symbols
Safety Precautions Safety Symbols WARNING Warning notes call attention to a procedure, which if not correctly performed, could result in personal injury. CAUTION Caution notes call attention to a procedure, which if not correctly performed, could result in damage to the instrument. Note: Calls attention to supplemental information. -
Page 4: Safety Statements
Bird SiteHawk Operation Manual Safety Statements USAGE ANY USE OF THIS INSTRUMENT IN A MANNER NOT SPECIFIED BY THE MANUFACTURER MAY IMPAIR THE INSTRUMENT’S SAFETY PROTECTION. EL USO DE ESTE INSTRUMENTO DE MANERA NO ESPECIFICADA POR EL FABRICANTE, PUEDE ANULAR LA PROTECCIÓN DE SEGURIDAD DEL INSTRUMENTO. - Page 5 Safety Precautions SERVICE SERVICING INSTRUCTIONS ARE FOR USE BY SERVICE - TRAINED PERSONNEL ONLY. TO AVOID DANGEROUS ELECTRIC SHOCK, DO NOT PERFORM ANY SERVICING UNLESS QUALIFIED TO DO SO. SERVICIO LAS INSTRUCCIONES DE SERVICIO SON PARA USO EXCLUSIVO DEL PERSONAL DE SERVICIO CAPACITADO. PARA EVITAR EL PELIGRO DE DESCARGAS ELÉCTRICAS, NO REALICE NINGÚN SERVICIO A MENOS QUE ESTÉ...
- Page 6 Bird SiteHawk Operation Manual UNITS ARE EQUIPPED WITH RECHAREABLE BATTERIES. THESE ARE TO BE REPLACED BY AUTHORIZED SERVICE PERSONNEL ONLY!!! LAS UNIDADES VIENEN EQUIPADAS CON BATERIAS RECARGABLES. ¡¡¡Y SOLAMENTE EL PERSONAL DE SERVICIO AUTORIZADO PUEDE REEMPLAZARLAS!!! GERÄTE SIND MIT WIEDER AUFLADBAREN BATTERIEN BESTÜCKT.
-
Page 7: About This Manual
When inquiring about updates to this manual refer to the part number and revision on the title page. Literature Contents Describes the features of the Bird SiteHawk™, lists equipment Introduction — supplied and optional equipment, provides power-up instructions and measurement settings. -
Page 8: Table Of Contents
Table of Contents Safety Precautions ......... i Safety Symbols . - Page 9 Table of Contents Chapter 6 Data Save and Export ......38 Saving and Recalling SiteHawk Status Data ......38 Chapter 7 Maintenance .
-
Page 10: Chapter 1 Introduction
1920 x 1080 pixel touch screen display area. Power Meter Application SiteHawk Analyzers include the Bird RF Meter Application. The Bird RF Meter is an Android application designed to work with a wide variety of Bird Power Sensors. -
Page 11: Items Supplied
Introduction Items Supplied Description Part Number Hard Carrying Case 7002A218-2 Soft Carrying Case 7002A219-1 USB Adapter SK-CONN-OTG-2 AC Adapter (12 VDC) APL336-1230 Touch Pen (stylus) SK-TP-112 USB Drive 5A2745-1 Instruction Manual 920-SK-4500 RF Cable, 1 meter SK-TC-MNFN-1M Calibration Combination (Cal Combo), DC - SK-CAL-MN-C 4 GHz Li-ion Battery (7.4 V, 6800 mAh) -
Page 12: Sitehawk Analyzer Specifications
Bird SiteHawk Operation Manual SiteHawk Analyzer Specifications Frequency Range 1 MHz to 4.5 GHz Frequency Accuracy ±2.5 ppm Frequency Resolution Setting 1 kHz Output Power –10 dBm Reflected Amplitude Accuracy –15 dB to 0 dB ±0.4 dB –25 dB to –15 dB ±1.5 dB... - Page 13 Introduction Pressure 84 to 106.7 kPa Warm-Up Time 15 minutes Power Measurement Yes, with RF Meter App 4043, 5012D, 5014, 5015, 5015-EF, Compatible Devices 5016D, 5017D, 5018D, 5019D, 7020, 7022, 7023 Storage Capacity 16 GB Immunity to Interfering Signals +13 dBm CE compliant.
-
Page 14: Measurement Capability
Female N connector for connecting to the antenna. Use Antenna Test Port a phase-stable cable for best results. Input connector for charging the SK-4500 using the Charger Input supplied charger. USB device port for connection to a USB Drive or Bird USB-C 3.0 Type Power Sensor. -
Page 15: Power
Introduction Power The SiteHawk Analyzer has an internal, rechargeable, lithium-ion battery pack. CAUTION Only use the supplied AC adapter to charge the unit. The unit cannot be charged through the USB port (i.e. from a laptop). Charging from a power source other than the supplied charger may damage the battery. -
Page 16: Measurement Port
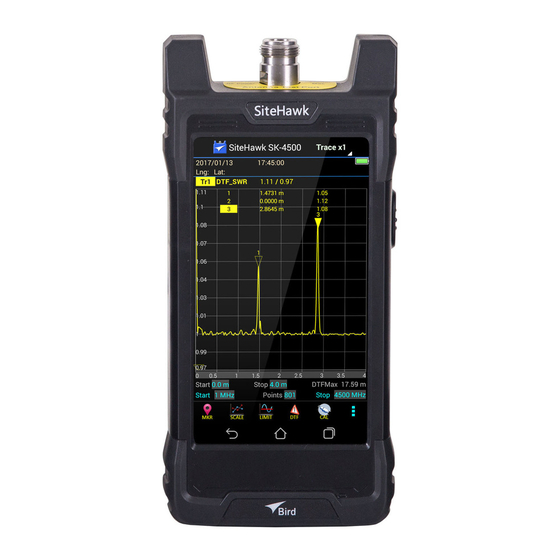
Bird SiteHawk Operation Manual Measurement Port The measurement port is a 50 ohm N-type. This port is used to connect the device under test. User Interface The SiteHawk user interface consists of a touch screen interface. The user presses the screen to access menus, change settings, perform measurements and save results. - Page 17 Introduction Figure 2 User Interface Description (Match Measurement Mode) Item Description Measurement Mode, press to display Measurement Mode menu. Trace Selection, press to choose number of traces to display. MKR icon, press to display the Marker menu. SCALE icon, press to display the scale menu. LIMIT icon, press to display the limit menu.
- Page 18 Bird SiteHawk Operation Manual DTF icon, press to display the Distance to Fault menu. CAL icon, press to display the calibration menu. Menu icon, press to display additional utility menus: MEM, FREQ, RESET, FILE, PNG, SYS. Device information row, includes date, time, longitude, latitude, battery time remaining, battery percentage remaining.
-
Page 19: Setting The Measurement Frequencies
Introduction Setting the Measurement Frequencies Frequencies can be set manually. Frequency range should be greater than the normal range of the antenna. Example - For a 450 MHz antenna, set the start frequency at 400 and the stop frequency at 500 MHz, for an 800 MHz antenna, set the start frequency at 700 and the stop frequency at 1,100 MHz. -
Page 20: Setting The Measurement Data Points
Bird SiteHawk Operation Manual Setting the Measurement Data Points Select the number of data points to take during a measurement. There are seven data point options: 51 points 101 points 201 points 401 points 801 points ... -
Page 21: Setting The Distance Units And Cable Values (Dtf Menu)
Introduction Setting the Distance Units and Cable Values (DTF Menu) The trace can display the entire length (distance) of the cable system being measured or a smaller portion of the length for better detail. If it is suspected that there might be a fault at a known distance along a cable, set the display to show only that area by using the start and stop points. - Page 22 Bird SiteHawk Operation Manual Cable Loss 1. Select CableLoss. 2. Set cable loss values. Note: Manually enter cable loss value or select the cable type from the cable list. Cable List The Cable List contains known cable values for a variety of cable types. The Cable List may be edited to add or delete cables.
-
Page 23: Trace Settings
Introduction Trace Settings The number of traces displayed and the minimum and maximum grid scale values can be manually changed. Note: SiteHawk is capable of displaying up to 4 traces. 1. Press the Trace name (e.g. Tr1) to select the active trace. See Figure 5 on page 14 Note: The Trace name will be highlighted to indicate the active... - Page 24 Bird SiteHawk Operation Manual Adjusting the trace within the selected scale Note: Scale settings only affect the active trace, if more than one trace is currently displayed, select the desired trace before chang- ing scale. 1. Press SCALE icon. See Figure 6 on page 15 2.
-
Page 25: Chapter 2 Calibration
Chapter 2 Calibration Calibrating the SiteHawk Analyzer For best results, set the frequency and calibrate the Bird Site Analyzer immediately before taking measurements. Note: Use a precision open, short, load (OSL) calibration standard or “Calibration Combo” for accurate measurement results. -
Page 26: Chapter 3 Measure Match Mode
Chapter 3 Measure Match Mode Match measurement verifies and monitors the match conditions in the antenna system at various frequencies. The results are shown on an x-y graph. Frequency is shown on the x-axis and Return Loss or SWR is shown on the y-axis. Before making a Match Measurement, be sure to have a Calibration Combination (Cal Combo), all necessary cables with adapters of the correct size and connector type. -
Page 27: Interpreting The Measurement
Measure Match Mode 6. Connect the SiteHawk to the device under test. 7. Wait 10 Seconds for the sweep to update. Interpreting the Measurement The graph below shows a typical Match Measurement for an antenna system. Figure 9 Interpreting Match Measurement The graph contains the following elements: ... - Page 28 Bird SiteHawk Operation Manual Performing a Cable Loss Measurement 1. Press trace measurement field to display Measurement Mode menu. 2. Press CableLoss in the Measurement Mode menu. Figure 10 Selecting Cable Loss Measurement 3. Set the frequency start and stop to a range that is greater than the normal range of the antenna.
- Page 29 Measure Match Mode Interpreting a Cable Loss Measurement The graph below shows a typical cable loss measurement. Note that the scale is greatly reduced to show the cable’s variation across frequency. Figure 11 Interpreting Cable Loss Measurement 1. Marker 1 and Marker 2 indicate the minimum and maximum loss for the cable under test.
-
Page 30: Chapter 4 Fault Location Mode
Chapter 4 Fault Location Mode Fault location identifies the position of impedance discontinuities (reflections) within the antenna system. The measurement results are displayed on an x-y graph. Distance from the SiteHawk Analyzer is shown on the x-axis, while relative magnitude of the discontinuity is shown on the y-axis. Before making a fault location measurement, ensure that the following items and information are present: ... -
Page 31: Calculating The Frequency Span
Fault Location Mode Data Points Increasing the number of data points increases the measurable distance (401 points results in twice the distance of 201 points, and 801 points results in four times the distance of 201 points). When changing the number of data points measured, the software automatically recomputes the new maximum measurable distance. -
Page 32: Selecting Fault Location Mode
Bird SiteHawk Operation Manual Selecting Fault Location Mode 1. Press trace measurement field to display Measurement Mode menu. 2. Press to select one of the following from the Measurement Mode drop down menu: DTF_SWR DTF_RL Note: When making Distance to Fault measurement, select units for the Y (vertical) scale: DTF_SWR for standing wave ratio or DTF_RL for return loss in dB. -
Page 33: Interpreting The Fault Location Measurement
Fault Location Mode Note: If the SiteHawk Analyzer is calibrated with a phase stable cable connected to its antenna port, do not remove the cable. Con- nect it to the cable to be tested. 13. Wait at least 10 seconds for the sweep to update. 14. - Page 34 Bird SiteHawk Operation Manual Note: If a maximum distance less than the total length of the cable system is selected, the trace will not show the end of the cable system (antenna). To display the full cable system always set the maximum distance to a value that is a few feet or meters greater than the entire length of the cable system.
-
Page 35: Chapter 5 Additional Features
Chapter 5 Additional Features Limit Line The limit line helps to set off those parts of a trace that are outside of the acceptance (limit) values. It appears as a red horizontal line at the limit line value. The part of the trace that is not acceptable will display in white. Additionally, identification of signals falling outside acceptable limits can be visually and audibly enhanced using a failure flag and alarm. - Page 36 Bird SiteHawk Operation Manual Value Sets the position of the limit line on the vertical scale (Y axis). Press the field to enter a value. Step Sets the numerical value the limit line will move when the Move UP or Move Down button are pressed.
-
Page 37: Markers
Additional Features Markers Each marker is displayed as a triangle pointer. Up to six markers can be used with each trace to visually indicate the trace value at specific frequency points. Only markers for the active trace are displayed. The SiteHawk analyzer displays the frequency and signal value for each marker at the top of the screen. - Page 38 Bird SiteHawk Operation Manual 2. Select from the following marker options: Press Add to add a marker. Delete Pressing Delete will the active marker. If deleting a marker, select the marker before opening the marker menu. Freq Indicates the current frequency position of the active marker. Press the Freq field to enter a new position/frequency for the marker.
- Page 39 Additional Features Figure 17 Marker Examples Using Delta Markers The delta marker feature displays the difference (delta) in both frequency (or distance) and value between the active marker and all other markers. All markers follow the current trace only. Note: The Delta marker compares points on one trace and at least two markers must be displayed for the Delta Option to work.
- Page 40 Bird SiteHawk Operation Manual Figure 19 Highlighted Markers 3. Press MKR icon, and select MoveDelta. shows Marker 1-3 is now highlighted. Note: Figure 20 Figure 20 Highlighted Delta Marker Peak Search Between Markers The peak search between markers feature causes marker 3 to move to the peak signal between marker 1 and marker 2 positions.
-
Page 41: Utility Menus
Additional Features shows marker 3 at the peak signal position Note: Figure 21 between marker 1 and marker 2. Figure 21 Marker 3 Peak Search Utility Menus Pressing the Menu icon will display the utility menus: MEM, FREQ, RESET, FILE, PNG, SYS. - Page 42 Bird SiteHawk Operation Manual FILE Menu Pressing the FILE icon will display the file menu. See Figure 23 Figure 23 File Menu Saving and Recalling Traces Traces and measurement data can be saved and recalled from either the unit’s internal memory or an external USB thumb drive. See “Data Save and Export”...
- Page 43 Additional Features Save Screen Picture (jpeg) Saves a JPEG file of the current Sweep Display Area, press the menu option and a save dialog is displayed allowing the user to enter a file name or use the default file name. Note: If the Site Name option is set to ON an Edit SiteName dialog box will be displayed each time screen shot is taken.
- Page 44 Bird SiteHawk Operation Manual Figure 25 Delete User File dialog box Site Name Press to toggle ON or OFF, when set to ON the site name will be included on all screen shots. After Site Name is set to ON, an Edit SiteName dialog box will be displayed each time a screen shot is taken.
- Page 45 Additional Features RESET Icon The reset menu will reset the SiteHawk to default settings. All current data is cleared including calibration, and all menus are reset to default. Saved data is not affected by a reset. 1. Press the Menu icon. 2.
- Page 46 Bird SiteHawk Operation Manual System Settings Press the SYS icon on the SYS menu to open the System Settings dialog. The System Settings dialog allows the user to change system display settings. The full menu is best viewed with the SiteHawk in the vertical position.
-
Page 47: Chapter 6 Data Save And Export
Chapter 6 Data Save and Export Saving and Recalling SiteHawk Status Data SiteHawk status, calibration result, and tracing data can be saved to the instrument, and can be recalled to be displayed on the sweep display area. The parameters for this instrument setting include: scale, trace, cursor and analysis. - Page 48 Bird SiteHawk Operation Manual Hz——frequency measurement unit (kHz, MHz, GHz) FMT—— Data Format RI——Real part and Imaginary part MA——Linear Amp and Phase DB——Log Amp (dB) and Phase Z0——reference impedance F[n]——Frequency about point N {…}’—— {(RI) |(MA) |(DB)} {…}”——{(RI) |(MA) |(DB)}...
- Page 49 Data Save and Export Figure 33 File Menu 3. Select the format of the saved file: Data can be saved as cst or sta trace data. Data can be saved as a S1p file. Data can be saved as a datafile (.csv). ...
- Page 50 Bird SiteHawk Operation Manual Recall Trace Data Data in sta or cst data files can be recalled and displayed with the current data trace. 1. Press the Menu icon. 2. Press the FILE icon to display the file menu. See Figure 33 3.
- Page 51 Data Save and Export 4. Select Directory containing files to delete. Note: The default directory (folder) displayed in the Delete User File dialog box is the default save folder, there is no need to select a different folder if the default folder was used to save files. Skip to step 5 Press SCAN.
- Page 52 Bird SiteHawk Operation Manual Data Transfer Function Data transfer from the SK-4500 may be accomplished using a USB Drive or via Bluetooth transfer. For instructions on how to make transfers see "Data Transfer via USB Drive" on page 43 "Data Transfer via Bluetooth" on page...
- Page 53 Data Save and Export Figure 39 External Storage 10. Navigate to the directory where the file will be saved. 11. Press the Paste icon to save the file onto the USB drive. 12. Exit the File Manager. 13. Tap Settings on the Home Screen. See Figure 40 14.
- Page 54 Bird SiteHawk Operation Manual Display Storage Option in Settings If the storage option is not visible in the Settings menu perform the following: 1. Tap Settings on the Home Screen. See Figure 40 on page 44 2. Tap Customize, see...
- Page 55 Data Save and Export Data Transfer via Bluetooth Files may be transfered to/from the SiteHawk using the following steps. 1. Press Home key on the SiteHawk display. 2. Select Settings. 3. Turn on Bluetooth. 4. Press Home key. 5. Select the File Manager icon on the unit’s home screen. 6.
-
Page 56: Chapter 7 Maintenance
Chapter 7 Maintenance Cleaning Clean the SiteHawk Analyzer only with a soft cloth dampened with mild detergent and water. Do not use any other type of cleaning solution. CAUTION Do not touch the center pin of the Antenna Test Port with bare hands, water, or emery cloth. -
Page 57: Replacing The Battery
Device Calibration It is recommended that an instrument calibration be performed by a certified service provider at nominal three year intervals. Contact Bird Electronic for more information. Storage Store the SiteHawk Analyzer in an enclosed case and in an environment that does not exceed values listed in the Specifications section. -
Page 58: Edit Cable List
Bird SiteHawk Operation Manual Edit Cable List The Cable List contains a list of known cable values. These procedure provide the steps necessary to edit the Cable List and select Cable Lists. The Cable List that is preloaded on the SiteHawk is named CableList.ini. - Page 59 Maintenance Delete Cable from Cable List Note: Only cables added by the user may be deleted using this method. 1. Press DTF icon. 2. Press CableList option to display the Cable List. See Figure 45 3. Scroll to the bottom of the Cable List to see the cable to be deleted. 4.
- Page 60 6. Select a cable in the list and press OK. Edit Cable List on a PC 1. Download the Cable List Editor from SiteHawk page on the Bird Website, and save on a PC. 2. Copy the file CableList.ini from the SiteHawk folder on the SiteHawk. See “Data Transfer Function”...
- Page 61 Maintenance Figure 49 Cable List Editor 6. Click Add to add a new cable or select an existing cable to change and click Edit. Note: Any cable may be deleted by selecting the cable in the list and clicking Delete. 7.
-
Page 62: Firmware Update
Bird SiteHawk Operation Manual 15. Launch the SiteHawk App. 16. Load the updated Cable List. See “Recall Cable List” on page 50 Firmware Update 1. Go to http://www.birdrf.com/Products/Test and Measurement/Analyzers/ Cable-Antenna-Analyzers/ 2. Scroll down to the Downloads. 3. Click on the Firmware link. -
Page 63: Customer Service
If the unit needs to be returned for any reason, request an Return Material Authorization (RMA) through the Bird Technologies website. All instruments returned must be shipped prepaid and to the attention of the RMA number. - Page 64 Bird SiteHawk Operation Manual Appendix SiteHawk Analyzer default Settings Description Default Setting Touchstone Data Format RI - Real-Imaginary Allocation of Channels Active Channel Number Marker Value Identification Capacity 8 digits (Stimulus) Marker Value Identification Capacity 5 digits (Response) Vertical Divisions...
-
Page 65: Limited Warranty
Limited Warranty All products manufactured by Seller are warranted to be free from defects in material and workmanship for a period of three (3) years, unless otherwise specified, from date of shipment and to conform to applicable specifications, drawings, blueprints and/or samples. Seller’s sole obligation under these war- ranties shall be to issue credit, repair or replace any item or part thereof which is proved to be other than as warranted;...
Need help?
Do you have a question about the SiteHawk SK-4500 and is the answer not in the manual?
Questions and answers