Table of Contents
Advertisement
Advertisement
Table of Contents

Subscribe to Our Youtube Channel
Related Manuals for Rohde & Schwarz ETL 2112.0004.13


Summary of Contents for Rohde & Schwarz ETL 2112.0004.13
- Page 1 ® R&S TV Analyzer Getting Started (EBYN2) 2118413002...
- Page 2 ® This document describes the following R&S ETL model: ● 2112.0004.13 U.S. Patent Nos. 4,631,603; 4,819,098; 4,907,093; 5,315,448; 6,381,747; and 6,516,132. Used for the video and audio hardware decoder option (R&S ETL-B281). The software contained in this product uses several valuable open source software packages. For information, see the "Open Source Acknowledgment"...
- Page 3 Safety Instructions Instrucciones de seguridad Sicherheitshinweise Consignes de sécurité Risk of injury and instrument damage The instrument must be used in an appropriate manner to prevent electric shock, fire, personal injury or instrument damage. ● Do not open the instrument casing. ●...
- Page 4 Gefahr von Verletzungen und Schäden am Gerät Betreiben Sie das Gerät immer ordnungsgemäß, um elektrischen Schlag, Brand, Verletzungen von Personen oder Geräteschäden zu verhindern. ● Öffnen Sie das Gerätegehäuse nicht. ● Lesen und beachten Sie die "Grundlegenden Sicherheitshinweise", die als gedruckte Broschüre dem Gerät beiliegen. ●...
-
Page 5: Table Of Contents
® Contents R&S Contents 1 Preface....................7 For Your Safety......................7 Information Provided on the Instrument..............7 Conventions Used in the Documentation..............8 2 Documentation Overview..............10 Getting Started Manual....................10 User Manuals and Help....................10 Tutorials........................10 Basic Safety Instructions................... 10 Data Sheets and Brochures..................11 Release Notes and Open Source Acknowledgment (OSA)........ - Page 6 ® Contents R&S 5.1.7 Rotary Knob........................22 5.1.8 Cursor Keys........................23 GEN OUT 50 Ω Output....................24 5.1.9 5.1.10 USB Interfaces......................24 5.1.11 AF OUT Output......................24 RF IN 75 Ω Input (B203 Option)..................25 5.1.12 RF IN 50 Ω Input......................25 5.1.13 5.1.14 Display..........................
- Page 7 ® Contents R&S Behavior of the ON/STANDBY Key................43 Checking the Provided Options.................44 Turn-On Tests......................45 7.6.1 Performing a Self-Alignment..................45 7.6.2 Performing a Self-Test....................45 8 Sample Application................46 Test Setup........................46 Setting the TV Analyzer/Receiver Mode..............46 Performing the Measurement..................46 9 Operating the Instrument in a LAN.............48 Computer Name......................
- Page 8 ® Contents R&S 11.3 Replacing the Fuses....................59 11.4 Storing..........................60 Index......................61 Getting Started 2118.4130.02 ─ 04...
-
Page 9: Preface
® Preface R&S Information Provided on the Instrument 1 Preface This chapter provides information related to safety issues and the product documenta- tion. 1.1 For Your Safety The R&S ETL is designated to develop, produce and verify electronic components and devices in an industrial environment. -
Page 10: Conventions Used In The Documentation
® Preface R&S Conventions Used in the Documentation www.rohde-schwarz.com/product/etl ► If you install a new firmware version, the information in the C:\R_S\Instr\doc directory is updated also. 1.3 Conventions Used in the Documentation The following conventions are used throughout the product documentation. Typography Convention Description... - Page 11 ® Preface R&S Conventions Used in the Documentation The terms "select" and "press" can refer to any of the described methods, for using a key on the device or on a keyboard, or a mouse pointer in the display. Getting Started 2118.4130.02 ─ 04...
-
Page 12: Documentation Overview
® Documentation Overview R&S Basic Safety Instructions 2 Documentation Overview This chapter provides an overview of the R&S ETL user documentation. Unless speci- fied otherwise, you find the documents on the R&S ETL product page at: www.rohde-schwarz.com/manual/etl 2.1 Getting Started Manual Introduces the R&S ETL and describes how to set up and start working with the prod- uct. -
Page 13: Data Sheets And Brochures
® Documentation Overview R&S Application Notes, Application Cards, White Papers, etc. 2.5 Data Sheets and Brochures The data sheet contains the technical specifications of the R&S ETL. It also lists the options and their order numbers, and optional accessories. The brochure provides an overview of the instrument and deals with the specific char- acteristics. -
Page 14: System Overview
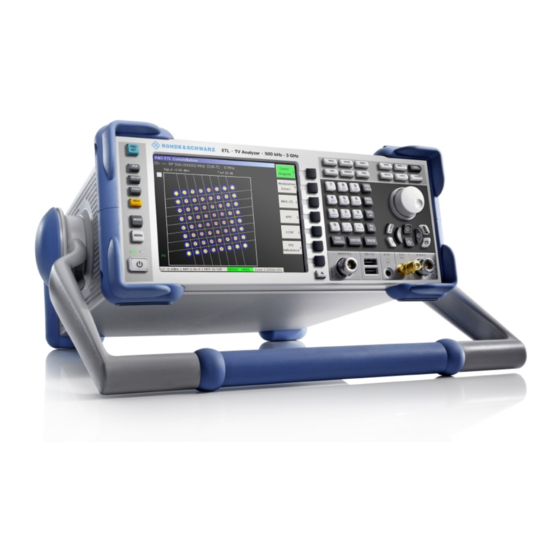
® System Overview R&S 3 System Overview The R&S ETL TV analyzer stands for all-in-one. The R&S ETL combines the function- ality of a TV and FM (radio) signal analyzer, a video and MPEG TS analyzer and a spectrum analyzer in a single instrument. The R&S ETL also contains generators to create analog video signals, audio signals and MPEG-2 transport streams. -
Page 15: Setting Up The Instrument
® Setting Up the Instrument R&S Unpacking the Instrument 4 Setting Up the Instrument Risk of injuries To avoid injuries to yourself or others, always follow the instructions provided in the fol- lowing chapters. Furthermore, observe the general safety instructions delivered with the R&S ETL. -
Page 16: Checking The Accessories
® Setting Up the Instrument R&S Putting Up the Instrument 4.1.3 Checking the Accessories The R&S ETL comes with the following accessories: ● Power cable ● Getting started manual 4.1.4 Warranty Conditions For information on warranty conditions for the R&S ETL, refer to the terms of the deliv- ery documents. - Page 17 ® Setting Up the Instrument R&S Putting Up the Instrument Risk of injury when stacking instruments A stack of instruments can tilt over and cause injury if not stacked correctly. Further- more, the instruments at the bottom of the stack can be damaged due to the load imposed by the instruments on top.
-
Page 18: Mounting The Instrument In A Rack
® Setting Up the Instrument R&S Putting Up the Instrument 4.2.2 Mounting the Instrument in a Rack The R&S ETL can be installed in a 19" rack mount by using a rack adapter kit (for order no. see data sheet). Follow the installation instructions that are part of the adapter kit. -
Page 19: Interfaces And Connectors
® Interfaces and Connectors R&S Front Panel 5 Interfaces and Connectors This chapter describes the front panel and the rear panel of the R&S ETL, including all function keys and connectors. When using the interfaces and connectors, take care to avoid electromagnetic interfer- ence. -
Page 20: On/Standby Key
® Interfaces and Connectors R&S Front Panel 9 = GEN OUT 50 Ω output 10 = USB interfaces 11 = AF OUT output 12 = RF IN 75 Ω input 13 = RF IN 50 Ω input 14 = Display 5.1.1 ON/STANDBY Key See (1) in Figure... -
Page 21: Keys For Operating Softkeys
® Interfaces and Connectors R&S Front Panel PRINT key Displays the softkeys of the print menu for: ● Customizing the screen printout. ● Selecting and configuring the printer. HELP key Displays the context-sensitive help. MODE key Opens a dialog box to change between measurement modes. MENU key Displays the highest softkey menu level of the current measurement mode. - Page 22 ® Interfaces and Connectors R&S Front Panel [AMPT] key Displays the softkeys of the amplitude menu for the following settings: ● Reference level ● Displayed dynamic range ● RF attenuation ● Unit for the level display ● Level offset ● Input impedance ●...
-
Page 23: Run Key
® Interfaces and Connectors R&S Front Panel [MKR->] key Displays the softkeys of the marker -> menu for: ● Using for search functions of the measurement markers (maximum/minimum of the trace). ● Assigning the marker frequency to the center frequency. ●... -
Page 24: Rotary Knob
® Interfaces and Connectors R&S Front Panel Inserts a decimal point "." at the cursor position. ● Sign key Changes the sign of a numeric parameter. In the case of an alphanumeric parame- ter, inserts a "." at the cursor position. ●... -
Page 25: Cursor Keys
® Interfaces and Connectors R&S Front Panel ● Moves the scroll bar vertically, if the scroll bar is focused and the edit mode is acti- vated. For details on the edit mode, refer to the user manual, chapter "Operating Concepts", or the help. -
Page 26: Gen Out 50 Ω Output
® Interfaces and Connectors R&S Front Panel [NEXT TAB] key Opens the next tab of the dialog box. 5.1.9 GEN OUT 50 Ω Output See (9) in Figure 5-1. Output of the tracking generator. Connect the DUT using a cable equipped with a male N connector. -
Page 27: Rf In 75 Ω Input (B203 Option)
® Interfaces and Connectors R&S Front Panel Danger of injuries If the volume is turned up fully, you may damage your hearing. Before putting on the headphones, check the volume setting (output voltage) carefully using the marker menu or the [MENU] key. This connector cannot be used simultaneously to the IF/Video output connector on the rear panel. -
Page 28: Rear Panel
® Interfaces and Connectors R&S Rear Panel 5.2 Rear Panel All standard connectors are located at the bottom of the rear panel (slot 1 in Fig- 5-2). All slots above are used for options. Each slot is specifically designed for one or several options, as listed in the legend of Figure 5-2. - Page 29 ® Interfaces and Connectors R&S Rear Panel The AC power switch also interrupts the power supply of the OCXO (OCXO Reference Frequency option, R&S FSL-B4). When switching the R&S ETL back on, be sure to comply with the extended warm up phase specified in the data sheet. For details on connecting to the AC power supply, refer to Chapter 6.2, "Connecting to the Power...
-
Page 30: Dc Power Supply (B230)
® Interfaces and Connectors R&S Rear Panel CCVS OUT Used in "TV Analyzer/Receiver" mode: ● Video source 75 Ω CCVS 1 Vpp – Analog TV: demodulated video signal With the Video Generator option (R&S ETL-K203) installed and the video gen- erator enabled: Video generator output 75 Ω... -
Page 31: Gpib Interface (B10)
® Interfaces and Connectors R&S Rear Panel Shock hazard The used power supply (SELV) must fulfill the requirements for reinforced/double insu- lation for main supply circuits in accordance to DIN/EN/IEC 61010 (UL 61010B.1, CSA C22.2 No. 1010.1) or DIN/EN/IEC 60950 (UL 1950, CSA C22.2 No. 950). It is rec- ommended to fuse the DC power supply according to Table 5-2. -
Page 32: Ocxo Reference Frequency (B4)
® Interfaces and Connectors R&S Rear Panel 5.2.4 OCXO Reference Frequency (B4) Optional; installed in slot 4, see Figure 5-2. Generates a very precise 10 MHz reference signal. The signal is output at the EXT REF standard connector, see page "EXT TRIG/GATE"... - Page 33 ® Interfaces and Connectors R&S Rear Panel ● Provides an analog audio generator signal intended to feed the “left signal” (L) or the multiplex (MPX) input of a FM stereo radio transmitter. – FM Stereo / FM Mono (R&S ETL-K110/111) SER DAT / AF GEN R OUT The output signal depends on the selected standard: ●...
-
Page 34: Additional Interfaces (B5)
® Interfaces and Connectors R&S Rear Panel I IN Accepts an analog I baseband signal. Used in combination with Q IN for all digital TV standards. 5.2.6 Additional Interfaces (B5) Optional; installed in slot 5, see Figure 5-2. POWER SENSOR LEMOSA female connector for connecting power sensors of the R&S NRP-Zxy family. -
Page 35: Av Decoder And Ts Processing (B380)
® Interfaces and Connectors R&S Rear Panel Figure 5-3: Pin assignment Signal Description +5 V / max. 250 mA Supply voltage for external circuits 2 to 7 Reserved for future use Ground READY FOR TRIG- Signal indicating that the R&S ETL is ready to receive trigger signal (low active = 0 V). -
Page 36: Mpeg Processing Board (B280)
® Interfaces and Connectors R&S Rear Panel Electromagnetic interference (EMI) can affect the measurement results. To avoid any impact, make sure that the conditions described in Chapter 6.1, "Preventing Electro- magnetic Interference", on page 37 are met. DVB COMMON INTERFACE Receptacle for a conditional access module (CAM) in line with the European EN50221 standard. -
Page 37: Li-Ion Battery Pack (B235)
® Interfaces and Connectors R&S Rear Panel Extends the functionality of the R&S ETL to analyze (R&S ETL-K282) and generate (R&S ETL-K280) MPEG-2 Transport Streams. Additionally, the MPEG Processing Board option can include the R&S ETL-B281 (Video/ Audio Hardware Decoder) option. An R&S ETL also fitted with this option provides functionality to decode TV programs (SDTV and HDTV) within an MPEG-2 Transport Stream. - Page 38 ® Interfaces and Connectors R&S Rear Panel Used alternatively as power supply. The Battery Pack is described in a separate man- ual (2112.1069.32) provided with the option. For the ratings of the power supply, refer also to the data sheet. For information on switching the R&S ETL on or off, refer to Chapter 7, "Switching On or Off the...
-
Page 39: Connecting The Instrument
® Connecting the Instrument R&S Preventing Electromagnetic Interference 6 Connecting the Instrument This chapter describes the power supply options and how to connect the R&S ETL to the power supply and external devices. 6.1 Preventing Electromagnetic Interference To prevent electromagnetic interference, the R&S ETL must be operated with all shielding covers fitted. -
Page 40: Connecting To The Power Supply
® Connecting the Instrument R&S Connecting to the Power Supply 6.2 Connecting to the Power Supply By standard, the R&S ETL uses an AC power supply. In order to use the R&S ETL independently from an AC power supply, the R&S ETL can be additionally fitted with a DC power supply (DC Power Supply option, R&S ETL-B230) and/or a battery pack (Battery Pack option, R&S ETL-B235). -
Page 41: Connecting Usb External Devices
® Connecting the Instrument R&S Connecting USB External Devices 6.3 Connecting USB External Devices Using the two USB interfaces on the front panel of the R&S ETL, you can directly con- nect USB devices to the R&S ETL. This number can be increased as necessary by using USB hubs. -
Page 42: Mouse
® Connecting the Instrument R&S Connecting USB External Devices 6.3.2 Mouse You can change settings such as the speed of the mouse cursor in Windows. For details, refer to the Windows documentation. 6.3.3 Memory Stick The R&S ETL has a disk drive. You can exchange data by using a memory stick which you plug into one of the USB interfaces. -
Page 43: Switching On Or Off The Instrument
® Switching On or Off the Instrument R&S Instrument States 7 Switching On or Off the Instrument Shock hazard Observe the basic safety instructions delivered with the R&S ETL, especially the instructions on electrical safety. Be aware that in standby, the R&S ETL is still power-supplied. For an overview on available power supplies, refer to Chapter 6.2, "Connecting to the Power... -
Page 44: Switching On The Instrument
® Switching On or Off the Instrument R&S Switching Off the Instrument 7.2 Switching On the Instrument Risk of instrument damage Before switching on the R&S ETL, make sure that the following conditions are met: ● The R&S ETL is set up as described in Chapter 4, "Setting Up the Instrument", on page 13. -
Page 45: Switching Off
® Switching On or Off the Instrument R&S Behavior of the ON/STANDBY Key Prerequisites: ● The R&S ETL is in operation. ● The R&S ETL is connected to the AC power supply. ● The AC power switch on the rear panel is in position I. ●... -
Page 46: Checking The Provided Options
® Switching On or Off the Instrument R&S Checking the Provided Options on the power supply options, refer to Chapter 6.2, "Connecting to the Power Supply", on page 38. Power supply Instrument state Action Instrument reaction Press the [ON/STANDBY] key. Changes into standby or off state, depending on the status of the "Shutdown Off/Standby"... -
Page 47: Turn-On Tests
® Switching On or Off the Instrument R&S Turn-On Tests A list with hardware and firmware information is displayed. 5. Check the availability of the hardware options as indicated in the delivery note. 6. Check the options enabled using license keys as indicated in the delivery note. For an overview of the all options available for the R&S ETL, refer to the product site https://www.rohde-schwarz.com/product/etl/ 7.6 Turn-On Tests... -
Page 48: Sample Application
® Sample Application R&S Performing the Measurement 8 Sample Application Follow the instructions in this chapter to perform your first measurement with the R&S ETL. For an expanded selection of measurement examples and background information, refer to the user manual or the help. The chosen example applies to the DVBC and J.83/A/C TV standard. - Page 49 ® Sample Application R&S Performing the Measurement 4. Press the "Digital TV" softkey. 5. Press the [MEAS] key. 6. Select the "Digital TV Settings" softkey. 7. Compare the modulation parameters. 8. Select the correct modulation standard. 9. Press the "Spectrum" softkey. 10.
-
Page 50: Operating The Instrument In A Lan
® Operating the Instrument in a LAN R&S Computer Name 9 Operating the Instrument in a LAN The R&S ETL is equipped with a network interface and can be connected to an Ether- net LAN (local area network). The network card operates with a 10 MHz Ethernet IEEE 802.3 or a 100 MHz Ethernet IEEE 802.3u interface. -
Page 51: Ip Address
® Operating the Instrument in a LAN R&S IP Address 5. Read out the name. To change the computer name 1. Access as above: [SETUP] > "General Setup" > "Network Address" > "Computer Name" 2. Enter the computer name. 3. If you have entered an invalid name, in the status line, an out of range message is displayed. -
Page 52: Connecting The Instrument To The Network
® Operating the Instrument in a LAN R&S Connecting the Instrument to a Computer 4. Press the "IP address" softkey. 9.3 Connecting the Instrument to the Network Risk of network failure/virus infection Before connecting the R&S ETL to a network or configuring a network, do the follow- ing: ●... -
Page 53: Windows 7 Or Later
® Operating the Instrument in a LAN R&S Firewall Settings 9.4.1 Windows 7 or Later If Windows 7 or a later Windows version is installed on the computer, you can set up a LAN connection really fast. 1. Activate DHCP on both the computer and the R&S ETL. 2. -
Page 54: Installed Software
® Installed Software R&S Operating System 10 Installed Software The firmware and the operating system are already installed on the R&S ETL. Further information ● Performing a firmware update: See the release notes. ● Installing software options: See the document delivered with the option key. 10.1 Operating System The R&S ETL has a Windows Embedded operating system with one of the following versions:... -
Page 55: Automatic Logon
® Installed Software R&S Operating System User name and password are factory-set as follows: ● User name: instrument ● Password: 894129 If the R&S ETL is connected to a network, and if the user name and the password are identical under Windows and on the network, you log on to Windows and the network at the same time. -
Page 56: Access To Windows Settings
® Installed Software R&S Additional Software 10.1.2 Access to Windows Settings The Windows settings are grouped in the Windows "Control Panel". For details, refer to the Windows documentation. Changing Windows settings requires a mouse and an external keyboard. To display the Windows desktop 1. -
Page 57: Backup And Restore Application
® Installed Software R&S Backup and Restore Application Using other software or hardware can cause the R&S ETL to perform improperly or faulty. The following program packages have been successfully tested for compatibility with the measurement instrument software: ● R&S ETL TxCheck 10.3 Backup and Restore Application Using the backup and restore application, you can back up the instrument installations and their configuration so that they can be restored if necessary. - Page 58 ® Installed Software R&S Backup and Restore Application The main dialog is displayed. It provides access to all functions of the backup and restore application. Figure 10-1: Main dialog (example) Getting Started 2118.4130.02 ─ 04...
-
Page 59: Creating A Backup
® Installed Software R&S Backup and Restore Application (1) = Header showing instrument type (2) = Header showing instrument name (3) = Free memory space on backup partition (4) = List of backups already created (5) = Description of currently selected backup To continue, see one of the following chapters: ●... -
Page 60: Restoring A Selected Backup Version
® Installed Software R&S Backup and Restore Application 10.3.2 Restoring a Selected Backup Version Using this function, you can restore the selected instrument installation and its configu- ration. Malware protection When restoring a backup, the Windows operating system and installed anti-malware software are probably outdated. -
Page 61: Maintenance
® Maintenance R&S Replacing the Fuses 11 Maintenance The R&S ETL does not need a periodic maintenance. What is necessary is essentially the cleaning of the R&S ETL. However, it is recommended to check the rated data from time to time. The address of our support center and a list of all Rohde &... - Page 62 ® Maintenance R&S Storing Shock hazard For fuse replacement, ensure that the R&S ETL is switched off and disconnected from all power supplies. 1. Open the lid of the AC power connector. 2. Lift the fuse holder out of its slot. 3.
- Page 63 ® Index R&S Index SER CLK / AF GEN L OUT ........30 SER DAT / AF GEN R OUT ........31 AC power connector ............26 TS ASI IN .............. 34, 35 AC power supply TS ASI OUT ............34, 35 connecting to ..............
- Page 64 ® Index R&S Information mode Safety issues ..............7 TV Analyzer ..............46 instrument states ............... 41 MODE key ................. 19 IP address ................. 49 network ................48 automatic logon ............52 AMPT ................20 connecting to .............. 50 BACK ................22 NEXT TAB key ..............
- Page 65 ® Index R&S Restore password ..............52 Main dialog ..............55 settings ............... 54 RF IN connector ..............25 Windows 8 .................52 rotary knob ................ 22 Windows XP ..............52 RUN key ................21 safety information ..............7 Safety information ............... 7 Safety instructions .............
Need help?
Do you have a question about the ETL 2112.0004.13 and is the answer not in the manual?
Questions and answers