SYMA Gyro Remote Control Series User Manual

SYMA Gyro Remote Control Series User Manual

2.4g 720p 4-channel pressure fixed position hovering 
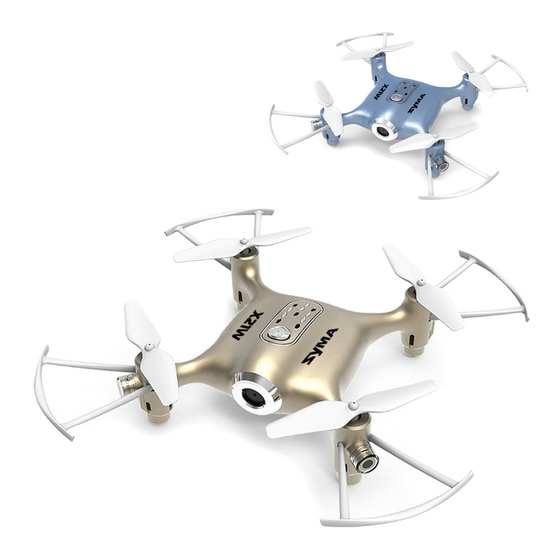
remote control drone
Hide thumbs Also See for Gyro Remote Control Series:

Advertisement

X
4-CHANNEL PRESSURE FIXED POSITION HOVERING
USER MANUAL
1
MAIN FEATURES
● Utilizes the 4-axis structure, enabling the drone to be even
more flexible, speedy.It can fly indoor .
● Built-in 6-axis gyro stabilizer to ensure accurate positioning
in-flight.
● The structure uses a modular design which makes it easy to
install and repair.
● Headless function making it easy for directional control.
● Pressure-fixed-position hovering function for Auto Hover Mode.
● 360° stunt flip.
● Auto take-off and landing.
● HD wifi real-time transmission aerial for getting the fun of
different photography.
GYRO REMOTE CONTROL SERIES
21W(720P)
REMOTE CONTROL DRONE
8+

Advertisement

Table of Contents
loading
Need help?

Need help?

Do you have a question about the Gyro Remote Control Series and is the answer not in the manual?

Questions and answers

Summary of Contents for SYMA Gyro Remote Control Series

  • Page 1 GYRO REMOTE CONTROL SERIES 21W(720P) 4-CHANNEL PRESSURE FIXED POSITION HOVERING REMOTE CONTROL DRONE USER MANUAL MAIN FEATURES ● Utilizes the 4-axis structure, enabling the drone to be even more flexible, speedy.It can fly indoor . ● Built-in 6-axis gyro stabilizer to ensure accurate positioning in-flight.
  • Page 2: Safety Guide

    Safety Guide 1. Please store the smaller-sized drone accessories in places that are out of reach of children. 2. This drone is very powerful. For all first-time flights, the left joystick must be slowly pushed up in order to prevent the drone from ascending too fast to avoid unnecessary collision and possible damage or injury.
  • Page 3: Package Description

    4.Transformers used with the toy are to be regularly examined for damage to the cord,plug,enclosure and other parts,and that,in the event of such damage,the toys must be used with this transformer until the damage has been repaired. Package Description The following items can be found in this product package: •...
  • Page 4 Phone clip holder dismantle: 1.Pull up the phone clip holder from behind the remote control. Battery Changing And Charging Methods For Drone Battery changing methods for drone 1.Press the power button on 2.Push the battery cover the top of the drone to 1-2S of drone backwards.
  • Page 5: Battery Installation For Remote Control

    stored in a cool and dry place. - Avoid dismantling the batteries. - During the charging of battery, avoid leaving the charging place. - Rechargeable batteries are to be removed from the toy before being charged; - Rechargeable batteries are only to be charged under adult supervision; - Exhausted batteries are to be removed from the toy;...
  • Page 6: Product Features

    1. Battery Installation Method: Open up the battery cover at the back of the remote control. Correctly place 4 x AA alkaline batteries in the battery box in strict adherence to the polarity instructions (the AA alkaline batteries are not included). 1.
  • Page 7 4. Fast/Slow Speed Function: Slow speed by default when first powered-on. Possible to switch the function mode of fast/ slow speed by pressing in on the right joystick for a short time. It is switched into fast speed mode when two “beep” sounds come from the remote control,pressing in on the right joystick for a short time under fast speed mode and then one “beep”...
  • Page 8 2. Press the power button on the top of the drone to 1-2s make sure the drone is turned“ON”, and Front adjust the specified direction of the drone’s head Left Right under the headless mode as the new forward Back direc.
  • Page 9 In the WiFi search list, look for a network called “FPV-WIFI- ****” and connect to it. Once connection has been established, exit the “Settings” option. 3.Open the SYMA GO App, click the “START” icon to enter the control interface. A full bar in the WiFi signal icon indicates the strongest possible signal.
  • Page 10 3. Interface icon instructions Mobile APP control interface WIFI Signal One key Take photo Record start/stop Time Right Joystick Left Joystick Trimming A One Key take-off/ Landing Trimming C Trimming B Click for display/hide the toolbar Display/hide Joystick Level Calibration/defining Return headless forward direction Flight-track...
  • Page 11: Flight Preparation

    2.When using the remote control to take photo ,the rear indicator light flashes on the drone , when record video , after the indicator light continued to flash twice stop, and then flash twice again ,press the photo/video button again to stop. note:When using the remote control to take photo/video ,If the drone is not loaded into the memory card, even if the indicator light will flash, no storage function.
  • Page 12 Method 2: Move the left and right joysticks inwards in an internal loop of “8” for 1 second, the blades of the drone start rotating slowly. Method 3: When the drone is stationary,press the B button, the drone automatically takes off and hovers at a certain height.
  • Page 13: Trimming Operation

    Drone Controlling Diagram Operating direction Ascending and descending control Forward and backward control When the left joystick (Accelerator) When the right joystick (Direction is pushed upwards or downwards, Rudder) is pushed upwards or the drone will ascend or descend downwards, the drone will advance correspondingly.
  • Page 14: Memory Card Installation

    Left/right side flight trim control While the drone is hovering in the air and automatically flies left/right, press in on the left joystick and at the same time push the right joystick left/right slightly to fine tune the direction. Don’t release the left joystick until the drone is flying in a stable state.
  • Page 15 This device must not be collocated or operating in conjunction with any other antenna or transmitter.” Decoration of Conformity lnserts: “Hereby, GuangDong Syma model aircraft lndustrial co.,ltd, declares that this drone is in compliance with the essential requirements and other relevant provisions of Directive 1999/5/EC...
  • Page 16: Accessories/Parts List

    Accessories/Parts List Body Body Rotor Blade Protective Frame (White) (Black) Battery Cover Silicone Rubber Lamp Cover Battery Cover (Black) Ring (White) Receiver Board LiPo Battery Motor A Motor B Remote Control Light Board USB Cable Card Reader Mobile Phone Retaining Clip -15-...
  • Page 17: Product Descriptions

    Product descriptions Product Name Qty. Product Name Qty. Top Main Body assembly Camera Board assembly X21W(720P) Memory card slot Bottom Main Body Camera Connecting Parts Blade(Clockwise Direction) Camera Cover Blade(Counter Clockwise Direction) Protective Gear Motor(Clockwise Direction) Motor(Counter-clockwlse Direction) Battery Silicone Rubber Ring Battery Cover Lamp Cover Light Board...
  • Page 18: Main Specifications

    Main Specifications 13.6cm 13.6cm Drone Length : 13.6cm Drone’s Width : 13.6cm Drone’s Height : 3.1cm Motor’s Model : Battery : 3.7V 380mAh lithium battery Rectification procedures Problem Reason Solution 1. The drone has entered into 1. Charge up the drone. The drone lowvoltage protection.
  • Page 19 Problem Reason Solution 1. Re-adjust the calibration The drone is until the drone is level flying towards 1. The drone is not calibrated to the ground. For further its side in one level to the ground. details, see No.3 on Page direction during 5 for details (Function of hovering...
  • Page 20 QR code for android iOS system system Manufacturer Guangdong Syma Model Aircraft Industrial Co., Ltd. The Crossing of No.2 West Xingye Road and North Xingye Road,Laimei. Industrial Park Chenghai District Shantou City Guangdong China. The company has the right of final interpretation...

This manual is also suitable for:

X21wGyro remote control seriesX15w

Table of Contents