SYMA GYRO REMOTE CONTROL SERIES User Manual
4-channel pressure fixed position hovering remote control drone 2.4g
Hide thumbs
Also See for GYRO REMOTE CONTROL SERIES:
- User manual (21 pages) ,
- User manual (15 pages) ,
- User manual (19 pages)
Advertisement
X
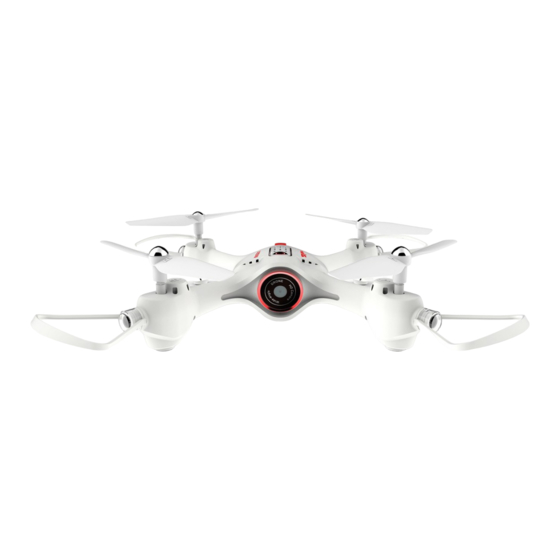
4-CHANNEL PRESSURE FIXED POSITION HOVERING REMOTE CONTROL DRONE
USER MANUAL
1
MAIN FEATURES
● Utilizes the 4-axis structure, enabling the drone to be even more
flexible, speedy.It can fly indoor.
● Built-in 6-axis gyro stabilizer to ensure accurate positioning
in-flight.
● The structure uses a modular design which makes it easy to
install and repair.
● Headless function making it easy for directional control.
● 360° stunt flip.
● Pressure-fixed-position hovering function for Auto Hover Mode.
● Auto take-off and landing.
● HD real-time transmission aerial for getting the fun of
different photography.
GYRO REMOTE CONTROL SERIES
23W
8+
Advertisement
Table of Contents

Related Manuals for SYMA GYRO REMOTE CONTROL SERIES


Summary of Contents for SYMA GYRO REMOTE CONTROL SERIES
- Page 1 GYRO REMOTE CONTROL SERIES 4-CHANNEL PRESSURE FIXED POSITION HOVERING REMOTE CONTROL DRONE USER MANUAL MAIN FEATURES ● Utilizes the 4-axis structure, enabling the drone to be even more flexible, speedy.It can fly indoor. ● Built-in 6-axis gyro stabilizer to ensure accurate positioning in-flight.
-
Page 2: Safety Guide
Safety Guide 1. Please store the smaller-sized drone accessories in places that are out of reach of children. 2. This drone is very powerful. For all first-time flights, the left joystick must be slowly pushed up in order to prevent the drone from ascending too fast to avoid unnecessary collision and possible damage or injury. -
Page 3: Package Description
Package Description The following items can be found in this product package: • Drone • USB Charging Cable • Remote Control • Mobile Phone • Instruction Manual Retaining Clip • Main Blades Phone Clip Attachment/Removal Method Phone clip holder Phone clip holder installation: removal: 3.Hold the elastic... - Page 4 The charging time is about 130 minutes; Hover flight time is approximately 7 minutes. Precautions as follows during charging of battery: - Avoid placing the active batteries in places with direct exposure, sunlight and high temperatures. For example, naked light or electrical equipment installations;...
- Page 5 1. Battery Installation Method: Open up the battery cover at the back of the remote control. Correctly place 4 x AA alkaline batteries in the battery box in strict adherence to the polarity instructions (the AA alkaline batteries are not included). 1.
- Page 6 2. Turning on the drone Method 1:Push the left joystick (throttle) to the highest point and then back to the center, the blades of the drone start rotating slowly. Method 2:Push the left and right joysticks to the bottom inner corners for 1 second, the blades of the drone start rotating slowly.
- Page 7 Drone Controlling Diagram Operating direction Ascending and descending control Forward and backward control When the left joystick (throttle) is When the right joystick (rudder) is pushed upwards or downwards, pushed upwards or downwards, the drone will ascend or descend the drone will fly forward or correspondingly.
-
Page 8: Product Features
Left/right side flight trim control If the drone automatically flies towards the left/right side while hovering, press in the left joystick and at the same time push the right joystick right/left slightly to fine tune the direction. Don’t release the left joystick until the drone is flying in a stable state. - Page 9 5. 360° Stunt Flip Function: When you are familiar with the basic actions, you can proceed to explore even more exciting stunt actions. Fly the drone to a height of 3M above the ground, push the upper right corner button (Stunt Flip Button) on the remote control and simultaneously push the right joystick to the farthest position of Front/Back/Left/Right, the drone will now execute the Front/Back/Left/Right stunt flip action.
- Page 10 WLAN search list, look for a network called “FPV-WIFI- ****” and connect to it. Once connection has been established, exit the “Settings” option. 3.Open the SYMA GO App, click the “START” icon to enter the control interface. A full bar in the WiFi signal strenght icon indicates the strongest possible signal.
- Page 11 3. Interface icon instructions Mobile APP control interface Signal Strength One key Take phone Record start/stop Time Right Joystick Left Joystick Trimming A One Key take-off/ Landing Trimming C Trimming B Click for display/hide the toolbar Display/hide Joystick Level Calibration/defining Return headless forward direction Flight-track...
- Page 12 This device must not be collocated or operating in conjunction with any other antenna or transmitter.” Decoration of Conformity lnserts: “Hereby, GuangDong Syma model drone lndustrial co.,ltd, declares that this drone is in compliance with the essential requirements and other relevant provisions of Directive 2014/53/EU.”...
-
Page 13: Accessories/Parts List
Accessories/Parts List Body(White) Body(Black) Rotor Blade Protective Frame Gear assembly Receiving plate Receiving plate Front trim (White) base(White) base(Black) Electroplated trim Front trim (black) Upper trim (Black) Upper trim (White)) (Red) Electroplated trim Lamp cover LiPo Battery(White) LiPo Battery(Black) (Silver) Receiver Board WiFi receiver board Motor A... -
Page 14: Product Descriptions
Product descriptions Product Name Qty. Product Name Qty. Top Main Body Gear assembly Bottom Main Body Protective frame Blade(Clockwise Direction) Battery Blade(Counter Clockwise Direction) Releiver Board Motor(Clockwise Direction) Receiving plate base Motor(Counter-clockwlse Direction) Front trim Blade cover Lamp cover -13-... -
Page 15: Main Specifications
Main Specifications 210 mm 210 mm Drone’s Length : 210mm Drone’s Width : 210mm Drone’s Height : 50mm Motor’s Model : Ø8 Battery : 3.7V/500mAh lithium battery Rectification procedures Problem Reason Solution 1. The drone has entered into 1. Charge up the drone. The drone low voltage protection. - Page 16 Problem Reason Solution 1. Re-adjust the calibration The drone is until the drone is level flying towards 1. The drone is not calibrated to the ground. For further its side in one level to the ground. details, see No.3 on Page direction during 7 for details (Function of hovering...
- Page 17 QR code for apple QR code for android iOS system system Manufacturer Guangdong Syma Model Aircraft Industrial Co., Ltd. The Crossing of No.2 West Xingye Road and North Xingye Road,Laimei. Industrial Park Chenghai District Shantou City Guangdong China. Contact person: SYMA Telephone:+86 0754-86381898 The company has the right of final interpretation of this instruction manual statement.
Need help?
Do you have a question about the GYRO REMOTE CONTROL SERIES and is the answer not in the manual?
Questions and answers