Table of Contents
Advertisement
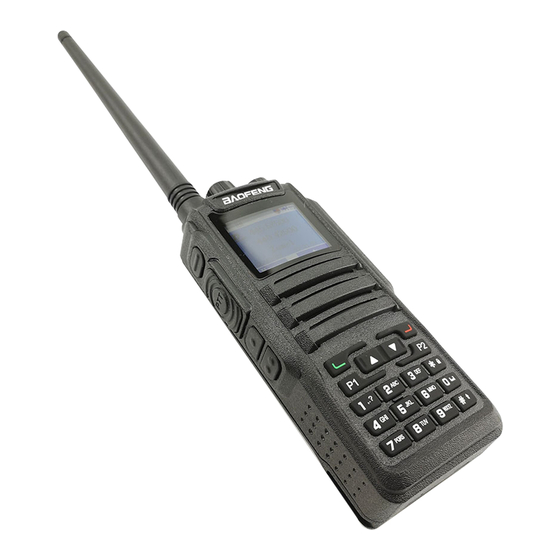
Thank you for your favor with our products.
We are dedicated to providing high performance and high stability radio communication products. This two-way
radio is no exception. The radio is a DMR dual-slot digital walkie-talkie developed and produced by my team with
3000 memory channels, full-color LCD display and full keyboard hand-tuning function. In order to make you fully
understand the various advantages of the radio performance and use and maintenance methods, please read
this manual carefully.
Main Features
Broadband walkie talkie
Support UV double segment, frequency range UHF400.000-480.000MHz / VHF136.000-174.000MHz
DMO True2-Slot dual time slot
Direct mode dual-slot communication achieves two groups of calls at a frequency point at the same time, so
that the communication efficiency is doubled and frequency resources are saved
Digital and analog compatible, smooth over
Support DMR digital and analog two communication modes to ensure that the original analog products
smooth transition to digital products to meet different communication needs
Digital signaling function
Rich calling modes that support DMR protocol, including single call, group call and all call; supports remote
inhibit function and other applications
SMS function
Supports SMS, text editing and draft in 64 characters in Chinese and English, so that text messages calls can
be sent when voice call is inconvenient
High sound quality
This digital two-way radio uses advanced AMBE +2TM voice processing technology to achieve high quality
Manual writing-frequency
Supports channel / frequency mode, allows manual writing-frequency in frequency mode, and
writing-frequency software can be used to set the required frequency without connecting the computer
High/low power switch
Meets the power requirements of different call distances to save more energy
To users:
Advertisement
Table of Contents

Related Manuals for Baofeng DM-1701


Summary of Contents for Baofeng DM-1701
- Page 1 To users: Thank you for your favor with our products. We are dedicated to providing high performance and high stability radio communication products. This two-way radio is no exception. The radio is a DMR dual-slot digital walkie-talkie developed and produced by my team with 3000 memory channels, full-color LCD display and full keyboard hand-tuning function.
-
Page 2: Table Of Contents
Alarm function Supports general alarm and silent alarm in emergency situations Digital mode supports the use of relays Side buttons can be customized without changing the user’s operating habits Contents 1. Familiar with this machine------ 4 Key introduction----- 4 Programmable key -------5 2. - Page 3 5. Emergency alarm function -------------------10 Receive emergency alert ----------------11 Reply to emergency alert -------------------------------12 Send emergency alert ---------------------------12 Send emergency alert with call ------------------------13 Send an emergency alert with voice following-------------- 14 Restart emergency mode --------------15 Exit emergency mode 6. Menu Function Operation -------------------15 Menu navigation --------------------------15 Character input------------------------------ 15 English alphabet pattern: ----------------------16...
- Page 4 SMS function--------------25 Edit and send SMS ------------------25 Send pre-sent text messages-----------------26 Send SMS using the one-touch call button --------------------27 Manage sending failed messages ---------------27 Manage sent SMS -----------------29 Receive SMS ----------------------31 View SMS ----------------------32 Manage Received SMS --------------------32 Check your inbox SMS -----------------------33 Reply to inbox message -------------------------33 Delete messages in your inbox--------------34 Delete all messages in your inbox--------------34...
- Page 5 Turn on or off keyboard sound ----------------42 Set power level ----------------43 Control the screen backlight -------------------43 Set noise reduction level --------------44 Open or close the boot screen ----------------------45 Lock the key and unlock the key -----------------------45 Language Selection -----------------46 Turn LED on or off----------------46 Turn VOX function on or off ---------------47 Power on password ----------------48 Clock -----------------48...
- Page 6 ■ Description of Buttons Switch between transmission and reception; when transmitting, press this button and speak to the [PTT]Transmit button microphone; release the button to receive. Side button 1 Short press this button to quickly switch the upper and lower screen. * Defaults to Up and down screen Press and hold it to enter the alarm mode, press and hold it again or press briefly to exit the alarm mode.
- Page 7 Press and hold this button to lock on / off keyboard [*]button Code word * in DTMF function Switch the input method in input method interface. [#]button Code word # in DTMF function ■ Programmable Buttons In order to improve the operational convenience, the function shortcut keys provided by this product are 【SK1】 key, 【SK2】 key, 【SK3】...
-
Page 8: Preparation Before Use
RF radiation information This product is intended for professional applications that meet RF radiation requirements. Users must be aware of the hazards of RF radiation and take appropriate measures to meet the requirements of RF radiation limit. Common sense in RF radiation RF refers to the electromagnetic frequency that can be radiated into space. - Page 9 Red light In charging Green light The charging is completed Note: For best battery performance, charge for a minimum of 4 hours on first charge. ■Battery information ●The first use of the battery Since the battery is not fully charged at the factory, please charge the new battery before use. Under normal circumstances, the battery when used for the first time, need to charge 4 hours, lithium-ion battery charging using slow charge or fast charge can be performed when charging.
- Page 10 ★Please do not charge the battery when the battery power is not used up (after the battery is exhausted, the voice prompt alarm will be given), which will shorten the service life of the battery. ★Do not put a fully charged battery back on the charger to "power up" again, as this operation significantly reduces the cycle life of the battery.
-
Page 11: Status Indication
■ Accessories installation 1. Install / remove the antenna Turn off the radio and insert the antenna into the mounting hole and turn clockwise. (Figure 1-1) When removing the antenna, turn it counterclockwise to remove the antenna. (Figure 1-2) Do not shake the top of the antenna by hand, otherwise it will reduce the working performance and service life of the antenna. -
Page 12: Volume Adjustment
Currently pointing to the main analog mode; press A/B button to switch the main channel up and down. When double-waiting is turned on and works in analog sub-channel, the icon is ★LED Indicators This product has LED indicators so you can easily grasp the current operating state. Indicator status Product status Red on... -
Page 13: Receive And Reply Group Call
★VFO frequency mode frequency setting In frequency mode, long press 【BACK】 key on the standby interface, V on the right side of the screen means that it is in manual input frequency mode. You can manually input the frequency and specify a certain frequency to transmit. -
Page 14: Receive And Reply Single Call
until the call is answered. Press 【BACK】 to enter the main screen and view the caller's alias before reply. ★Receive and reply single call A single call is an individual walkie-talkie call to another individual walkie-talkie. There are two types of single call types: the first type, the walkie talkie presence test is performed before the call is ready, and the other type is ready for the call immediately. -
Page 15: Start A Single Call
2. Hold the walkie talkie in its upright position and keep it at a distance of 1 to 2 inches (2.5 to 5.0 cm) from the mouth. 3. Press 【PTT】 key to initiate a call, LED indicator light is red. The screen displays the talk group alias or ID, as well as the group call icon. -
Page 16: Emergency Alarm Function
1. Press the preprogrammed one-touch call button to initiate a group or single call to a predefined alias or ID. 2. Hold the walkie talkie in its upright position and keep it at a distance of 1 to 2 inches (2.5 to 5.0 cm) from the mouth. -
Page 17: Receive Emergency Alert
Alarm initiator to exit the alarm mode, there are two cases: ●Turn off the radio to exit the whole machine alarm. ● in other ways, when exiting alarm mode, the alarm on the current channel can only be temporarily exited. When reselecting the channel, the alarm will continue;... -
Page 18: Reply To Emergency Alert
Short press 【BACK】 key, and then press the pre-programmed alarm close key, clear the prompt of receiving emergency alarm and exit emergency mode. ★Reply to emergency alert When receiving an emergency alert: 1. Press any key to stop all audible alerts that have received an emergency alert. 2. -
Page 19: Send An Emergency Alert With Voice Following
Or press the pre-programmed alarm close button to exit emergency mode. 8. The walkie talkie returns to the home screen. If your transceiver is set to "Mute," it will not display any voice or visual cues in Emergency Call mode and will not receive any response (call) from the target transceiver until you press the {PTT} key to initiate the call. -
Page 20: Menu Function Operation
If the radio is turn off, it will exist the emergency mode. When you turn on again, the radio won’t start resume emergency mode ★ Individual Operation This feature is ideal for people who work alone. If you encounter unexpected situations during individual operation, you can’t operate the radio in preset time. - Page 21 ■ Input Method You can enter user aliases, numbers and text messages via the keypad. This product supports the English input method, Simplified Chinese Pinyin input method, and number input method. When inputting user alias, ID or SMS, if there is no content in the editing area, press 【BACK】 to return to the last menu, Or if there is content in the editing area, press 【BACK】...
-
Page 22: How To Use The Menu
■ Simplified Chinese Pinyin Input Method 1. Press [#] to switch to Pinyin input method (LCD shows PY). 2. Press number buttons to enter the pinyin, and the LCD shows the alternate pinyin and corresponding candidate Chinese characters. 3. Press []/ [] to select the desired pinyin. 4. -
Page 23: Remote Monitoring
contact list) and stays in the display interface. Press [EXIT] to exit. ■Radio detection In digital mode, you can initiate radio detection to a contact without interfering with each other to confirm whether the other party has turned on the unit or uses in the current channel. ... - Page 24 “Transmission failed and inhibited”. It can be activated by SMS writing frequency or wake-up. Note: This function works only if the function is set and turned on by writing-frequency software. ■Contact list settings Contact list provides "Address Book" for handheld walkie-talkies. Each entry corresponds to an alias or ID used to initiate the call.
-
Page 25: Check Out The Latest Call Number
8. You will hear a short tone; the screen shows the termination of the call. If you release the PTT key while the walkie talkie is setting up a call, it exits without any hint and returns to the previous screen. walkie talkies can be preprogrammed to perform walkie-talkie presence detection prior to setting up a single call. -
Page 26: Initiate A Call From The Communication List
keyboard tone is on, a bass tone sounds. ■Calling prompt operation Call Alert Allows you to prompt a specific walkie talkie user to call you back when possible. This feature is only available for user aliases or IDs, and can be accessed via the menu via Contacts or Manual Dialing. - Page 27 8. The LCD shows the SMS :< User/Call group alias or ID>, confirm that the SMS is being sent. 9. If the message sent successfully, a beep sound, and the screen shows the message has been sent. Or if the message has not been sent, a high-pitched tone sounds and the screen shows that the message has failed to be sent.
- Page 28 Or if the message has not been sent, the screen shows that the message has failed to be sent. Forward SMS Choose forward to send the SMS to another user/call group alias or ID. 1.Press the【】/【】button to select “Forward” ,press the【MENU】button to make a choice. 2.Press the【】/【】button to required alias or ID ,press the【MENU】button to make a choice.
- Page 29 Use the Menu function: 1.Press the【MENU】button to enter into the MENU mode. 2.Press the【】/【】button, Select “SMS” ,press the【MENU】button to make a choice. 3.Press the【】/【】button, Select “Sent SMS”, press the【MENU】button to make a choice. 4.Press the【】/【】button to required SMS, then press the【MENU】button to make a choice. If the SMS was sent by Email program, it will appear a subject line, the icon at the top right of the screen indicates the state of the SMS.
-
Page 30: Receive Sms
show a icon indicated sent failed at this stage. Delete the already sent SMS in “Already sent item” file Use the Menu function: 1.Press the【MENU】button to enter into the MENU mode. 2.Press the【】/【】button, Select “SMS ”,press the【MENU】button to make a choice. 3.Press the【】/【】button, Select “Sent SMS”, press the【MENU】button to make a choice. - Page 31 Store messages in your inbox according to the most recently received in sequence. You can return to the previous screen by pressing the【BACK】button at any time. Read the SMS in the inbox 1.Press the【MENU】button to enter into the MENU mode. 2.Press the【】/【】button, Select “SMS ”,press the【MENU】button to make a choice.
-
Page 32: Encryption
5.Press the【MENU】button again to enter into the sub-menu. 6.Press the【】/【】button to delete, then press the【MENU】button to make a choice. 7.Press the 【 】 / 【 】 button to “YES” when the Delete appears, then press the 【MENU】 button to make a choice. 8. -
Page 33: Scan List
2. DTMF number-> input corresponding number. 3. In the channel information, choose the corresponding receive signal system (same system as step 2) tick the decode X (the same number as step 2) 4. When receive the corresponding DTMF number, the activation and remote kill function will be achieved. Radio remote kill Use the Menu function: 1.Press the【MENU】button to enter into the MENU mode. - Page 34 Read the scan list 1. Use the channel knob to choose a channel with pre-programmed scan list; 2.Press the【MENU】button to enter into the MENU mode; 3.Press the【】/【】button to scan, then press the【MENU】button to make a choice; 4.Press the【】/【】button to read the list, then press the【MENU】button to make a choice; 5.Use the【】/【】button to read every member in the list.
-
Page 35: Scan Reply
5.Use the【MENU】button to make a choice. 6. When the scan is activated, the red LED indicator light flash, and the scan icon will appear in the screen; Or when the scan is stopped, the LED light will be off and no scan icon is displayed. Scan Reply During scan, the radio will stop at the channel/group calls when the radio detect activity channel/group calls, This is called as the pre-programmed time limit for the “Scan suspend time”... -
Page 36: Offline
5~15 sec Turn off the backlight automatically when the time is up Normally Normally filter the useless calls or background noise Squelch Level Strictly Strictly filter the useless calls or background noise Picture Display according to the picture provided by the customer Boot interface Preset Two lines, can be edited by host computer... -
Page 37: Turn On Or Off Keyboard Sound
8. The screen back to the upper menu automatically. • Even when the radio is turn off, the radio is kept off-line situation. Radio tone/Prompt tone Including below options: • All tones • Call permission • Keyboard tones All tones If necessary, you can start or stop all the radio tones and prompt tones (except the emergency tones) Turn on or turn off all the radio tones according to the all tones on/off by pre-programmed. - Page 38 high or low. The menu functions as follows: 1. Press【MENU】to enter menu mode. 2. Press【】/【】to set, then press【MENU】to select. 3. Press【】/【】to the radio setting, then press【MENU】to select. 4. Press【】/【】to transmitting power, then press【MENU】to select. 5. Follow the screen prompt to change the current Settings. 6.
-
Page 39: Language Selection
2. Press【】/【】to set, then press【MENU】to select. 3. Press【】/【】to the radio setting, then press【MENU】to select. 4. Press【】/【】to the boot screen, then press【MENU】to select. 5. The screen displays open, press【MENU】to enable the boot screen display, and the screen displays it is open. •... -
Page 40: Power On Password
when the microphone on the attachment with VOX function detects the voice, the radio will automatically transmit the signal during the programmed time period. Press the【PTT】during the radio operation will disable the VOX function, to re-enable the VOX function need perform one of the following operations: •... - Page 41 The menu functions as follows: 1. Press【MENU】to enter menu mode. 2. Press【】/【】to set, then press【MENU】to select. 3. Press【】/【】to the radio setting, then press【MENU】to select. 4. Press【】/【】to the clock, then press【MENU】. 5. Press【】/【】to the time, then press【MENU】to select, which indicates the current time. 6.
-
Page 42: Mode
mode. In frequency mode, long press 【BACK】 to switch between frequency mode and channel mode. In frequency mode, you can manually type the frequency. Single-call matching The menu functions as follows: 1. Press【MENU】to enter menu mode. 2. Press【】/【】to set, then press【MENU】to select. 3. - Page 43 2. Press【】/【】to set, then press【MENU】to select. 3. Press【】/【】to the radio setting, then press【MENU】to select. 4. Press【】/【】to the radio number, then press【MENU】to select. 5. The screen shows the radio ID and name. Check radio version Check and indicate this radio’s firmware version, CPS version information. The menu functions as follows: 1.
-
Page 44: Channel Name
8. After the changes, press【MENU】, the screen shows that the transmitting frequency has been saved. Note: According to frequency range of software limit frequency changes when editing and changing frequency, if less than the frequency range of software, then the final change results will be the minimum value settings on the software, the opposite is maximum. -
Page 45: Color Code
3. Press【】/【】to the radio configuration, then press【MENU】to select. 4. Use the keyboard to type the correct radio configuration password (software Settings), then press【MENU】to select. 5. Press【】/【】to CTCSS, then press【MENU】to select. 6. Press【】/【】to CTCSS encode, then press【MENU】to select. 7. The screen shows turn off a group of CTCSS encode number, press【】/【】to close, then press【】/ 【】to select, there is no CTCSS encode value, the screen shows CTCSS encode is closed;... - Page 46 Relay Station Time Slot The relay time slot refers to the slot for voice communication or data transmission, which only can be modified within the digital channels. Method of cooperating MENU: Entering the menu via [MENU] button. Press【】/【】to find SETTING, press [MENU] to confirm. Press【】/【】to find CONFIGURATION, press [MENU] to confirm.
- Page 47 Press【】/【】to find CONFIGURATION, press [MENU] to confirm. Input the correct configuration password (setting by programming), press [MENU] to confirm. Press【】/【】to find the group call list, press [MENU] to confirm. Press 【】 / 【】 to select the group call list, which can delete or add the group member. Press 【】 / 【】 to add group call list, which can add the new group call.
- Page 48 Problem Reason Solution The battery doesn’t be installed Remove and re-install the battery. correctly. The battery runs out. Charging or change a new battery. The radio doesn’t start. The battery is poor contact causing Clearing the contact. Please get contact with by damaged or dirty.
- Page 49 ◆Wipe the radio on dirt with dust, lint free cloth, to prevent poor contact. ◆After long term use of radio, walkie talkie buttons, control knobs and chassis are easy to dirty. You can use neutral detergent (do not use strong corrosive chemicals) and wet cloth to clean. After cleaning, make sure the radio is completely dry;...
Need help?
Do you have a question about the DM-1701 and is the answer not in the manual?
Questions and answers