Advertisement
Quick Links
Advertisement

Related Manuals for Baofeng 5RH PRO Series


Summary of Contents for Baofeng 5RH PRO Series
- Page 1 Amateur Radio 5RH PRO SERIES USER’S MANUAL...
- Page 2 PREFACE Thank you very much for choosing our Multi-Band Amateur Radio in favor of our products. This Amateur radios utilizes the latest advanced technology to provide reliable communications in today's demanding communications environments. It is extremely stable and reliable for long distance communication with a sleek and compact design. It feature s emergency alarm, personnel death alarm, work alone, GPS, APRS position reporting, analog DTMF, 2TONE, 5TONE, CTCSS/DCS encode/decode.
- Page 3 Table of Contents Chapter 1. Getting Started 5.5 Frequency (VFO) mode 1.1 Regulations and Safety Warnings 5.6 Channel (MR) mode and Channel selection 1.2 Content of the packaging 5.7 Select a Zone 1.3 Features and Functions 5.8 Making a call Chapter 2.
- Page 4 Chapter 1. Getting Started 1.1 Regulations and Safety Warnings FCC Regulatory Conformance This equipment has been tested and found to comply with the limits for a Class B digital device, pursuant to Part 15 of FCC Rules. These limits are designed to provide reasonable protection against harmful interference in a residential installation. This equipment generates and can radiate radio frequency energy.
- Page 5 RF Exposure Compliance and Control Guidelines and Operating Instructions To control your exposure and ensure compliance with the occupational/ controlled environmental exposure limits, always adhere to the following procedures. Guidelines: • Do not remove the RF Exposure Label from the device. •...
- Page 6 3. Do not operate the product near any medical or electronic equipment that is vulnerable to RF signals. 4. Do not hold the product while driving. 5. Do not operate the product in any area where use of wireless communication equipment is completely prohibited. Important Tips To help you make better use of the product, be sure to observe the following instructions: 1.
- Page 7 • 1 Radio body • 1 Belt Clip • 1 Antenna • 1 Lithium-Ion battery pack • 1 Desk charger (With wall-wart) • 1 Wrist Belt • Instruction Manual *If any item is missing, please notify your Baofeng / Pofung dealer.
- Page 8 1.3 Features and Functions • 1.77" TFT large screen, full keyboard, fully open menu operation • Scanner function: VFO scan range setting, three scan recovery methods, channel scan, CTC/DCS scan, scan channel addition and removal • 108-136,136-174,220-260,350-390,400-520MHz Multiband scanning receiver (*Suitable for North American users) *144-146MHz, 430-440MHz...
- Page 9 Chapter Battery Information 2.1 Charging the Battery Pack The Li-ion battery pack is not charged at the factory; please charge it before use. Charging the battery pack for the first time after purchase or extended storage (more than 2 months) may not bring the battery pack to its normal maximum operating capacity.
- Page 10 injure a human. If the battery terminals are short circuited it will generate a lot of heat. Take care when carrying and using the battery. Remember to put the battery or radio into an insulated container. Do not put it into a metal container. 2.3 How to Charge a.
- Page 11 » Never store the battery in unsafe surroundings, as a short may cause an explosion. » Do not put the battery in a hot environment or throw it into a fire, as it may cause an explosion. 2.6 Using the Type-C USB Charger The Type-C USB charger is a handy port that allows you to conveniently charge your Li-ion battery pack.
- Page 12 3.3 Installing the battery pack Before attaching or removing the battery make sure your radio is turned off by turning the power/volume knob all the way counter-clockwise. 1). Make sure the battery is aligned in parallel with the radio body with the lower edge of the battery about 1-2cm below the edge of the radio.
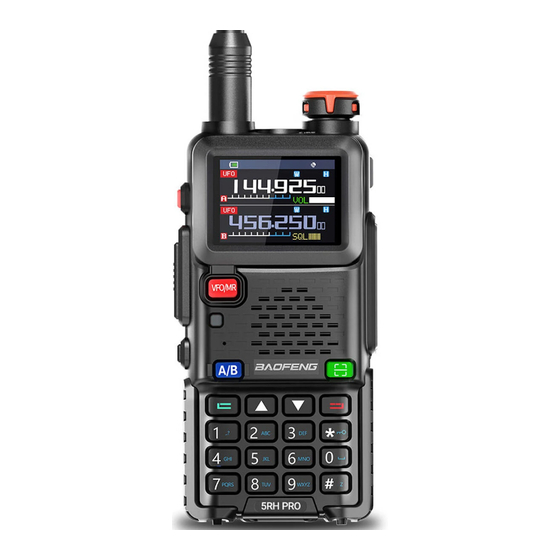
- Page 13 Chapter4. Radio Overview 4.1 Buttons and controls of the radio 1. Power/Volume knob 2.SK1- Broadcast FM and Alarm key 3. PTT key 4. VFO/MR mode key 5. Status LED 6. SK2-Flashlight and Monitor key 7. A / B select key Key (MENU) 9.
- Page 14 4.2 Main keypad controls ◎ VFO/MR: Short press to switch VFO/MR mode. Press and hold to switches channel display mode: Channel CH, Frequency (display small channel number), Name (channel alias). ◎ A/B: Short press to switches between A (upper) and B (lower) displays. Press and hold to switch Double Wait / Signal Wait / Off dual watch mode.
- Page 15 To enable or disable the BT feature. The BT earpiece can work properly only after the BT feature is enabled. Man Down To enable or disable the Man Down feature. One Touch Call To make a call or send a message to the preset contact or implement an auxiliary feature. Zone To Switch between the two zone.
- Page 16 4.5 LCD icon summary 。 *The highlighted band is the main channel (i.e., the working band) and the grayed-out band is the sub band (the watch band)
- Page 17 Make sure you can hear the DTMF side tone from the radio speaker, set to DT-ST, Reverse function enabled ANI-ST, DT+ANI. 2TONE signaling enabled for current Enables access of repeaters in VFO/Frequency Mode. TX channel/frequency will be shifted higher in frequency than RX。 5TONE signaling enabled for current Enables access of repeaters in VFO/Frequency Mode.
- Page 18 careful not to turn it too far, as you may inadvertently turn your radio off. 5.3 Main Band/Sub Band Switch Press the [A/B] key switches between A (upper) and B (lower) displays. The frequency or channel on the selected display becomes the active listening and transmit frequency or channel.
- Page 19 will switch to channel 12. When the voice prompt function is enabled, the corresponding channel will be broadcast by voice. 5.7 Select a Zone A zone is a group of channels with the same property. The radio supports up to 10 zones, with a maximum of 64 channels per zone. To select a zone, do one of the following: key go to Menu >...
- Page 20 Method 1: Press key go to the main Menu -> Radio Settings -> Press/ Longpress of "SK1/SK2" as [FM Radio], and turn on or off the radio by pressing the preset [FM Radio] key. Method 2: Press key go to the main Menu -> Radio Settings ->Radio On/Off, turn the radio on or off. After turning on the radio function, the station search method is as follows: -Press key to enter radio search mode, the screen displays 'Seeking...', the radio will automatically save the searched radio frequency as a...
- Page 21 5.15 TX Repeaters tone Tone-burst 1750Hz, but also 1000Hz, 1450Hz, 2100Hz, these tone-bursts are mainly used for repeater activation and are more common in Europe. Before using the Tone-burst function, the SK1/SK2 programmable key must be defined as the “1750Hz” function. Press the pre-programmed [1750Hz] key to send 1750Hz tone-bursts.
- Page 22 weather channel and automatically cycles through the work channel and weather alert channel. Activate the Weather Alert feature and receive a 1050 HZ alert signal, you will hear a loud beep and the radio will automatically switch to weather broadcast mode. NOAA Weather Shortcuts In standby mode, press and hold [0] key to quickly enter the NOAA weather menu, press ...
- Page 23 In frequency mode, the frequency sweep range can be precisely set. Input the start value and end value of the sweep frequency through the keyboard. EX: Enter 144146, in frequency mode, scan in the range of 144.000-146.000MHZ. Enter 430440, in frequency mode, scan in the range of 430.000-440.000MHZ.
- Page 24 (3) Press or to select CTCSS; (4) Press the key to enter the CTCSS code, and scan the CTCSS code in sequence. When a valid CTCSS code is scanned, it stays on the CTCSS code and the speaker is turned on. (5) Press the key to store the scanned CTCSS code and exit the scan to return to the previous menu.
- Page 25 corresponding CTCSS/DCS code of the current channel or frequency. 6.2 DTMF DTMF is an in-band signaling method using dual sinusoidal signals for any given code. Originally developed for telephony systems, it has proved a very versatile tool in many other areas. In two-way radio systems, DTMF is most commonly used for automation systems and remote control.
- Page 26 6.5 Dual Watch In certain situations, the ability to monitor two channels at once can be a valuable asset. This can be achieved in one of two ways. You can either have one receiver in your radio and flip-flop between two frequencies at a fixed interval (known as Dual Watch), or you can equip a radio with two receivers (known as Dual Receive or Dual VFO).
- Page 27 Frequency Mode (VFO): Used for a temporary frequency assignment, such as a test frequency or quick field programming if permitted. Channel Mode (MR): Used for selecting preprogrammed channels. Ex 1. Programming a Channel Repeater Offset with CTCSS Tone EXAMPLE New memory in Channel 28: RX = 432.55000 MHz TX = 437.55000 MHz (This is a (+ 5) Offset) TX CTCSS tone 123.0...
- Page 28 6.11 Repeaters Programming The following instructions assume that you know what transmit and receive frequencies your repeater employs, and that you're authorized to use it. (1) Press [VFO/MR] key, the transceiver is set to VFO mode, and the VFO icon will be displayed on the lift. (2) Use the numeric keypad to enter the repeater's output (your receive) frequency.
- Page 29 • Turn ANI, DTMFST, PTT-ID off and PTT-LT to 0ms (menu items 22 through 24). • Turn off Squelch Tail Elimination (Tail) features (menu items 26). • Turn roger beep (ROGER) off (menu item 10). Program channel • Set bandwidth to Wide (menu item 4). •...
- Page 30 Using the menu with short-cuts (1) Press the key to enter the menu. (2) Use the numerical keypad to enter the number of the menu item. (3) To enter the menu item, press the key. (4) For entering the desired parameter you have two options: a) Use the arrow keys as we did in the previous section;...
- Page 31 Add up to 10 zones, add a full 10 zone will automatically hide the “Add Zone” option. 7.3.2 Power On Displya Setting • Picture: The radio will display a preset picture when powered on. Picture requires .bmp format, size size 160*128 pixels •...
- Page 32 -Code+Sound(No): After sending an alarm code to the Control Center and group members, no alarm tone will be sent locally. In the alarm state, there is no sound or visual indication. -Code+Tone: After sending an alarm code to the control center and group members, a local alarm tone will be emitted. In alarm state, there are audible and visual indications.
- Page 33 Allows you to view or reset the current channel alias as follows: 1. Press +[4] to enter Program Channel. 2. Press to select “CHL NAME”; 3. Press to enter the channel alias editing interface, and you can perform the following operations: -Press # key to switch input method, switch between numeric, alphabetic and pinyin input method.
- Page 34 In standby, press key to enter the main menu >> GNSS >> GPS Information. - My Position Enter “My Position”, it will display the Longitude (E), Latitude (S),Speed, Altitude, number of Satellites, Date and Time. Position...: My Position indicator is blinking. Position successful: My Position indicator is Stable, showing Longitude, Latitude, Speed, Altitude, number of Satellites, Date and Time.
- Page 35 7.4.5 Position system use Before using the position system, you must turn on the position on/off. To open the position system path: Method 1: In standby mode, press the key to enter the main menu >> GNSS >> GPS On/Off. Method 2: Define the side key function as “GNSS System”.
- Page 36 information of the member's local machine. Note: The member (Host) does not display the position direction pointer. Press key to return to the member list. -Share position (Send position) In the member (local) display screen, press and hold the PTT key, the transmitter indicator will briefly light up red to share the local position information to other members.
- Page 37 Appendix A. – Trouble shooting guide Phenomena Analysis Solution The battery may be installed improperly. Remove and reattach the battery. The battery power may run out. Recharge or replace the battery. You cannot turn on the radio. The battery may suffer from poor contact caused by dirty Clean the battery contacts or replace the battery.
- Page 38 Appendix B. - Technical Specifications GENERAL Channel Capacity Channel Spacing 25.0 KHz/12.5 KHz Input Voltage 7.4 VDC Battery Life: 5% TX, 5% RX, 90% Standby Li-on: 15 hours @ 5 watts Operating temperature -10˚C to 60˚C Antenna Impedance 50Ω Radio Dimensions 135mm X 63mm X 39mm (not including antenna) Radio Weight 290 g (with Li-ON battery)
- Page 39 Appendix C. - Shortcut Menu operations Main Sub Menu Sub Menu Name Settings Description Menu Sequence • Channel 1-Channel 64 Stored zone, at least one zone saved. • +Add Zone: Add a zone and name the zone. The Set up to 10 zones and store up to 64 channels Zone Zone 1 newly added zone will default to one channel...
- Page 40 1-5 levels of adjustable brightness. 1 level of the Brightness darkest, 5 levels of the brightest • PICTURE: The radio will display an Baofeng picture Controls the behavior of the display when the Power on Display when powered on. transceiver is turned on.
- Page 41 • MESSAGE: The radio will display the characters set up in PC software when powered on. • VOLTAGE: The power voltage is momentarily displayed. Allows editing of power-up messages on this unit. Press MENU to enter message editing, press EXIT WELCOME Power on MSG to go forward to delete, and enter text or letters...
- Page 42 1000Hz, 1450Hz, 1750Hz, 2100Hz a ALERT • • 1750Hz 2100Hz total of 4 options are offered. This function is used eliminate squelch tail noise between BaoFeng handhelds that are • • 55Hz: communicating directly (no repeater). • • TAIL Reception of a 55 Hz or 134.4 Hz tone burst...
- Page 43 Radio On/Off Turn on or off the FM radio. On: When FM radio is used, you can still receive FM Radio or transmit on the channel. Radio Interrupt Off: When FM radio is used, the radio will not permit a transmission or reception. Allow to set automatic power off when not used •...
- Page 44 Mutes the speaker of the transceiver in the • absence of a specific low-level digital signal. If the RX DCS • 023N-754I station you are listening to does not transmit this specific signal, you will not hear anything. Transmits a specific and continuous subaudible •...
- Page 45 • OFF: Disable the Skip Frequency feature Skip Frequency • ON: Enable Skip Frequency function This option allows you to decide whether to enable the Scrambler feature. This technology can invert the frequency spectrum at the • OFF: Disable the Scramber feature transmitting party to make the signal Scramber •...
- Page 46 OFF: Disable the NOAA weather feature. • • WX 1 162.55000 WX 2 162.55000 • • WX 3 162.55000 WX 4 162.55000 Enter NOAA weather. Press and hold the 0 key for Weather On/Off • • WX 5 162.55000 WX 6 162.55000 quick access to the NOAA Weather feature NOAA...
- Page 47 D445N D446N D452N D454N D455N D462N D464N D465N D466N D503N D506N D516N D523N D526N D532N D546N D565N D606N D612N D624N D627N D631N D632N D645N D654N D662N D664N D703N D712N D723N D731N D732N D734N D743N D754N D023I D025I D026I D031I D032I D036I D043I D047I...
- Page 49 Appendix E. - CTCSS Table CTCSS CHART (Hz) Number Frequency Number Frequency Number Frequency Number Frequency Number Frequency 67.0 69.3 71.9 74.4 77.0 79.7 82.5 85.4 88.5 91.5 94.8 97.4 103.5 107.2 110.9 114.8 118.8 123.0 127.3 131.8 136.5 141.3 146.2 151.4 156.7...
- Page 50 Disclaimer The accuracy and completeness of the contents are sought in the process of compilation, but we do not bear any responsibility for the possible errors or omissions. With the continuous development of technology, we reserve the right to change the design and specification of the product without notice. No copy, modification, translation and dissemination of this handbook may be made in any form without the prior written authorization of our department.
Need help?
Do you have a question about the 5RH PRO Series and is the answer not in the manual?
Questions and answers