
Related Manuals for Motomaster 011-1504-0


Summary of Contents for Motomaster 011-1504-0
- Page 1 011-1504-0 BATTERY CHARGER CHA RG E 75 50 IMPORTANT: INSTRUCTION This manual contains important safety and operating instructions. MANUAL Read all instructions and follow them when using this product.
-
Page 2: Technical Specifications
011-1504-0 | contact us 1-800-528-6817 DO NOT RETURN THIS PRODUCT TO THE STORE! QUESTIONS? CALL CUSTOMER SERVICE, HOTLINE: 1-800-528-6817. This MotoMaster product carries a two (2) year warranty against defects in workmanship and materials. At ® its discretion, MotoMaster Canada agrees to have any defective part(s) repaired or replaced free of charge, ®... -
Page 3: Warranty
TABLE OF CONTENTS WARRANTY TECHNICAL SPECIFICATIONS SAFETY INFORMATION KEYPARTS LIST IMPORTANT INFORMATION OPERATION MAINTENANCE AND STORAGE TROUBLESHOOTING... -
Page 4: Important Safety Instructions
011-1504-0 | contact us 1-800-528-6817 Before using your MotoMaster battery charger, absolutely necessary. Use of an improper ® be sure to read and save these safety instructions. extension cord could result in a risk of fire Failure to do so could result in serious injury or and electric shock. -
Page 5: Preparing To Charge
batteries only. It is not intended to supply accessories in the vehicle are off to prevent power to a low voltage electrical system arcing. other than in a motor-starting application. Be sure the area around the battery is well- • •... -
Page 6: Charger Location
011-1504-0 | contact us 1-800-528-6817 CHARGER LOCATION Check the polarity of the battery posts. The • positive (pos, P, +) battery post usually has a Place the charger as far away from the • larger diameter than the negative (neg, N, -) battery as the DC cables permit. - Page 7 ii. For a positive-grounded vehicle, connect including the plastic boots on the battery the negative (black) clip (1) from the clips. battery charger to the negative (neg, N, Attach at least a 24” (61 cm) long 6-gauge • -) ungrounded post (2) of the battery. (AWG) insulated battery cable (1) to the Connect the positive (red) clip (3) to the negative (neg, N, -) battery post (2) (see Fig.
- Page 8 011-1504-0 | contact us 1-800-528-6817 Connect charger AC supply cord to electrical Recommended minimum AWG size for • • outlet. extension cord. When disconnecting the charger, always do • Length of cord <100’ (30.5 m) >100’ (30.5 m)
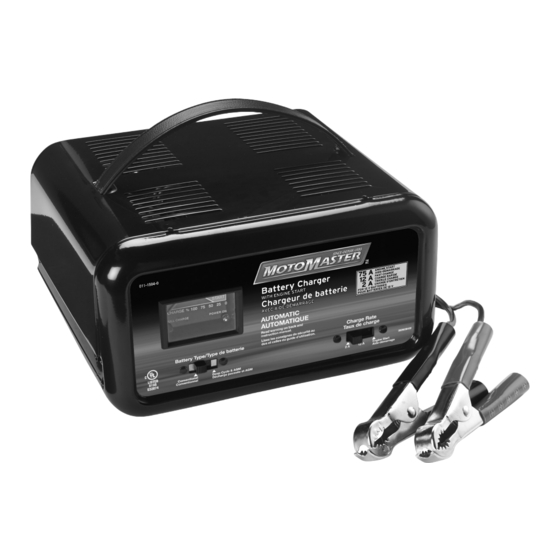
- Page 9 FEATURES Ammeter Battery type selector switch Power cord Battery clips Charge rate selector switch Full charge (green) LED indicator Power ON (yellow) LED indicator CHA RGE 75 50 MM-111504-01...
-
Page 10: Battery Charger Components
011-1504-0 | contact us 1-800-528-6817 This MotoMaster battery charger is easy to use reading the state of charge. It is scaled for use ® and designed for years of reliable service. This with the 10 A charge rate only. For the 2 A charge... -
Page 11: Automatic Charging
AUTOMATIC CHARGING When an AUTOMATIC CHARGE is performed, the charger automatically switches to the maintain mode once the battery is charged. When the FULL CHARGE (green) LED is lit, the charger has stopped charging and switched to the maintain mode of operation. MAINTAIN MODE When the FULL CHARGE (green) LED is lit, the charger has started maintain mode. - Page 12 011-1504-0 | contact us 1-800-528-6817 3. With the charger plugged in and connected to the battery of the vehicle, set the charge rate selector switch (1) to the ENGINE START position (see Fig. E). Fig. E CHARGE 75 50 MM-111504-05 4.
-
Page 13: Calculating Charge Time
CALCULATING CHARGE TIME Use the following table to more accurately determine the time it will take to bring a battery to full charge. Find your battery’s rating on the chart below, and note the charge time given for each charger setting. The times given are for batteries with a 50% charge prior to recharging. -
Page 14: Maintenance
011-1504-0 | contact us 1-800-528-6817 MAINTENANCE After use, and before performing maintenance, unplug and disconnect the battery charger. • Use a dry cloth to wipe all battery corrosion and other dirt or oil from the battery clips, cords, and the •... -
Page 15: Troubleshooting
TROUBLESHOOTING PROBLEM POSSIBLE CAUSE SOLUTION The charger is mak- • Circuit breaker is cycling. • The settings may be wrong. Check ing an audible clicking the charger settings. sound. • Battery is defective. • Have the battery checked. • Shorted battery cables or clips •... -
Page 16: Before Returning For Repairs
011-1504-0 | contact us 1-800-528-6817 BEFORE RETURNING FOR REPAIRS • When a charging problem arises, make certain that the battery is capable of accepting a normal charge. Double check all connections, the AC outlet for a full 120 V, the charger clips for correct polarity and the quality of the connections from the cables to the clips and from the clips to the battery system.
Need help?
Do you have a question about the 011-1504-0 and is the answer not in the manual?
Questions and answers