Motomaster Classic Series Instruction Manual
Hide thumbs
Also See for Classic Series:
- Instruction manual (16 pages) ,
- Instruction manual (16 pages)

Related Manuals for Motomaster Classic Series


Summary of Contents for Motomaster Classic Series
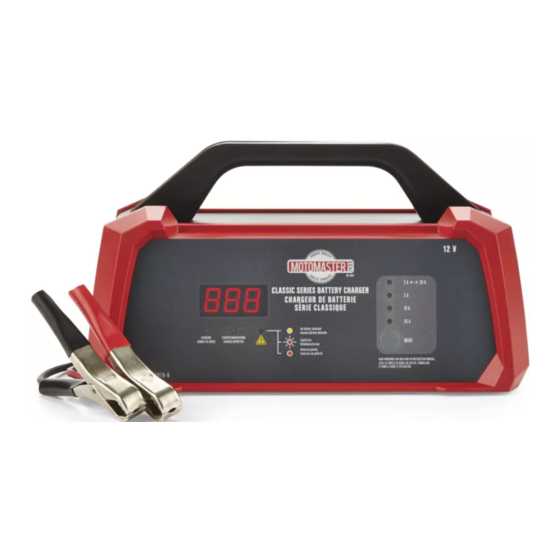
- Page 1 Model no. 011-1974-0 ® Classic Series Battery Charger IMPORTANT SAFETY INSTRUCTIONS. INSTRUCTION SAVE THESE INSTRUCTIONS. MANUAL This manual contains important safety and operating instructions.
-
Page 2: Warranty
This MotoMaster product carries a three (3) year warranty against defects in workmanship and materials. At its discretion, MotoMaster Canada agrees to have any defective part(s) repaired or replaced free of charge, within the stated warranty period, when returned by the original purchaser with proof of purchase. -
Page 3: Table Of Contents
bars ® TABLE OF CONTENTS Warranty Introduction Safety Connecting Your Battery tion tabs Controls and Indicators Charging Your Battery Understanding Factors that Affect Charging Time Understanding the Multi-Stage Charging Process Maintenance and Care Troubleshooting/ Fault Codes Technical Specifications... -
Page 4: Introduction
INTRODUCTION tabs tabs This MotoMaster Classic Series Battery Charger features advanced technology that makes battery charging ® faster, easier, and safer while helping to maximize the performance and life of your batteries. This battery charger is designed for use on all types of 12-volt lead-acid batteries including Wet (flooded), Maintenance-free (MF), Calcium (Ca), Enhanced Flooded (EFB), Absorbed Glass Mat (AGM), and Gel. - Page 5 bars ® To reduce risk of electric shock, unplug charger from outlet before attempting any maintenance or cleaning. Turning off controls will not reduce this risk. WARNING—RISK OF EXPLOSIVE GASES. WORKING IN THE VICINITY OF A LEAD-ACID BATTERY IS DANGEROUS. BATTERIES GENERATE EXPLOSIVE GASES DURING NORMAL BATTERY OPERATION.
- Page 6 Model no. 011-1974-0 l Questions? Contact us 1-888-942-6686 AC ELECTRICAL CONNECTIONS PLUGGING CHARGER IN Your charger requires a 120 V AC electrical wall outlet receptacle installed according to local codes and ordinances. USING AN EXTENSION CORD An extension cord should not be used unless absolutely necessary. Use of an improper extension cord could result in a risk of fire and electric shock.
- Page 7 bars ® PREPARING TO CHARGE If it is necessary to remove battery from vehicle to charge, always remove grounded terminal from battery first. Make sure all accessories in the vehicle are off so as not to cause an arc. Be sure area around battery is well ventilated while battery is being charged. Clean battery terminals.
-
Page 8: Connecting Your Battery
headline bars Model no. 011-1974-0 l Questions? Contact us 1-888-942-6686 CONNECTING YOUR BATTERY tabs FOLLOW THESE STEPS WHEN BATTERY IS INSTALLED IN VEHICLE WARNING: A SPARK NEAR THE BATTERY MAY CAUSE A BATTERY EXPLOSION. TO REDUCE THE RISK OF A SPARK NEAR THE BATTERY: Position AC and DC cords to reduce risk of damage by hood, door or moving engine part. - Page 9 bars ® FOLLOW THESE STEPS WHEN BATTERY IS OUTSIDE VEHICLE WARNING: A SPARK NEAR THE BATTERY MAY CAUSE A BATTERY EXPLOSION. TO REDUCE THE RISK OF A SPARK NEAR THE BATTERY: Check polarity of battery posts. POSITIVE (POS, P, +) battery post usually has a larger diameter than NEGATIVE (NEG ,N, -) post.
-
Page 10: Controls And Indicators
Model no. 011-1974-0 l Questions? Contact us 1-888-942-6686 CONTROLS AND INDICATORS A. Digital Display During charging, the digital display will alternate between Volts (V), Amps (A) and Battery State of Charge (%). It can also display Fault Codes if a charging error is detected. Volts—Actual charging voltage will be displayed. - Page 11 bars ® Amber (solid)—No battery detected. Check to ensure that clamp connections to the battery posts are clean and solid. If connections are good, the battery is severely discharged (<1.5 V) and may be unsafe to charge. The battery should be tested or replaced. Red (flashing)—A fault has been detected and charging has been aborted.
-
Page 12: Charging Your Battery
Model no. 011-1974-0 l Questions? Contact us 1-888-942-6686 Examples of Battery Sizes in Common Applications Small (10 25 Ah) Motorcycle, scooter, ATV, personal watercraft, snowmobile. Medium (30 50 Ah) Compact car, mid-size sedan, compact SUV, riding mower, UTV. Large (60 100 Ah) Full-size car, large SUV, truck, boat, RV, farm tractor. -
Page 13: Understanding Factors That Affect Charging Time
bars ® UNDERSTANDING FACTORS THAT AFFECT CHARGING TIME The time it takes to fully recharge a battery depends on several factors including: 1. Battery Depth of Discharge The greater the depth of discharge, the longer it will take to fully charge a battery. For example, a battery discharged to a level of 50% will take about twice as long to fully charge than a battery discharged only 25%. -
Page 14: Understanding The Multi-Stage Charging Process
Model no. 011-1974-0 l Questions? Contact us 1-888-942-6686 UNDERSTANDING THE MULTI-STAGE CHARGING PROCESS STAGE 1 DESULPHATION* Pulses of voltage and current help recover sulphated or deeply discharged batteries. STAGE 2 SOFT START* Gently introduces current to condition deeply discharged batteries and prevent overheating that could damage the battery. -
Page 15: Troubleshooting/Fault Codes
bars ® TROUBLESHOOTING/FAULT CODES Error Code Condition Cause Solution Connect battery to charger Charger does not BEFORE connecting charger to recognize the battery. AC power. Ensure battery posts are clean. Rock clamps back and forth on Poor clamp connection. battery posts to ensure a good connection. -
Page 16: Technical Specifications
Model no. 011-1974-0 l Questions? Contact us 1-888-942-6686 Error Code Condition Cause Solution The battery does not The charge current Try charging battery again using a go into Maintenance is too low. higher charge rate. mode after being charged for 24 hours.
Need help?
Do you have a question about the Classic Series and is the answer not in the manual?
Questions and answers