
Related Manuals for Vicon HPOE-100


Summary of Contents for Vicon HPOE-100
-
Page 1: Installation Guide
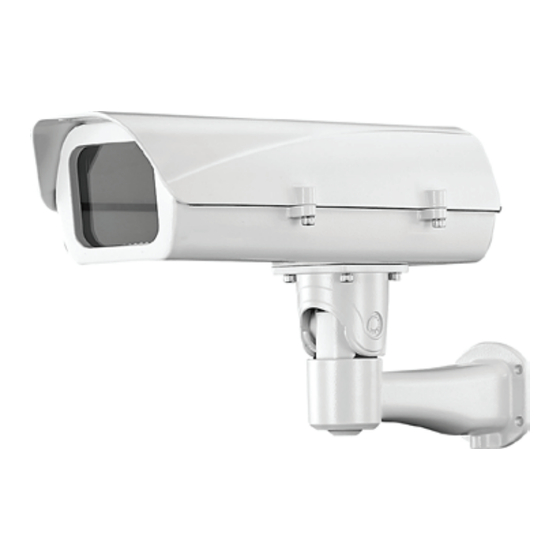
HPOE-100 Network Camera Housing INSTALLATION GUIDE Mounting Configuration and Dimensions Component Description... - Page 2 Power Consumption D-Fog Heater Always On (9W) Heater 15°C On, 25°C Off (10W) IR LEDs Installation Recommendations If you plan to install this camera enclosure into a tropical, sea coastal, or an environment where salt water or corrosive industrial waste water/moist are present, please seal each stainless steel screws and fittings with a silicon grease compounds.
- Page 3 When done, tighten up the waterproof connectors. Align the buffer pad with the mounting hole at the bottom of the camera Place the mounting plate on top of buffer pad and then secure it to the camera. You may need adjust its position so that the lens module can flush align with the tempered glass.
- Page 4 Connect PoE input to the power unit. Connect a short Ethernet cable between the PoE output and the Ethernet port on the camera. If using the media converter, connect the wires to the 12V output on the PSU unit. PoE IN from external PoE OUT to 12V DCOUT...
- Page 5 Mount the enclosure on to the installed bracket, and secure the connection by tightening the 4 socket screws. Due to the weight of the enclosure, it is best to have two men mounting the enclosure.
- Page 6 Vicon Industries Ltd www.vicon-security.com...
Need help?
Do you have a question about the HPOE-100 and is the answer not in the manual?
Questions and answers