
Related Manuals for Rose electronics RackView RV1-CAKVT17/DVI


Summary of Contents for Rose electronics RackView RV1-CAKVT17/DVI
- Page 1 RackView 17" 19" and 20" Sliding KVM Drawer Installation Operation Manual 10707 Stancliff Road Phone: (281) 933-7673 Houston, Texas 77099 techsupport@rose.com...
- Page 2 RackView 17" 19" and 20" KVM Drawer to be in good working order for one year from the date of purchase from Rose Electronics or an authorized dealer. Should this product fail to be in good working order at any time during this one-year warranty period, Rose Electronics will, at its option, repair or replace the Unit as set forth below.
- Page 3 DECLARATIONS OF CONFORMITY This is to certify that, when installed and used according to the instructions in this manual, the units listed and described here are shielded against the generation of radio interferences in accordance with the application of Council Directives 2014/30/EU and 2014/30/EU, as well as these standards: ■...
-
Page 4: Table Of Contents
TABLE OF CONTENTS Contents Disclaimer System Introduction Features RackView Options Package Contents Before Installation RackView Models Front View - All Models RackView Layout – All Models RackView Rear Panel Connector Layout RackView Chassis Dimensions Installation Procedure Installation of the RackView 17/19-inch Installation of the RackView 20-inch Operation of the RackView 17/19/20-inch models Cabling RackView to an External Device... - Page 5 TABLE OF CONTENTS Tables Table 1. Specifications ........................13 Table 2. Part numbers ........................14 Table 3. RackView product and packaging dimensions ..............15 Table 4. RackView product and packaging dimensions (including a KVM switch) ......15 Table 5. RackView + KVM switch – selection table ................15 Table 6.
-
Page 6: System Introduction
(See limited warranty). System Introduction Thank you for choosing the Rose Electronics RackView KVM drawer. The RackView KVM drawer is available in several different high-performance LCD display sizes. All RackView drawers are rack mounted devices and operated following the same general procedure. -
Page 7: Rackview Options
RackView Options Integrated KVM switch, DVI USB Audio (12 port) or VGA USB (8 or 16 port) Touchscreen resistive and capacitive displays on the 17" and 19" models only HDMI (replaces the DVI interface) S-Video + Composite (BNC) 3G/HD/SD-SDI video, available on the 17"... -
Page 8: Rackview Models
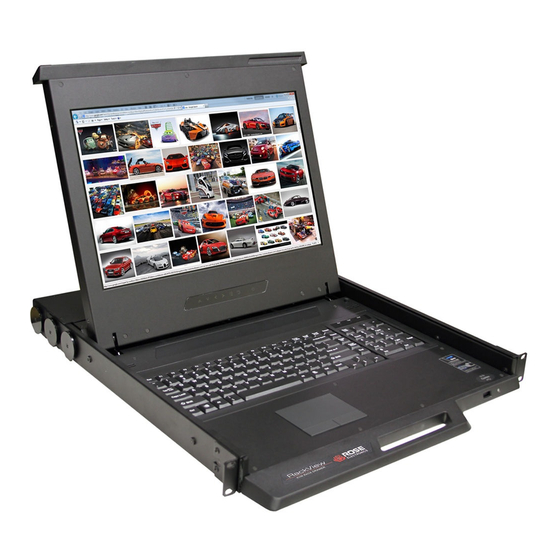
MODELS RackView Models The RackView is available in three models as described below. Front View - All Models RackView 17/19-inch TFT color LCD RackView 20-inch TFT color LCD VGA and DVI, 1280×1024 resolution VGA and DVI, 1600×1200 resolution Figure 1. RackView models - front view RackView Layout –... -
Page 9: Rackview Rear Panel Connector Layout
RackView Rear Panel Connector Layout The RackView rear panel includes an HD15(KVM) and DVI-D connector as standard. The HD15(KVM) connector supports VGA video, and also the keyboard/mouse interface. This diagram shows the approximate positioning of the connectors on the rear panel. RackView 17 / 19 / 20-inch rear panel connector layout Figure 3. -
Page 10: Installation Procedure
INSTALLATION Installation Procedure Installation of the RackView 17/19-inch Step 1 Insert the Left and Right rear-mounting slides into the RackView Console Drawer Step 2 Measure the depth of the front and rear rack rails Align each rear-mounting slide to a suitable length (depth) Step 3 Complete the Installation... -
Page 11: Installation Of The Rackview 20-Inch
Installation of the RackView 20-inch STEP 1 Attach the left and right mounting bracket to the 19" mounting rails on the rack. Adjust the mounting bracket to fit your rack. M6 screw x 8 pcs included. Leave all M6 screws slightly loose, until you complete the installation in step #3 STEP 2 Pick up the RackView LCD tray. -
Page 12: Operation Of The Rackview 17/19/20-Inch Models
Operation of the RackView 17/19/20-inch models Step 1 Hold the handle and slide out the RackView drawer Step 2 Flip up the LCD to a suitable viewing angle Step 3 Operate the RackView Console Drawer Figure 7. RackView operation RackView KVM Drawer (17", 19", 20") Manual... -
Page 13: Cabling Rackview To An External Device
Cabling RackView to an External Device Connection to a PS2 or USB Server Connection to an External KVM Switch Figure 8. RackView cable connectivity Note: Cabling options include either a VGA/USB, a VGA/PS2, or a DVI/USB cable. Note: Please check cable details with your supplier. Caution: The RackView KVM drawer is hot-pluggable, but components of connected devices, such as the servers and KVM switch, may not be hot-pluggable. -
Page 14: Rackview Cables
RackView Cables There are 3 different combo connection cables available for RackView. The user should select one of these cables at time of order placement. These cables are used to connect the RackView to either a PC or an external KVM switch Add either /K1, /K2 or /K3 onto the RackView part number K3: DVI + USB K1: VGA + USB... -
Page 15: Osd Selection
OSD Selection RackView 17/19-inch OSD Selection Panel RackView 20-inch OSD Selection Panel OSD Configuration Figure 10. RackView chassis mounting options Troubleshooting If the RackView KVM Drawer fails to synchronize correctly with the attached product (PC, Switch, Extender), and the monitor displays a distorted video pattern, press the screen power reset button once on the RackView keyboard tray to re-synchronize the video signal RackView KVM Drawer (17", 19", 20") Manual... -
Page 16: Safety
PRODUCT SAFETY Safety The RackView KVM Drawer, like all electronic equipment, should be used with care. To protect yourself from possible injury and to minimize the risk of damage to the Unit, read and follow these safety instructions. Follow all instructions and warnings marked on this Unit. ... -
Page 17: Maintenance And Repair
This Unit does not contain any internal user-serviceable parts. In the event a Unit needs repair or maintenance, you must first obtain a Return Authorization (RA) number from Rose Electronics or an authorized repair center. This Return Authorization number must appear on the outside of the shipping container. -
Page 18: Table 1. Specifications
APPENDICES Appendix A — Specifications Description RackView 17" RackView 19" RackView 20" 17.4 x 18.1 x 1.73" 17.4 x 19.7 x 1.73" 17.4 x 25.6 x 1.73" Drawer Dimensions (441.6 x 460 x 44mm) (441.6 x 500 x 44mm) (442 x 650 x 44 mm) Rail Depth 18.5-27.6"... -
Page 19: Table 2. Part Numbers
Appendix B — Part Numbers Part Numbers Description RV1-CAKVT17/DVI /Kn RackView 17" KVM Drawer, Touchpad Mouse, (for Kn, see cables below) RV1-CAKVT19/DVI /Kn RackView 19" KVM Drawer, Touchpad Mouse, (for Kn, see cables below) " RV1-CAKVT20/DVI /Kn RackView 20 KVM Drawer, Touchpad Mouse, (for Kn, see cables below) RackView Interface Cable: (only 1 cable is included –... -
Page 20: Table 3. Rackview Product And Packaging Dimensions
Appendix C — RackView Dimensions RackView Dimensions Package Size and Weight Product Dimension Packing Dimension Gross Model (W × D × H) approx (W × D × H) approx Weight Weight 441.6 x 460 x 44 mm 590 x 808 x 140 mm 12 kg 16.6 kg RV1-CAKVT17/DVI/Kn... -
Page 21: Table 6. Rackview Integrated Kvm Switch Models
KVM Switch Models – Rear Panel View The power supply on some models may be changed to12VDC external power when the KVM switch is integrated into the RackView chassis. An interface cable (/Kn) is not required with an integrated KVM switch. KVM-108CMB 8-port KVM Switch VGA/USB + Cascade Port... -
Page 22: Figure 11. Rackview With Hdmi And S-Video/Bnc Video Options
Appendix F — RackView Video Options RackView Video Option with HDMI or S-Video/BNC Video Interface The RackView KVM Drawers can be ordered with optional HDMI or S-Video/BNC interface in place of the DVI video interface. The diagram below shows the approximate positioning of these video connectors on the back panel. -
Page 23: Table 9. Dvi-D And Vga Video Formats
Video Formats (DVI-D and VGA) DVI-D / VGA Input PC Signal Resolution/Refresh Rate Applies to 20" model only Applies to 20" model only 1600 x 1200 x 60Hz Applies to 20" model only Applies to 20" model only 1400 x 1050 x 60Hz Applies to 20"... -
Page 24: Figure 13. Rackview With Dc Power Connector Fitted
Appendix G — RackView DC Power Options RackView DC Power The RackView KVM Drawers can be ordered with optional DC power input as specified in the table below. Select the DC voltage required, then add the voltage to the RackView part number as /nnnDC For example, adding 48VDC to a RackView 17”... - Page 25 ▪ ▪ WWW.ROSE.COM sales@rose.com (800) 333-9343 ▪ ▪ Rose Electronics 10707 Stancliff Road Houston, Texas 77099 Rose USA (281) 933-7673 ▪ Rose Europe +49 (0) 2454 969442 ▪ Rose Asia +65 6324 2322 Rose Australia +61 (0) 421 247083 WWW.ROSE.COM...
Need help?
Do you have a question about the RackView RV1-CAKVT17/DVI and is the answer not in the manual?
Questions and answers