
Related Manuals for OLIMEX OLIMEXINO-32U4


Summary of Contents for OLIMEX OLIMEXINO-32U4
- Page 1 OLIMEXINO-32U4 development board USER’S MANUAL Revision H, April 2017 Designed by OLIMEX Ltd, 2013 All boards produced by Olimex LTD are ROHS compliant...
- Page 2 This document is intended only to assist the reader in the use of the product. OLIMEX Ltd. shall not be liable for any loss or damage arising from the use of any information in this document or any error or omission in such information or any incorrect use of the product.
-
Page 3: Table Of Contents
CHAPTER 2 INTRODUCTION TO ARDUINO ............. 7 2. What is Arduino? ........................7 2.1 First steps with Arduino IDE ....................8 CHAPTER 3 SETTING UP THE OLIMEXINO-32U4 BOARD ......10 3. Introduction to the chapter ..................... 10 3.1 Electrostatic warning ......................10 3.2 Requirements ......................... - Page 4 OLIMEX© 2017 OLIMEXINO-32U4 user's manual 9. Introduction to the chapter ..................... 22 9.1 Eagle schematic ........................22 9.2 Physical dimensions ....................... 24 CHAPTER 10 REVISION HISTORY ..............25 10. Introduction to the chapter ....................25 10.1 Document revision ....................... 25 10.2 Board revision ........................
-
Page 5: Chapter 1 Overview
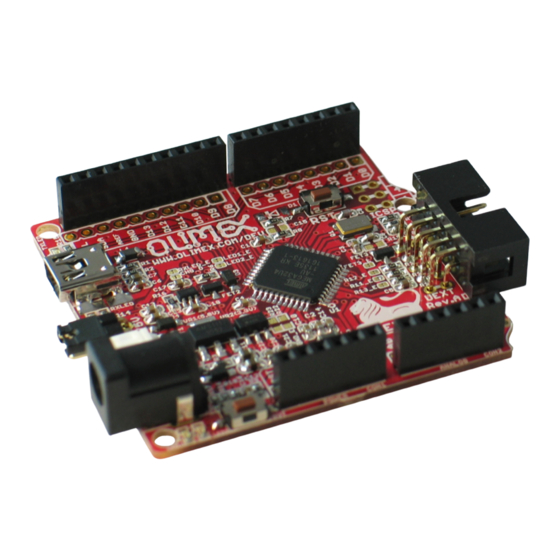
Thank you for choosing the OLIMEXINO-32U4 development board from Olimex! This document provides a User’s Guide for the Olimex OLIMEXINO-32U4 development board. As an overview, this chapter gives the scope of this document and lists the board’s features. The document’s organization is then detailed. -
Page 6: Similar Boards
OLIMEXINO-32U4 user's manual 1.2 Similar boards OLIMEXINO-32U4 is an ARDUINO-LEONARDO-like board with ATmega32U4. It is a powerful board considering its low price but yet a starter board for the Arduino family. The more powerful Arduino board we have in the range is OLIMEXINO-328 – based on Arduino Duemilanove. -
Page 7: Chapter 2 Introduction To Arduino
OLIMEX© 2017 OLIMEXINO-32U4 user's manual CHAPTER 2 INTRODUCTION TO ARDUINO 2. What is Arduino? Arduino is an open-source electronics prototyping platform, designed to make the process of using electronics in multidisciplinary projects easily accessible. The hardware consists of a simple open hardware design for the Arduino board with an Atmel AVR processor and on-board I/O support. -
Page 8: First Steps With Arduino Ide
Arduino web site: http://www.arduino.cc/. 2.1.2 For purchases before the official release of Leonardo If you have purchased the OLIMEXINO-32U4 before the official release of the Arduino Leonardo board there are two scenarios for using Arduino IDE: 1) Download Arduino IDE 1.0 RC2 or Arduino IDE 1.0.0. When you extract the package check if the Arduino Leonardo section is the \hardware\arduino\boards is uncommented. - Page 9 OLIMEX© 2017 OLIMEXINO-32U4 user's manual From File->Open navigate to the examples folder which is found in the Arduino IDE installation folder. Choose a simple example to begin with like BlinkWithoutDelay.ino and open it. Click verify and after it compiles click “Upload”. Voila, you have uploaded code to your Arduino device.
-
Page 10: Chapter 3 Setting Up The Olimexino-32U4 Board
3.3 Powering the board The OLIMEXINO-32U4 board is self-powered by the miniUSB if it is connected to a USB hub of a computer. Alternatively, it can be powered via the POWER JACK by 7Vdc to 12Vdc or via the 3.7V-LI_BAT connector by 3.7V battery. -
Page 11: Chapter 4 Olimexino-32U4 Board Description
4. Introduction to the chapter Here you get acquainted with the main parts of the board. Note the names used on the board differ from the names used to describe them. For the actual names check the OLIMEXINO-32U4 board itself. -
Page 12: Chapter 5 The Atmega32U4 Microcontroller
OLIMEXINO-32U4 user's manual CHAPTER 5 THE ATMEGA32U4 MICROCONTROLLER 5. Introduction to the chapter In this chapter is located the information about the heart of OLIMEXINO-32U4 – its microcontroller. The information is a modified version of the datasheet provided by its manufacturers. - Page 13 OLIMEX© 2017 OLIMEXINO-32U4 user's manual – On-chip PLL for USB and High Speed Timer: 32 up to 96 MHz operation – One 8-bit Timer/Counter with Separate Prescaler and Compare Mode – Two 16-bit Timer/Counter with Separate Prescaler, Compare- and Capture Mode –...
-
Page 14: Chapter 6 Control Circuity
Here you can find information about reset circuit, power circuit and quartz crystal locations. 6.1 Reset OLIMEXINO-32U4 reset circuit includes R7 (4.7kΩ), R8 (330Ω), D1 (Shottky diode), ATmega32U4 pin 13 (#RESET) and a RESET button. Note that it also can be found at the ICSP header pin 5 and power connector pin 1. -
Page 15: Chapter 7 Hardware
OLIMEX© 2017 OLIMEXINO-32U4 user's manual CHAPTER 7 HARDWARE 7. Introduction to the chapter In this chapter are presented the connectors that can be found on the board all together with their pinout. Jumpers functions are described. Notes and info on specific peripherals are presented. Notes regarding the interfaces are given. -
Page 16: Uext
IMPORTANT: Be careful with the voltage output available at pin #1. The on-board 3.3V/5V switch also controls the voltage output available at pin #1 of the UEXT. Do not connect Olimex modules when the switch is set to 5V position, unless you are 100% sure that these UEXT modules work fine at 5V (most Olimex modules can not work properly at 5V, only at 3.3V) -
Page 17: Arduino Shield Pin Holes
OLIMEX© 2017 OLIMEXINO-32U4 user's manual 7.4 Arduino shield pin holes For your convenience the pads are named individually near each of them. Please take extra care about the numbering but consider that there might be offset. Pad Name Signal Pad Name... -
Page 18: Usb Mini Connector
(UART, SPI, I2C). Most Olimex-manufactured UEXT modules work at 3.3V – they would get damaged if the jumper is set 3.3V. When using Olimex MOD- board on this UEXT ensure the jumper is set to 3.3V, else you might damage the module. -
Page 19: Additional Hardware Components
UEXT_CS). SMD jumpers. Default state for all three is closed. 7.7 Additional hardware components The components below are mounted on the OLIMEXINO-32U4 board but are not discussed above. They are listed here for completeness: General-purpose button 2 general purpose LEDs 2 LEDs showing virtual port activity Note that connectors on the CON1, CON2, CON3, CON4 are soldered/mounted. -
Page 20: Chapter 8 Memory And Block Diagram
OLIMEX© 2017 OLIMEXINO-32U4 user's manual CHAPTER 8 MEMORY AND BLOCK DIAGRAM 8. Introduction to the chapter Below is located the block diagram of the processor and on the next page you can find a memory map for this family of processors. It is strongly recommended to refer to the original datasheet released by Atmel for ones of higher quality. -
Page 21: Memory Organization
OLIMEX© 2017 OLIMEXINO-32U4 user's manual 8.1 Memory organization Page 21 of 28... -
Page 22: Chapter 9 Schematics
In this chapter are located the schematics describing logically and physically OLIMEXINO-32U4. 9.1 Eagle schematic OLIMEXINO-32U4 schematic is visible for reference here. You should zoom the pdf for a better view and also string search is available. You can also find a stand-alone pdf on the web page for OLIMEXINO-32U4 at our site: https://www.olimex.com/Products/Duino/AVR/OLIMEXINO-... - Page 23 PD6/T1/#OC4D/ADC9 PB7/PCINT7/OC0A/OC1C/#RTS AREF PD7/T0/OC4D/ADC10 AREF D2(SDA) D3(SCL) ATMEGA32U4-AU BUTTONS 1xPN1x10+1xPN1x8+2xPN1x6 DVCC DVCC This hardware design by Olimex LTD is licensed under a Creative Commons Attribution-ShareAlike 3.0 Unported License. STAT LEDS ICSP DVCC D7(LED1) D9(LED2) TXLED D17(RXLED) ICSP D14(MISO) NA[1N5819(S4SOD-123)] 4.7k 4.7k...
-
Page 24: Physical Dimensions
OLIMEX© 2017 OLIMEXINO-32U4 user's manual 9.2 Physical dimensions Note that all dimensions are in inches. Page 24 of 28... -
Page 25: Chapter 10 Revision History
5, 14, 15, with probe you know exactly which port you are 17, 25 measuring” - not true with OLIMEXINO-32u4 (only on component side) Fixed - “Proto area is shown.” - there is no proto are Fixed -”programming/debugging outside of the PINGUINO IDE”... -
Page 26: Board Revision
OLIMEX© 2017 OLIMEXINO-32U4 user's manual connectors soldered on the pin holes. Before being able to connect with a shield you have to solder connecters yourself.” - the shield connectors are already soldered Fixed the numbering of sub-chapters in chapter 7 Signal on D7 in the table is not BUT. -
Page 27: Web Page Of Your Device
OLIMEXINO-32U4 user's manual 10.3 Web page of your device The web page you can visit for more info on your device is https://www.olimex.com/Products/Duino/AVR/OLIMEXINO-32U4/. There you can find more info and some examples. Web page of the original Arduino and Arduino software: http://arduino.cc/en/. -
Page 28: Warranty And Returns
All goods are checked before they are sent out. In the unlikely event that goods are faulty, they must be returned, to OLIMEX at the address listed on your order invoice. OLIMEX will not accept goods that have clearly been used more than the amount needed to evaluate their functionality. - Page 29 Mouser Electronics Authorized Distributor Click to View Pricing, Inventory, Delivery & Lifecycle Information: Olimex Ltd. OLIMEXINO-32U4...
Need help?
Do you have a question about the OLIMEXINO-32U4 and is the answer not in the manual?
Questions and answers