Table of Contents
Advertisement
INSTRUCTION MANUAL
INSTALLATION / OPERATIONS / PARTS & SERVICE
36W36
43W36
136W36
V136W36
236W36
This Manual is prepared for the use of Service Technicians
and should not be used by those not properly qualified. This
manual is not intended to be all encompassing. You should
read, in its entirety, the repair procedure you wish to perform
to determine if you have the necessary tools, instruments and
skills required to perform the procedure
RETAIN THIS MANUAL FOR FUTURE REFERENCE.
THE MONTAGUE COMPANY
1830 Stearman Avenue P.O. BOX 4954
HAYWARD,CA 94549-4954
510.785.8822 FAX:510-785-3342
1-888-875-2722
WWW.MONTAGUECOMPANY.COM
Radiglo
Gas Fired Heavy Duty
Over Fired
Broilers
243W36
C36
C45
C36 SHB
C45 SHB
NOTICE
.
Advertisement
Table of Contents

Related Manuals for MONTAGUE 36W36


Summary of Contents for MONTAGUE 36W36
- Page 1 RETAIN THIS MANUAL FOR FUTURE REFERENCE. THE MONTAGUE COMPANY 1830 Stearman Avenue P.O. BOX 4954 HAYWARD,CA 94549-4954 510.785.8822 FAX:510-785-3342 1-888-875-2722 WWW.MONTAGUECOMPANY.COM...
- Page 2 IMPORTANT FOR YOUR SAFETY THIS MANUAL HAS BEEN PREPARED FOR PERSONNEL QUALIFIED TO INSTALL GAS EQUIPMENT, WHO SHOULD PERFORM THE INITIAL FIELD START-UP AND ADJUSTMENTS OF THE EQUIPMENT COVERED BY THIS MANUAL. Qualified installation personnel are individuals, a firm, corporation, or company which either in person or through a representative are engaged in and are responsible for: A.
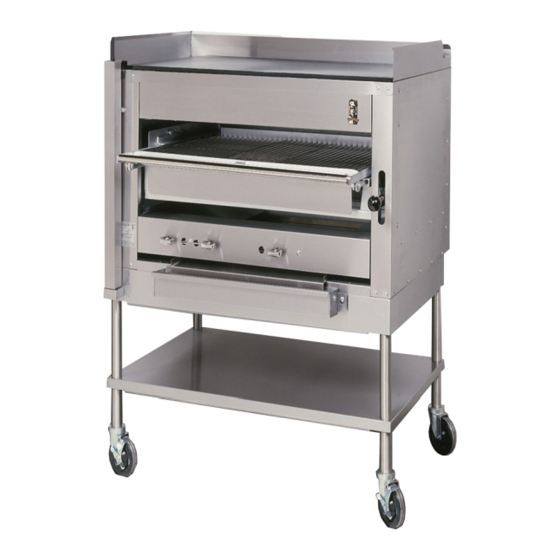
- Page 3 Some models include a cabinet, conventional oven, or convection oven. Montague Gas Broilers are produced with the best possible material and workmanship. Proper installation is essential for safe, efficient, trouble-free operation.
- Page 4 INTRODUCTION SPECIFICATIONS # BURNERS NATURAL PROPANE TOTAL MODEL (broilers only) BTU/HR BTU/HR BTU/HR 36W36 42,000 ea. 42,000 ea. 84,000 43W36 42,000 ea. 42,000 ea. 126,000 136W36 42,000 ea. 42,000 ea. 124,000 V136W36 42,000 ea. 42,000 ea. 129,000 236W36 42,000 ea.
-
Page 5: Table Of Contents
36W36 & 43W36 EXPLODED VIEW ..... .23 36W36 & 43W36 PART NUMBERS ..... . 24... -
Page 6: Installation
INSTALLATION ASSEMBLY CAUTION Provisions must be made to assure adequate Uncrate broiler as near to final location as air supply to unit for proper burner operation. possible. For easier and lighter handling of broiler, remove grids, grid frame, drip tray and CLEARANCES grease container. -
Page 7: Leveling
INSTALLATION BATTERY ARRANGEMENT Setting In Place Model No‖s 36W36, 43W36, 136W36, and V136W36. Floor Mounted Ranges Figure 3. Ceramic Radiants 1. Place the first unit in the exact position it will occupy in the battery. 1. Insert ceramic end pieces at front and rear 2. -
Page 8: Gas Connection
INSTALLATION GAS CONNECTION 2. Connect the gas supply line from the service gas shutoff valve to the inlet side of the gas pressure regulator using 3/4‖ pipe. Avoid kinks Before connecting the broiler(s) to the gas supply or sharp bends that could restrict gas flow. line, be sure that all new piping has been cleaned and purged to prevent any foreign matter from NOTE: If flexible or semi-flexible connectors are... -
Page 9: Gas Pressure Regulator
INSTALLATION FOR PROPANE GAS: This gas pressure regulator is factory adjusted for 10.0‖ W.C. manifold pressure. The rated inlet pressure to the regulator is 1/2 psig (3.45 kPa). The broiler is equipped with fixed orifices for use with a manifold pressure of 6.0‖ W.C. for natural gas and 10.0‖... -
Page 10: Pilot
INSTALLATION BURNER ADJUSTMENT PILOT INITIAL ADJUSTMENT The efficiency of the broiler depends on a delicate Each burner has a separate pilot burner. The balance between the supply of air and the volume pilot flame is adjusted through access holes in of gas at each main burner resulting in complete the valve control panel, Figure 7. -
Page 11: Operation
OPERATION GENERAL BURNER CONTROL: Used to turn the gas on or off. One control for each burner. This appliance has been classified as GRID HEIGHT: The grid is set to the desired commercial cooking equipment and must be operated by qualified and/or professional cooking height by depressing the ball and operating personnel adjusting the lever up or down. -
Page 12: Maintenance
MAINTENANCE GENERAL CLEANING PAINTED SURFACES/ POWDER COATED WARNING Exterior THE BROILER AND ITS PARTS ARE HOT. Allow the broiler to cool down before cleaning USE CARE WHEN OPERATING, exterior surfaces. Painted surfaces should be CLEANING OR SERVICING THE UNIT. cleaned using a mild soap and warm water solution on a sponge or soft cloth. -
Page 13: Remove Heat Tint
MAINTENANCE Drying thoroughly will prevent water spots which CLEANING: are harmful to the finish. After each use, scrape griddle clean with a HELPFUL HINTS: griddle scraper when cooked food is removed to keep surface free of encrusted material To remove streaks, rub stainless steel and also prevent flavor transfer. -
Page 14: Maintenance Schedule
OVERFIRED BROILER MAINTENANCE SCHEDULE COMPONENTS APRIL JUNE JULY SEPT T-COUPLE (CE) 1,3,4 1,3,4 1,3,4 1,3,4 INJECTORS GASKETS BEARINGS PILOT VALVE (CE) GRID IRON * BURNERS TOP PLATE * AIR MIXER GREASE CONT. * INTERIOR GEAR MECH. REGULATOR CERAMICS 1,2,4 1,2,4 1,2,4 1,2,4 DRIP TRAY *... -
Page 15: Parts Removal And Replacement Procedures
PARTS REMOVAL & REPLACEMENT PROCEDURES Turn the control valves to the full off position, then Perform the following procedures to remove and remove the control valve knobs. replace parts. To eliminate mistakes when ordering parts, always provide the following 2. Remove the two screws from the front of the control information: panel. -
Page 16: Drip Tray And Horizontal Grease Container
PARTS REMOVAL AND REPLACEMENT PROCEDURES DRIP TRAY AND HORIZONTAL NOTE: Make sure that the pipe joint compound or pipe thread sealant that is being used is GREASE CONTAINER resistant to the corrosive actions of liquefied he drip tray is located below the drip deflector. petroleum gases. -
Page 17: Burner
PARTS REMOVAL AND REPLACEMENT PROCEDURES MAIN BURNERS 4. Install the new pilot assembly, orifice and pilot assembly bracket. 5. Connect the gas line to the back of the pilot The connection for the burners is accessed by assembly. removing the venturi cover. The burners are accessed by removing the grids and carriage. -
Page 18: Burner Valves
PARTS REMOVAL & REPLACEMENT PROCEDURE 5. Connect the gas line to the back of the valve. 9. Reassemble by reversing procedure. 6. Turn the main gas shutoff valve to the broiler to the ―ON‖ position. WARNING WARNING ALL GAS JOINTS DISTURBED DURING SERVICING MUST BE CHECKED FOR LEAKS. -
Page 19: Carriage Position Handle
PARTS REMOVAL AND REPLACEMENT PROCEDURE CARRIAGE POSITION HANDLE Threaded Stud 1. Turn off the burners. The carriage position handle consists of the parts shown in the following illustration and parts list. 2. Allow the broiler to cool to room temperature. 3. -
Page 20: Gear & Bracket
PARTS REMOVAL AND REPLACEMENT PROCEDURES Gear with Bracket 1. Turn off the burners. 2. Allow the broiler to cool to room temperature. 3. Raise grill to the top. 4. Remove all components of carriage position handle. 5. Remove the two screws and nuts that hold the gear with bracket to the vertical frame rail. -
Page 21: Adjustments
SERVICE & ADJUSTMENT PROCEDURES When service is needed, contact a local service company, dealer, or factory to perform mechanical maintenance and repairs. These instructions are intended for use by competent service personnel. 7. Insert a blade-type screwdriver into the top CAUTION hole of the regulator. -
Page 22: Carriage Position Handle
If carriage is difficult to move or will not stay in place, the handle tension requires adjusting. Model #’s 36W36 and 43W36: Through lower compartment. 1. Remove black ball knob and chrome sleeve. 2. Turn threaded rod to the left to increase Model #’s 136W36 and V136W3... -
Page 23: Troubleshoot Chart
TROUBLESHOOTING CHART SYMPTOM CAUSE REMEDY Pilot burner flames are burning Gas too rich Perform the Pilot Burner yellow Adjustment Procedure Perform the Pilot Burner Orifice Clogged pilot air passages Removal and Replacement Procedure. Pilot not properly adjusted Perform the Pilot Adjustment Valve Adjustment Procedure. -
Page 24: Troubleshoot Chart
TROUBLESHOOTING CHART SYMPTOM CAUSE REMEDY The heat of one or more burners Clogged burner ports Clean burner ports or perform is not uniform over the surface The Main Burner Removal and Replacement Procedure. of the ceramic tiles. Broken or missing ceramics Replace broken or missing ceramics. -
Page 25: C36 & C45 Exploded View
C36 & C45 EXPLODED VIEW... -
Page 26: C36 & C45 Part Numbers
ITEM PART # PART # DESCRIPTION C36 & 236W36 C45 & 243W36 12925-9 12925-9 PANEL, RIGHT SIDE 25442-8 25442-8 FLUE, RIGHT SIDE 25440-1 25440-1 FLUE, LEFT SIDE 12610-1 15391-5 FLUE DEFLECTOR 15355-9 15385-0 EXTERIOR TOP 12923-2 12923-2 PANEL, LEFT SIDE 1100-2 1100-2 MANIFOLD... -
Page 27: C36 & C45 Part Numbers
ITEM PART # PART# DESCRIPTION C36 & 236W36 C45 & 243W36 1601-2 1601-2 GRID IRON, LEFT 1600-4 1600-4 GRID IRON, RIGHT 1602-0 GRID IRON, CENTER 38331-7 38040-7 GRID FRAME ASSEMBLY 2549-1 3548-3 DRIP DEFLECTOR 4655-8 4657-4 CARRIAGE ASSEMBLY 2033-8 2033-8 KNOB, BLACK BALL 3504-1 3504-1... - Page 28 NOTES...
-
Page 29: 36W36 & 43W36 Exploded View
36W36 & 43W36 EXPLODED VIEW... -
Page 30: 36W36 & 43W36 Part Numbers
ITEM PART # PART # DESCRIPTION 36W36 43W36 15168-8 15287-0 PANEL, BACK & SIDE 15233-1 32069-2 FALSE TOP, FRONT 15238-2 32075-7 FLUE, LEFT SIDE 15239-0 32076-5 FLUE, RIGHT SIDE 15232-3 15232-3 FALSE TOP, FRONT 15609-4 31642-3 DOOR ASSEMBLY 3173-9 3173-9... - Page 31 ITEM PART # PART # DESCRIPTION 36W36 43W36 15216-1 15216-1 VENTURI 1231-9 1231-9 TUBING, ALUMINUM 1601-2 1601-2 GRID IRON– LEFT 1602-0 GRID IRON– CENTER 1601-2 1601-2 GRID IRON– RIGHT 3396-0 3396-0 BEARING ASSEMBLY 32376-4 38040-7 GRID FRAME ASSEMBLY WITH BEARINGS...
- Page 33 In order to establish full compliance with Proposition 65, we attached a yellow warning label to each gas fired unit manufactured by the Montague Company. Carbon monoxide would not be present in concentrations that would pose a ―significant risk‖ to the consumer when the equipment is installed, operated and maintained as follows: 1.
- Page 34 P/N 40583-3 RD 4/13...
Need help?
Do you have a question about the 36W36 and is the answer not in the manual?
Questions and answers