Advertisement
Advertisement
Table of Contents

Related Manuals for BLADEZ POWERMILL BF-6422


Summary of Contents for BLADEZ POWERMILL BF-6422
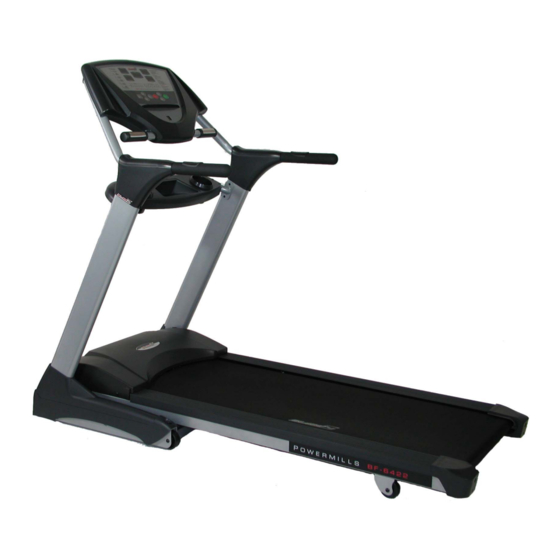
- Page 1 Treadmill Owner’s Manual BF 6422...
- Page 2 Please read this manual carefully before using your BF-6422 POWERMILL. This will allow you to get a full understanding of all the features BLADEZ’ treadmills provide. If you have any questions or concerns, please contact BLADEZ Corporation or any authorized BLADEZ FITNESS distributors in your area.
-
Page 3: Table Of Contents
TABLE OF CONTENTS SECTION PAGE 1. IMPORTANT SAFETY INSTRUCTIONS ............3 2. ASSEMBLY INSTRUCTIONS................5 3. GETTING STARTED.....................10 4. PROGRAMS DETAILS ..................14 5. PREVENTIVE MAINTENANCE................16 6. EXPLODED VIEWS....................17 7. PARTS LIST ......................18 8. TROUBLESHOOTING..................19 9. WARRANTY......................21... -
Page 4: Important Safety Instructions
SECTION 1 IMPORTANT SAFETY INSTRUCTIONS Read all instructions before using the treadmill. Notice: Consult your family physician or health care professional to develop a well planned exercise program to fit your health needs. If you encounter any pain or breathing discomfort while working out, STOP!, and consult a physician before continuing. - Page 5 IMPORTANT SAFETY INSTRUCTIONS CONTINUED GROUNDING INSTRUCTIONS This product must be grounded. If it malfunctions or breaks down, grounding provides a path of least resistance for electric currents, to reduce the risk of electric shock. This product is equipped with a cord which has an equipment-grounding conductor and a grounding plug.
-
Page 6: Assembly Instructions
SECTION 2 ASSEMBLY INSTRUCTIONS ASSEMBLY PART LIST ITEM NO. DESCRIPTION QUANTITY Bolt, M5 x P0.8 x 10 Bolt, M5 x P0.8 x 15 Bolt, M8 x P1.25 x 15 Bolt, M8 x P1.25 x 60 Screw Ø5 x 25 Allen wrench 5mm Allen wrench 6mm Power Cord Safety key... - Page 7 ASSEMBLY INSTRUCTIONS CONTINUED Illstrations of treadmill assembly. A minimum of two people are required to assemble this treadmill. Also, read and understand all instructions thoroughly before assembling the treadmill. Failure to do so could result in injury. 1. Use 2 bolts (b) to secure the bottle holder (M) to the right side upright (D).
- Page 8 ASSEMBLY INSTRUCTIONS CONTINUED 3. Press the left and right covers (E and F respectively) onto the main frame and secure them with 4 bolts (a) as shown. 4. Feed the handrail wires through the console mounting pipe (G and H) openings and pull them out from the top.
- Page 9 ASSEMBLY INSTRUCTIONS CONTINUED 5. Pull the wires from the right upright and feed through a hole underneath the console mounting pipe as shown in zoomed view. Pull the wire connector from the top of the console mounting pipe and rest the handrail on top of the uprights.
- Page 10 ASSEMBLY INSTRUCTIONS CONTINUED 7. Tighten all handrail bolts. Press to snap the left and right handrail covers (K and L) in place and secure them with 2 screws (e).
-
Page 11: Getting Started
SECTION 3 GETTING STARTED FOLDING: To fold your treadmill into the upright position, first be sure to set the elevation to the 0 % elevation. Treadmill will not lock into the upright position if the treadmill is not at 0 % elevation. Using both hands, lift the treadmill by the end caps and push it up until the retaining shaft locks the treadmill into place. - Page 12 GETTING STARTED CONTINUED SAFETY KEY & CLIP Your Bladez treadmill is equipped with a safety key that will disable the treadmill if it is not in place. You should attach the clip end to your clothing. The magnet end goes into the recess of the console.
- Page 13 GETTING STARTED CONTINUED PROGRAM SET-UP 1. Turn on POWER 2. Press MODE key ~ Manual light will be flashing. 3. Adjust the programs from P1-P5 with the keys. 4. Press ENTER ~ Level light will be on. 5. Adjust the levels from L1-L5 with the keys.
- Page 14 GETTING STARTED CONTINUED HANDRAIL CONTROLS – The right handrail controls the speed of the treadmill and can be adjusted at any time during your workout. The left handrail controls the elevation of the treadmill and can be adjusted at any time during your workout. CONSOLE FEEDBACK TIME –...
-
Page 15: Programs Details
SECTION 4 PROGRAM DETAILS The following is a dot-matrix level scale display showing INCLINE and SPEED windows. Each pre-set program P1-P6 has 3 levels of workout choices as shown in the following profiles. P1-9 HOLE P2-CARDIO INCLINE SPEED INCLINE SPEED... - Page 16 PROGRAM DETAILS CONTINUED P3 – RUNNING P4 – FAT BURN INCLINE SPEED INCLINE SPEED P4 – INTERVALS P6 – HILL INTERVALS INCLINE SPEED INCLINE SPEED...
-
Page 17: Preventive Maintenance
SECTION 5 PREVENTIVE MAINTENANCE If the running belt has shifted to left or right off the center or simply skid when running, please refer to the following 1. Turn the power off. 2. Use a 6mm wrench to tighten the rear roller bolt on the side of the treadmill toward which the belt is Rear Roller Bolt... -
Page 18: Exploded Views
SECTION 6 EXPLODED VIEW BF6527 HRP BF - 6422... -
Page 19: Parts List
SECTION 7 PART LIST – BF-6422 Description Description Item Qty Item Computer console P-1107&P-1108 Frame Bolt K-299 Power socket Computer pipe (L) Power switch Computer pipe (R) Circuit breaker Handrail upper cover (L) P-1102L Sensor (round) M5xP0.8x12 Handrail upper cover (R) P-1102R Bolt UC-1... -
Page 20: Troubleshooting
SECTION 8 TROUBLESHOOTING ERROR MESSAGE PROBABLE CAUSES SOLUTION - Loss of Feedback Speed Sensor disconnected Check Speed Sensor Connection - Running Deck Running Deck not Check R-Deck oil lubricated Check Sensor position Speed Sensor misaligned Speed Sensor Faulty Replace S-Sensor Loose Display Cable Check Display Cable connection... - Page 21 TROUBLESHOOTING CONTINUED ERROR MESSAGE PROBABLE CAUSES SOLUTION - Safety Key Off Safety Key Faulty Check Safety Key or Switch - Elevation Motor Elevation Motor not moving Check Elevation Motor connection - Stalled Elevation Elevation Motor screw Clean screw and lubricate binding Elevation Motor out of Check Zero Position of E-...
-
Page 22: Warranty
LABOR – 1 Year Bladez Fitness shall cover the labor cost for the repair of the device for a period of one year from the date of original purchase, so long as the device remains in the possession of the original owner.
Need help?
Do you have a question about the POWERMILL BF-6422 and is the answer not in the manual?
Questions and answers