Table of Contents
Advertisement
Advertisement
Table of Contents

Related Manuals for BLADEZ BLADEZ T2 BASIC


Summary of Contents for BLADEZ BLADEZ T2 BASIC
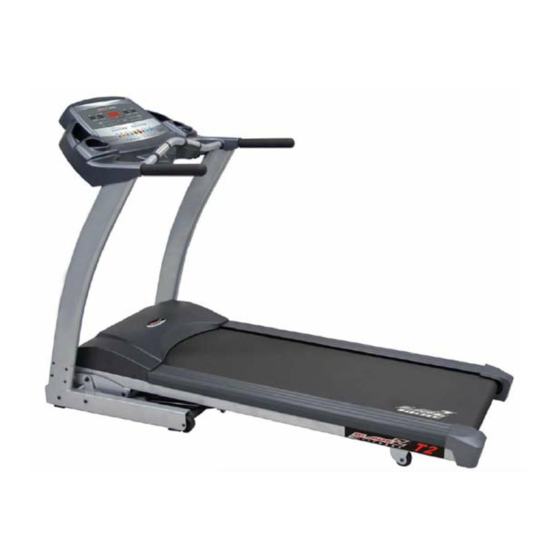
- Page 1 Treadmill Owner’s Manual Bladez T2 Basic BLADEZ Corporation 20155 Ellipse Foothill Ranch, CA 92610 Phone: 949-206-8152 Fax: 949-206-0013 Email: fitness@ebladez.com Revision Date: 11/14/06 BladeZ Corporation • 20155 Ellipse • Foothill Ranch • CA • 92610 www.ebladez.com...
- Page 2 INTRODUCTION: ongratulations for selecting BLADEZ as your primary source of fitness. BLADEZ treadmills offer many exercise programs that benefit users of all levels and ages. Your new treadmill is designed to make your workouts more effective and enjoyable. Please read this entire manual carefully before using your treadmill.
-
Page 3: Table Of Contents
TABLE OF CONTENTS SECTION PAGE 1. IMPORTANT SAFETY INSTRUCTIONS ............... 3 2. ASSEMBLY INSTRUCTIONS................. 5 3. GETTING STARTED....................7 4. WORKOUT PROGRAM DETAILS .................11 5. PREVENTIVE MAINTENANCE................18 6. TROUBLESHOOTING.....................19 7. WARRANTY......................21 BladeZ Corporation • 20155 Ellipse • Foothill Ranch • CA • 92610 www.ebladez.com •... -
Page 4: Important Safety Instructions
SECTION 1 IMPORTANT SAFETY INSTRUCTIONS Read all instructions before using the treadmill. Notice: Before using this or any other exercise equipment consult your family physician or health care professional to develop a well planned exercise program to fit your health needs. If you encounter any pain or breathing discomfort while working out, STOP!, and consult a physician before continuing WARNING! -
Page 5: Grounding Instructions
IMPORTANT SAFETY INSTRUCTIONS CONTINUED GROUNDING INSTRUCTIONS This product must be grounded. If it malfunctions or breaks down, grounding provides a path of least resistance for electric currents, to reduce the risk of electric shock. This product is equipped with a cord which has an equipment- grounding conductor and a grounding plug. -
Page 6: Assembly Instructions
SECTION 2 ASSEMBLY INSTRUCTIONS ITEM Description Computer Frame Left Upright Right Upright Bolt cover Bottle ITEM Description Bolt M8xP1.25x15 M8xP1.25x60 Bolt Allen Wrench 6mm Allen Wrench 5mm SILICON Safety Key/Clip Power Cord BladeZ Corporation • 20155 Ellipse • Foothill Ranch • CA • 92610 www.ebladez.com •... - Page 7 ASSEMBLY INSTRUCTIONS CONTINUED It is highly recommended that two persons assemble the product. Please do not assemble it alone. 1. Tighten the bottom control wire to the plastic wire protection sleeve by pulling the guide wire inside the right upright tube (C, D). Position it to the side round hole in the right upright tube, then insert the upright tubes (C, D) into the two locations on the frame.
-
Page 8: Getting Started
SECTION 3 GETTING STARTED FOLDING: To fold your treadmill into the upright position, first be sure to set the elevation to 0% elevation. The treadmill will not lock into the upright position if the treadmill is not at 0 % elevation. Using both hands, lift the treadmill by the end caps and push it up until the retaining shaft locks the treadmill into place. -
Page 9: Key Functions
GETTING STARTED CONTINUED SAFETY KEY & CLIP Your Bladez treadmill is equipped with a safety key that will disable the treadmill if it is not in place. You should attach the clip end to your clothing. The magnet end goes into the recess in the center of the console. If at any time you need to stop the treadmill simply pull the safety key quickly off the console. - Page 10 GETTING STARTED CONTINUED CONSOLE FEEDBACK TIME – This will read the number of minutes left in the program that you have selected. In Quick Start, it will read the number of minutes that you have been exercising. CALORIES – This reading is the amount of body heat in calories burned during your workout.
-
Page 11: Quick Start
GETTING STARTED CONTINUED 4. Press ENTER again and HOLD for 10 seconds. 5. A 1 or 0 will appear in the CALORIES window. Zero = English and One = Metric. 6. Use the keys to change the value. 7. Press ENTER to confirm change and return to program setup. USING HEART RATE GRIP PULSE –... -
Page 12: Workout Program Details
SECTION 4 WORKOUT PROGRAM DETAILS Your BLADEZ treadmill will provide both manual controlled and factory installed preset workout programs. In MANUAL, you control the speed and elevation at your discretion. For QUICK START exercise with Time setting, refer to Manual Program. In PRESET programs, the speed and/or elevation will change in accordance with the program’s profile (as illustrated on the following pages). - Page 13 WORKOUT PROGRAM DETAILS CONTINUED HRC PROGRAM SETUP (Requires Wireless Chest Strap Available Separately) The purpose of this program is self-training based on your heart rate. During the workout, when your target heart rate (Step 9) is reached, the speed and elevation will automatically adjust to keep it at this rate.
- Page 14 WORKOUT PROGRAM DETAILS CONTINUED CUSTOM PROGRAM SETUP 1. Turn on POWER. 2. Weight will be flashing. (Default 150lbs./kg.) 3. Adjust weight with keys and press ENTER. 4. Press MODE key ~ P1 light will be flashing. 5. Select the program (P9-P10) with the keys.
- Page 15 WORKOUT PROGRAM DETAILS CONTINUED 10. Adjust your height with the keys. 11. Press ENTER ~ Weight will be flashing. 12. Confirm weight or change with the keys. 13. Press ENTER within 10 seconds or the program will exit. 14. Hold the heart rate sensors firmly for 30 seconds for best results. Your body fat will be displayed in terms of percent and body type.
- Page 16 WORKOUT PROGRAM DETAILS CONTINUED The Bladez T2 has 6 preset programs. P2 9 HOLE: This program simulates the motion of golfers walking in a golf course and the resistance level ly 3828 yards or 2.17 is based on uphill and downhill movement. The entire program is approximate miles and will stop automatically once the distance is reached.
- Page 17 WORKOUT PROGRAM DETAILS CONTINUED BladeZ Corporation • 20155 Ellipse • Foothill Ranch • CA • 92610 www.ebladez.com • Phone 949-206-8152 • Fax 949-206-0013...
- Page 18 WORKOUT PROGRAM DETAILS CONTINUED NOTE: The user can manually adjust the speed of any of the preset programs (P1-P7) at any time during the workout by pressing accelerate or decelerate. Press to control the elevation. Once the change is made to the program (P1-P7), it will stay at that level until the user makes another change.
-
Page 19: Preventive Maintenance
SECTION 5 PREVENTIVE MAINTENANCE The running belt can shift to one side or simply ‘skid over’ when running. To center the belt using the 6mm Allen wrench, run the machine at 3mph for a few minutes to determine which side the belt is drifting towards; left or right. -
Page 20: Troubleshooting
SECTION 6 TROUBLESHOOTING ERROR MESSAGE PROBABLE CAUSES SOLUTION - Loss of Feedback Speed Sensor disconnected Check Speed Sensor Connection - Running Deck Running Deck not Check R-Deck oil lubricated Speed Sensor misaligned Check Sensor position Speed Sensor Faulty Replace S-Sensor Loose Display Cable Check Display Cable connection... - Page 21 ERROR MESSAGE PROBABLE CAUSES SOLUTION Elevation Motor out of Check Zero Position of E- Range Motor E-Motor Potentiometer Replace Elevation Motor - Elevation Motor Elevation Motor out of Replace Elevation Motor Range - Display Doesn’t Light Up On/Off switch Check if unit is turned on Insufficient Power Source Plug unit in a dedicated 120V, 20Amp Outlet...
-
Page 22: Warranty
SECTION 7 WARRANTY USA / CANADA Warranty Warranties may vary in other countries. See your local Bladez Dealer. BLADEZ FITNESS extends the following exclusive, limited warranty, which shall apply only to the use of the device in the home, for residential, non-commercial purposes only. Any other use of the device shall void this warranty.
Need help?
Do you have a question about the BLADEZ T2 BASIC and is the answer not in the manual?
Questions and answers